This step by step diy project is about rustic large outdoor chair plans plans. If you want to enhance the look of your backyard, you should consider building a few chairs. Using my easy to follow plans you can build this chair and the matching table with minimum effort and basic tools. Take a look over the rest of my woodworking plans, if you want to get more building inspiration. Premium Plans available for this project in the Shop.
This comfy and stylish chair is perfect for lounging in your backyard or on your patio. With these easy-to-follow plans, you’ll be able to build a beautiful outdoor chair that’s perfect for relaxing and enjoying the great outdoors!
When buying the lumber, you should select the planks with great care, making sure they are straight and without any visible flaws (cracks, knots, twists, decay). Investing in cedar or other weather resistant lumber is a good idea, as it will pay off on the long run. Use a spirit level to plumb and align the components, before inserting the galvanized screws, otherwise the project won’t have a symmetrical look. If you have all the materials and tools required for the project, you could get the job done in about a day. See all my Premium Plans HERE.
Projects made from these plans
Large Outdoor Chair Plans
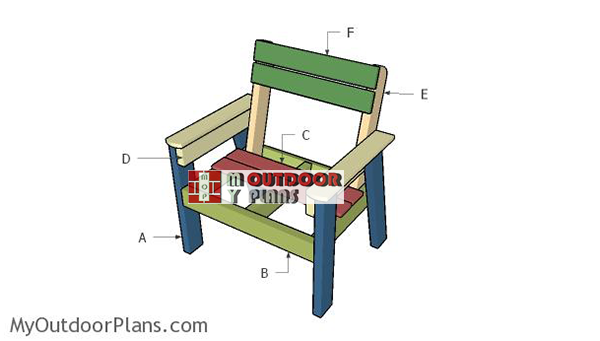
Building-an-outdoor-chair
Cut & Shopping Lists
- A – 2 pieces of 2×4 lumber – 23″ long, 2 pieces – 24 3/4″ long LEGS
- B – 2 piece of 2×4 lumber – 27″ long, 3 pieces – 18″ long FRAME
- C – 4 pieces of 1×4 lumber – 27″ long SEAT
- D – 2 pieces of 2×4 lumber – 21 3/4″ long, 2 pieces of 1×4 lumber – 22 1/4″ long ARMRESTS
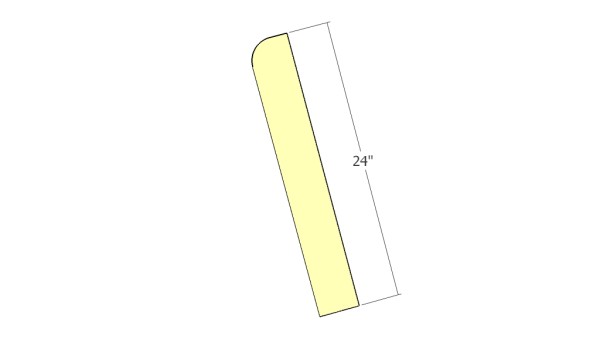
- E – 2 pieces of 2×4 lumber – 24″ long SUPPORTS
- F – 5 pieces of 1×4 lumber – 24″ long BACKREST
- 4 pieces of 2×4 lumber – 8′
- 3 piece of 1×4 lumber – 8′
- 2 1/2″ screws
- wood filler , wood glue, stain/paint
Tools
![]() Hammer, Tape measure, Framing square, Level
Hammer, Tape measure, Framing square, Level
![]() Miter saw, Drill machinery, Screwdriver, Sander
Miter saw, Drill machinery, Screwdriver, Sander
Time
Related
Building a backyard chair
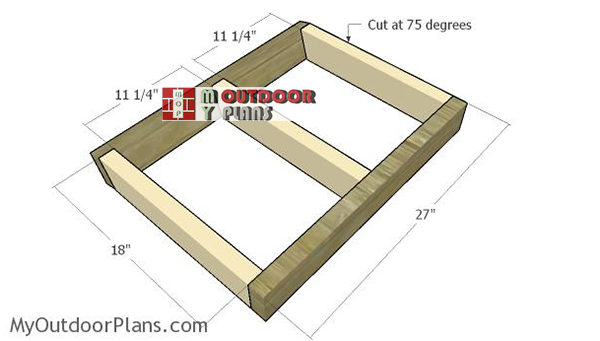
Building-the-frame
The first step of the project is to build the seat frame. Cut the components from 2×4 lumber, as shown in the diagram. Drill pilot holes through the 27″ long components and insert 2 1/2″ screws into the perpendicular components. Leave no gaps between the components and insert waterproof glue.
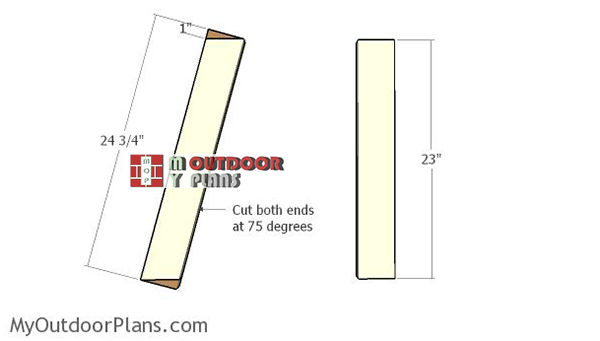
Building-the-legs
Build the legs for the chair from 2×4 lumber. Smooth the ends with sandpaper.
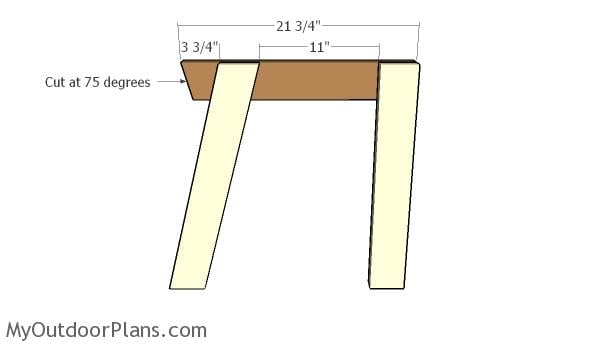
Assembling-the-sides
Assemble the sides for the chair from 2×4 lumber. Drill pilot holes through the supports and insert 2 1/2″ screws. Add glue to the joints and make sure the corners are square.
Assembling-the-chair-frame
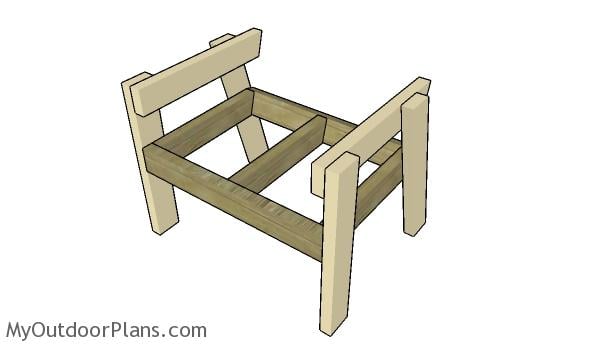
Attach the sides of the chair to the seat frame. Leave 11″ from the ground to the bottom edge of the seat frame. Make sure the corners are right angled.
Building the backrest supports
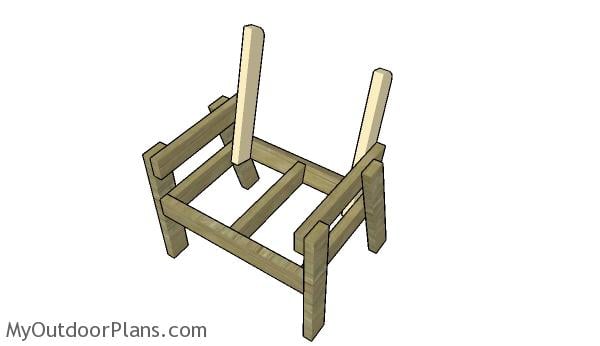
Build the backrest supports from 2×4 lumber, as well. Round the exposed corner of the supports using a jigsaw. Smooth the edges with sandpaper.
Fitting-the-backrest-supports
Fitting-the-backrest-slats
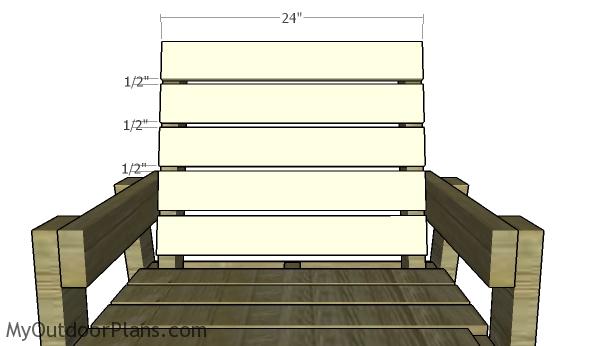
Attach the 1×4 slats to the backrest supports. Place a piece of 1/2″ plywood between the slats to create even gaps. Drill pilot holes and insert 1 1/4″ screws to lock them into place.
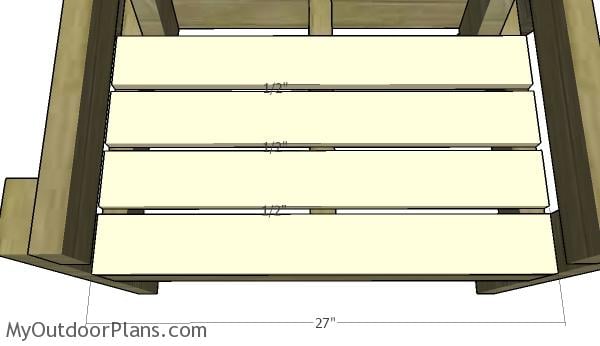
Fitting-the-seat-slats
Attach 1×4 slats to the seat frame, in the same manner described above.
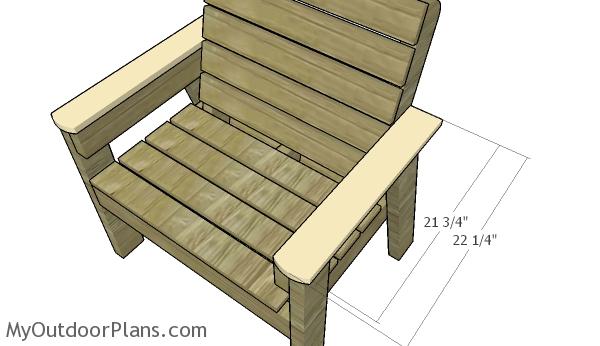
Fitting-the-armrests
Use 1×4 lumber for the armrests. Round the exposed end of the components and lock it into place with 1 1/4″ screws, after drilling pilot holes.
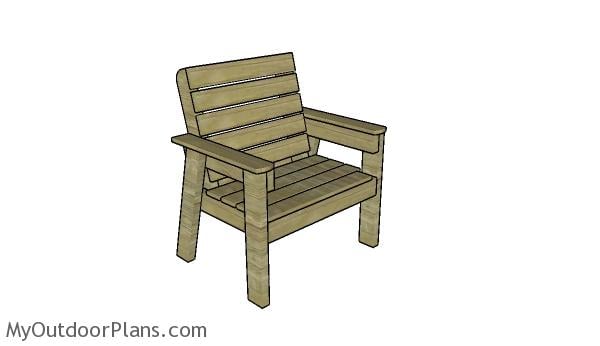
Large-outdoor-chair-plans
Fill the holes with wood putty and smooth the surface with 120-220 grit sandpaper. Apply a few coats of paint or stain to enhance the look of the chair and to protect the components from the elements.
For the Large Outdoor Chair project, you can expect to spend about a weekend putting it together, making it a fun and manageable DIY project. In terms of cost, you’ll need around $75-$150 for lumber and hardware, depending on your local prices and the type of wood you choose. With these step-by-step plans, you’ll have a gorgeous and sturdy outdoor chair ready to enjoy in no time!
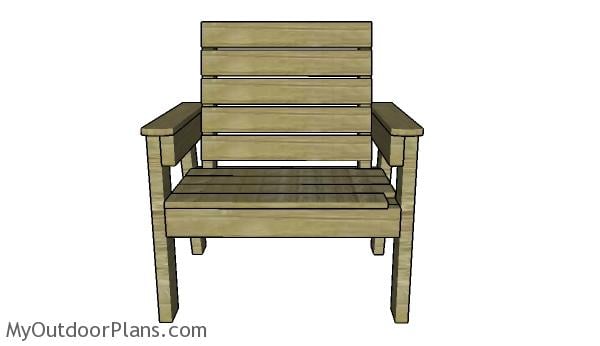
Build-an-outdoor-chair
This is a simple project you should be able to build in a few hours without much effort. This large chair is sturdy and is the perfect choice for any backyard or patio. Premium Plans available for this project in the Shop.
If you want to get PREMIUM PLANS for this project, in a PDF format, please press GET PDF PLANS button bellow. Thank you for the support.
This woodworking project was about large outdoor chair plans free. If you want to see more outdoor plans, check out the rest of our step by step projects and follow the instructions to obtain a professional result.


6 comments
thanks a lot for all your sharings Ovidiu,
this support is priceless for me
your plans looks so useful and easy to understand for amateurs like me,
i will keep following your channel and plans and i will do my best to support you.
Thank you for the nice words. Looking forward to seeing your projects!
Built this chair tonight for my first furniture build. Thanks for the plans. It was a very simple build for a first timer like me and has given confidence to start planing my next project. I love this chair very sturdy and large enough for a big boy like me. Can’t wait to relax in it the next time I grill.
That’s awesome. Gotta keep yourself busy these days.
Great set of plans, can not wait to work on this weekend project.
Thanks. Looking forward to seeing your future projects.