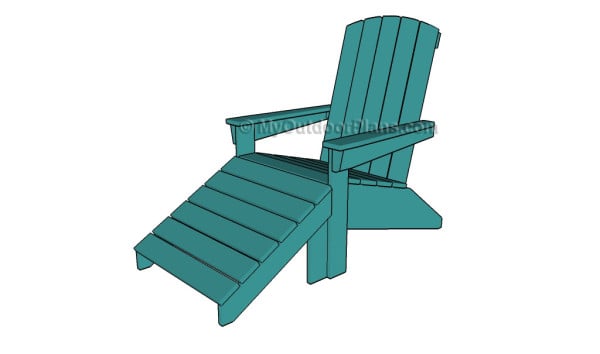
This step by step woodworking project is about adirondack footstool plans. If you want to add character to your adirondack chair, we suggest you to consider building a nice footstool that will complement its look and add comfort. If you follow the detailed instructions and you already know the basic woodworking techniques, you can get a professional result.
You need to sand the edges of the components with a sand block, or round them with a router and a 1/4” bit. Moreover, we recommend you to align all the components at both ends before driving in the screws. Work with great care and with attention, making sure all the slats are placed equally spaced. Invest in high quality lumber, such as pine, cedar or redwood, as the chair will be exposed to rain. See all my Premium Plans HERE.
Projects made from these plans
Adirondack Footstool Plans

Building an adirondack footstool
[tabs tab1=”Materials” tab2=”Tools” tab3=”Time”]
[tab id=1]
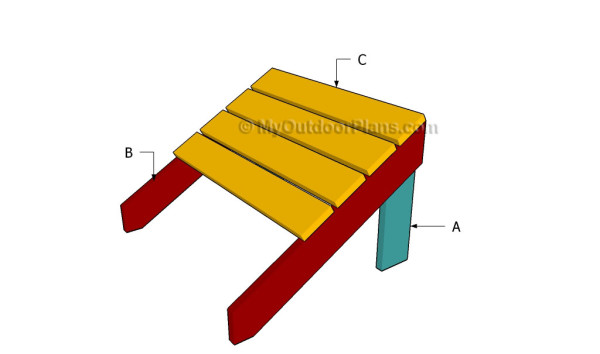
- A – 2 pieces of 1×4 lumber – 14 1/2” long LEGS
- B – 2 pieces of 1×4 lumber – 24 3/4” long FRAME
- C – 6 pieces of 1×4 lumber – 23 1/2” long SLATS
- 3 pieces of 1×4 lumber – 8 ft
- 2 1/2″ screws
- 1 5/8″ screws
- 1 1/4″ screws
- wood filler
- wood glue
- stain/paint
[/tab]
[tab id=2]
![]() Hammer, Tape measure, Framing square
Hammer, Tape measure, Framing square
![]() Miter saw, Drill machinery, Screwdriver, Sander
Miter saw, Drill machinery, Screwdriver, Sander
[/tab]
[tab id=3]
[/tab]
[/tabs]
Building an adirondack footstool

Building the footrest supports
The first step of the woodworking project is to build the structure of the footstool. As you can easily notice in the diagram, we recommend you to build the side components out of 1×4 lumber.
Top Tip: Mark the cut lines on the slats, making sure you read the instructions described in the diagram attentively. Use a circular saw to make the cuts, smooth the edges with sandpaper and remove the residues with a vacuum cleaner.

Attaching the legs
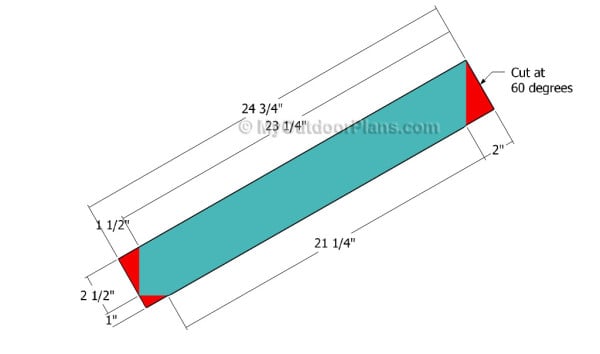
The next step of the garden project is to attach the legs to the adirondack footstool. As you can easily see in the image, we recommend you to cut the top of the 1×4 slat at 60 degree, by using a miter saw.
Smooth the cut edges with sandpaper and drill pilot holes through the legs before attaching them to the side components. Add glue to the joints and make sure you leave no gaps between the components. Plumb the legs with a spirit level.

Fitting the slats
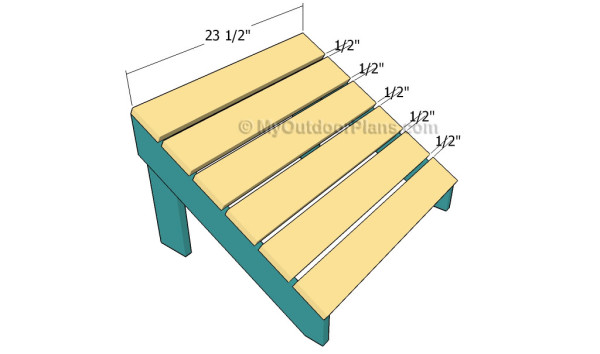
One of the last steps of the woodworking project is to attach the 1×4 slats to the frame of the footstool. In order to get a professional result, we recommend you to place the slats equally-spaced.
Drill pilot holes through the slats before inserting the 1 1/4′ screws into the frame, to prevent the wood from splitting. Add glue to the joints and make sure the sides of the footstool are perfectly plumb.

Adirondack footstool plans
Last but not least, we recommend you to take care of the finishing touches. Therefore, fill the holes with a wood filler and let the compound to dry out for about several hours. Afterwards, sand the wooden surface along the wood grain, using 120-grit sandpaper.
Top Tip: Vacuum the residues thoroughly, before covering the wooden surface with several coats of stain. Make sure you apply the products in a properly-ventilated location.
This woodworking project was about free adirondack chair plans. If you want to see more outdoor plans, check out the rest of our step by step projects and follow the instructions to obtain a professional result. Don’t forget to LIKE our facebook page and to follow us on G+ to be the first that gets out latest tutorials.
