This step by step diy woodworking project is about 2×4 adirondack chair plans. I continue the 2×4 series of projects, with this super straight-forward adirondack bench. This bench is sturdy, easy to build and it features a beautiful design. Make sure you take a look over the rest of plans to see alternatives and more projects for your garden.
When buying the lumber, you should select the planks with great care, making sure they are straight and without any visible flaws (cracks, knots, twists, decay). Investing in cedar or other weather resistant lumber is a good idea, as it will pay off on the long run. Use a spirit level to plumb and align the components, before inserting the galvanized screws, otherwise the project won’t have a symmetrical look. If you have all the materials and tools required for the project, you could get the job done in about a day. See all my Premium Plans HERE.
Projects made from these plans
2×4 Adirondack Bench Plans
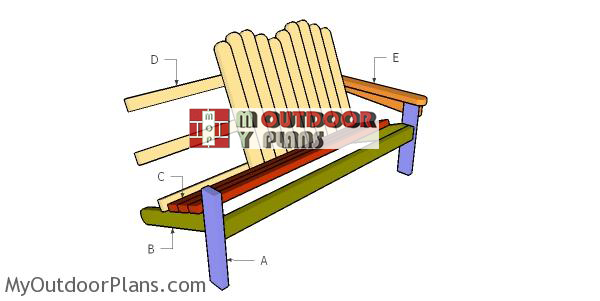
Building-an-adirondack-bench
Cut & Shopping Lists
- A – 2 pieces of 2×4 – 19 1/2″ long FRONT LEGS
- B – 2 pieces of 2×4 lumber – 32 1/4″ long, 1 piece – 60 long FRAME
- C – 5 pieces of 2×4 lumber – 60″ long SEAT
- D – 2 pieces of 2×4 lumber – 60″ long, 6 pieces – 30 1/2″ long, 6 pieces – 32″ long, 4 pieces – 29″ long, 1 piece – 63″ long BACKREST
- E – 2 pieces of 2×4 lumber – 25 3/4″ long, 2 pieces – 28 1/4″ long ARMRESTS
- 14 pieces of 2×4 lumber – 8′
- 2 1/2″ screws
- glue, filler
- stain
Tools
![]() Hammer, Tape measure, Framing square, Level
Hammer, Tape measure, Framing square, Level
![]() Miter saw, Drill machinery, Screwdriver, Sander
Miter saw, Drill machinery, Screwdriver, Sander
Time
![]() One day
One day
Building a 2×4 adirondack bench
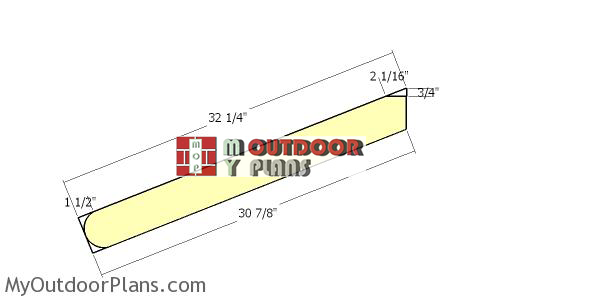
Back-legs—2×4-adirondack-bench
The first step of the project is to build the back legs for the adirondack bench. Mark the cut lines on the 2×4 slats and get the job done with a saw. Smooth the edges with attention for a professional result.
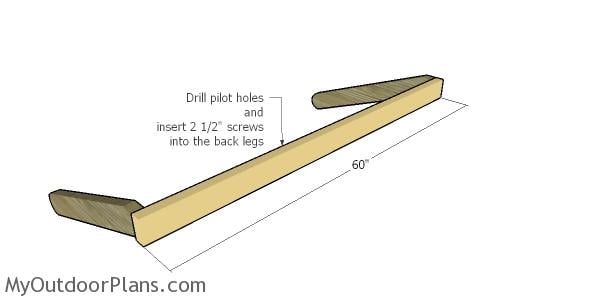
Assembling the frame
Continue the outdoor project by attaching the 2×4 slat to the front of the back legs. Drill pocket holes through the front component and insert 2 1/2″ screws into the front slat. Make sure the corners are square and align the edges. Add glue to the joints for a durable bond.
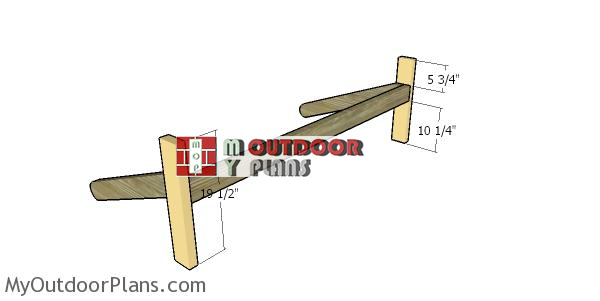
Fitting-the-front-legs
Build the front legs from 2×4 lumber. Clamp the front legs to the back legs and align the edges flush. Drill pilot holes through the frame and inset 2 1/2″ screws into the front legs.
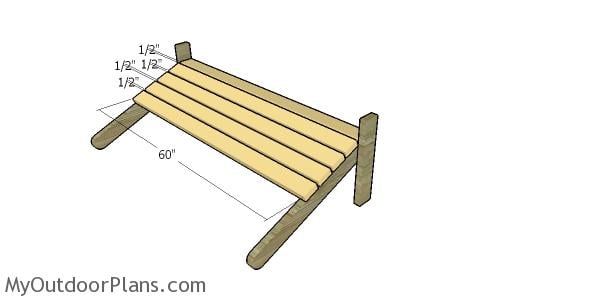
Attaching the seat slats
Use 2×4 slats to build the seat for the bench. Place the slats equally spaced, by placing 1/2″ plywood between them. Drill pilot holes at both ends of the slats and insert 2 1/2″ screws into the frame.
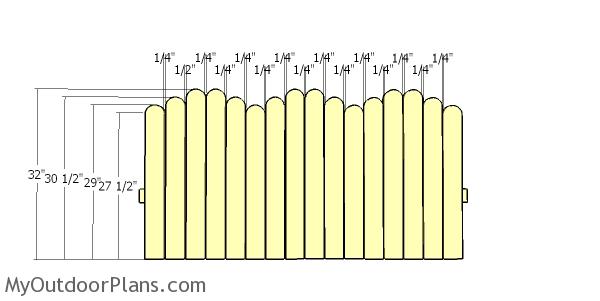
Backrest slats
Build the backrest of the adirondack bench from 2×4 lumber. Use a jigsaw to round the top of the slats, as shown in the diagram. Place the slats on a level surface and make sure their bottom edge is perfectly flush one with another .

Backrest-supports—adirondack-bench
Use 2×4 lumber for the back supports. Drill pilot holes through the supports and then insert 2 1/2″ screws.
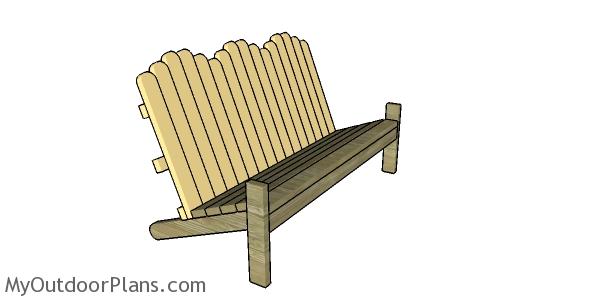
Fitting the backrest
Attach the backrest to the frame of the bench. Drill pilot holes through the bottom support of the backrest into the back legs. Make sure the backrest makes a 90 degree angle with the seat.
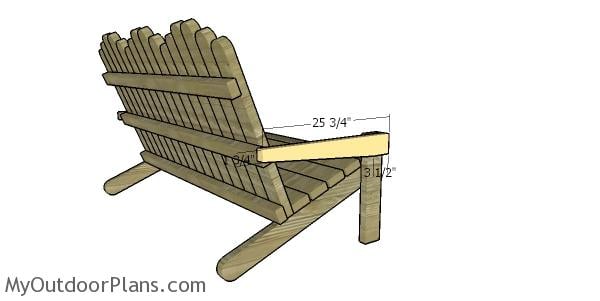
Fitting the armrest supports
Build the armrest supports from 2×4 lumber. Attach the support to the front legs and to the backrest of the chair. Drill pilot holes and insert 2 1/2″ screws to lock the support into place. Leave no gaps between the components and make sure the edges are perfectly aligned.
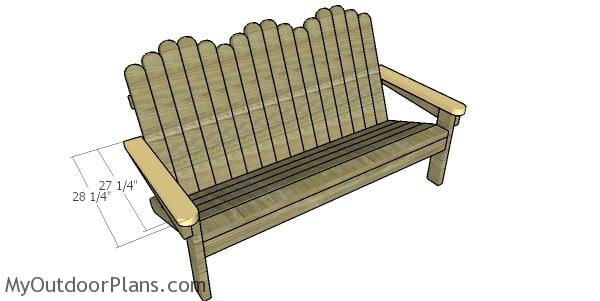
Fitting the armrests
Use 2×4 lumber for the armrests, as well. Fit the armrests to the bench frame, as shown in the diagram. Align everything with attention, and use 2 1/2″ screws” screws to lock the components into place. Add glue to enhance the rigidity of the bond.
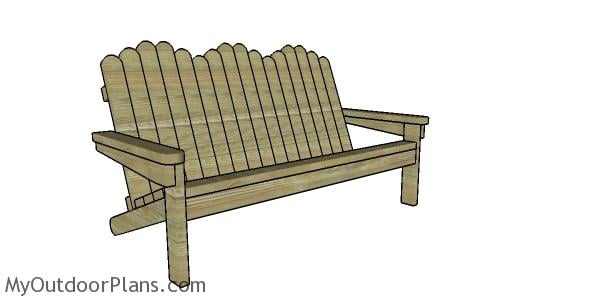
2×4 adirondack bench plans
Fill the holes with wood putty and let them dry out for a few hours. Smooth the surface with 100-200 grit sandpaper and remove the residues with a damp cloth. Apply a few coats of stain or paint to enhance the look of the chair.
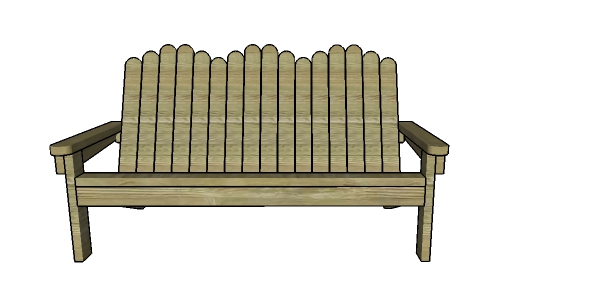
2×4 adirondack bench plans
Top Tip: Check out the rest of my adirondack projects HERE. Thank you for taking a look over my designs. Check out the matching 2×4 adirondack chair HERE.
This woodworking project was about 2×4 adirondack bench plans. If you want to see more outdoor plans, check out the rest of our step by step projects and follow the instructions to obtain a professional result.

5 comments
On the spacing for the backrest boards, why is there a gap of 1/2″ between the 2nd and 3rd board? Is this a typo? Should it be 1/4″ like all the rest of the board spacing?
No, there is no type. It’s just you are left with 1/4″ which you can distribute it to several gaps to be unnoticeable.
This thing weighs like 300lb. Build it where you plan on keeping it. Good luck.
Hi: When attaching the armrest support to the middle backrest support, I am having issues with the armrest support falling to the bottom of the backrest support rather than the top of the backrest support (this causes issues with the armrest sitting flush on the armrest support). Any suggestions for fixing this?
I used composite decking instead of 2x4s for seating. This meant I need to add one more back leg for the center.
Also needed to use some ledger lock lag type screws for the areas of support (Such as the base of the backrest to the legs). The 2 1/2 inch screws did not seem to be strong enough to support weight. Also added an additional support from back of the new center leg to the back rest for add structural integrity and support.
This this is a heavy beast.. Needed to build in parts and then assemble outside. Getting the back support to fit flush with the arm rests was a challenge as well. I ended up removing that piece from the assembled back and adding it to the arm rests, then adding the backrest against it at the proper angle. This was because when I tried to get it to fit when assembled the armrest seemed low, and needed to raise at an incline… This is all due to the angles and not having help when installing… I am sure with 2 or more people you may not run into this issue as you can adjust the angle of the backrest properly.