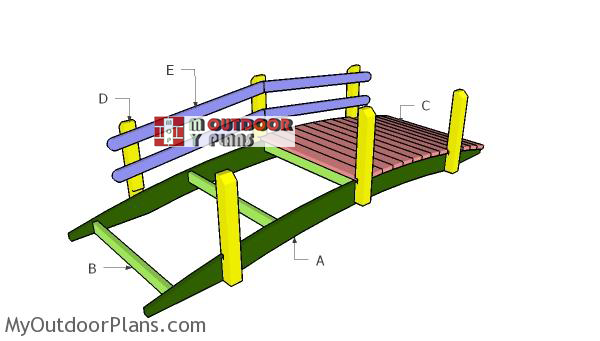
This step by step diy woodworking project is about arched garden bridge. I have designed this simple garden bridge so you can add unique appeal to your property. If you have some basic tools and woodworking skills, you can get the job done in just a few days. Make sure you take your time before making the cuts, for a professional result. See my other woodworking plans HERE.
There are many plans and designs to choose from, so make sure you take a close look over the rest of the garden bridge plans featured on our website. Plan everything with attention and adjust the size and the shape of the bridge to suit your needs. Plumb the legs and make sure the corners are right-angled before inserting the galvanized screws into place. Drill pilot or pocket holes to prevent the wood from splitting. See all my Premium Plans HERE.
Projects made from these plans
Arched Garden Bridge – Free DIY Plans
Building-a-garden-arched-bridge
Cut & Shopping Lists
- A – 2 pieces of 2×14 lumber – 144″ long STRINGERS
- B – 5 pieces of 2×4 lumber – 43″ long SUPPORTS
- C – 31 pieces of 2×6 lumber – 48″ long SLATS
- D – 2 pieces of 2×3 lumber – 37 1/2″ long, 1 piece – 39 3/4″ long, 4 pieces – 31 1/4″ long 2xRAILS
- 2 pieces of 2×16 lumber – 12′
- 3 pieces of 2×4 lumber – 8′
- 8 pieces of 2×4 lumber – 6′
- 2 pieces of 4×4 lumber – 8′
- 15 pieces of 2×6 lumber – 8′
- 2 1/2″ screws, nuts, washers
- 5 1/2″ carriage bolts
- wood filler, wood stain
Tools
![]() Hammer, Tape measure, Framing square, Level
Hammer, Tape measure, Framing square, Level
![]() Miter saw, Drill machinery, Screwdriver, Sander
Miter saw, Drill machinery, Screwdriver, Sander
![]() Post hole digger, Concrete mixer
Post hole digger, Concrete mixer
Time
Related
How to build an arched a garden bridge
Building-the-stringers
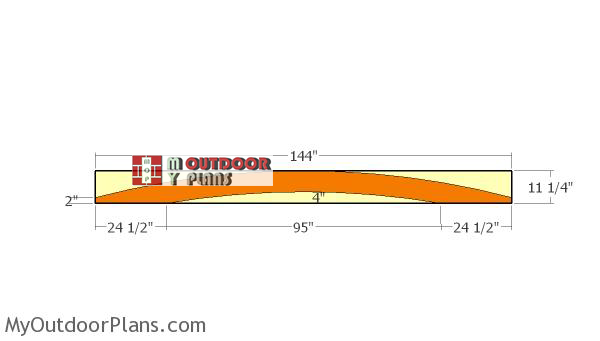
The first step of the garden project is to build the stringers for the bridge. Therefore, you need to mark the lines on the 2×12 slats, making sure the marks are accurate. Make sure you work with attention, otherwise the end result won’t raise up to your expectations. Use a jigsaw to make the curved cuts and use sandpaper to smooth the cut edges. Repeat the process for the other stringer. Use two nails placed at both ends of the beams and string, so you can draw the curve accurately.
Assembling-the-garden-bridge-frame
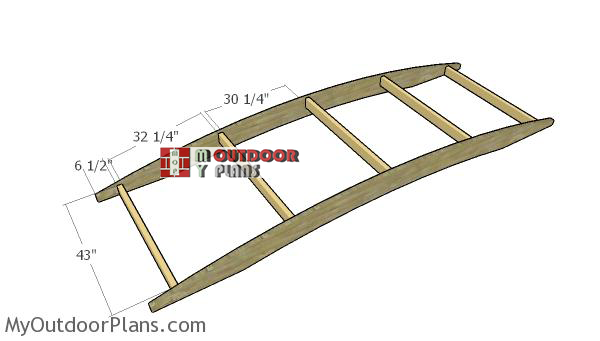
Continue the woodworking project by fitting the supports between the side stringers. Therefore, use 2×4 lumber for the supports. Align the supports to the stringers and drill pocket holes at both ends. Fit the supports into place, align them with great care and insert 2 1/2″ screws into the stringers at both ends. Make sure the corners are square for a professional result.
Fitting the decking boards
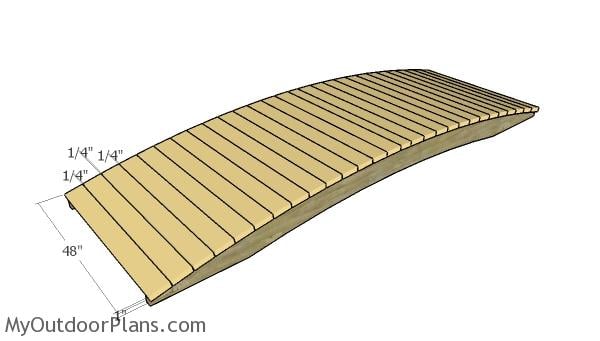
Fit the 2×6 boards to the frame of the garden bridge. Make sure the boards overhang on both sides of the frame for 1″. Fit a piece of 1/4″ plywood between the boards so you create even gaps between. Drill pilot holes at both ends of the boards and insert 2 1/2″ screws to lock them into place tightly.
Building-the-rail-supports
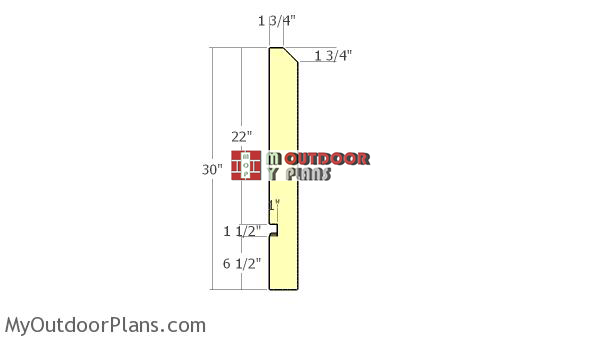
Use 4×4 lumber for the rail supports. Mark the cut lines on the posts and then make the recesses, as shown in the diagram. Use a circular saw to make parallel cuts inside the areas and then remove the excess with a chisel.
Fitting the rail supports
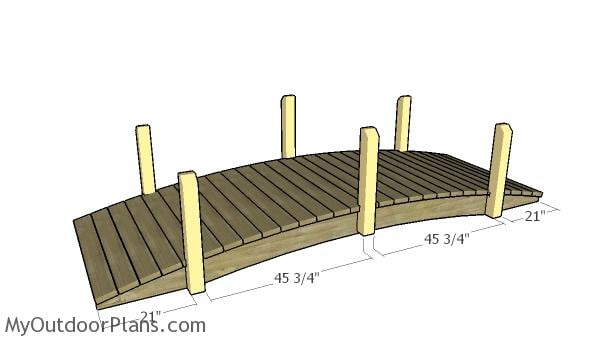
Fit the posts to the frame of the garden bridge. Align the posts and plumb them with a spirit level. Drill pilot holes through the posts and through the stringers. Insert at least 5 1/2″ carriage bolt for each post, so you can lock them into place tightly.
Rails
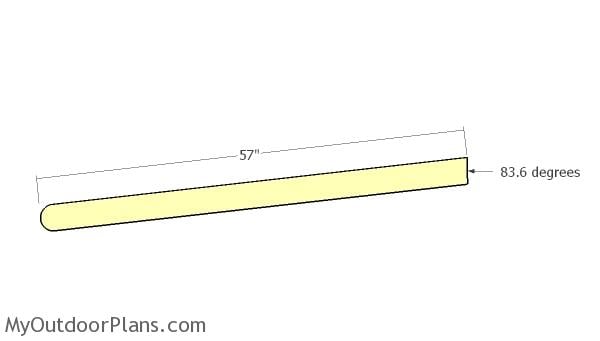
The next step of the project is to build the rails. Use 2×4 lumber for the rails. Use a jigsaw to round one end of the rails and make and angle cut to the opposite end.
Fitting the rails
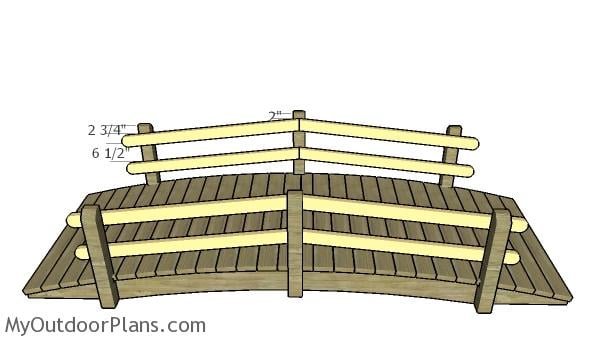
Fit the rails to the posts and align them with attention. Make sure the two rails meet on the middle of the post. Align the edges with attention, drill pilot holes and insert 2 1/2″ screws to lock them to the posts tightly.
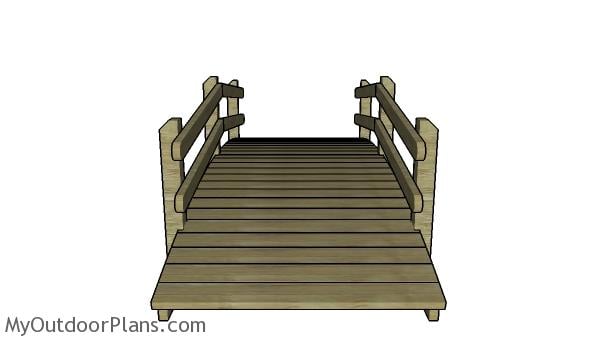
Arched garden bridge plans – Front view
Last but not least, you need to fill the holes with wood putty and let it dry for a few hours. Smooth the surface with 120-220 grit sandpaper so you can get a professional result. Apply a few coats of paint or stain so you can enhance the look of the bridge and protect the components from decay.
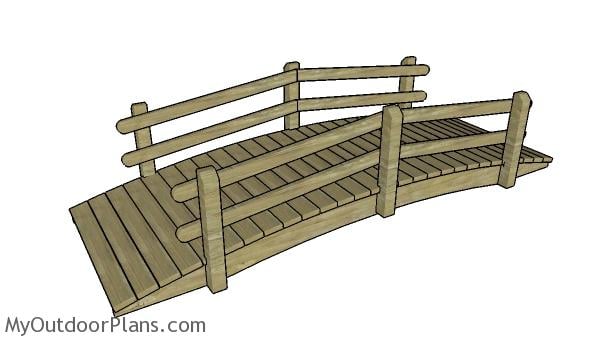
Arched garden bridge plans
This garden bridge is easy to build and it will soon become an important piece of your outdoor design.
Top Tip: If you want to enhance the look of the woodworking project and to protect the garden project from decay, we recommend you to cover the components with paint or stain. Place the bridge in a proper location and move it whenever necessary.
This woodworking project was about arched garden bridge plans. If you want to see more outdoor plans, we recommend you to check out the rest of our step by step projects. LIKE us on Facebook and Google + to be the first that gets out latest projects.

7 comments
Very nice bridge and the plans are great.
Thank you for the nice comment. Good luck with your DIY projects and I’m looking forward to seeing your future projects.
Hello, Ovidiu. Thank you for your wonderful site! I have a question regarding the material lists. As an example, the material list for the ‘Arched Garden Bridge’ is:
A – 2 pieces of 2×14 lumber – 144″ long STRINGERS
B – 5 pieces of 2×4 lumber – 43″ long SUPPORTS
C – 31 pieces of 2×6 lumber – 48″ long SLATS
D – 2 pieces of 2×3 lumber – 37 1/2″ long, 1 piece – 39 3/4″ long, 4 pieces – 31 1/4″ long 2xRAILS
then, below the line is listed:
2 pieces of 2×16 lumber – 12′
3 pieces of 2×4 lumber – 8′
8 pieces of 2×4 lumber – 6′
2 pieces of 4×4 lumber – 8′
15 pieces of 2×6 lumber – 8′
2 1/2″ screws, nuts, washers
5 1/2″ carriage bolts
wood filler, wood stain
What is the purpose of the second material list on each page? Is that a list of items that you should purchase, then cut them to the dimensions of the first list? Or, is the second list for a bridge with different dimensions? (I ask because the step-by-step construction and the first material list don’t include a 4×4 anywhere.)
Thank you in advance for your reply!
Hi there. You are absolutely correct. The first list is the cut list, the second one is the shopping list.
We need to make a bridge that is 24 feet long. Can we use the same plans but with longer stringers? Would it still be strong enough to use as a foot bridge?
Would you suggest any alterations?
Thank you,
24 ft is a large opening. I don’t recommend that without support posts.
Can this be widened to a 6ft bridge and shortened to 8-10 feet long without compromising the integrity of the bridge? I just need a short bridge to cross a runoff ditch that I can drive a mower across. Thanks!