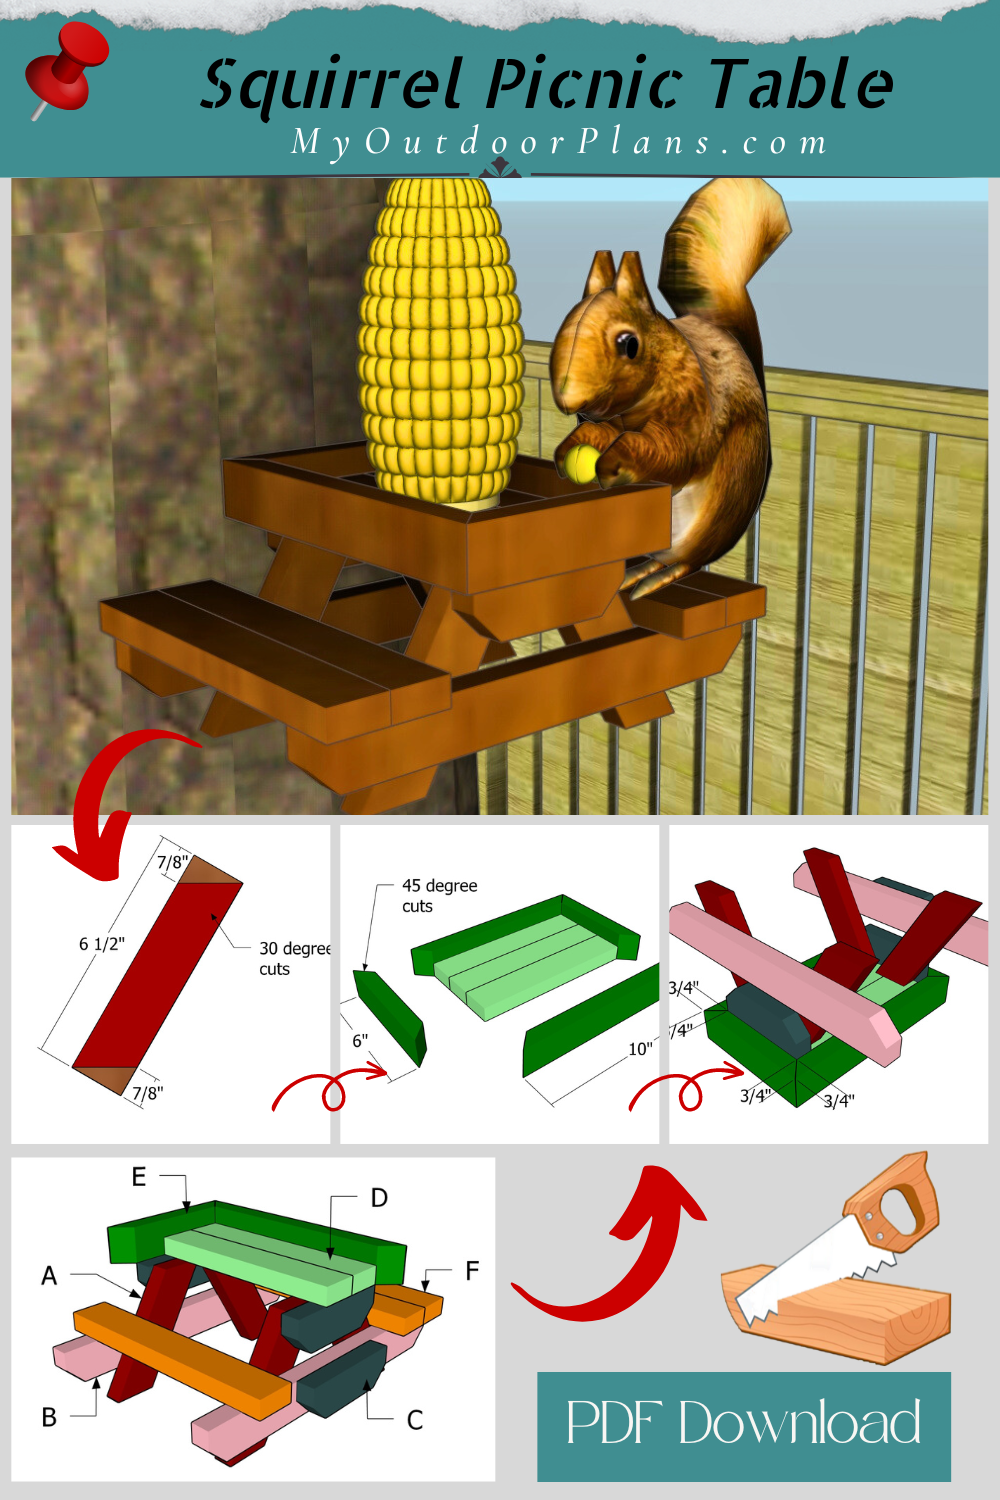
If you’re looking to add some charm to your backyard, I’ve got the perfect project for you: a squirrel picnic table! Not only is it a blast to build, but it’s also a great way to enjoy watching these cute critters dine in style. In this blog post, I’ll share free plans for building your very own squirrel picnic table. So, grab your tools and let’s make a fun and functional feeder that your backyard squirrels will love! Take a look over the rest of my woodworking plans, if you want to get more building inspiration. Premium Plans for this project available in the Shop.
Building a squirrel picnic table is an inexpensive and quick project that’s perfect for a weekend afternoon. You’ll likely spend around $20-$30 on materials, including wood, screws, and paint or sealant if you want to add a finishing touch. The entire project should take just 1-2 hours, making it a fun and easy DIY for any skill level!
For this project, I recommend using cedar or hardwood for their durability and natural resistance to the elements. Cedar is a fantastic option because it’s lightweight, rot-resistant, and has a beautiful, rustic look. Hardwood, on the other hand, provides superior strength and longevity, making your project a sturdy and stylish addition to your home.
Projects made from these plans
Squirrel Picnic Table – Free Plans
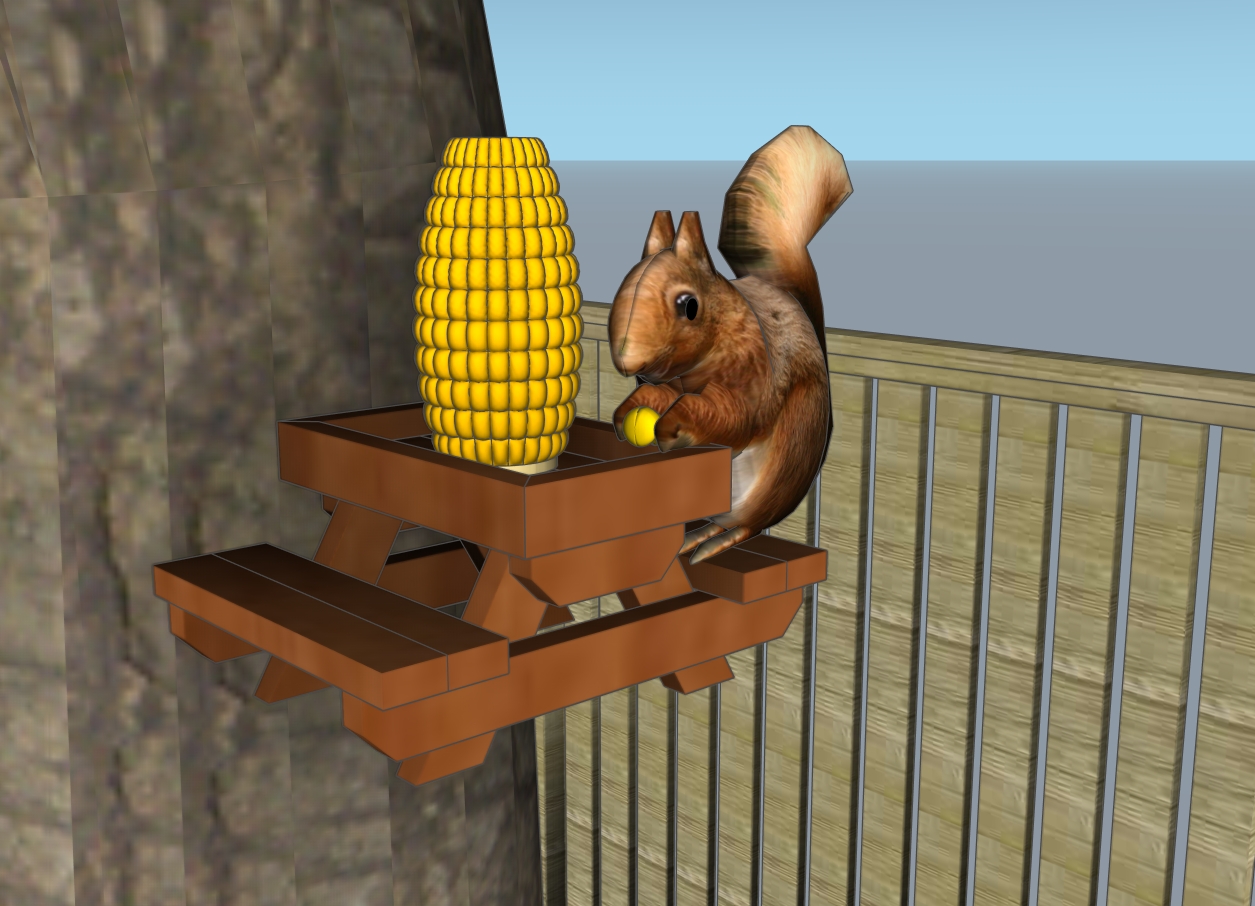
Building-a-squirrel-picnic-table
Cut and Shopping Lists
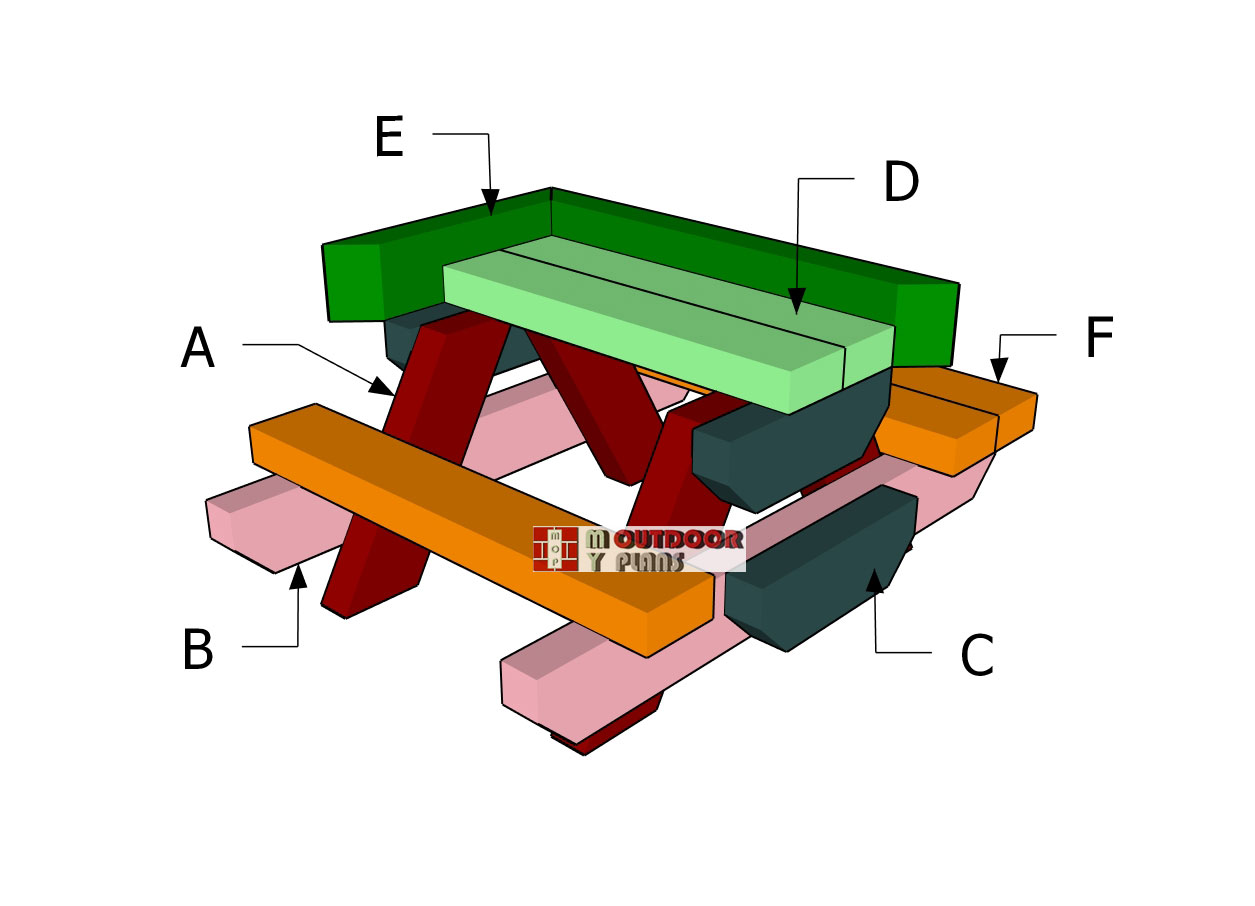
A – Legs – 1×2 lumber 6 1/2″ long – 4 pieces
B – Supports – 1×2 lumber 13″ long – 4 pieces
C – Supports – 1×2 lumber 4 1/2″ long – 4 pieces
D – Tabletop – 1×2 lumber 8 1/2″ long – 4 pieces
E – Tray Trims – 1×2 lumber 6″ long – 4 pieces
E – Tray Trims – 1×2 lumber 10″ long – 4 pieces
F – Seats – 1×2 lumber 10″ long – 4 pieces
- 1×2 lumber 8 ft – 2 pieces
- 2 1/2″ screws- 4 pieces
- 1 5/8″ screws- 30 pieces
- 1 1/4″ screws- 20 pieces
- Wood glue – 1 can
- Stain – 1 can
Tools
![]() Hammer, Tape measure, Framing square, Level
Hammer, Tape measure, Framing square, Level
![]() Miter saw, Drill machinery, Screwdriver, Sander
Miter saw, Drill machinery, Screwdriver, Sander
Time
![]() One weekend
One weekend
Related
Pin for Later!
Squirrel Feeder – Building the frame
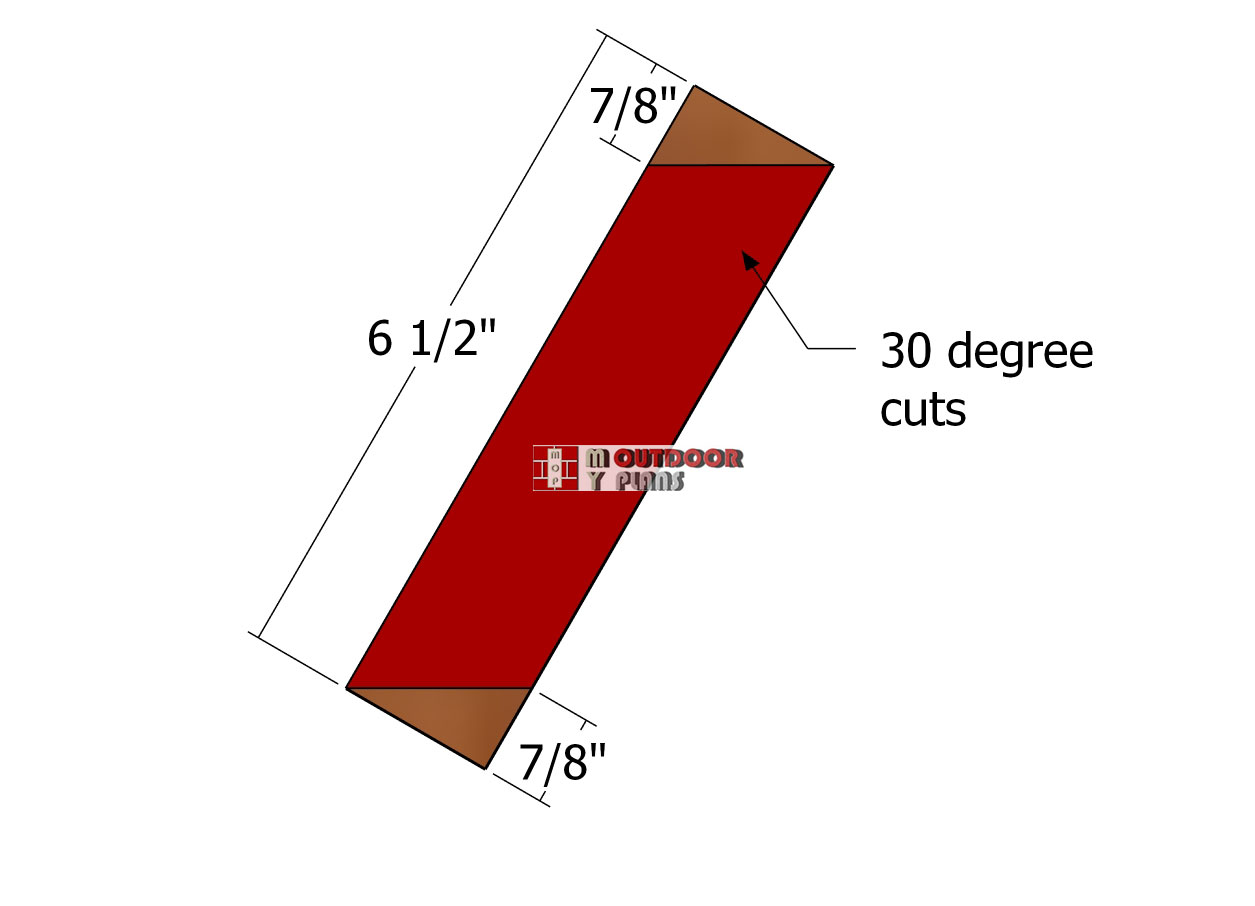
Legs
To kick off this project, we’re cutting the legs for the picnic table. Make 30 degree cuts to both ends of the 1×2 boards, as shown in the diagram. Use a miter saw, if available to get accurate and quick cuts.
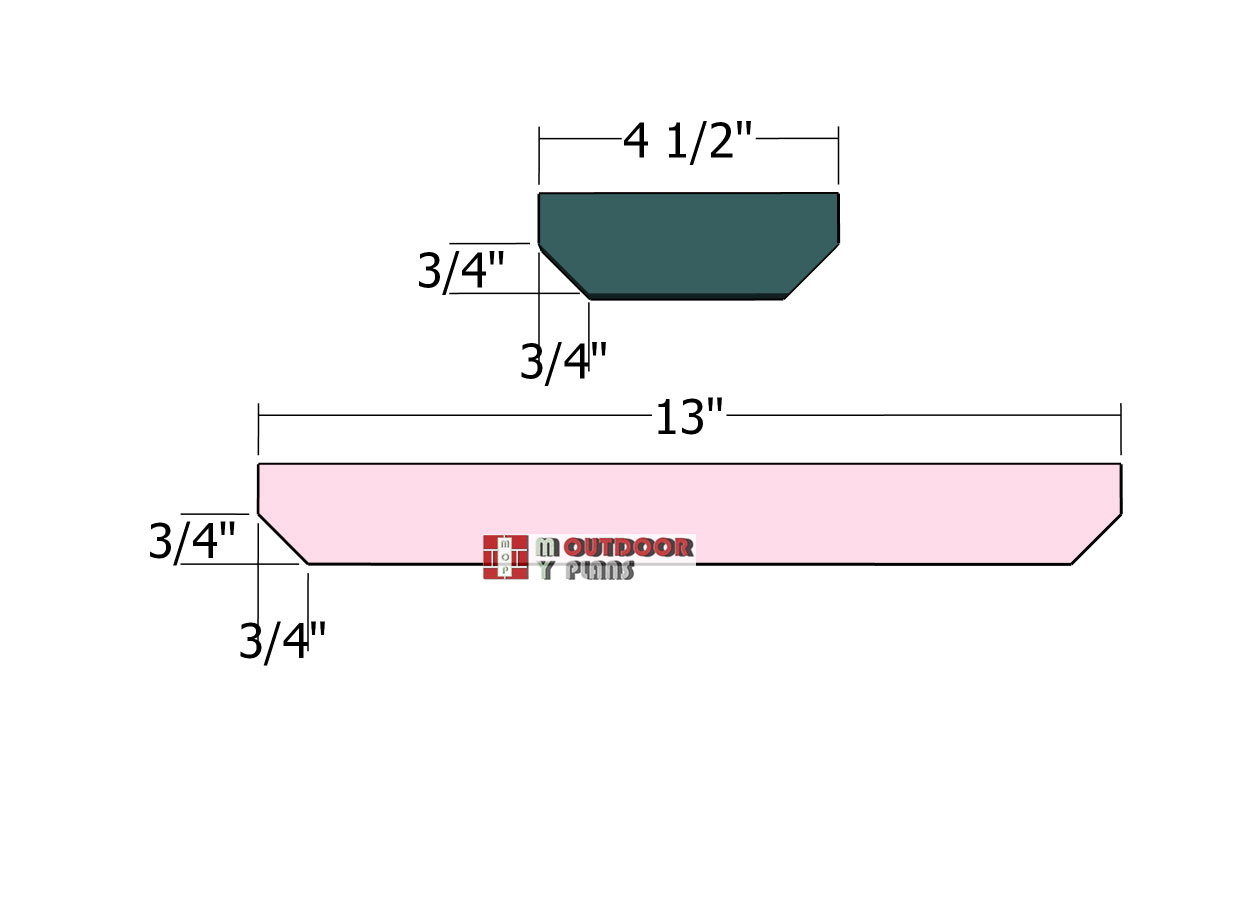
Side-Supports
Next, we need to cut to supports for the picnic table. Use 1×2 lumber and make 45 degree decorative cuts to both ends, as shown in the diagram. Smooth the edges with sandpaper.
Assembling-the-sides
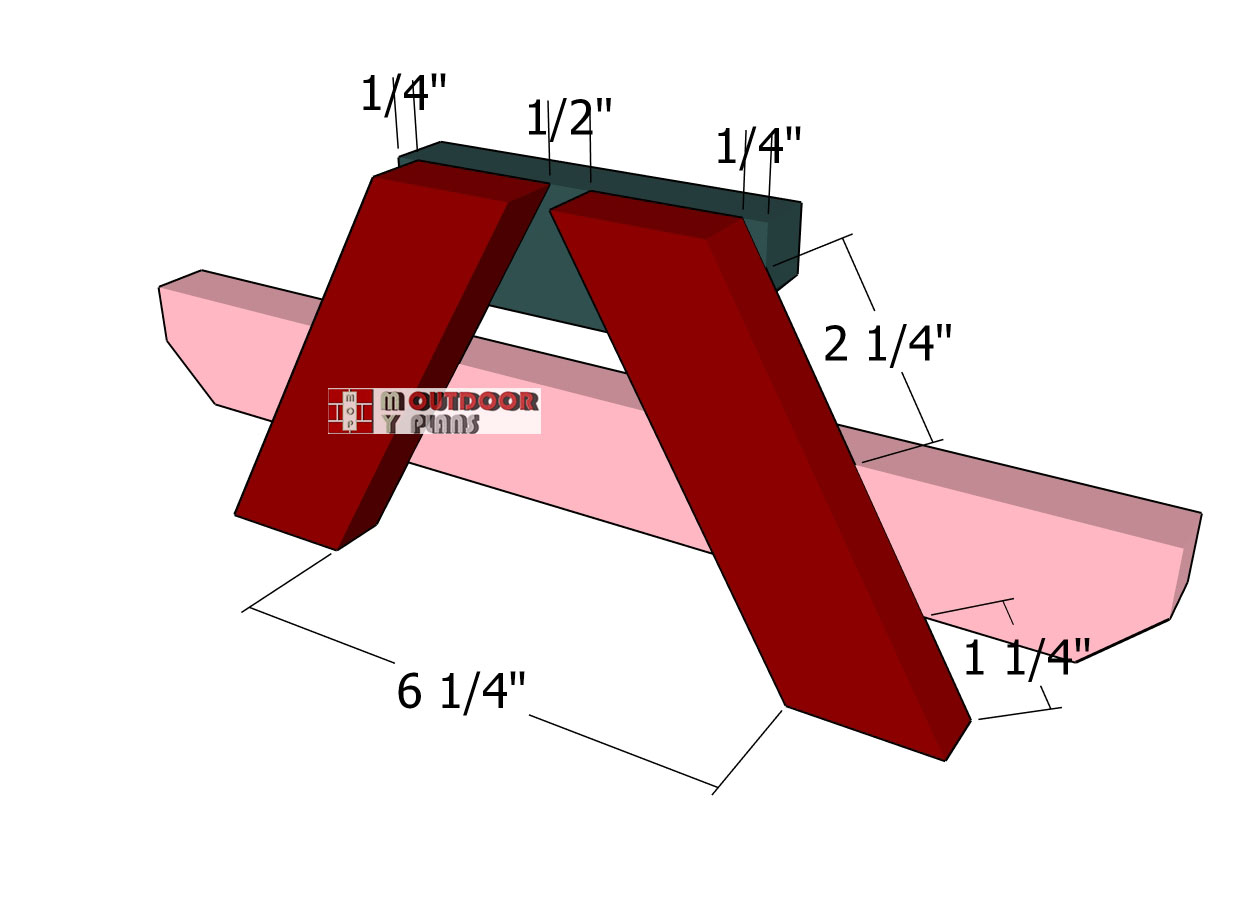
Next up, we need to assemble the sides for the chicken picnic table. Lay everything on a level surface and mark the location of the legs on top of the horizontal supports.
Use the info from the diagram to align all components together tightly. Drill pilot holes through the legs and insert 1 1/4″ screws into the supports. Use at least 2 screws for each joint.
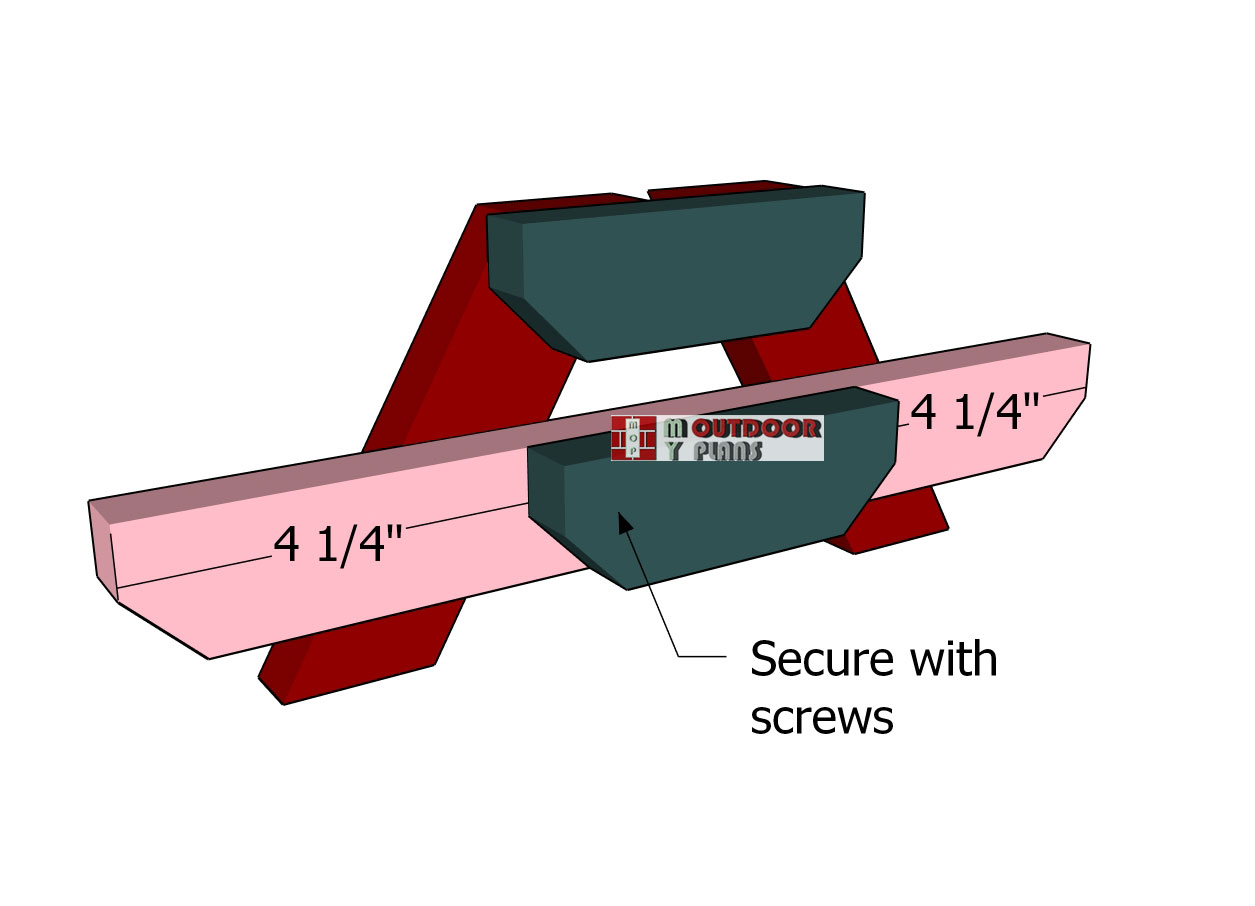
Tree-support
Notice the extra support secured to the seat brace. You have to fit this support on one side of the table, so we can attach it level to the tree.
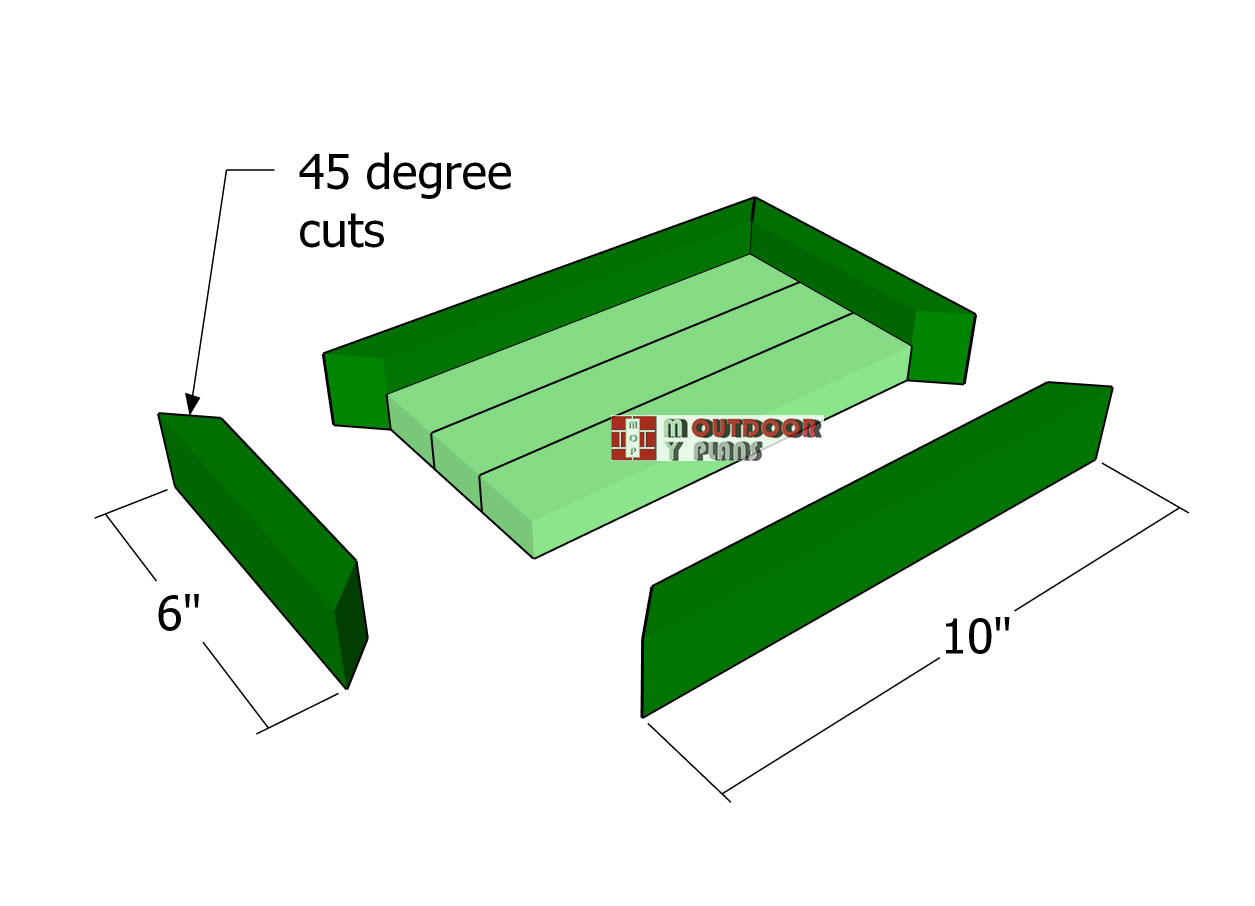
Table-trims
Next, we need to assemble the tabletop tray for the picnic table. Cut all components from 1×2 lumber as shown in the diagram. Make 45 degree cuts to both ends of the trims.
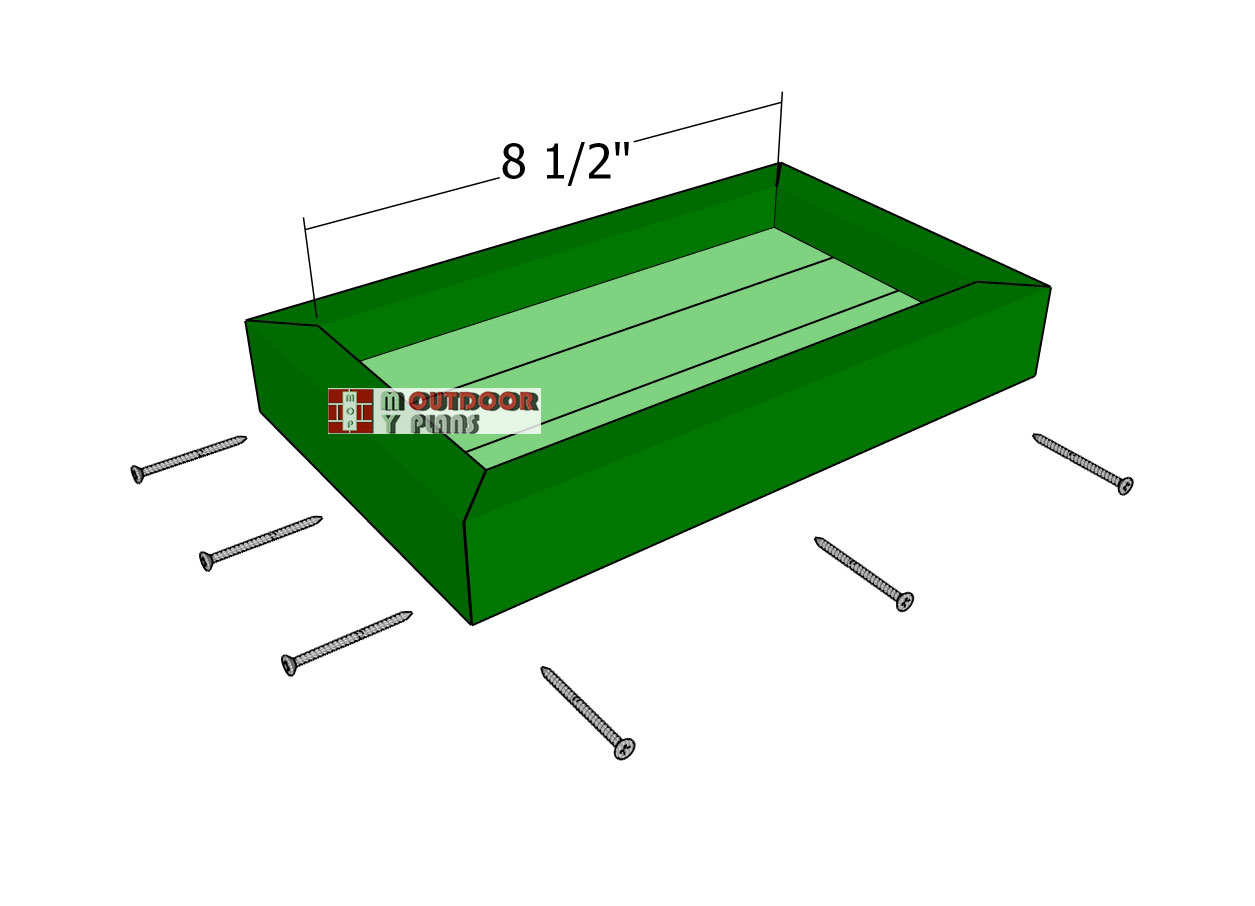
Assembling-the-tray
Lay everything on a level surface and assemble with glue and 1 5/8″ screws. Drill pilot holes to prevent the wood from splitting. Leave no gaps between the components.
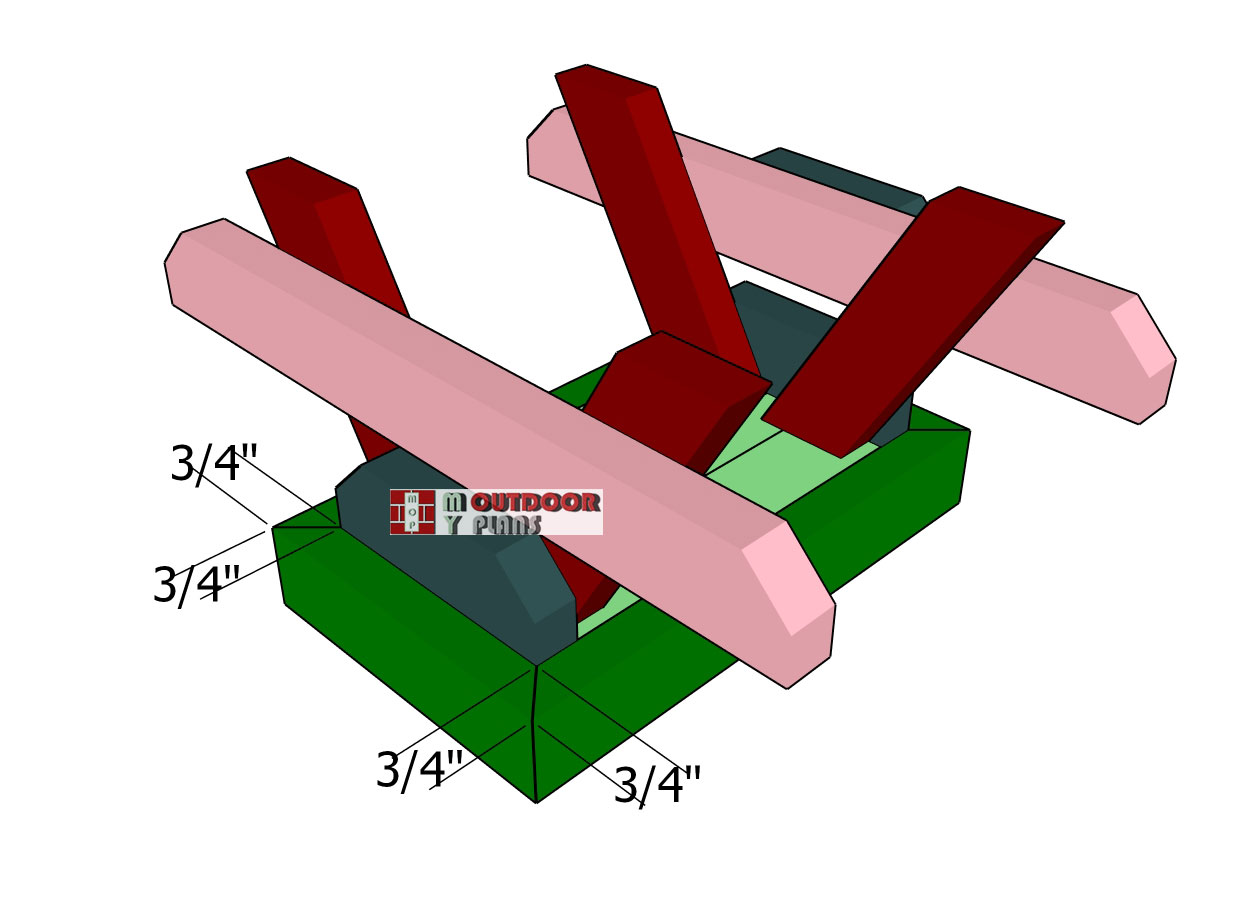
Assembling-the-picnic-table
Next up, align the side frames to the tray. Align everything with attention. Drill pilot holes and insert 1 5/8″ screws through the tray into the supports. I only show the picnic table upside down, to highlight the alignnent of the components.
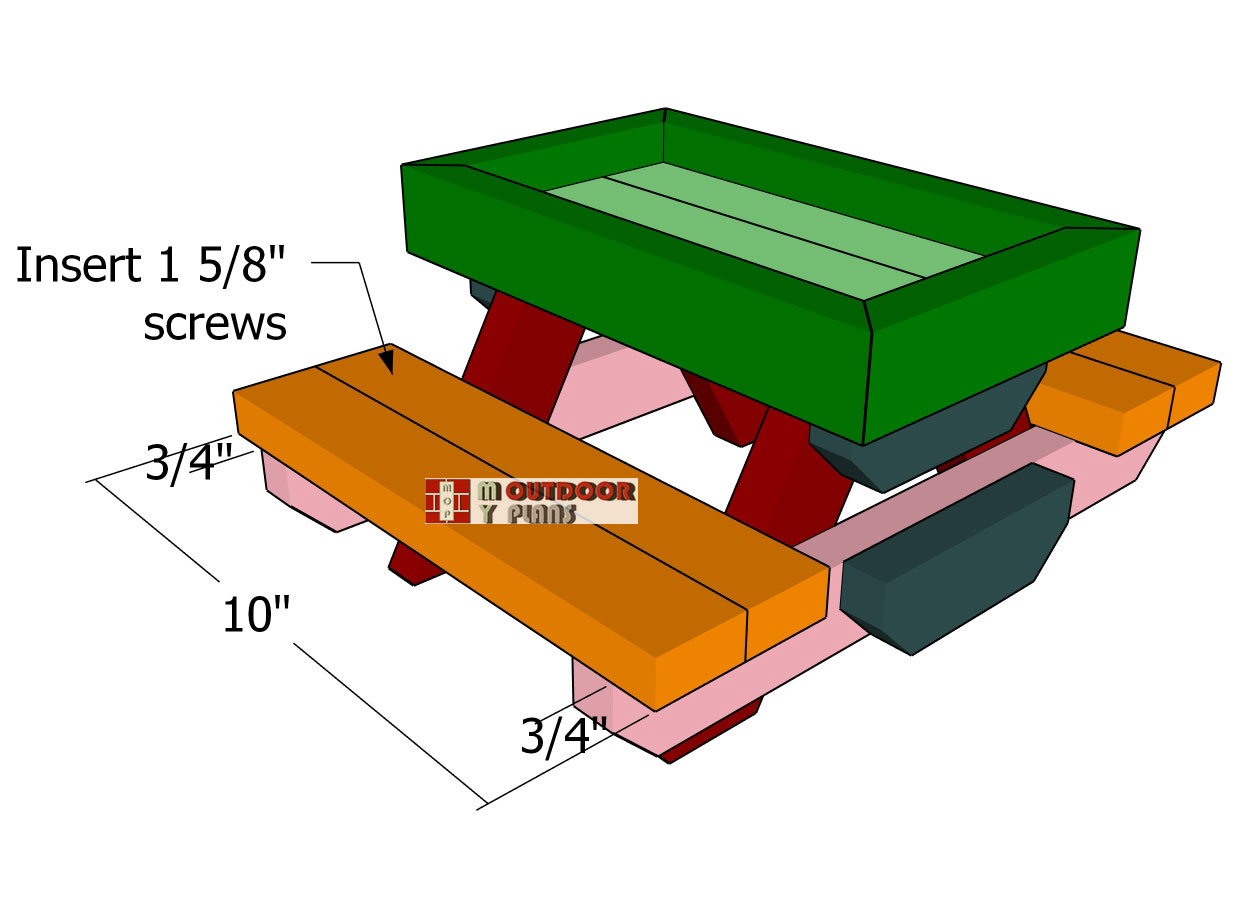
Seat-slats
Attach the 1×2 boards to the seat supports. Notice the 3/4″ overhangs on both sides. Drill pilot holes and insert 1 5/8″ screws to lock the boards into place tightly.
Picnic Table Feeder – Finishing touches
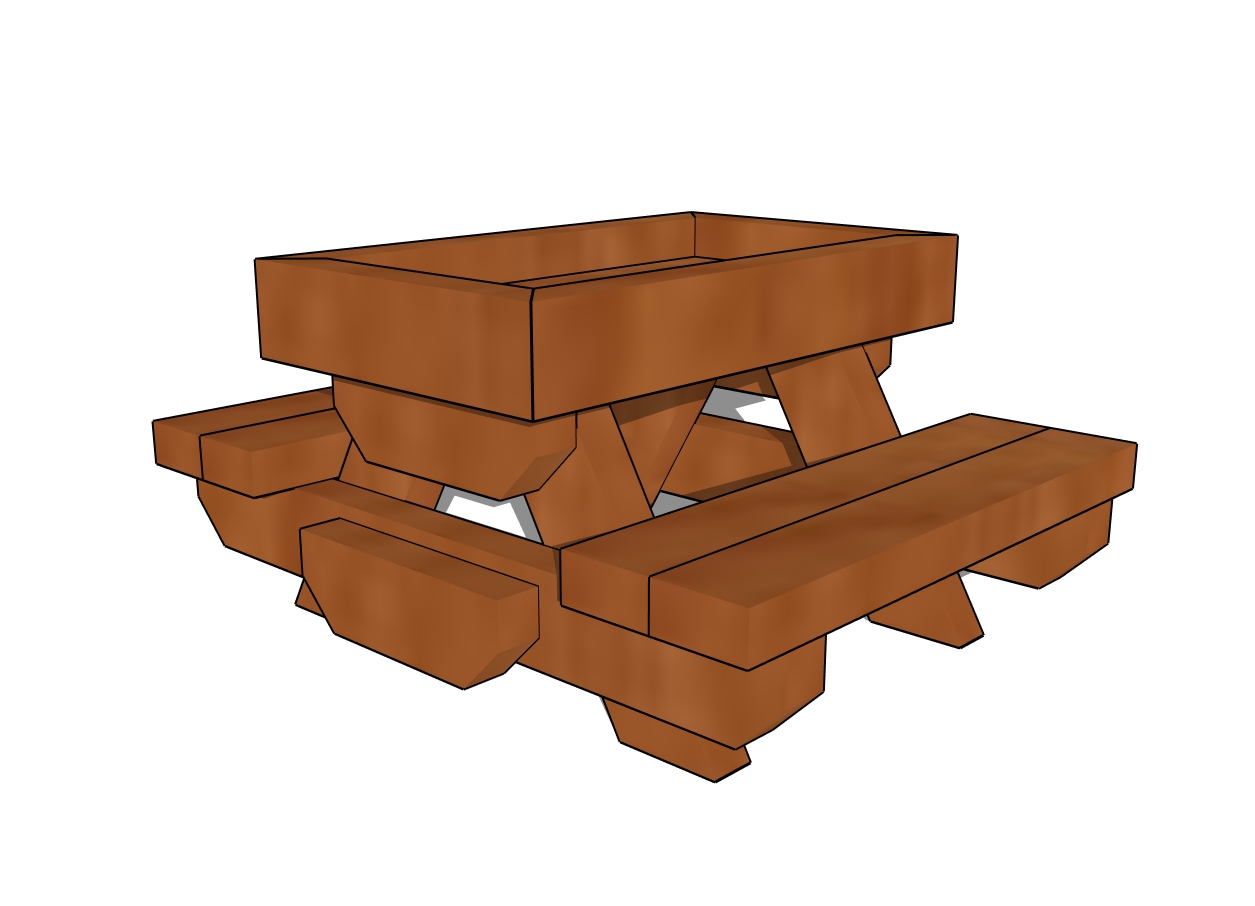
Squirrel picnic table plans
For the finishing touches on our picnic table, start by giving it a good sanding to smooth out any rough edges and ensure there are no splinters.
Next, apply a coat of non-toxic, food-safe sealant to protect the wood and make it easy to clean. Finally, add some cute little details like mini umbrellas or painted designs to give it a fun and personalized touch that your chickens will love!
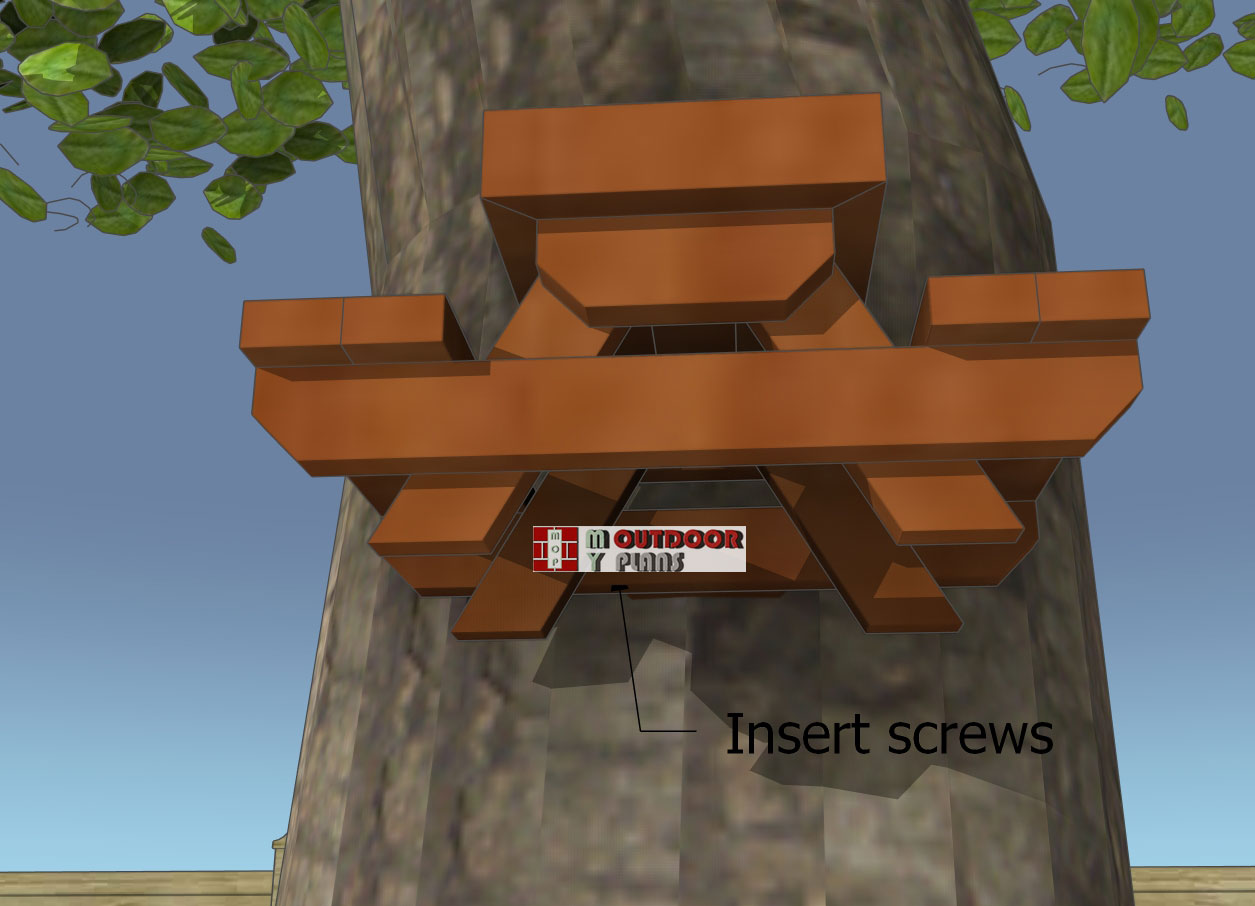
Securing-the-table-to-the-tree
Attach the squirrel picnic table to the tree with two 2 12″ screws. Use a spirit level to make sure the table is level on both directions.
Squirrel picnic table plans – diy project
And there you have it, a charming squirrel picnic table that’s not only fun to build but also adds a delightful touch to your yard. Whether you’re a seasoned DIYer or just starting out, this project is perfect for adding some creativity to your outdoor space.
If you want to get the Premium plans with all the extras, just press the GET PREMIUM PLANS button bellow. If you want to get the free plans, just read the blog FAQs.

This woodworking project was about DIY squirrel picnic table – free plans. If you want to see more outdoor plans, check out the rest of our step by step projects and follow the instructions to obtain a professional result.