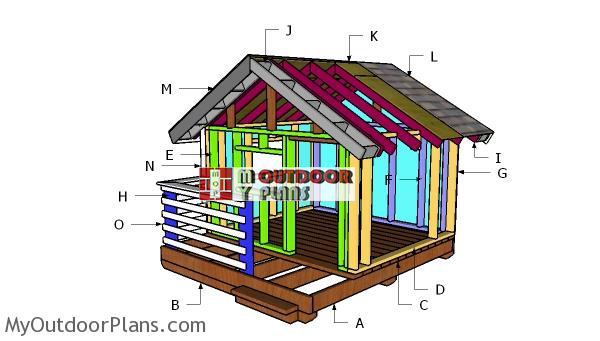
This step by step diy project is about diy playhouse plans. I have designed this small playhouse with front porch so you can get the job done with a small budget and with basic tools. This playhouse has been optimized so you can use the littlest amount of materials and save time. This playhouse is the perfect addition to any backyard. Take a look over the rest of my woodworking plans, if you want to get more building inspiration.
When buying the lumber, you should select the planks with great care, making sure they are straight and without any visible flaws (cracks, knots, twists, decay). Investing in cedar or other weather resistant lumber is a good idea, as it will pay off on the long run. Use a spirit level to plumb and align the components, before inserting the galvanized screws, otherwise the project won’t have a symmetrical look. If you have all the materials and tools required for the project, you could get the job done in about a day. See all my Premium Plans HERE.
Projects made from these plans
DIY Playhouse Plans
Building-a-playhouse
Cut & Shopping Lists
- A – 2 pieces of 2×6 lumber – 84″ long, 6 pieces – 93″long FLOOR FRAME
- B – 3 pieces of 4×4 lumber – 84″ long SKIDS
- C – 17 pieces of 5/4″ decking – 84″ long DECKING
- D – 2 pieces of 2×4 lumber – 72″ long, 5 pieces – 45″ long, 1 piece – 6″ long, 1 piece – 20″ long, 2 pieces – 30 1/2″ long 2xSIDE WALL
- E – 1 piece of 2×4 lumber – 77″ long, 6 pieces – 45″ long, 1 piece – 6″ long, 1 piece – 20″ long, 2 pieces – 27 3/4″ long, 1 piece – 4 1/2″ long, 1 piece – 48 1/2″ long FRONT WALL
- F – 2 pieces of 2×4 lumber – 77″ long, 6 pieces – 45″ long BACK WALL
- G – 2 pieces of 1/2″ plywood – 48″x72″ long, 2 pieces – 48″x84″ long EXTERIOR WALLS
- H – 3 pieces of 4×4 lumber – 32″ long POSTS
- 4 pieces of 4×4 lumber – 8′
- 8 pieces of 2×6 lumber – 8′
- 17 pieces of 5/4 decking – 8′
- 24 pieces of 2×4 lumber – 8′
- 4 pieces of 1/2″ plywood – 4’x8′
- 6d nails, 2 1/2″ screws, 3 1/2″ screws
- wood filler , wood glue, stain/paint
Tools
![]() Hammer, Tape measure, Framing square, Level
Hammer, Tape measure, Framing square, Level
![]() Miter saw, Drill machinery, Screwdriver, Sander
Miter saw, Drill machinery, Screwdriver, Sander
![]() Safety Gloves, Safety Glasses
Safety Gloves, Safety Glasses
Time
![]() One weekend
One weekend
Related
- PART 1: DIY Playhouse Plans
- PART 2: DIY Playhouse Roof Plans
- PART 3: DIY Playhouse Railings Plans
- Simple playhouse plans
How to build a playhouse
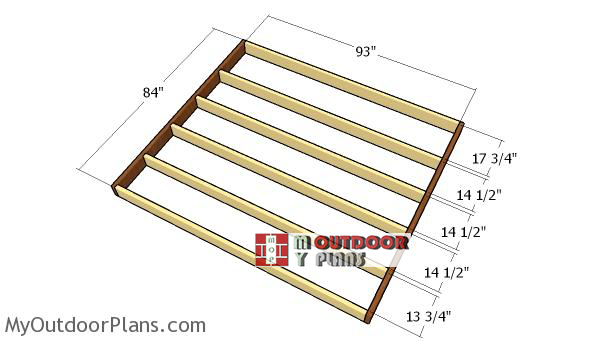
Building-a-floor-frame
The first step of the project is to build the floor frame for the playhouse. Cut the joists at the right dimensions and then lay them on a level surface. Align the edges flush and make sure the corners are square. Drill pilot holes and insert 3 1/2″ screws to lock the joists together tightly. Place the joists every 16″ on center.
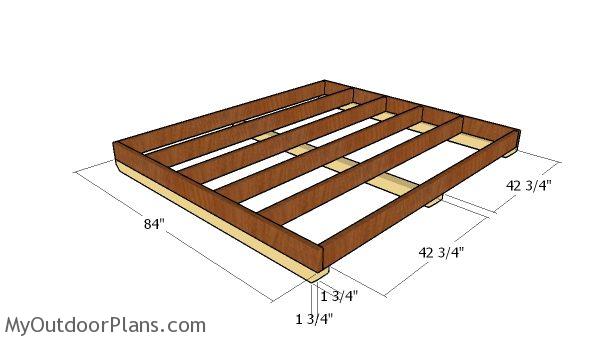
Fitting the skids
Fit the 4×4 skids under the frame, as shown in the diagram. Use rafter ties to lock the skids to the frame tightly.
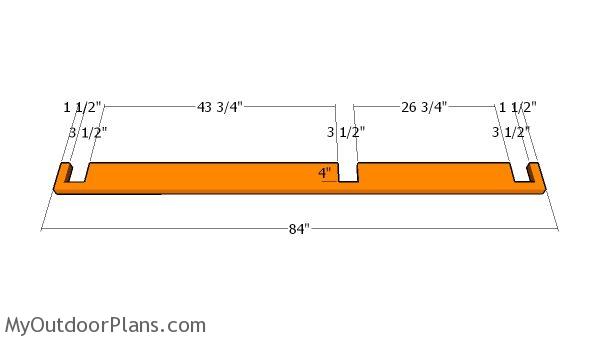
End decking board
Make cuts to a decking board, so you can fit it into place tightly. Use a circular saw to make the notch, so you can fit it around the porch posts.
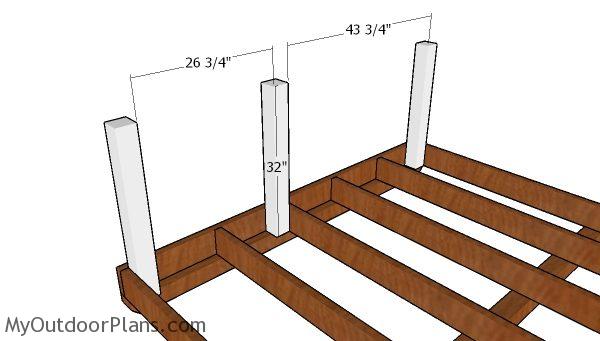
Fitting the posts
Fit the posts to the frame and plumb them with a spirit level. Drill pilot holes through the frame and insert 3 1/2″ lag screws into the posts.
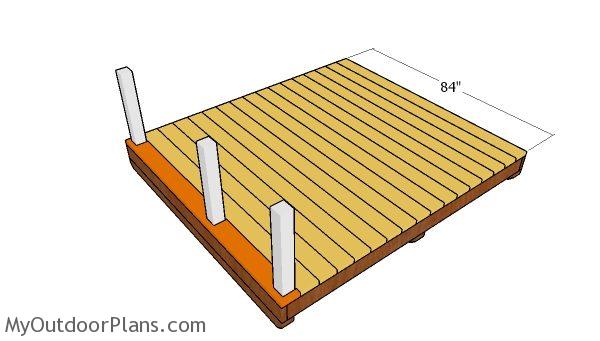
Fitting the decking
Fit the 5/4″ decking boards to the floor of the frame. Place a nail between the boards, drill pilot holes and insert 2 1/2″ screws to lock them into place tightly.
Building the wall frames
Side-wall-frame
Building the side walls for the playhouse is a straight forward process. Cut the components at the right dimensions and then lay them on a level surface. Drill pilot holes through the plates and insert 3 1/2″ screws into the studs. Align the edges flush and make sure the corners are square. Frame large window openings to the side walls. You can adjust the size of the window openings to suit your needs.

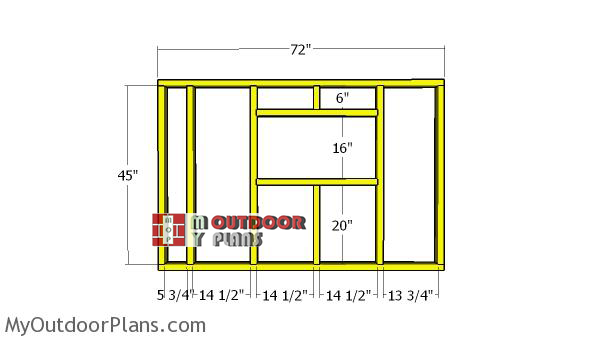
Front-wall-frame
Build the front wall for the playhouse from 2×4 lumber. Drill pilot holes through the plates and insert 3 1/2″ screws into the studs. Make sure the corners are square and frame a window opening, as well as a door opening.
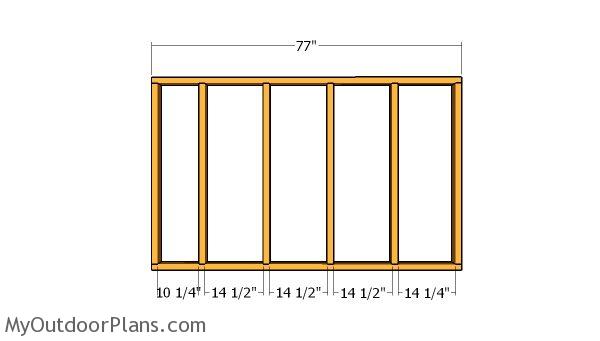
Back wall – frame
Use 2×4 lumber for the back wall frame. Cut the studs and the plates at the right dimensions. Drill pilot holes through the plates and insert 3 1/2″ screws into the studs. Make sure the corners are square and align the edges flush.
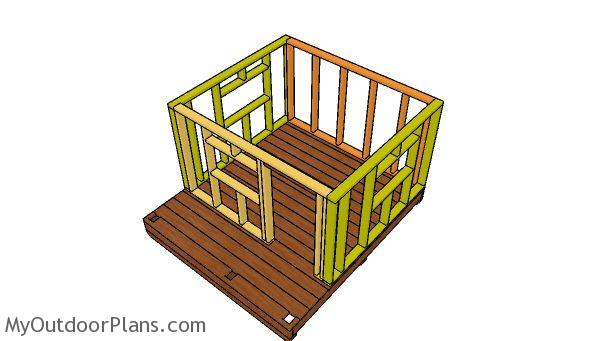
Building the frame of the playhouse
Fit the wall frames to the base of the playhouse. Align the edges flush and plumb them with a spirit level. Drill pilot holes through the bottom plates of the walls and insert 3 1/2″ screws into the floor. Moreover, you need to lock the adjacent walls together tightly with 2 1/2″ screws, after drilling pilot holes.
Fitting the wall panels
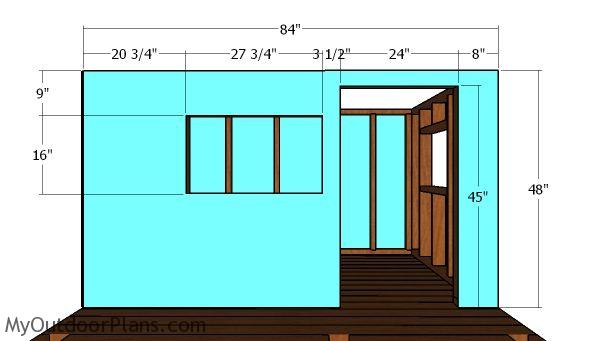
Front wall – siding
Use 1/2″ plywood for the exterior walls. Mark the cut lines on the sheets and then make the window openings and the door opening. Align the edges flush and then insert 6-8d nails every 8″ along the framing.
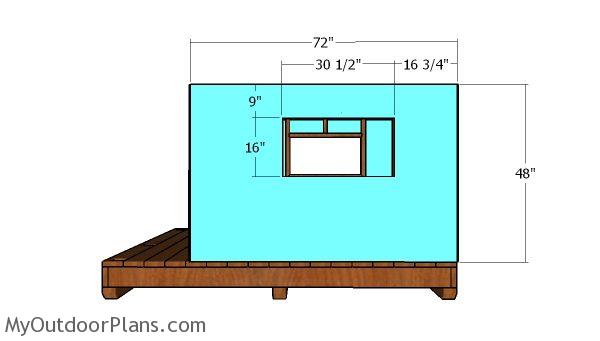
Side walls – exterior
Fit the panels to the sides of the playhouse, as well. Make the window opening with a saw. Align the edges flush and insert 6-8d nails, every 8″ along the framing.
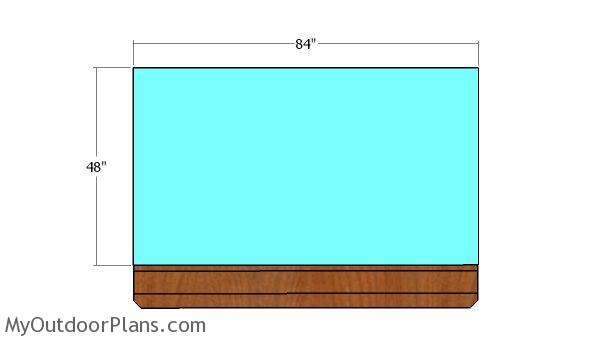
Back wall – siding
Fit the panel to the back wall, as well.
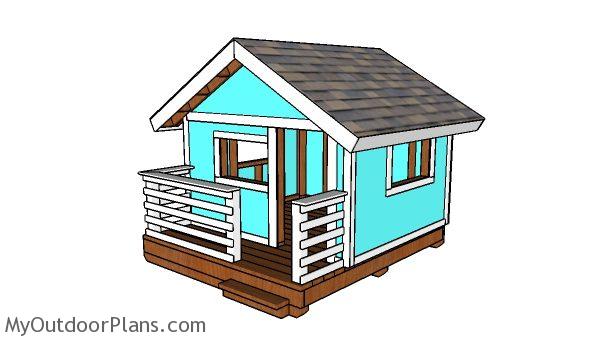
DIY Playhouse Plans
You need to take a look over PART 2 and PART 3 of the playhouse, so you learn how to build the gable roof and how to build the porch rails.
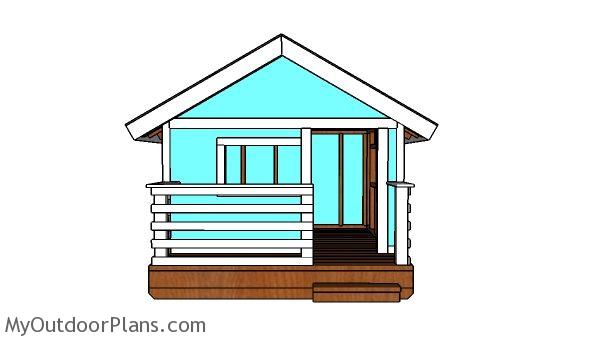
DIY Playhouse Plans – Front view
This playhouse has a beautiful appearance and it features a small front porch. This playhouse is super easy to build by anyone with basic skills and tools. If you are a weekend DIY-er, this project will be a nice change of pace and an opportunity to step up your game.

DIY Playhouse Plans – dimensions
Building a 7×8 gable playhouse with a porch will likely cost you between $500 and $1500, depending on the materials and any extra features you decide to include. Plan to spend about 1 to 2 weekends on this project, with time dedicated to both the main structure and the charming porch area. It’s a fun build that results in a durable, inviting space for kids to enjoy.

DIY Playhouse – free plans
A 7×8 gable playhouse with a porch is the perfect addition to your backyard, offering a cozy, imaginative space where kids can play, explore, and create. The gable roof gives it that classic, storybook look, while the porch adds a welcoming touch—perfect for tea parties, games, or just hanging out.

How to build a playhouse with porch
This project not only boosts your backyard’s appeal but also gives your children a special place that’s all their own, fostering creativity and outdoor fun for years to come.
This woodworking project was about diy playhouse plans free. If you want to see more outdoor plans, check out the rest of our step by step projects and follow the instructions to obtain a professional result.
