This step by step woodworking project is about gazebo railing plans. After building the frame and the roof of the gazebo, you should consider adding railings to the structure, although this step is optional. From our own experience, we assert that adding the right balusters to a gazebo will enhance its look and add value to your garden. Nevertheless, there are many things you should take into account, before starting the actual project.
Study the local codes with attention, as there might be several requirement related to gazebo’s railing. In addition, choose the lumber with attention, as they have to be in a perfect condition and weather-resistant (cedar, pine, redwood). Always pre-drill the components before inserting the screws, to prevent the wood from splitting. Fill the holes with wood putty and sand the surface thoroughly, until you get an even result.
Projects made from these plans
Cut & Shopping Lists
- A – 14 pieces of 2×4 lumber – 65 1/4″ long CLEATS
- B – 152 piece of 2×2 lumber – 30 – 35″ long BALUSTERS
- C – 7 pieces of 2×4 – 65 1/4” long RAILS
Tools
![]() Hammer, Tape measure, Framing square
Hammer, Tape measure, Framing square
![]() Miter saw, Drill machinery, Screwdriver, Sander
Miter saw, Drill machinery, Screwdriver, Sander
Time
Related
- Part 1: Square Gazebo Plans
- Part 2: Square Gazebo Roof Plans
- Part 3: Gazebo Railing Plans
Building railing for a gazebo
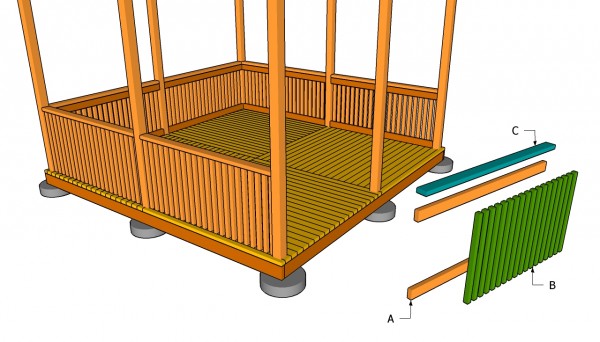
Building gazebo railings
Building railings for a square gazebo is a straight forward job, as you just have to build the wooden components and fit them into place. Nevertheless, you should choose the design of the balusters from the very beginning, making sure it matches the style of outdoor gazebo.
Top Tip: Always align the wooden components at both ends, before driving in the screws. Countersink the head of the screws, if you want to get a neat appearance.
Free gazebo railing plans
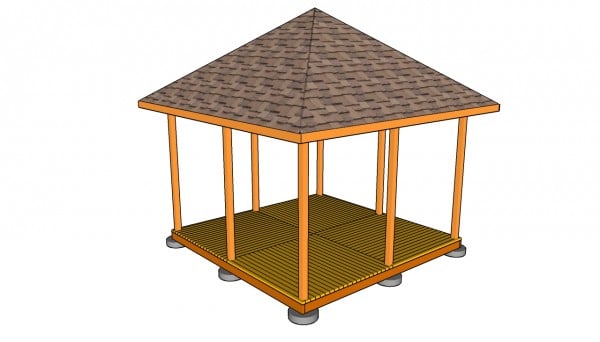
Square gazebo
The first step of the project is to assess the frame of the gazebo. If you have followed the instructions described in the first parts of the woodworking project, the posts should be plumb and equally spaced.
Deciding the design of the railing is difficult, as there are many alternatives. You could build the balusters from 2×2, 1×4 or you could buy them from diy stores.
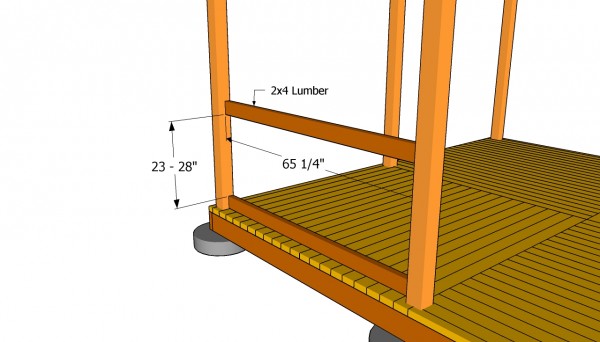
Installing the cleats
The first step of the actual project is to install the 2×4 cleats between the posts. As you can see in the image, you need to level them with a spirit level, before drilling pilot holes and inserting the screws. The best method is to use a pocket hole system.
Top Tip: If you want to leave 3-4” clearance space under the railing, you should place the bottom cleat accordingly. In addition, you could adjust the height of the balusters, according to your needs and tastes.
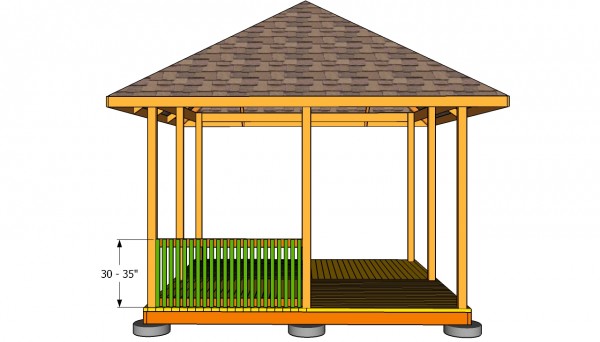
Installing the balusters
Next, install the balusters to the wooden cleats. In our case, we decided to go for 2×2 balusters and to place them every 1 1/2”. Cut all the balusters and smooth their edges or make them round with a router.
Plumb the balusters, drill pilot holes at their ends and secure them to the cleats with 2 1/2” galvanized screws. Don’t forget to countersink the head of the screws.

Installing the handrails
After installing the wooden balusters, the next step is to fit the handrails. In order to get the job done accurately and to get a durable result, we recommend you to round the exposed edges of the rails with a router and a 1/4” bit.
Place the rails into place, drill pilot holes, every 10” and insert 2 1/2” wood screws into the cleats. Make sure you countersink the head of the screws, otherwise they will be visible.
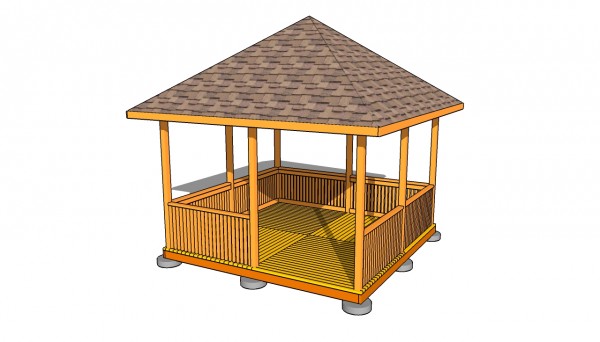
Gazebo railing plans
Continue the installing the railings to the other sides of the gazebo until you complete the job, using the techniques described above. Place a wood block between the balusters, to get consistent gaps.
Top Tip: Fill the holes with filler, let it dry out properly and sand the surface. Apply several coats of stain or paint to protect the wooden components from decay.
This woodworking project was about gazebo railing plans. If you want to see more outdoor plans, we recommend you to check out the rest of our projects. LIKE us on Facebook to be the first that gets our latest updates and submit pictures with your DIY projects.

