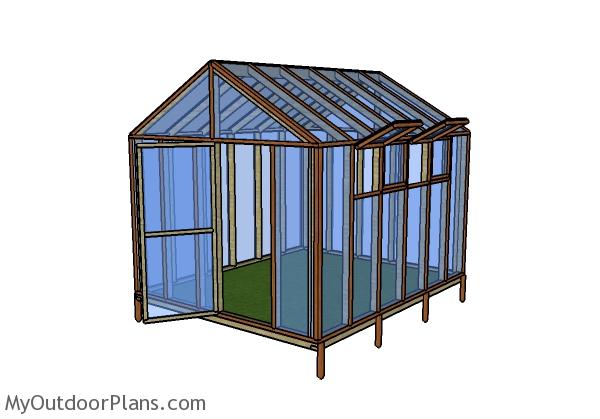
This step by step diy project is about 10×12 greenhouse trims plans. This is PART 2 of the greenhouse project, where I show you how to build the vents and the door for the greenhouse. In addition, I show you how to fit the 1×2 trims to the exterior of the greenhouse. Take a look over the rest of my woodworking plans, if you want to get more building inspiration.
When buying the lumber, you should select the planks with great care, making sure they are straight and without any visible flaws (cracks, knots, twists, decay). Investing in cedar or other weather resistant lumber is a good idea, as it will pay off on the long run. Use a spirit level to plumb and align the components, before inserting the galvanized screws, otherwise the project won’t have a symmetrical look. If you have all the materials and tools required for the project, you could get the job done in about a day. See all my Premium Plans HERE.
Projects made from these plans
10×12 Greenhouse Door and Trims Plans
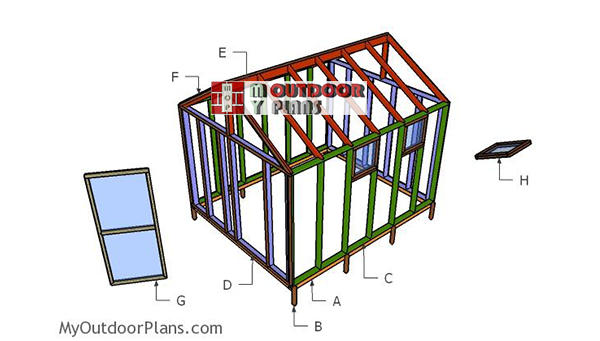
Building-a-10×12-greenhouse
Cut & Shopping Lists
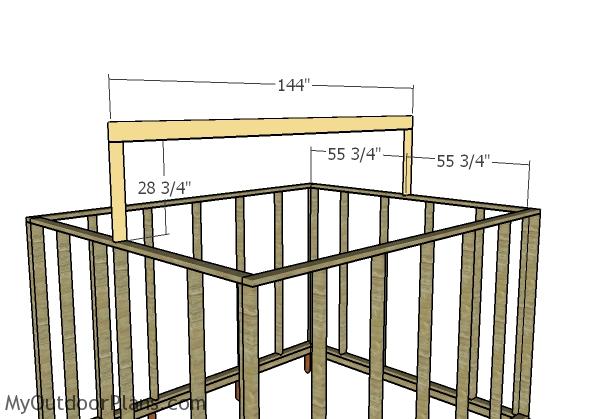
- E – 2 pieces of 2×4 lumber – 28 3/4″ long, 1 piece of 2×6 lumber – 144″ long TOP RIDGE
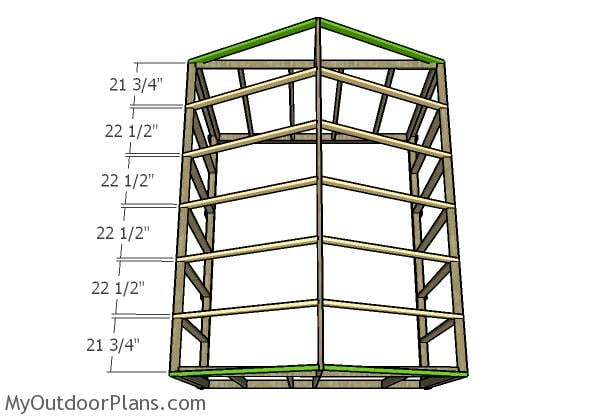
- E – 14 pieces of 2×4 lumber – 68 1/2″ RAFTERS
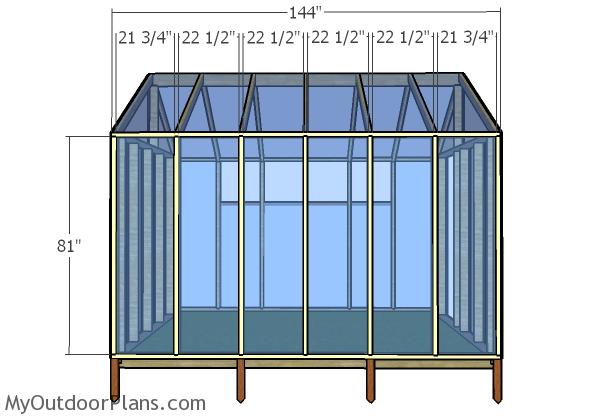
- F – 5 pieces of 1×2 lumber – 144″ long, 4 pieces – 120″ long, 26 pieces – 81″ long, 18 pieces – 68 1/2″ long, 2 pieces – 34 1/4″ long TRIMS
- G – 2 pieces of 2×2 lumber – 78″ long, 2 pieces – 34 1/4″ long, 1 piece – 31 1/4″ long DOOR
- G – 2 pieces of 1×2 lumber – 78″ long, 2 pieces – 34 1/4″ long, 1 piece – 31 1/4″ long DOOR TRIMS
- H – 2 pieces of 2×2 lumber – 22 1/2″ long, 2 pieces – 19 1/4″ long 4xVENT
- H – 2 pieces of 1×2 lumber – 22 1/2″ long, 2 pieces – 19 1/4″ long 4xVENT TRIMS
- 1 piece of 2×6 lumber – 12′
- 15 pieces of 2×4 lumber – 6′
- 7 pieces of 2×2 lumber – 8′
- 5 pieces of 1×2 lumber – 12′
- 4 pieces of 1×2 lumber – 10′
- 19 pieces of 1×2 lumber – 6′
- 26 pieces of 1×2 lumber – 8′
- 2 1/2″ screws, 3 1/2″ screws, 1 5/8″ screws
- greenhouse plastic
- vent opener
- hinges, latch
Tools
![]() Hammer, Tape measure, Framing square, Level
Hammer, Tape measure, Framing square, Level
![]() Miter saw, Drill machinery, Screwdriver, Sander
Miter saw, Drill machinery, Screwdriver, Sander
Time
Related
- PART 1: 10×12 Greenhouse Plans
- PART 2: 10×12 Greenhouse Trim Plans
How to build a greenhouse vents, door and trims
Fitting the ridge beam
Use 2×4 lumber for the supports and 2×6 lumber for the ridge beam. Drill pocket holes at both ends of the supports and then secure them into place with 2 1/2″ screws. Make sure the corners are square and then plumb the supports with a spirit level.

Building-the-rafters
Build the rafters from 2×4 lumber, using the pattern shown in the diagram. Use a circular saw to make cuts to the rafters and then smooth the edges with sandpaper.
Fitting the rafters
Fit the rafters to the top of the greenhouse. Place the rafters every 24″ on center for a professional result. Drill pilot holes and insert 2 1/2″ screws to lock the rafters into place tightly.
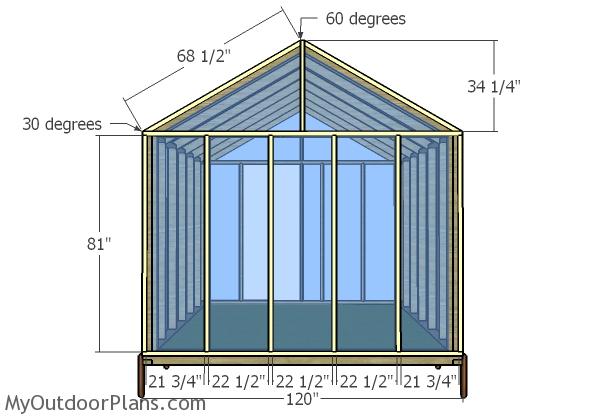
Side wall trims
The first step of the project is to attach 1×2 trims to the side walls of the greenhouse, after covering the structure with greenhouse plastic. Align the edges flush and secure the trims into place with 1 5/8″ screws, every 8″ along the framing.
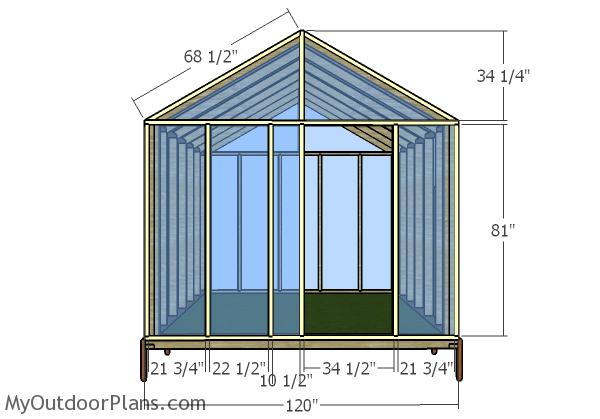
Back wall trims
Fit the trims to the back wall of the 10×12 greenhouse, as well. Align the edges flush and then insert 1 5/8″ screws every 8″, so you can lock the trims into place tightly. Make sure the corners are square and leave no gaps between the trims.
Front wall trims
Fit the 1×2 trims to the front wall of the greenhouse, as well. Align the edges flush and insert 1 5/8″ screws, every 8″ along the framing.
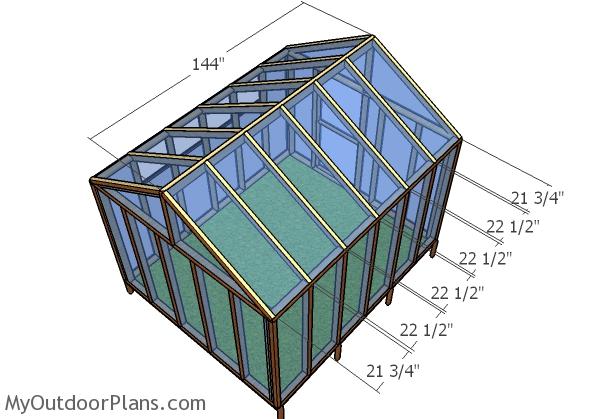
Fitting the roof trims
Fit the 1×2 trims to the top of the greenhouse, as well. Align the edges flush before inserting the screws.
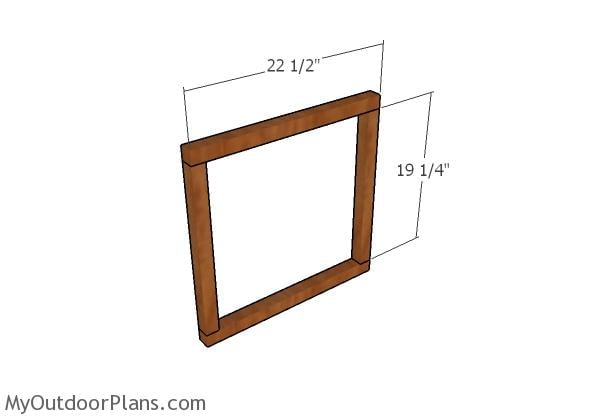
Building the vent frame
Use 2×2 lumber for the vents frame. Drill pilot holes and insert 2 1/2″ screws to lock the frame of the vents together tightly.
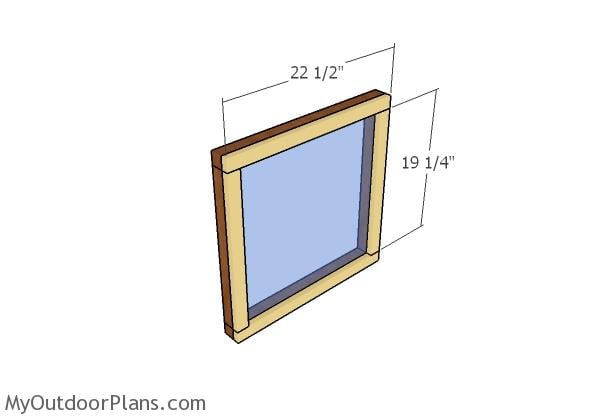
Vent trims
Fit the 1×2 trims to the vents, as well. Use 1 5/8″ screws to lock the trims to the trims into place.
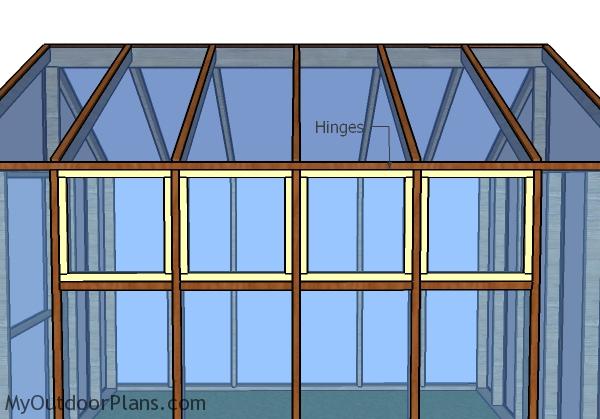
Fitting the vents
Fit the vents to the sides of the greenhouse and install the hinges, so you can open and close them easily. In addition, you can install automatic vent openers, so you air the greenhouse when the temperature get over a certain level.

Greenhouse-door-frame
Assemble the frame of the doors from 2×2 lumber, as well. Cut the components at the right dimensions and then lock them together tightly with 2 1/2″ screws, after drilling pilot holes. Make sure the corners are square and align the edges flush.
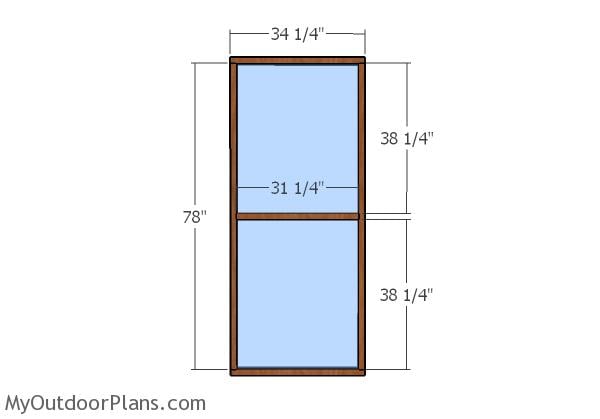
Door trims
Fit the plastic and the 1×2 trims to the doors.

Fitting the front door
Fit the doors to the openings and then lock them into place tightly with hinges. Check if the doors open and close properly and make adjustments, if necessarily.
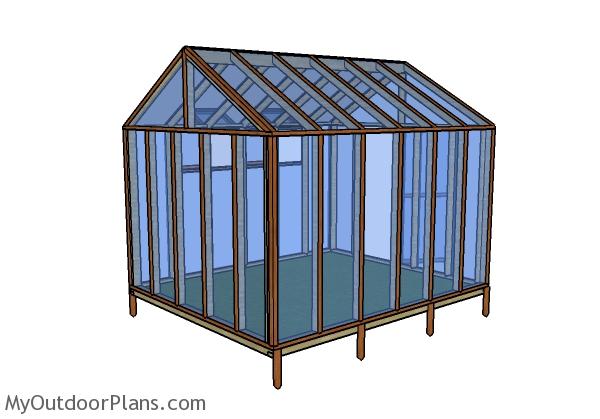
10×12 Greenhouse Plans – Back view
This greenhouse is large enough for the needs of a small family and I can guarantee it will keep you busy. The vegetables need some care and if you enjoy gardening, this new hobby will pay off.
10×12 Greenhouse Plans
This is a simple project you should be able to build in a few days without much effort. Don’t forget to take a look over PART 1 of the woodworking project to learn how to build the frame for this greenhouse. In addition, see a lot more greenhouse plans HERE.
This woodworking project was about 10×12 small greenhouse trims plans. If you want to see more outdoor plans, check out the rest of our step by step projects and follow the instructions to obtain a professional result.


6 comments
I would like to build a green house to the front of my home.
3 sided like a lean to with approximate size of :
_12′ Length 12′ Width 9′ High
Do you ever do that ?
I don’t create plans for custom sizes. However, I will publish a lean to greenhouse soon on the blog. I hope that would help you adjust it to your needs.
Thank you for these plans!!! Just finished framing today and now ordering polycarbonate sheets. Anxious to keep the veggies going during our cold Maryland winters.
There are way too many buttons on your site I think.
I have been trying to buy plans for a 10 x 12 greenhouse but it is just too confusing… How can I buy the plans…
Why doesn’t this greenhouse have a floor? I do not want it to sit flush on the ground.
Because this an open floor greenhouse. If you are looing for a different design, this plan is not for you. Cheers.