This step by step diy woodworking project is about free bar plans. If you want to learn more about building this simple bar, we recommend you to pay attention to all the instructions described in this article. There are many designs and plans to choose from when building a bar, so make sure you take a look over the alternatives before starting the actual construction project.
Invest in high-quality materials, such as cedar, pine or redwood, as they have both a nice finish and are durable. Always pre-drill the components before inserting the screws, to prevent the wood from splitting. Round the exposed edges of the bar to enhance the look of the bar and apply a few coats of paint over the components to prevent them from getting damaged from decay. See all my Premium Plans HERE.
Projects made from these plans
Building a bar
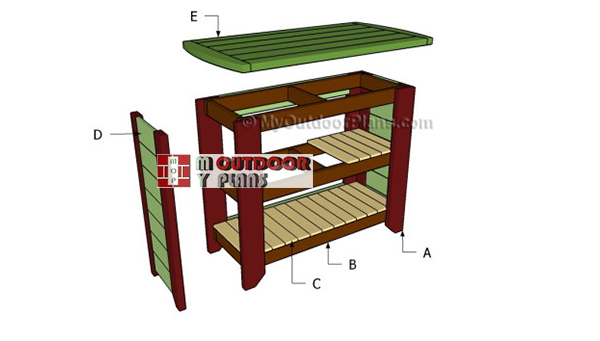
Building-a-bar
Cut & Shopping Lists
- A – 4 pieces of 2×4 lumber – 42″ long, 4 pieces of 2×6 lumber – 42″ long LEGS
- B – 9 pieces of 2×4 lumber – 15″ long, 6 piece – 48″ long FRAME
- C – 26 pieces of 1×4 – 18″ long SHELVES
- D – 14 piece of 1×6 lumber – 11″ long, 9 pieces – 40″ long PANELS
- E – 4 pieces of 2×6 lumber – 48″ long, 2 pieces of 2×4 – 48″ long, 2 pieces – 29″ long COUNTERTOP
Tools
![]() Hammer, Tape measure, Framing square, Level
Hammer, Tape measure, Framing square, Level
![]() Miter saw, Drill machinery, Screwdriver, Sander
Miter saw, Drill machinery, Screwdriver, Sander
Time
Related
Free Bar Plans
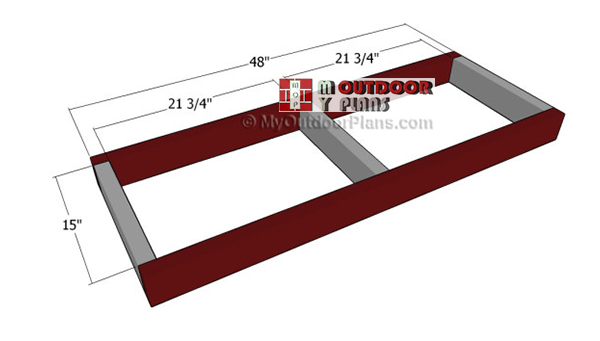
Building-the-frames
The first step of the woodworking project is to build the frames of the bar. As you can easily notice in the image, we recommend you to use 2×4 lumber and to cut the components at the right size before locking them together.
Top Tip: Check if the corners are right-angled and drill pilot holes before inserting the screws, in order to prevent the wood from splitting. Align everything properly.
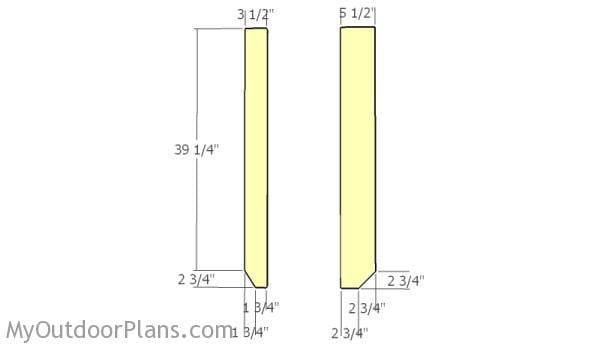
Building the legs
Build the legs for the bar using 2×4 or 2×6 lumber. Make decorative cuts to the bottom of the legs, as shown in the diagram.
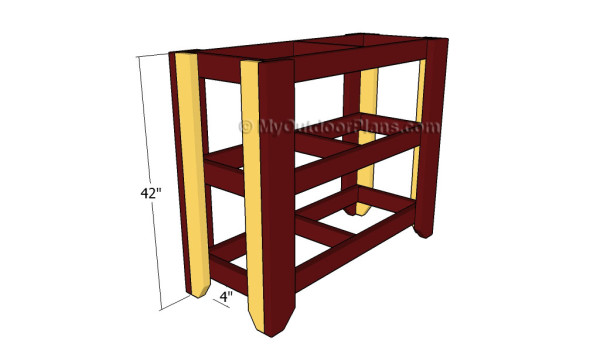
Attaching the side legs
Continue the woodworking project by attaching the legs to the three frames. In order to get a professional result, we recommend you to cut the ends of the legs in a decorative manner, by using a nice circular saw.
Use 2×4 lumber to build the side legs and lock them into place with galvanized screws. Plumb the legs and check if the frames are perfectly horizontal before inserting the screws.
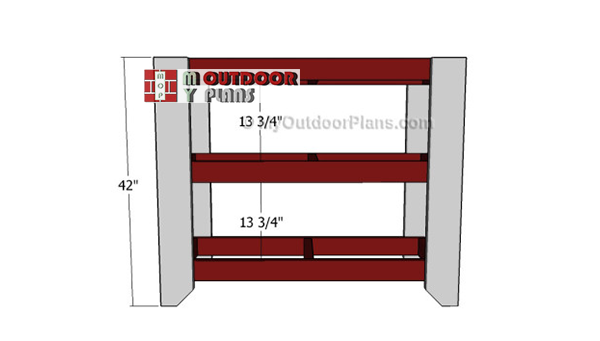
Attaching-the-legs-to-home-bar
Next, you need to attach the legs to the front and back faces of the bar. Cut the components at the right size and lock them to the structure with 2 1/2″ screws, from the inside. Leave no gaps between the adjacent legs before inserting the screws into place.
Add waterproof glue to enhance the rigidity of the joints and remove the excess with a damp cloth. Work with attention, otherwise the end result won’t match your expectations.
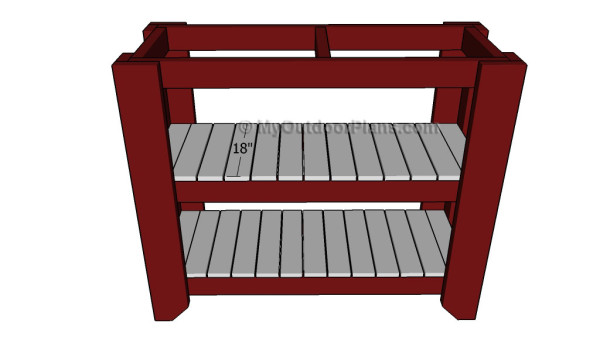
Attaching the slats to the shelves
Attach the 1×4 slats to the frames in order to build the shelves. Work with attention and pre-drill holes through the slats before locking them to the frames with 1 1/4″. Place the slats equally-spaced, in order to get a professional result.
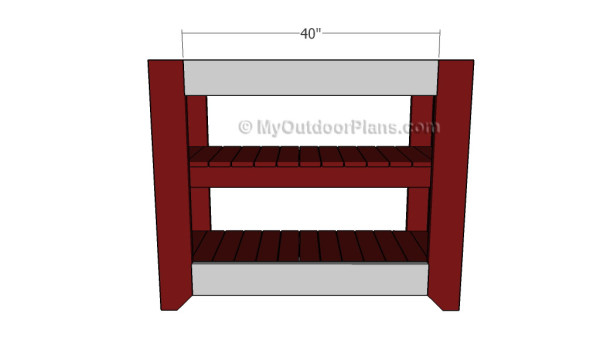
Attaching the slats to the back face of the bar
Attach the 1×6 trims to the exterior of the wooden bar starting with the back face. Drill pocket holes at both ends of the slats and secure them to the legs with 1 1/4″ screws. Add waterproof glue to the joints and make sure the edges are flush. Alternatively, use 1 1/4″ nails and glue to lock the trims to the frame.
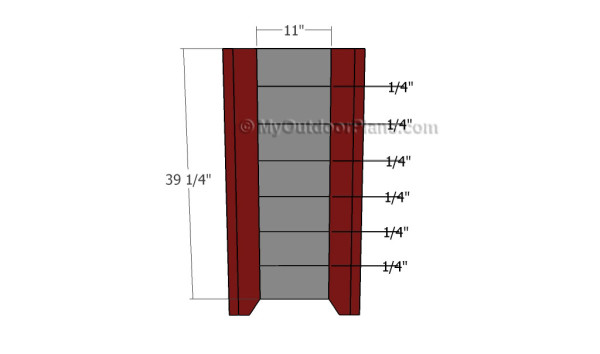
Attaching the slats to the sides of the bar
Fit the 1×6 slats between the side legs and lock them into place with galvanized screws. Add waterproof glue to the joints in order to enhance the rigidity of the structure.
Top Tip: Place the slats equally-spaced, leaving between them about 1/4″. Align the slats with great care and smooth the cut edges with sandpaper before fitting them into place.
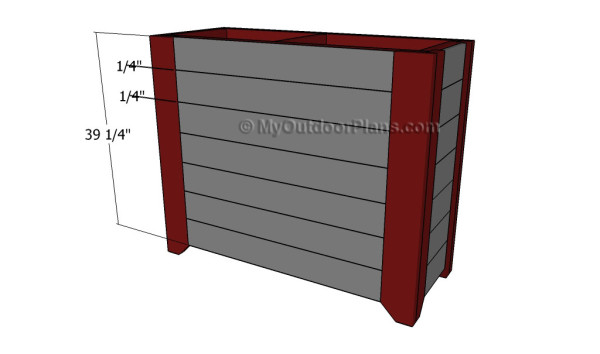
Fitting the slats to the front face of the bar
Continue by installing the slats to the front face of the bar, as shown in the image. Align the slats at both ends and secure them to the legs with galvanized screws.
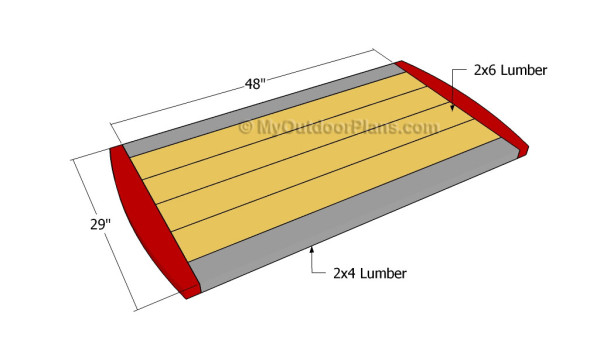
Building the countertop
Building the countertop is a straight-forward process, but you need to tackle it with great care. Align the slats with great care on a level surface and lock them together with galvanized screws.
Drill pocket holes along the edges of the slats before inserting the 2 1/2″ screws and add waterproof glue to the joints, in order to create a rigid structure. Make the end slats curved, in order to add value to the wooden bar.
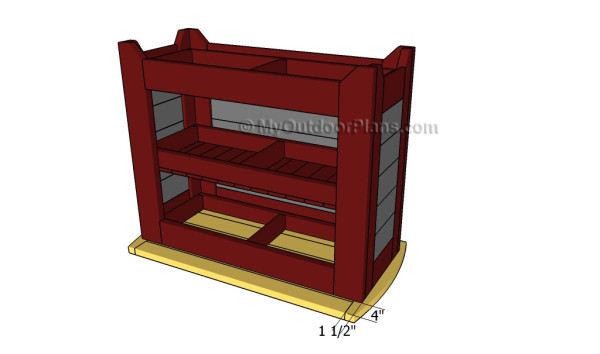
Attaching the countertop
Center the bar to the tabletop, making sure there are no gaps between the components. Drill pocket holes through the frame and insert 2 1/2″ screws into the countertop, to create a rigid structure.
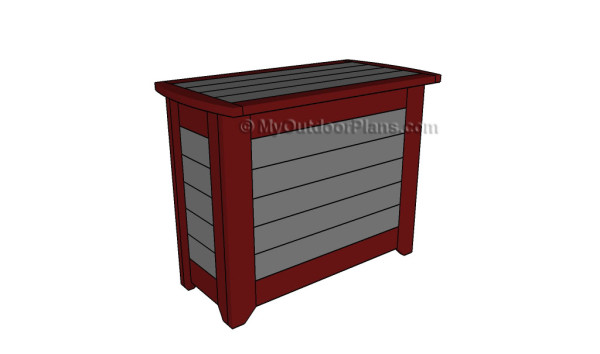
Free bar plans
One of the last steps of the woodworking project is to take care of the finishing touches. Therefore, fill the pilot holes with wood putty and smooth the surface with 120-grit sandpaper.
Top Tip: If you want to enhance the look of the woodworking project and to protect the bar from decay, we recommend you to cover the components with paint or stain. Place the bar in a proper location and move it whenever necessary.
This woodworking project was about free bar plans. If you want to see more outdoor plans, we recommend you to check out the rest of our step by step projects. LIKE us on Facebook and Google + to be the first that gets out latest projects.


