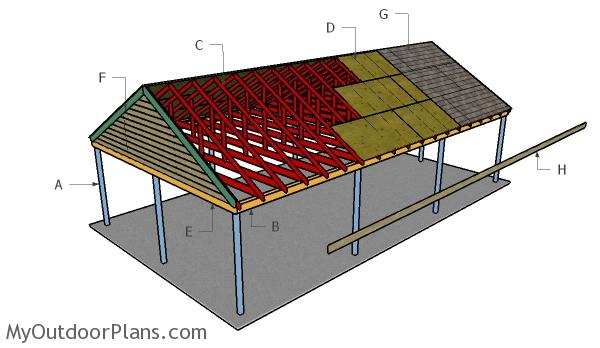
This step by step diy project is about 3 car carport plans. I have designed these plans so you can built a large carport that can host 3 cars and protect them from the elements. This carport has a gable roof and a simple structure, so anyone can get the job done in less than one week. Make sure you set the location and start the building process, only after reading the local building codes and getting the permit if necessary. Take a look over the rest of my woodworking plans, if you want to get more building inspiration.
When buying the lumber, you should select the planks with great care, making sure they are straight and without any visible flaws (cracks, knots, twists, decay). Investing in cedar or other weather resistant lumber is a good idea, as it will pay off on the long run. Use a spirit level to plumb and align the components, before inserting the galvanized screws, otherwise the project won’t have a symmetrical look. If you have all the materials and tools required for the project, you could get the job done in about a day. See all my Premium Plans HERE.
Projects made from these plans
It’s that simple to build a triple carport!
3 Car Carport Plans
Building a 3 car carport
Cut & Shopping Lists
- A – 10 pieces of 4×4 lumber – 132″ long POSTS
- B – 4 pieces of 2×6 lumber – 432″ long, 2 pieces – 240″ long SUPPORTS
- C – 1 piece of 2×6 lumber – 240″ long, 2 pieces of 2×4 lumber – 144″ long, 2 pieces – 40 1/2″ long 19xTRUSS
- C – 2 piece of 1/2″ plywood – 13 1/4″x16″ long, 2 pieces – 3 1/2″x11″ long, 2 pieces – 10″x17 1/4″ long, 1 piece – 12″x41 1/2 long 11xGUSSETS
- 10 pieces of 4×4 lumber – 12′
- 4 piece of of 2×6 lumber – 32′
- 2 pieces of 2×6 lumber – 20′
- 19 pieces of 2×6 lumber – 12′
- 51 pieces of 2×4 lumber – 12′
- 5 pieces of 1/2″ plywood – 4’x8′
- tube form, post anchor
- 20 pieces 7″ carriage bolts
- 500 pieces of 2 1/2″ screws
- 500 pieces of 1 5/8″ screws
- rafter ties
- wood glue, stain/paint
- wood filler
Tools
![]() Hammer, Tape measure, Framing square, Level
Hammer, Tape measure, Framing square, Level
![]() Miter saw, Drill machinery, Screwdriver, Sander
Miter saw, Drill machinery, Screwdriver, Sander
![]() Concrete mixer, Post hole digger
Concrete mixer, Post hole digger
Time
![]() One weekend
One weekend
Related
- PART 1: 3 car carport plams
- PART 2: Building the roof for a triple car carport
- Double carport plans
- Flat roof carport plans
How to build a triple carport

Laying out the 3 car carport
The first step of the woodworking project is to lay out the triple carport in a professional manner. Build batter boards and use string to layout everything in a professional manner. Apply the 3-4-5 rule to every corner and make sure the diagonal are equal, otherwise the corners won’t be square.
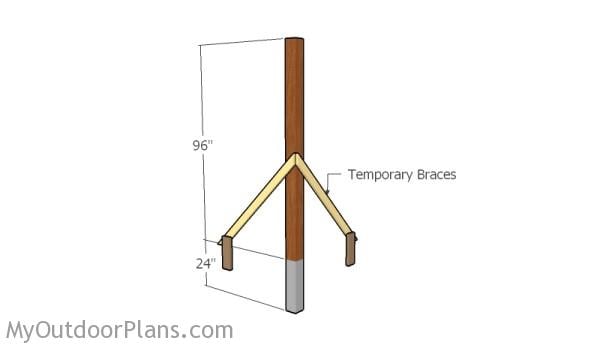
Fitting the posts
You can set the posts in concrete (about 3′ deep – make sure you read the local building codes for accurate information) or you can pour footing and use posts anchors. If you live in an area affected by hurricanes, it would be better to set the posts in concrete.
Use a post hole digger to make 15″ holes in diameter and 3′ deep. Pour a 2″ layer of concrete on the bottom of the holes so you level them. Fit the tube forms and then the 4×4 posts. Use a spirit level to make sure the posts are plumb and then secure them temporarily into place with braces. Fill the tubes with concrete and let it dry out as shown on the bags.
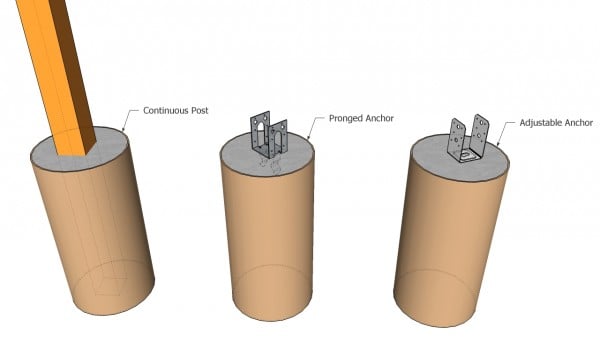
Anchoring the post into concrete
Alternatively, you can install adjustable anchors to the footings.
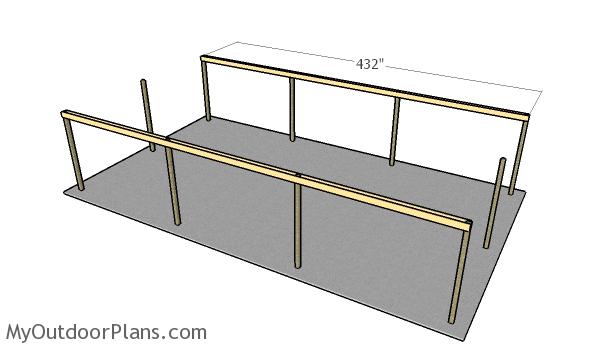
Fitting the support beams
The next step of the project is to attach the 2×6 support beams to the front and face posts. Clamp the beams to the top of the posts and use a spirit level to make sure they are perfectly horizontal. Drill pilot holes through the beams and through the posts and insert 7″ carriage bolts to lock everything tightly.
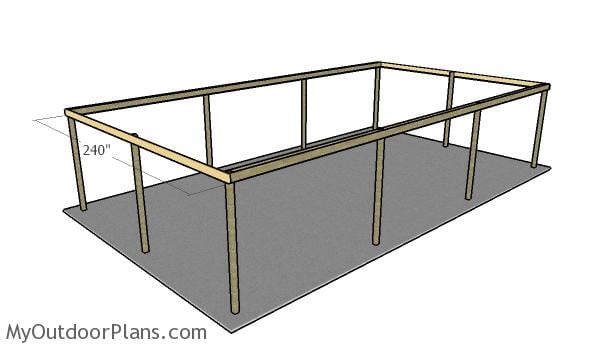
Fitting the side beams
Continue the project by fitting the 2×6 beams to the sides of the carport. Align the edges, making sure they are flush. Check if the beams are horizontal and if the corners are square. Drill pilot holes and insert 2 1/2″ galvanized screws to lock them into place tightly.
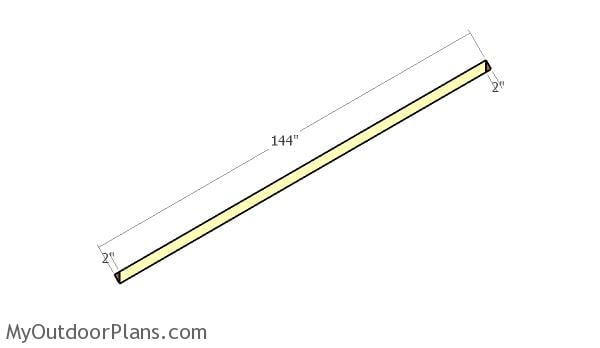
Building the rafters
Build the regular rafters from 2×4 lumber. Cut both ends of the rafters at 60 degrees and smooth the edges with sandpaper.
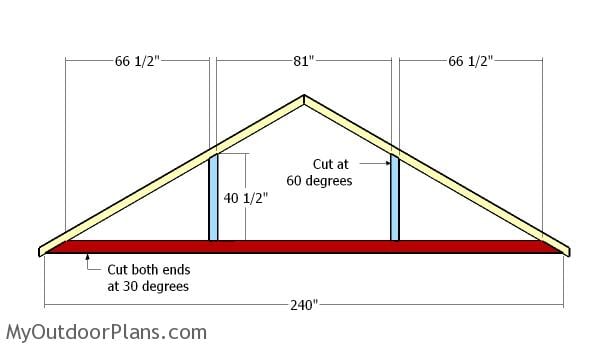
Assembling the trusses
Next, you need to build the bottom rafters from 2×6 lumber. Cut both ends of the beams at 30 degrees, using a miter saw. Lay the rafters on a level surface and leave no gaps between the components. Cut the supports from 2×4 lumber, making sure the tops are cut at 60 degrees.
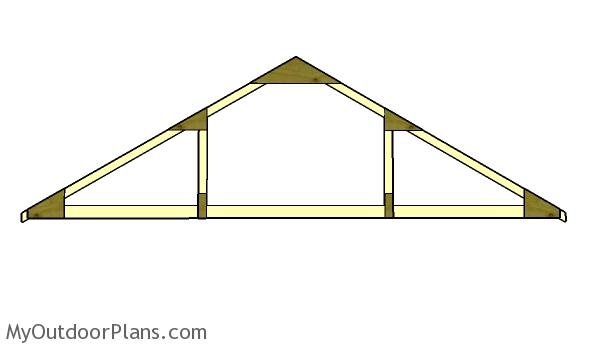
Fitting the gussets
Attach 1/2″ plywood gussets to enhance the rigidity of the joints. Align everything with attention and secure the gussets to the rafters with 1 5/8″ screws.
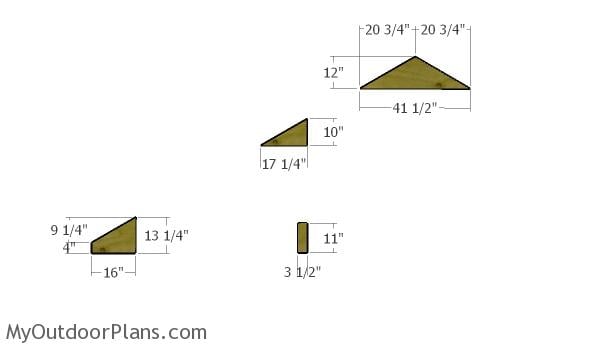
Building the gussets
Pay attention to this diagram, if you want to cut the gussets in a professional manner. Mark the cut lines on the 1/2″ plywood sheet and get the job done with a saw. Smooth the edges with attention for a neat result.
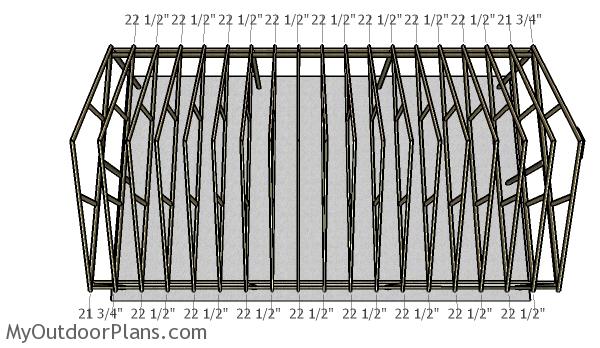
Fitting the trusses
Fit the trusses to the top of the carport, making sure you place them every 24″ on center. Use a spirit level to make sure the trusses are plumb. Use rafter ties to secure the trusses to the support beams. In addition, drive nails through the bottom rafters into the support beams, for extra-rigidity.
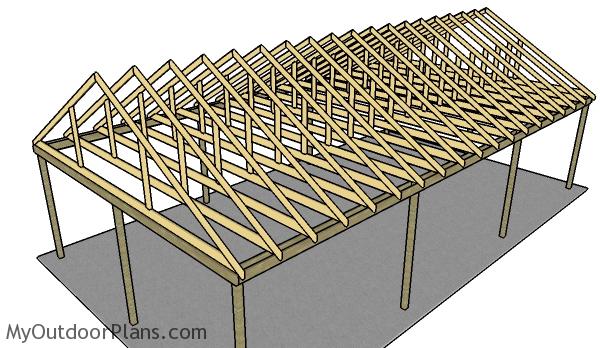
Trusses
In this image, you can see the roof structure from another angle. The roof structure is sturdy enough to support the roofing and to pass the test of time. However, always check the building local codes to make sure the plans comply with them.
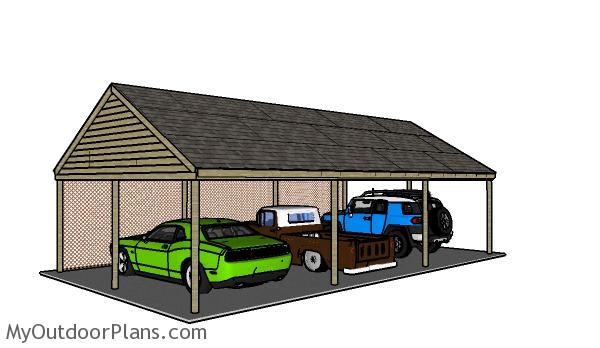
Building a large carport
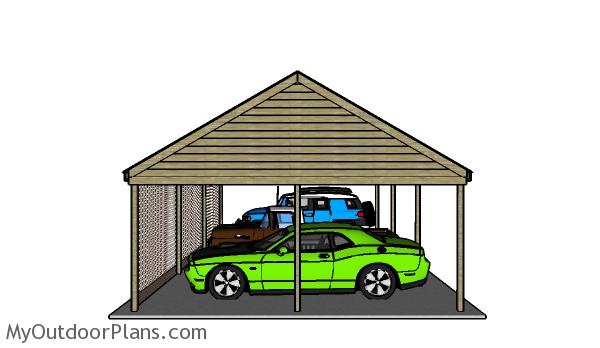
Make sure you read PART 2 of the project, as well, to learn how to install the gable ends and the roofing. As you can see in the images, the 3 car carport has a straight forward design and anyone can get the job done in just a few days. Moreover, you can adjust the size of the carport to fit even more cars.
This carport has generous dimensions, so you can fit pretty much any car under the roof and protect it from the elements. Moreover, you can add lattice panels to the back and to the sides of the carport to create privacy screens between the cars and your yard. Moreover the walls will further protect your cars from the elements.
How to build a 3 car carport
If you have a handy friend to help, I don’t see why you shouldn’t be able to assemble everything in one weekend. Remember that you need to adjust the size of the components so they suit your particular own needs and you have to check the local building codes before starting the building process. Read PART 2 of the project to see how to attach the gable ends and the roofing.
If you want to get PREMIUM PLANS for this project (different design with a re-engineered structure), in a PDF format, please press GET PDF PLANS button bellow. Thank you for the support.

This woodworking project was about 3 car carport plans free. If you want to see more outdoor plans, check out the rest of our step by step projects and follow the instructions to obtain a professional result.

- EXPLORE MORE IDEAS FOR -
 |
 |
 |
 |