This step by step diy woodworking project is about diy smokehouse plans. I have designed this project so that anyone can build a homemade smokehouse in at most one week. This 4×4 smoker is built from cedar, so that you can you use for many years in a row without degrading. If you want to smoke meat you can do it with this easy to build smokehouse. Remember to take a look over PART 2 and PART 3 so that you can learn how to build the roof and the door. Take a look over the rest of our woodworking plans, if you want to get more building inspiration.
When buying the lumber, you should select the planks with great care, making sure they are straight and without any visible flaws (cracks, knots, twists, decay). Investing in cedar or other weather resistant lumber is a good idea, as it will pay off on the long run. Use a spirit level to plumb and align the components, before inserting the galvanized screws, otherwise the project won’t have a symmetrical look. If you have all the materials and tools required for the project, you could get the job done in about a weekend.
Projects made from these plans
It’s that simple to build a smokehouse!
Smokehouse Plans
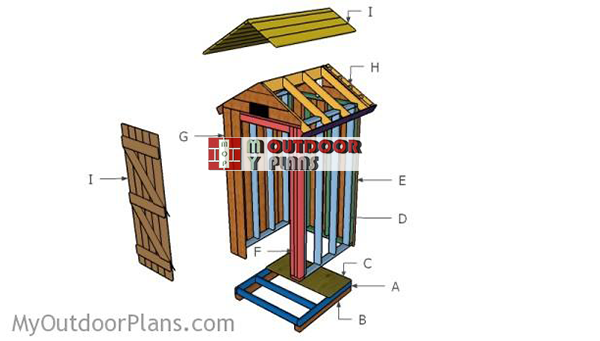
Building-a-meat-smokehouse
Cut & Shopping Lists
- A – 2 pieces of 2×4 lumber – 48″ long, 4 pieces – 45″ long FLOOR FRAME
- B – 2 pieces of 4×4 lumber – 48″ long SKIDS
- C – 1 pieces of 3/4″ plywood – 48″x48″ long FLOOR
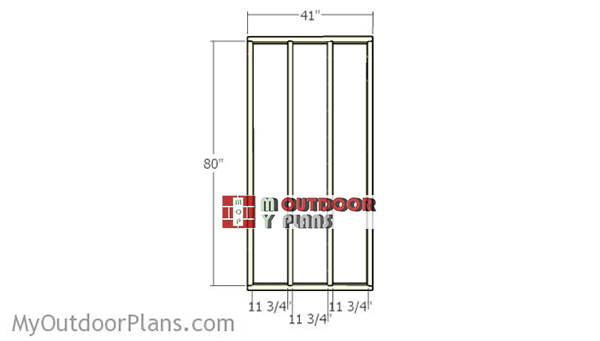
- D – 2 pieces of 2×4 lumber – 41″ long, 4 pieces – 80″ long 2xSIDE WALL
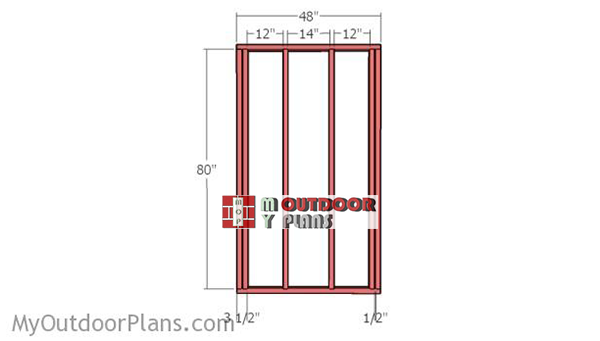
- E – 2 pieces of 2×4 lumber – 48″ long, 6 pieces – 80″ long BACK WALL
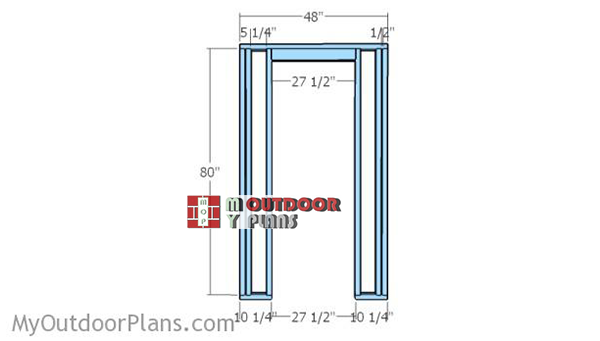
- F – 1 piece of 2×4 lumber – 48″ long, 2 pieces – 27 1/2″ long, 2 pieces – 10 1/4″ long, 6 pieces – 80″ long FRONT WALL
- G – 31 pieces of 1×6 lumber – 80″ long, 2 piece – 27 1/2″ long EXTERIOR WALLS
- 32 pieces of 1×6 tongue and groove cedar – 8′
- 28 pieces of 2×4 cedar – 8′
- 1 piece of 4×4 cedar – 8′
- 1 piece of 3/4″ plywood – 4’x4′
- 100 pieces of 1 1/4″ screws
- 200 pieces of 2 1/2″ screws
- 50 pieces of 3 1/2″ screws
Tools
![]() Hammer, Tape measure, Framing square, Level
Hammer, Tape measure, Framing square, Level
![]() Miter saw, Drill machinery, Screwdriver, Sander
Miter saw, Drill machinery, Screwdriver, Sander
Time
Related
- PART 1: Smokehouse plans
- PART 2: How to build a smokehouse roof
- PART 3: How to build a smokehouse door
Homemade wooden smokehouse plans
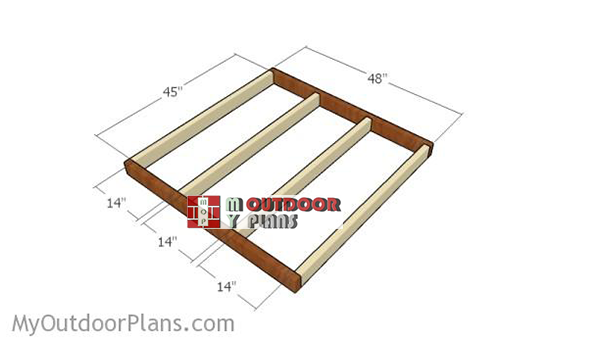
Building-a-4×4-floor-frame
The first step of the project is to assemble the frame of the floor. Cut the components from 2×4 lumber. I recommend you to use cedar for this project, as it is more weather-resistant and look a lot better. Drill pilot holes through the side joists and insert 2 1/2″ screws into the perpendicular components. Align the edges with attention and make sure the corners are square.
Under any circumstance do not use pressure treated lumber when building a homemade smokehouse, as it will poison the meat.
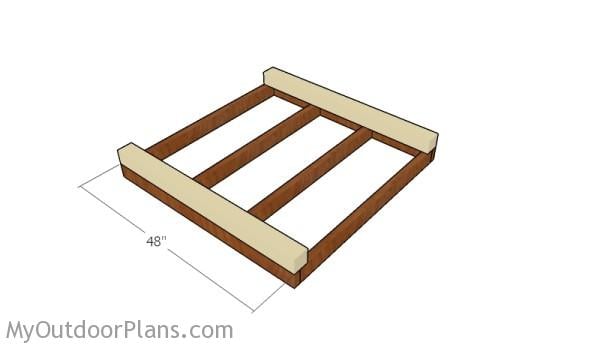
Attaching the skids
Attach 4×4 skids to the bottom of the frame, to create a clearance space between the ground and the smokehouse. In this manner you will protect the components from decay. Make sure you level the ground and set pavers under the skids. Alternatively, you can use four cinder blacks as skids.
When selecting the location of the smokehouse, you should also remember that you need to take a pipe from the stove to the shed. The easiest way is to fit it into the ground and fit a 90 degree pipe elbow so that it can get though the floor inside the smokehouse.
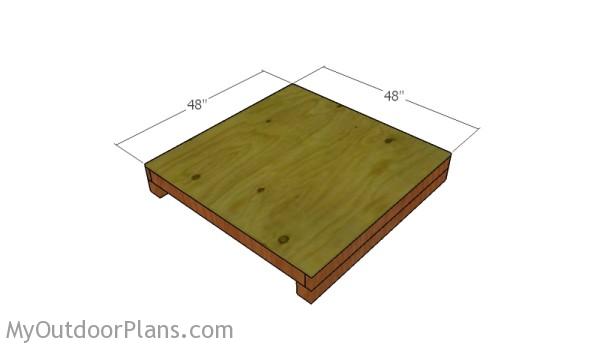
Attaching the floor
Attach the 3/4″ plywood floor to the frame and secure it into place with 1 1/4″ screws. Alternatively, you can use 1×6 cedar slats.
Building-the-front-wall-frame
Then, you need to build the front wall for the homemade smokehouse. Cut the components from 2×4 cedar, at the dimensions shown in the diagram. Drill pilot holes through the top and bottom plates and insert 2 1/2″ screws into the studs. Make sure you align the edges and check if the corners are perfectly right-angled.
Building-the-back-wall-frame
Frame the back wall of the 4×4 smokehouse, using 2×4 cedar boards. Drill pilot holes through the top and bottom plates and insert 2 1/2″ screws into the studs. Always align the edges flush and check if the corners are square.
Fitting the front and back walls
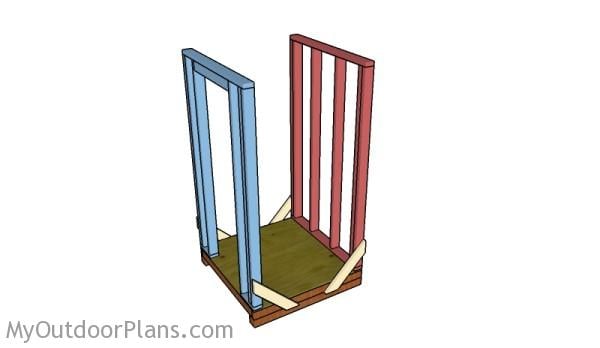
Fit the front and back walls to the floor of the smokehouse. Align the edges and set them temporarily into place with braces. Use a spirit level to make sure the walls are plumb. Drill pilot holes through the bottom plates and insert 3 1/2″ screws into the floor.
Building-the-side-wall-frames
Frame the side walls from 2×4 cedar boards. Use the same techniques described above.
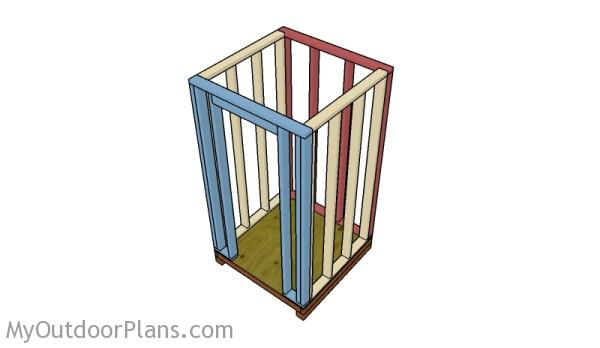
Assembling the frame of the smokehouse
Fit the side walls to the frame of the 4×4 smokehouse. Make sure the corners are square and check if the edges are flush. Drill pilot holes and use 2 1/2″ screws to lock the adjacent walls together tightly.
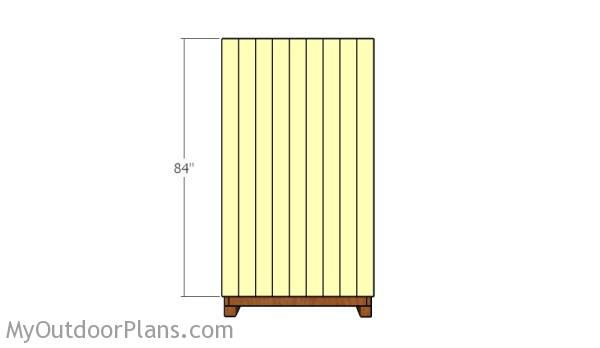
Fitting the slats to the back wall
Start attaching the 1×6 cedar slats to the back of the smokehouse. Make sure you leave no gaps between the slats or even better, you should tongue and groove boards. Align the top and bottom of the slats and secure them into place with 2″ nails.
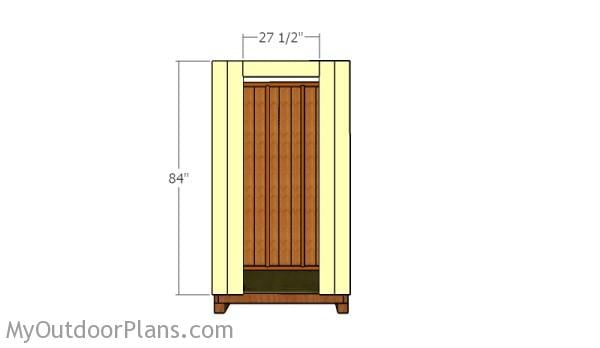
Fitting the slats to the front wall
Attach the 1×6 cedar slats to the front wall, as well. Align the edges, leave no gaps between them and lock them into place with 2/” nails.
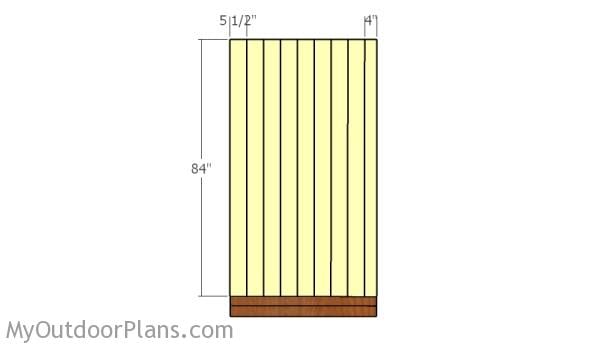
Fitting the slats to the sides
Last but not least, you should attach the slats to the sides of the structure, as shown in the diagram. Leave no gaps and secure them into place with 2″ nails.
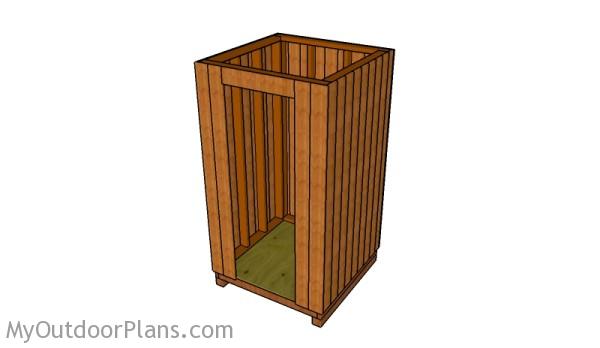
Making a 4×4 smokehouse
After attaching the boards to the exterior of the smokehouse, the project starts to take shape. Make sure you check out PART 2 and PART 3 of the project to see how to build the roof and the door for the project.
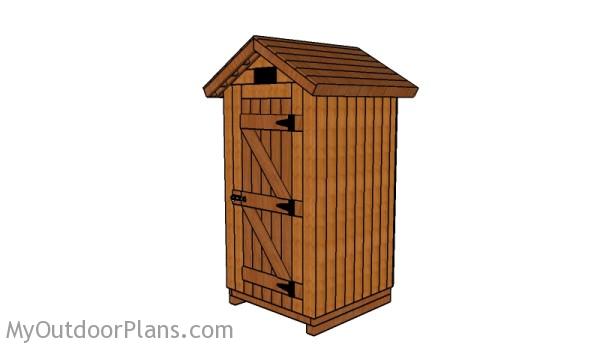
Smokehouse Plans
I spent a lot of time designing this smokehouse, making sure you maximize the use of the materials, so you don’t get a lot of waste from the cuts. In addition, I think that for any backyard project design is essential, so I went for a rustic theme.
If personally think that the free diy smokehouse plans look good, especially the door that has the diagonal braces exposed. This project is not about spending money but on investing them with a good use.
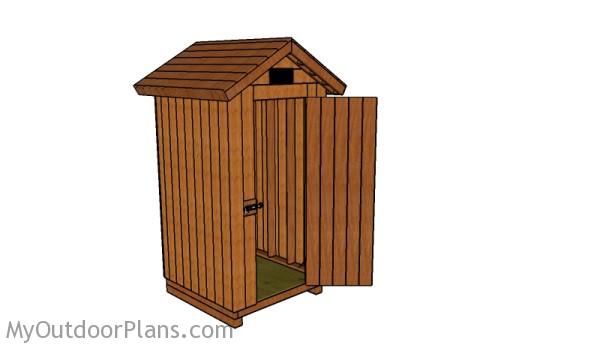
Homemade smoker plans
Fill the holes with wood putty and let them dry out for a few hours. Smooth the surface with 100-220 grit sandpaper and remove the residues with a damp cloth. After building the project, you need to cut out a hole either in the floor or in the walls, so you can fit the smoke pipe.
The best way to do this is dig a trench in the ground so that you can fit the pipe from the stove to the shed. In this manner, you can actually cold smoking the meat properly.
This woodworking project was about smokehouse plans free. If you want to see more outdoor plans, check out the rest of our step by step projects and follow the instructions to obtain a professional result.

