This diy woodworking project is about diy storage workbench plans. I have designed this sturdy workbench that you can build in one weekend with basic tools, so you can build wood projects quicker and to get a nice result, You can easily attach caster wheels under the workbench, as well as more storage shelves. If you want to get the job done in just an weekend, a small scale project is perfectly for your needs.
You need o buy proper materials for this project, therefore we recommend you to invest money in quality materials. The bridges construction requires two stringers built from 2×10 or 2×12 beams, so make sure they are perfectly straight and don have any visible flaw. Drill pilot holes in the components, at least 1/2” from the edges, if you want to prevent the wood from splitting. See all my Premium Plans HERE.
Projects made from these plans
Storage Workbench Plans
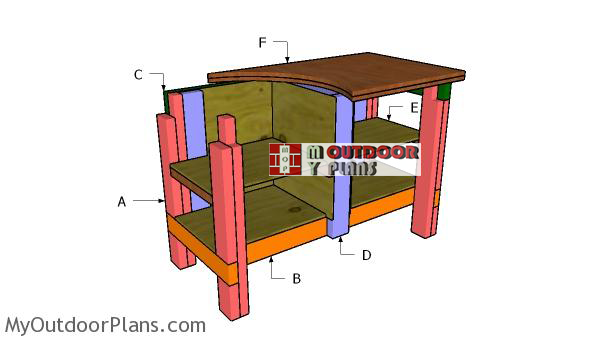
Building-a-workbench
Cut & Shopping Lists
- A – 4 pieces of 2×4 lumber – 30” long, 4 pieces – 17″ long, 4 pieces – 6″ long LEGS
- B – 2 pieces of 2×4 lumber – 21” long, 2 pieces – 42″ long FRAME
- C – 2 pieces of 2×4 lumber – 21” long, 2 pieces – 42″ long FRAME
- D – 4 piece of 2×4 lumber – 24” long, 2 pieces – 14″ long PARTITION
- E – 1 piece of 1/2″ plywood – 24″x39″ long, 4 pieces – 15 1/2″x20 1/2″ long, 2 pieces of 1/4″ plywood – 17″x20 1/2″ long SHELVES
- F – 2 pieces of 3/4″ plywood – 48″x96″ long TABLETOP
- 1 piece of 3/4″ plywood – 4’x4′
- 7 pieces of 2×4 lumber – 8′
- 1 piece of 1/2″ plywood – 4’x8′
- 1 piece of 1/4″ plywood – 4’x4′
- 2 1/2″ screws
- 1 5/8 screws
- 2″ brad nails
- wood glue, stain/paint
- wood filler
- caster wheels
Tools
![]() Hammer, Tape measure, Framing square
Hammer, Tape measure, Framing square
![]() Miter saw, Drill machinery, Screwdriver, Sander
Miter saw, Drill machinery, Screwdriver, Sander
Time
Building a 2×4 storage workbench
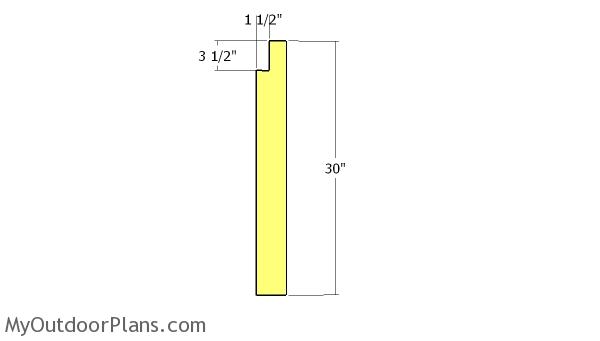
Building the legs
The first step of the project is to build the legs for the workbench. Therefore, use 2×4 lumber and a circular saw to make the notches to the top of the components. Mark the cut lines on the slats and then make the cuts. Smooth the edges with sandpaper.
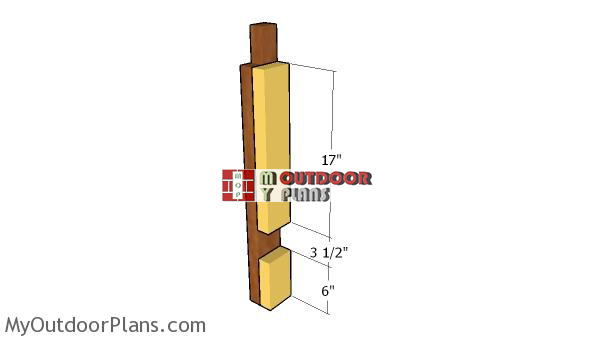
Assembling-the-legs
Next, you need to attach the 2×4 slats to the legs Add glue to the joints and insert a few 2 1/2″ brad nails to keep everything aligned properly, till the glue dies.
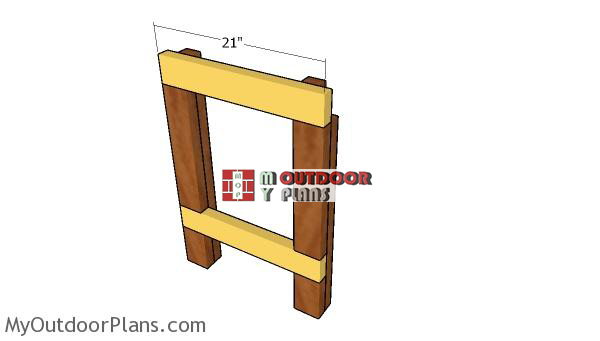
Assembling-the-sides
Continue the project by assembling the sides for the workbench. Fit the 2×4 supports to join the side legs together tightly. Add glue to the joints, drill pilot holes and insert 2 1/2″ screws to lock everything together tightly. Align the edges with attention and make sure the corners are square.
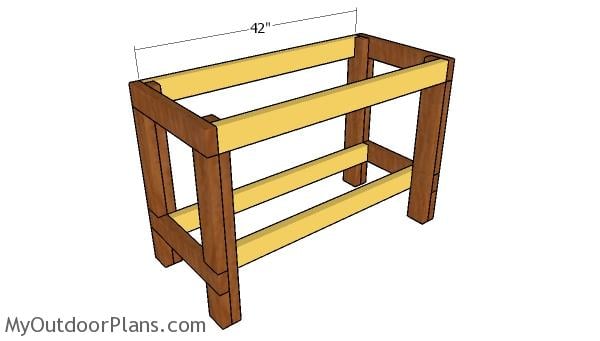
Assembling the frame of the workbench
Next, you need to assemble the frame of the workbench together, by attaching the side aprons. Cut the components from 2×4 lumber and secure them to the legs with 2 1/2″ screws, after drilling pilot holes. Add glue to the joints and then make sure the corners are square.
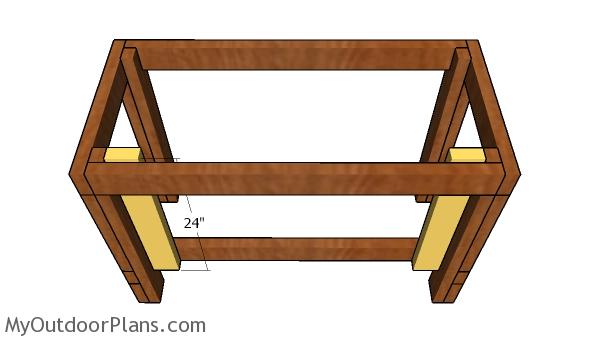
Back supports
Fit the 2×4 supports to the back of the workbench, as shown in the diagram. Align the edges flush, drill pilot holes and insert 2 1/2″ screws to lock them into place tightly.
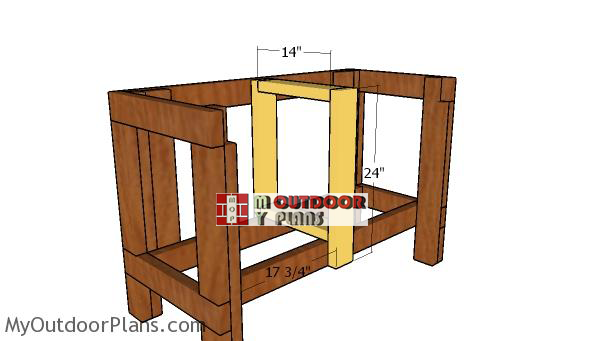
Middle-partition-frame
Use 2×4 lumber for the middle supports. Drill pocket holes at both ends of the horizontal supports and insert 2 1/2″ screws into the vertical supports. Make sure the corners are square and align the edges. Drill pilot holes through the bottom frame and insert 2 1/2″ screws to lock the support into place. Drill pilot holes through the frame and insert 2 1/2″ screws into the top frame.
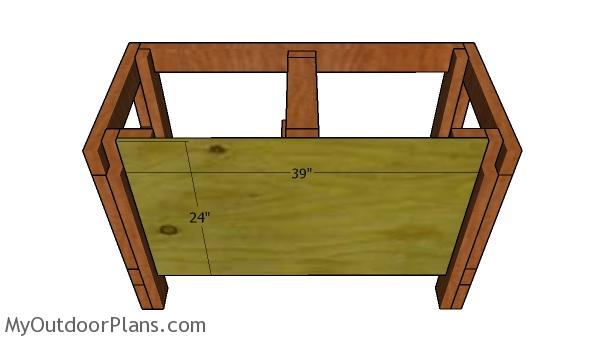
Fitting the back panel
Fit a 1/2″ plywood sheet to the back of the workbench. Make an accurate cut to the plywood sheet, so the corners are square and the lines are perfectly straight. Drill pilot holes through the sheet and then insert 1 5/8″ screws into the frame of the workbench.
Fitting the partitions
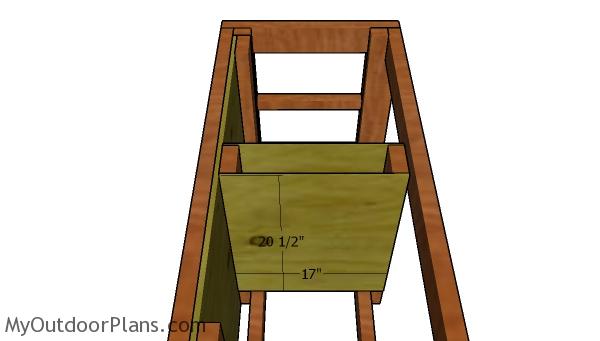
Next, you need to install the 1/4″ plywood panels to the middle partition frame. Align the edges with attention, drill pilot holes and insert 1 5/8″ screws to lock it into place tightly.
Shelves
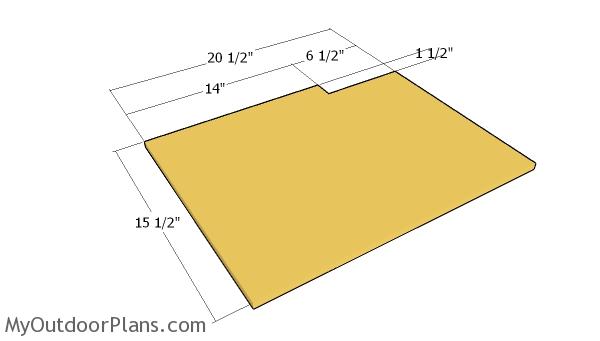
Use 1/2″ plywood for the shelves. Use a circular saw to make the cuts to the plywood sheet, using the pattern in the diagram.
Fitting the cleats
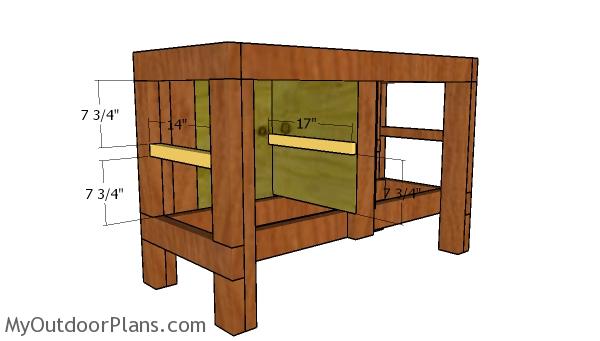
Use 2×2 lumber and 1×2 lumber for the shelf cleats. Drill pilot holes and insert screws to lock the cleats into place tightly. Use a small spirit level to make sure the cleats are perfectly level.
Fitting the shelves
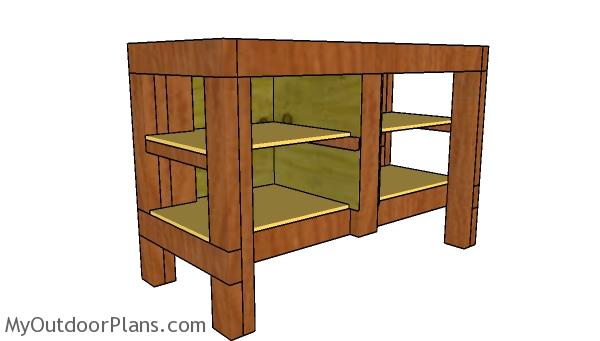
Fit the shelves to the cleats, as shown in the diagram. You can adjust the height at which you place the shelves, according to your needs.
Fitting the tabletop
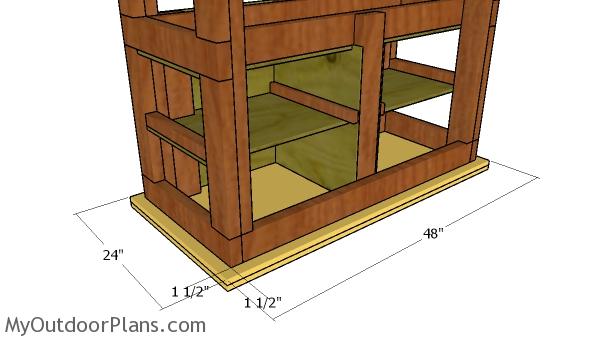
Use 2 pieces of 3/4″ plywood for the tabletop. Use glue between the sheets to you lock them together tightly. Center the frame of the workbench to the tabletop and then drill pilot holes. Insert 2 1/2″ screws to lock the tabletop to the frame of the workbench together tightly.
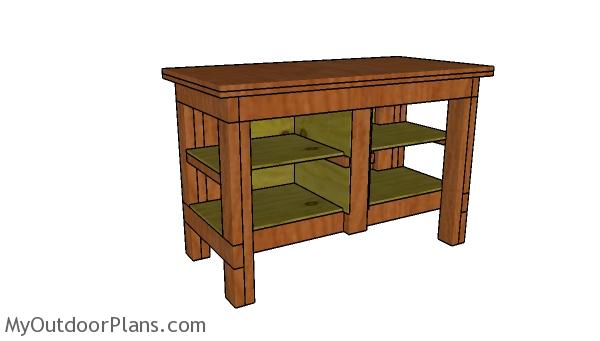
Storage Workbench Plans
Last but not least, you need to take care of the finishing touches. Fill the holes with wood putty and then smooth the surface with sandpaper. Apply a few coats of stain over the workbench to enhance the look of the workbench and to protect the components from decay.
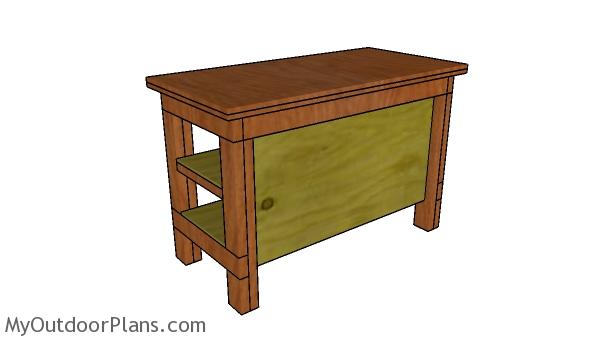
How to build a storage bench
You can make adjustments to my design, so you can make the most of the space. This is a sturdy bench that is a great start, if you are serious about woodworking, as a hobby. You can install caster wheels to the legs, so you gain more mobility with the workbench and move it from one place to another.
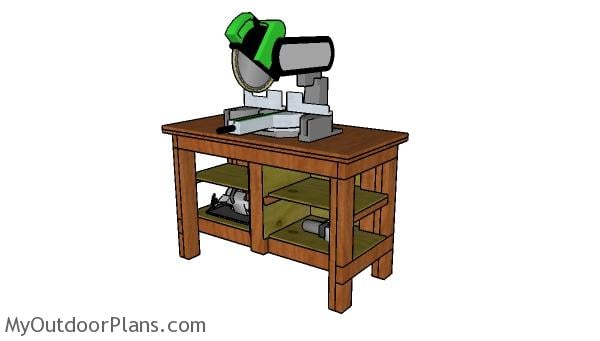
Storage Workbench – Free DIY Plans
Top Tip: Take a look over the rest of my workbench plans, so you can choose from more designs. Browse through all my free plans (well above 1000 plans) here.
This woodworking project is about diy storage workbench plans. If you want to see more outdoor plans, check out the rest of our step by step projects and follow the instructions to obtain a professional result. Feel free to SHARE this project with your friends! This keeps the ball rolling and helps me add more free plans to the site.


