In PART 2 of the 6×12 shed plans, we’re focusing on two key features: constructing the roof frame and installing the double doors. The roof, with its 3/12 pitch, is built for durability and optimal overhead space, while the double doors ensure convenient access and a polished finish. Follow along as we break down each step with tips and tricks to turn your shed into a sturdy, weather-ready structure. Let’s get to work!
When buying the lumber, you should select the planks with great care, making sure they are straight and without any visible flaws (cracks, knots, twists, decay). Investing in cedar or other weather resistant lumber is a good idea, as it will pay off on the long run. Use a spirit level to plumb and align the components, before inserting the galvanized screws, otherwise the project won’t have a symmetrical look. If you have all the materials and tools required for the project, you could get the job done in about a day.
Projects made from these plans
6×12 Lean to Shed Plans
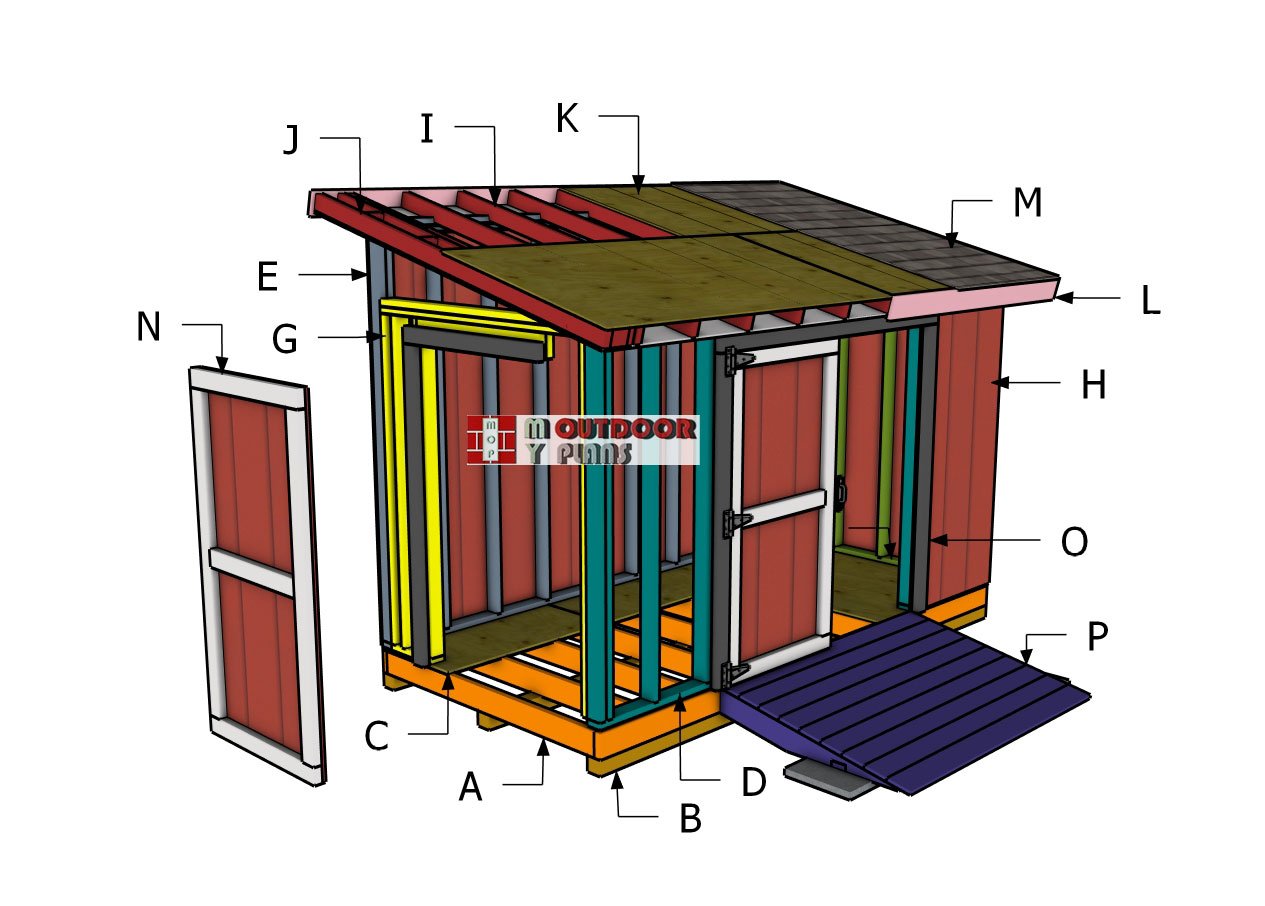
Building-a-6×12-lean-to-shed
Cut and Shopping Lists
J – OVERHANGS – 4 pieces of 2×4 lumber – 93″, 12 pieces – 4 1/4″
K – ROOF SHEETS – 1 piece of 1/2″ plywood – 4’x88″, 1 piece – 4’x72″, 1 piece – 45″x88″, 1 piece – 45″x72″
L – ROOF TRIMS – 2 pieces of 1×6 lumber – 93″, 2 pieces – 88 3/4″, 2 pieces – 72 3/4″
M – ROOFING – 150 sq ft of tar paper, 150 sq ft of asphalt shingles
N – DOORS – 6 pieces of 2×4 lumber – 65″, 6 pieces – 36″, 3 pieces – 29″, 3 pieces of T1-11 siding – 36″x72″
O – DOOR JAMBS – 4 pieces of 2×4 lumber – 72″, 1 piece – 43″, 1 piece – 79″
- 3/4″ plywood 4’x8′ – 2 pieces
- 3/4″ plywood 4’x4′ – 1 piece
- 1/2″ plywood 4’x8′ – 4 pieces
- 2×6 joist hanger – 3 pieces
- rafter ties – 22 pieces
- double shed door hardware – 1 kit
- single shed door hardware – 1 kit
- tar paper, asphalt shingles – 150 sq ft
- drip edges – 50 ft
- 16″x16″x1 3/4″ concrete pad block – 3 pieces
- 1 box of 1 1/2″ structural screws / nails
- 5 1/2″ screws – 10 pieces
- 3 1/2″ screws – 500 pieces
- 2 1/2″ screws – 200 pieces
- 1 5/8″ screws – 500 pieces
- 8d nails – 200 pieces
- 12d nails – 20 pieces
- 1 can of outdoor glue
- 1 can of wood putty
- 2 cans of paint / stain
- gravel
Tools
![]() Hammer, Tape measure, Framing square, Level
Hammer, Tape measure, Framing square, Level
![]() Miter saw, Drill machinery, Screwdriver, Sander
Miter saw, Drill machinery, Screwdriver, Sander
![]() Safety Gloves, Safety Glasses
Safety Gloves, Safety Glasses
Time
Related
- PART 1: 6×12 Lean to Shed Plans
- PART 2: 6×12 Lean to Shed Roof Plans
- 16×16 gable shed plans
STEP 4: Overhangs
Assembling-the-overhangs
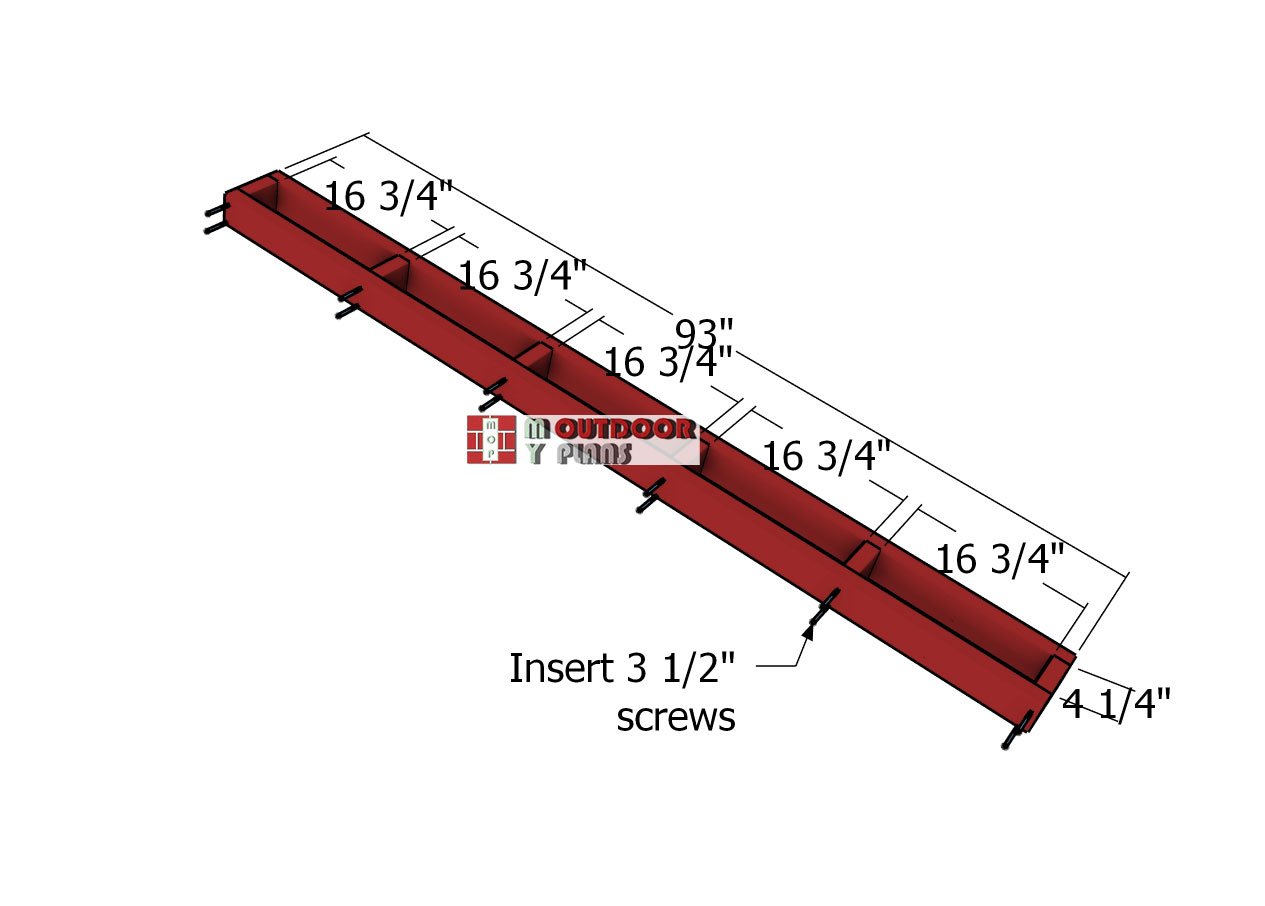
Grab your 2×4 lumber, and let’s tackle those shed overhangs! Start by cutting all the pieces to the exact dimensions shown in the plans—precision is everything for a clean fit. Lay the components out on a flat, level surface to make assembly smooth and straightforward.
Drill pilot holes through the beams, then secure the blockings with 3 1/2″ screws, using two screws per joint for maximum strength. This step not only ensures your overhangs are rock-solid but also adds a polished, professional look to your shed’s roofline.
Attaching-the-overhangs
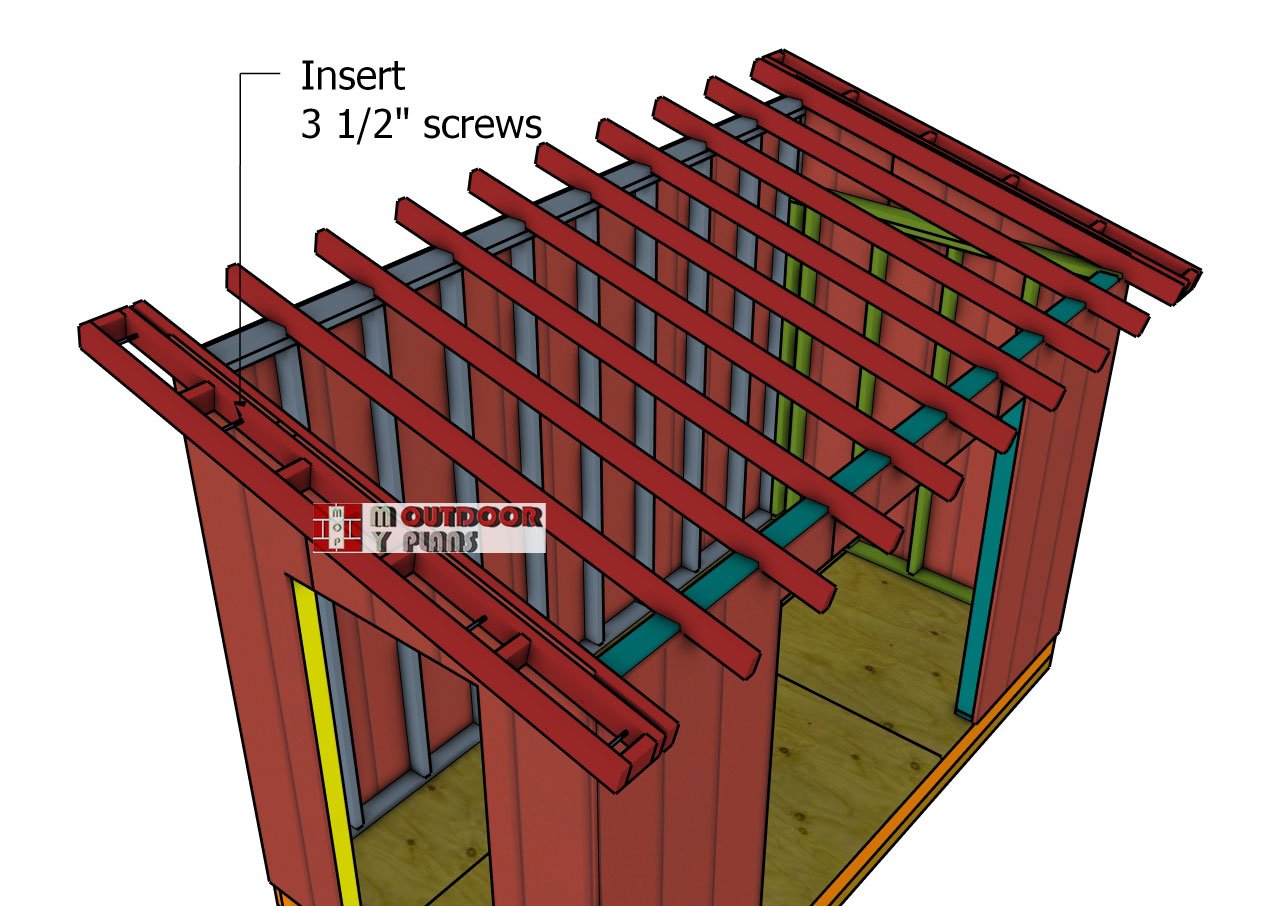
It’s time to install the side overhangs and give your shed a sharp, finished look! Align the edges of the overhangs perfectly with the top of the roof structure to ensure a clean, professional appearance. Secure them in place using 3 1/2″ screws, spacing them about every 8 inches along the roof frame for a strong and sturdy hold.
As you work, double-check that everything is straight and flush, this step not only enhances the aesthetics but also reinforces the overall strength of your shed.
STEP 5: Roofing
Fitting-the-roof-sheets
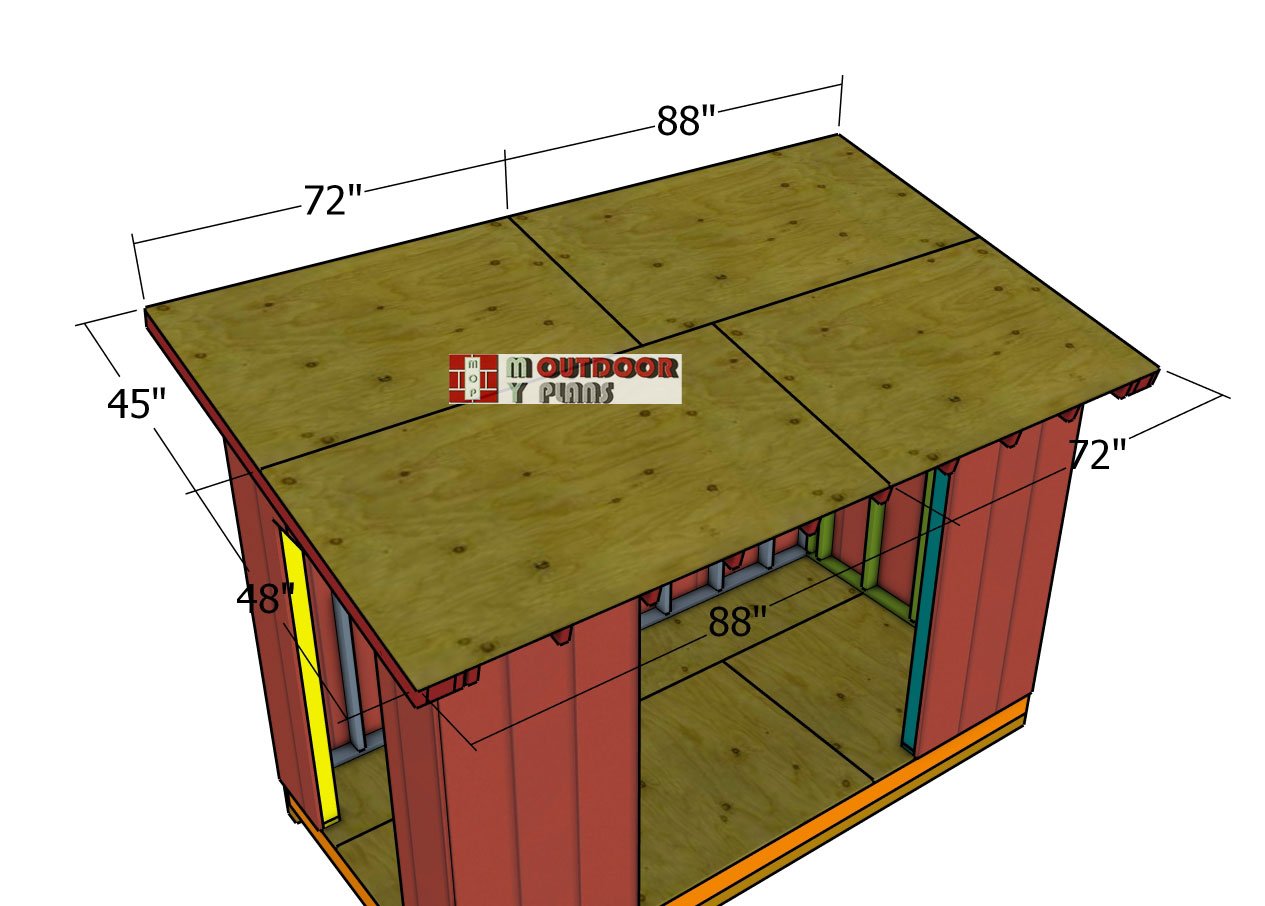
Let’s get that roof decking installed! Grab your 1/2″ plywood sheets and position them snugly onto the roof frame, ensuring the edges are perfectly flush for a seamless finish. Take your time to align everything—no gaps means a cleaner look and a sturdier result.
Drill pilot holes into the plywood, then secure the panels with 1 5/8″ screws, spacing them about 8 inches apart along the rafters. This creates a rock-solid base for your roofing material, ensuring your shed is ready to stand strong against anything Mother Nature throws at it.
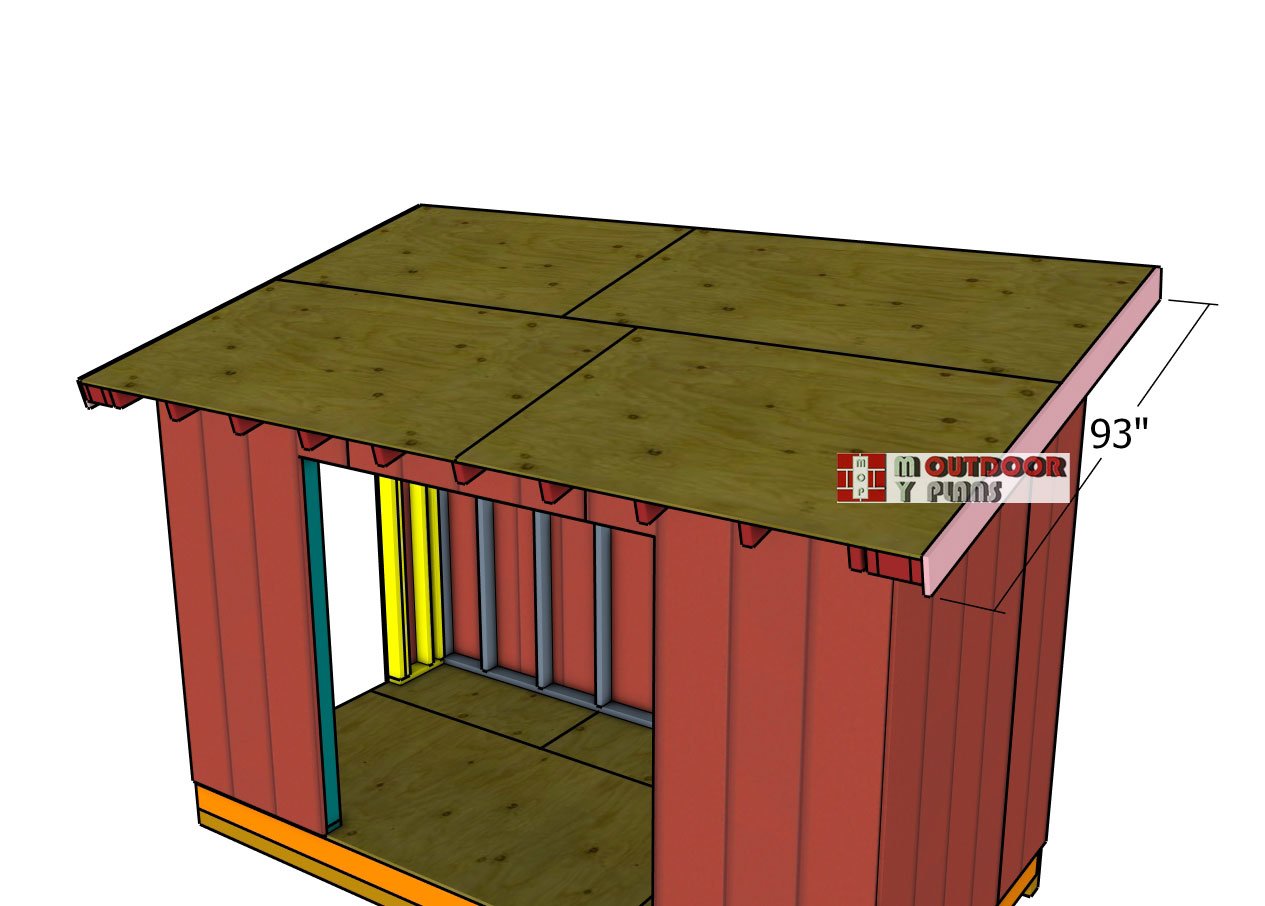
Side-roof-trims
Time to add those finishing touches and take your shed’s style to the next level! Attach 1×6 trims to the sides of the roof for a clean, polished look that makes your shed pop. Align the trims so they sit flush with the roof edges and top for a crisp, professional finish.
Secure the trims with 8d nails, spacing them evenly along the framing. This step isn’t just about curb appeal—it also protects the roof edges, adding durability and ensuring your shed stays in top shape for years to come. Style and function, all in one!
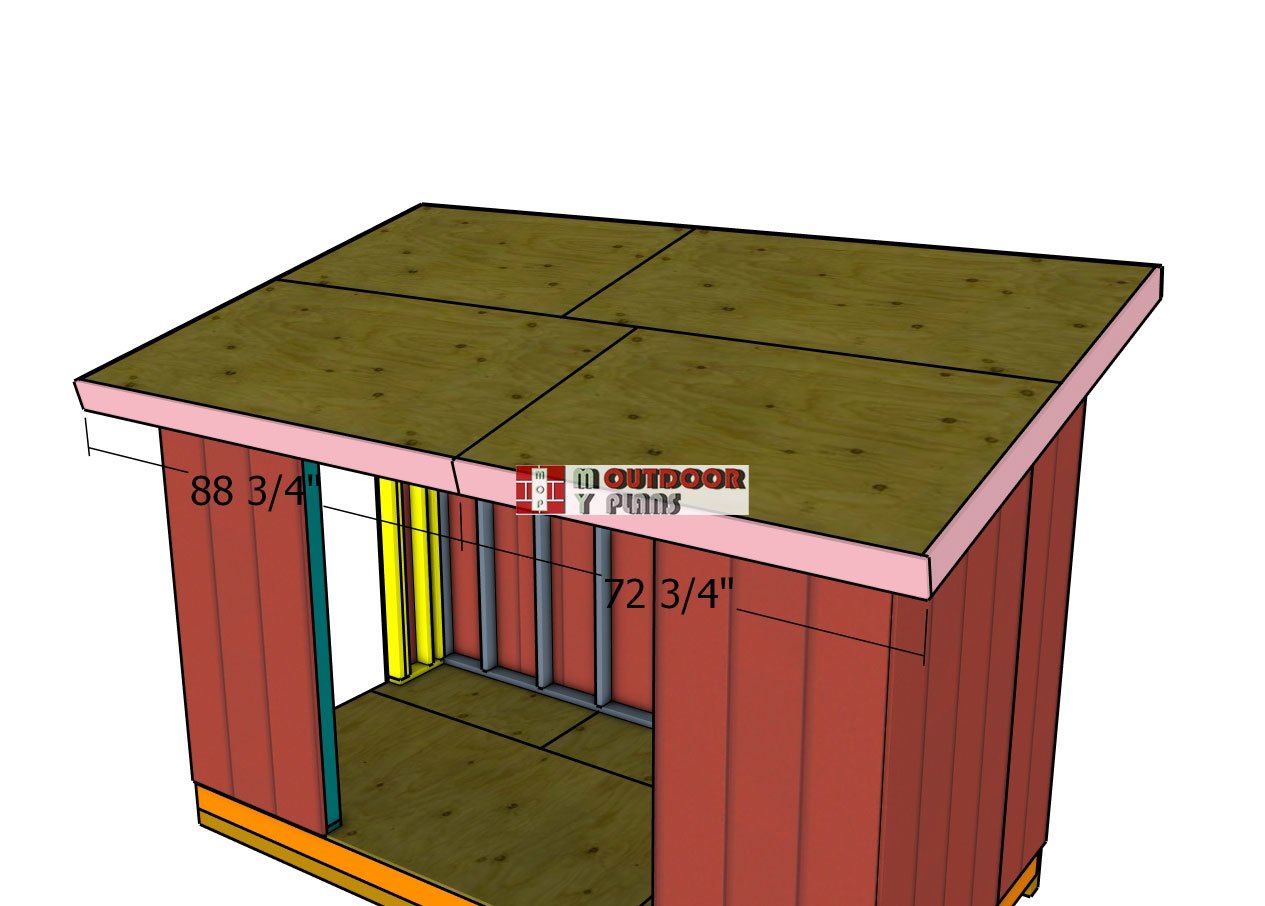
Front-and-back-roof-trims
Let’s finish off that roofline in style! Attach the trims to the front and back of the shed, aligning the edges flush with the ends of the rafters for a crisp, seamless look. Take a moment to double-check the alignment to ensure a picture-perfect finish.
Secure the trims by driving 8d nails into the rafter ends, spacing them evenly for a sturdy hold. This final touch not only enhances your shed’s appearance but also protects the exposed roof edges, adding both durability and charm to your project. It’s the perfect blend of function and style!
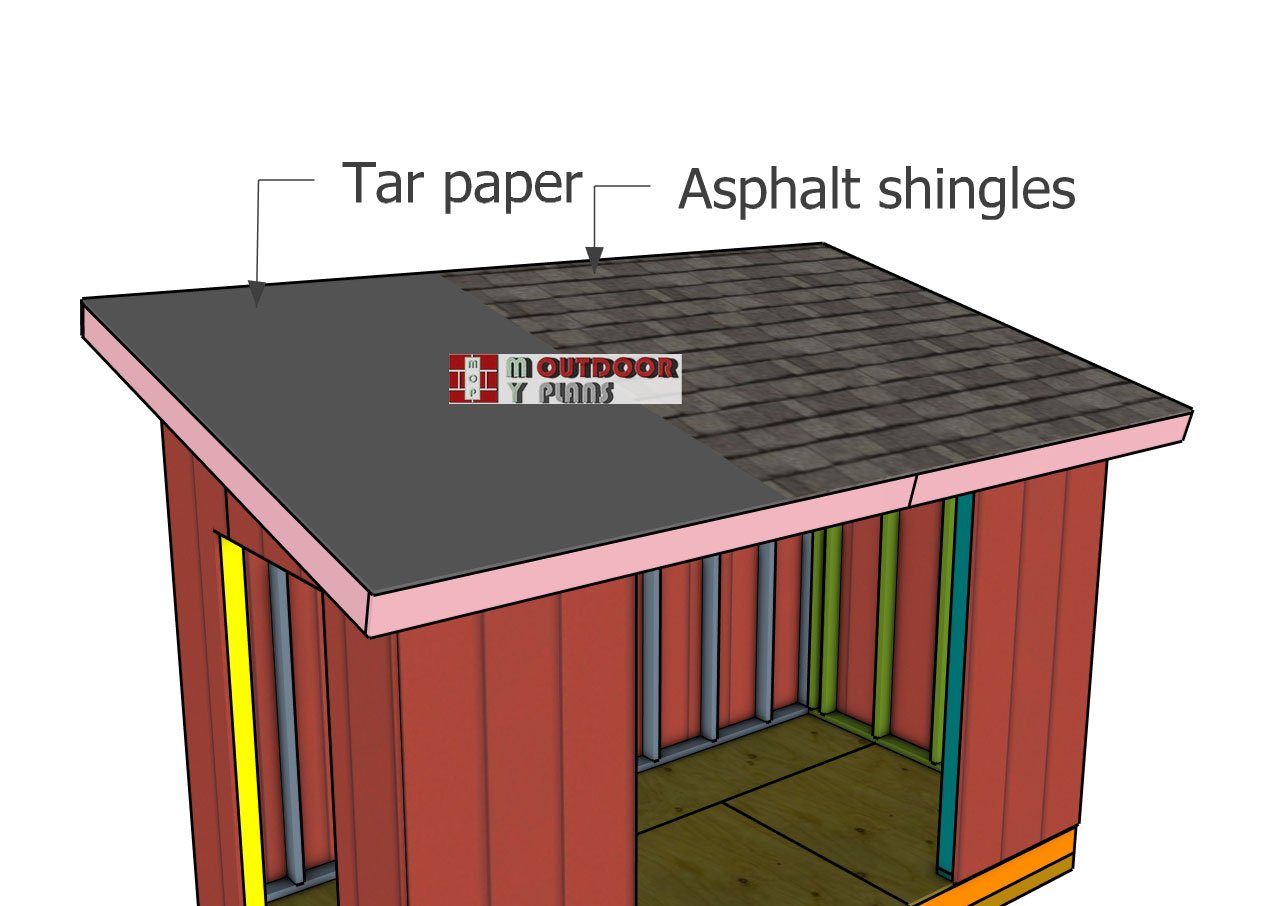
Installing-the-roofing
Installing asphalt shingles on your 6×12 lean-to shed roof is a straightforward process that ensures durability and weather resistance. Start by laying down roofing felt or tar paper over the roof sheathing to create a protective barrier against moisture. Secure the tar paper with staples or roofing nails, overlapping each row by about 4 inches to prevent leaks. Next, install drip edges along the eaves and rakes to channel water away from the edges and protect the underlying wood.
Begin laying shingles at the bottom edge of the roof, working your way upward in rows, ensuring each course overlaps the previous one according to the manufacturer’s guidelines. Secure each shingle with roofing nails, keeping the nails covered by the shingle above for a clean, watertight finish. Take your time aligning the shingles for a professional-looking result that will last for years.
STEP 6: Making the Shed Doors
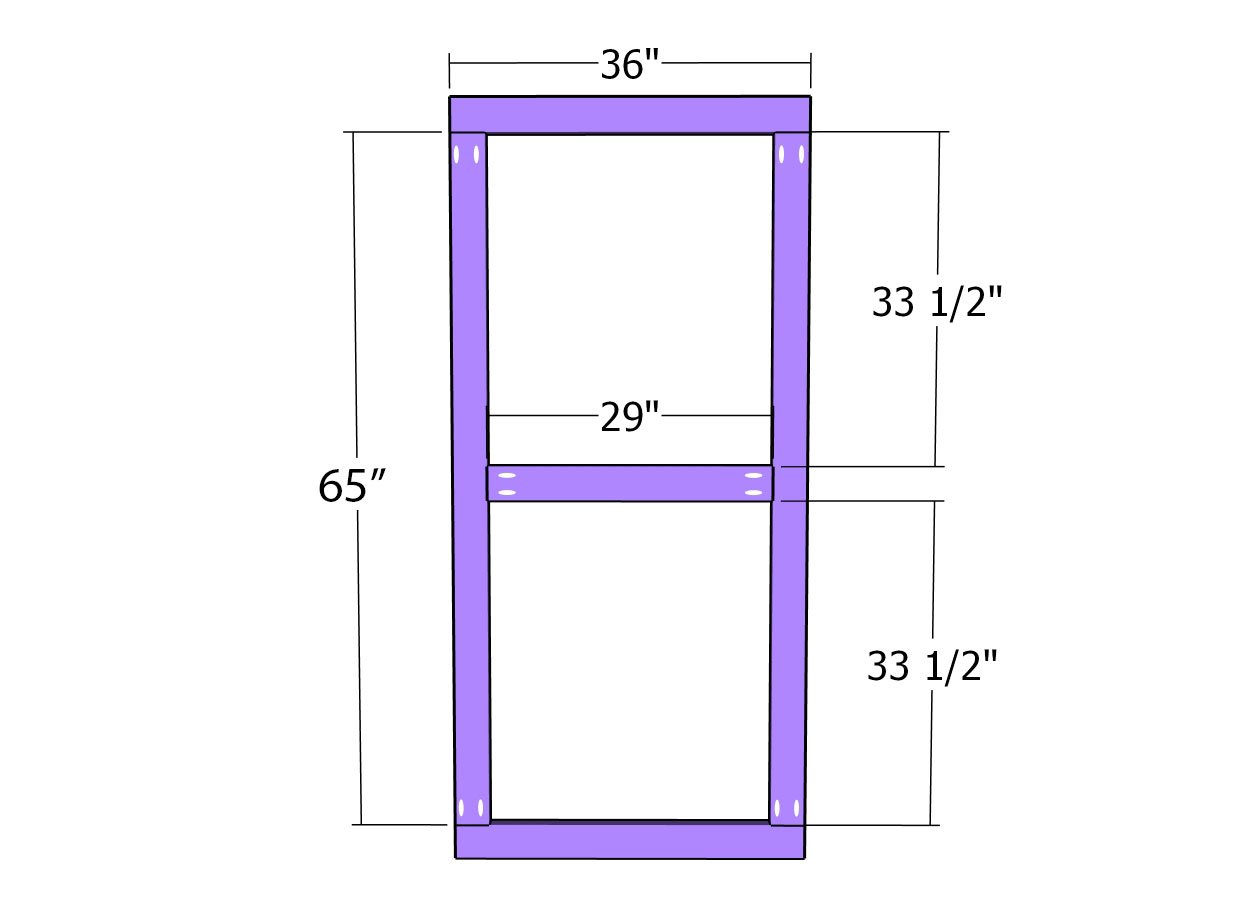
Door-frame
Let’s build those door frames like a pro! Cut your 2×4 lumber to size for a sturdy and reliable structure. Drill pocket holes at both ends of the vertical and horizontal pieces to create tight, secure joints. Lay the pieces out on a flat surface, taking care to ensure the corners are perfectly square for a precise fit.
Once everything is aligned, fasten the pieces together by driving 2 1/2″ screws into the pocket holes. This method guarantees a rock-solid frame that’s built to withstand daily use and provide dependable support for your shed doors. Strong, precise, and ready for action!
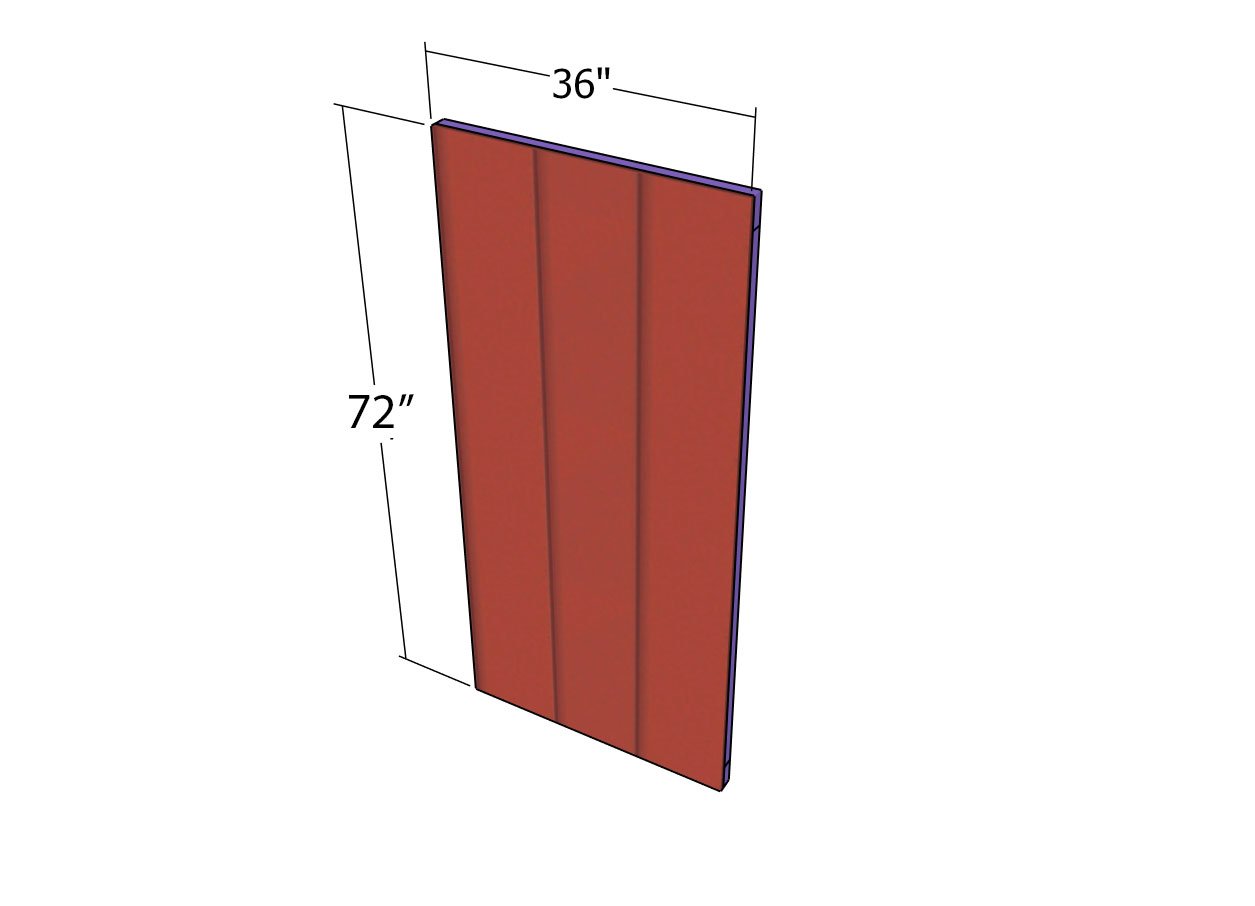
Door-panel
Remember those panels you cut out from the front wall siding? It’s time to bring them back into action! Attach the panels to the door frames, ensuring they’re perfectly aligned for a clean, seamless appearance. Secure them with 8d nails, spacing them evenly along the edges to lock everything together firmly.
This step not only gives your doors a polished, professional finish but also reinforces their strength and durability, making them ready to handle the rigors of daily use. Form meets function for doors that look great and last!
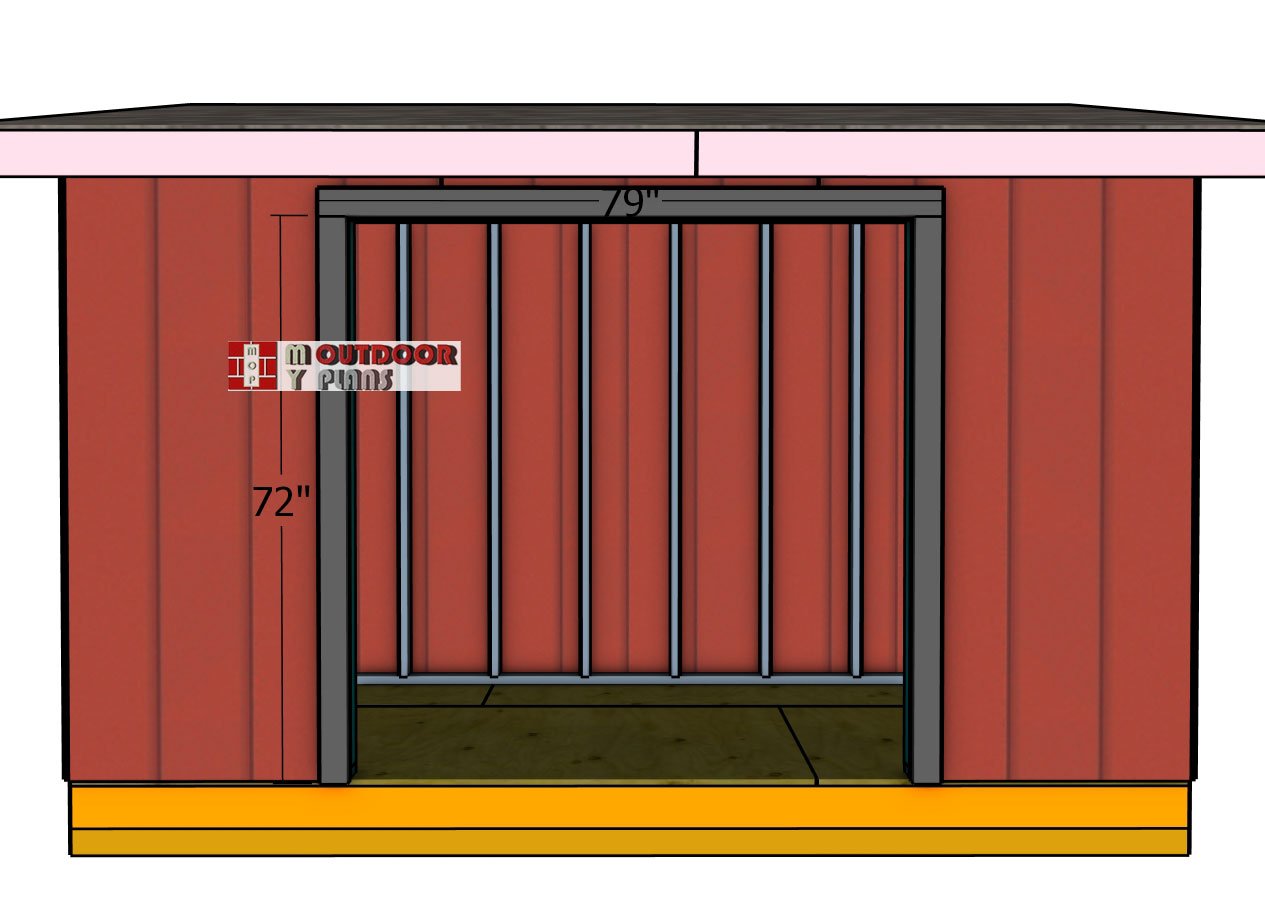
Double-door-jambs
Let’s get those door jambs installed! Grab your 2x4s and attach them around the door opening, aligning the edges so they’re perfectly flush. Drill pilot holes to prevent splitting, then secure the jambs in place with 3 1/2″ screws. Space the screws every 8″ along the framing for a strong, tight fit.
This step not only ensures a secure door installation but also gives the opening a clean, finished appearance.
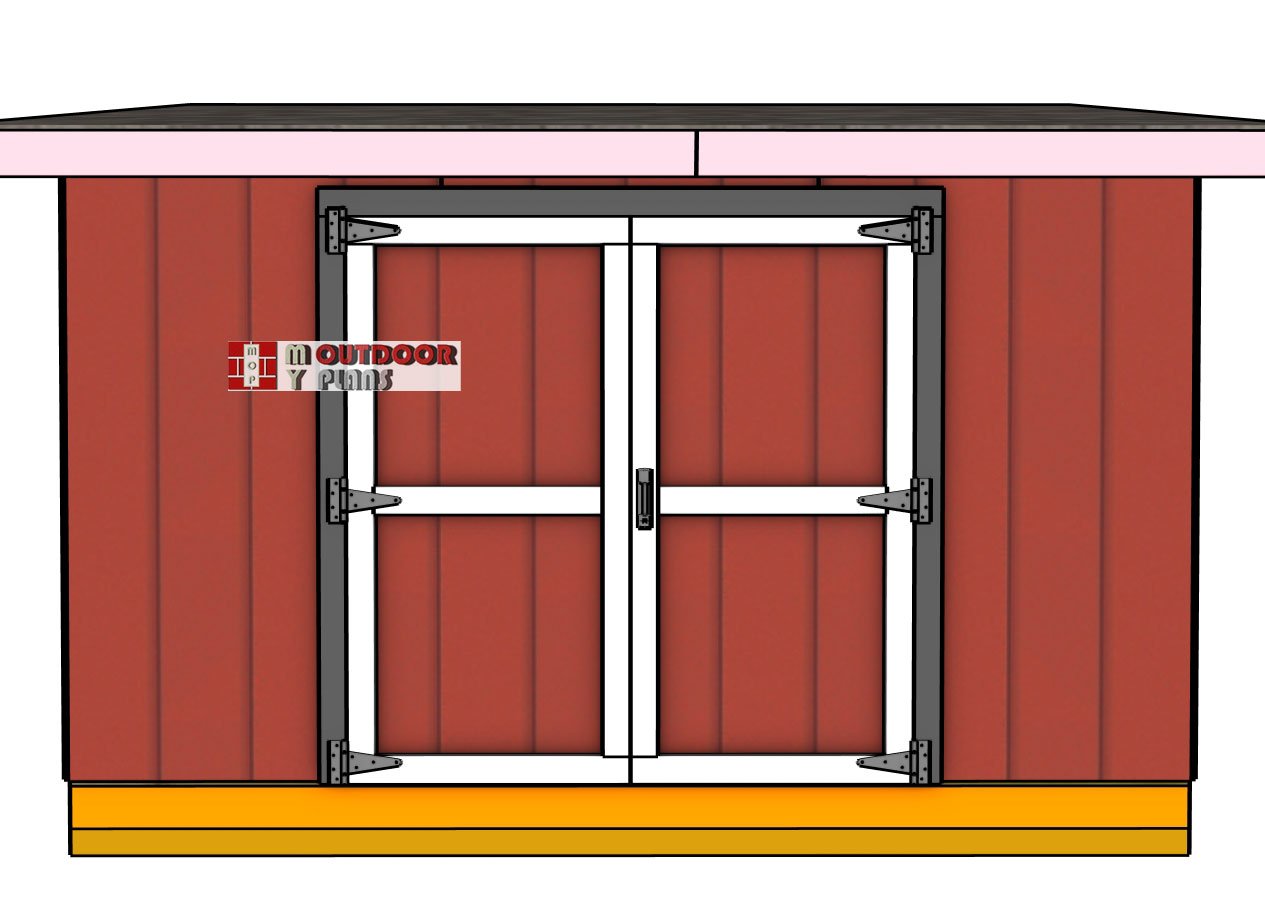
Fitting-the-double-doors
Fit the doors into the opening, ensuring they align perfectly with the jambs for a smooth, polished look. Attach the doors to the jambs using heavy-duty hinges, spacing them evenly along the edges for reliable support and easy operation.
Finish up by installing a sturdy latch to keep your doors secure and your belongings safe. With this final detail, your shed is complete and ready to tackle all your storage needs with style and functionality!.
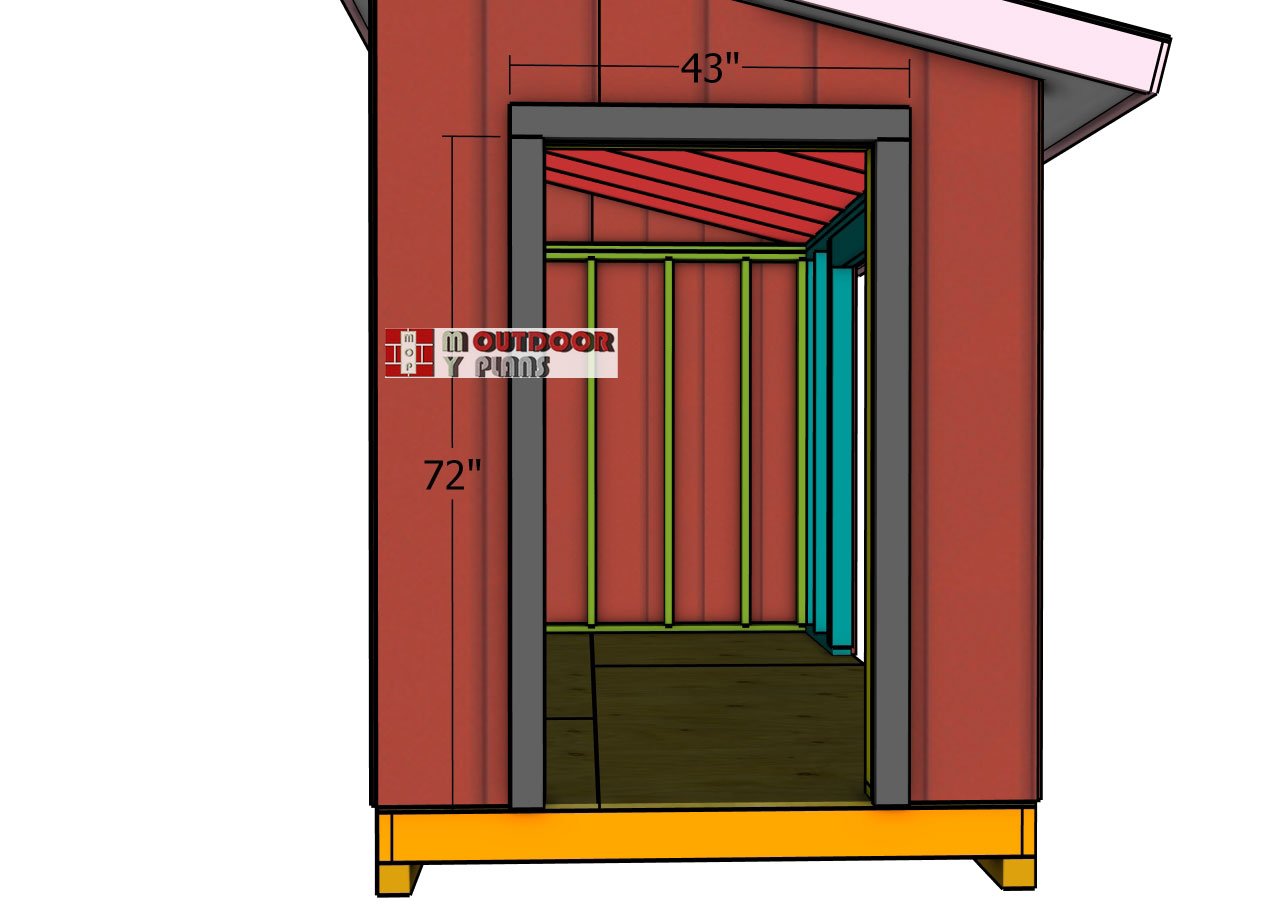
Side-door-jambs
Attach the 2×4 jambs around the side door, as well.
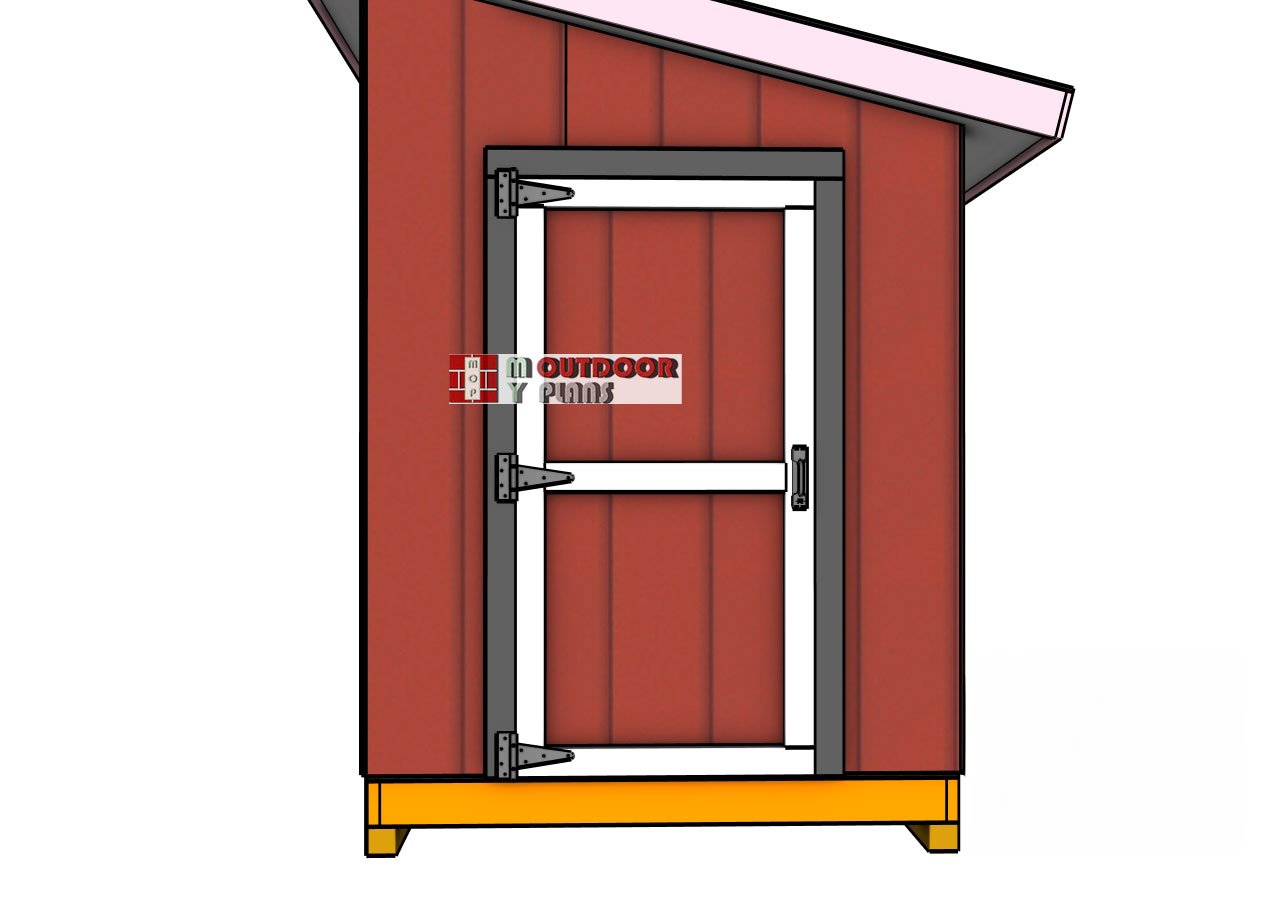
Attaching-the-side-door
Fit the door intro place and secure it to the jambs with hinges. Install the door latch, as well.
STEP 7: Finishing Touches
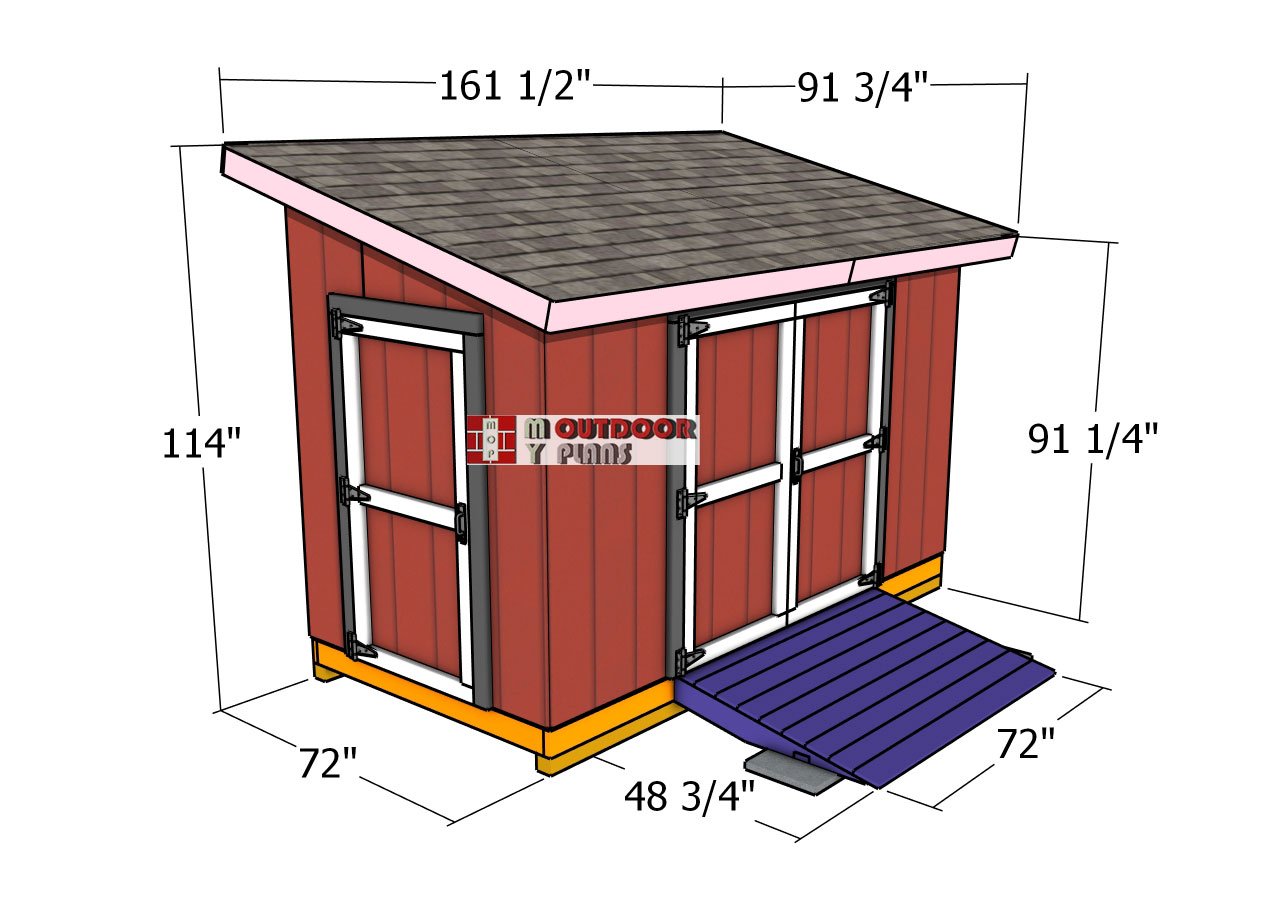
6×12-Lean-to-Shed-Plans—dimensions
With the main structure complete, it’s time to add the finishing touches that bring your shed to life! Fill any gaps or nail holes with wood filler for a smooth, polished look, then sand the surfaces to ensure everything is flawless.
Apply a weather-resistant paint or stain to protect the wood and complement your style, making your shed both durable and visually appealing. Don’t forget to seal around windows and doors with caulk for added protection against the elements. These final details not only enhance the appearance but also ensure your shed is built to last.
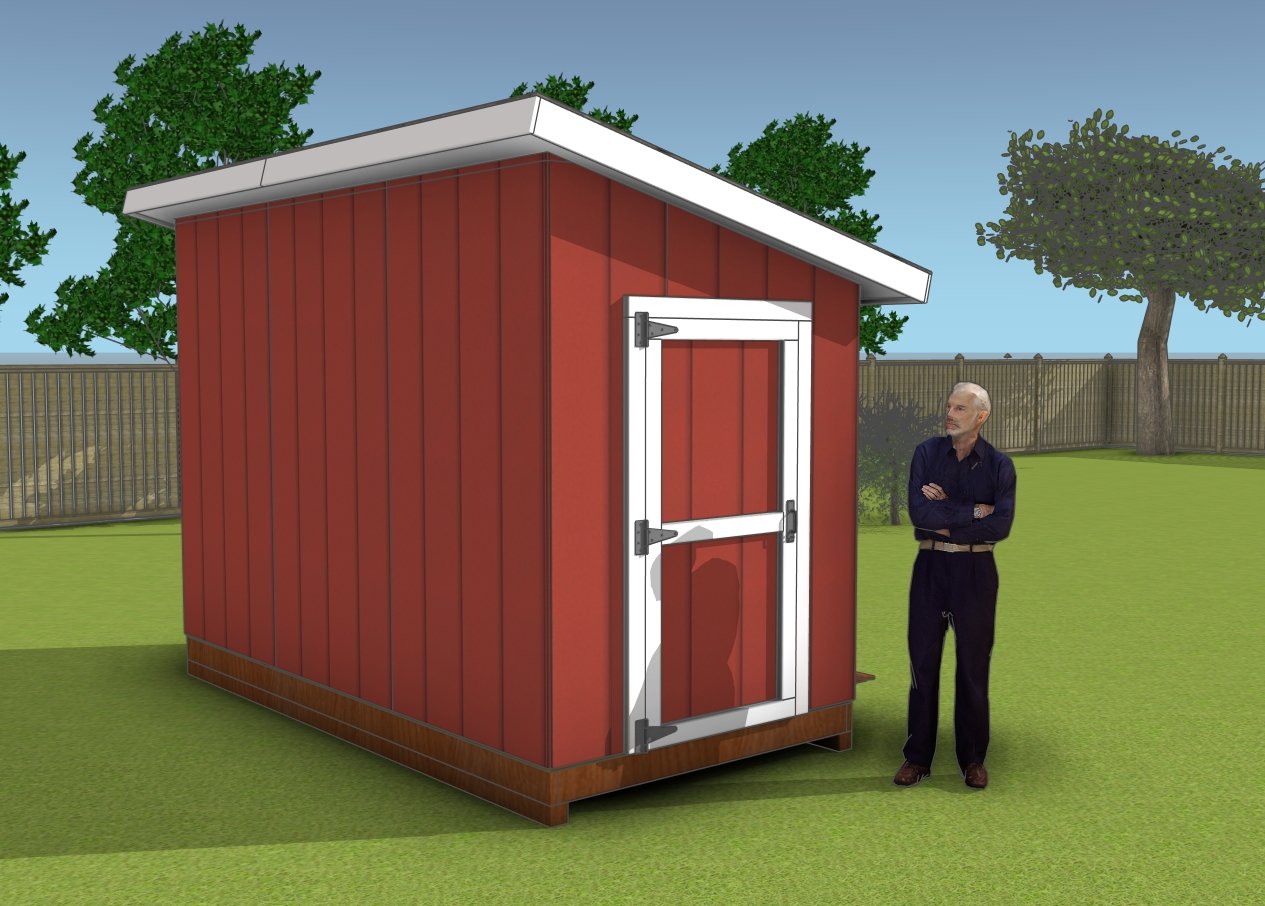
How to build a 6×12 lean to shed
Install the roof soffit using 1/4″ plywood, cutting the panels to fit snugly between the roof overhang and the walls. Secure the soffit in place with 1 1/4″ screws, spacing them evenly to create a clean, finished look. To ensure proper ventilation, consider installing small vent covers or continuous soffit vents in the plywood.
Pairing these with a roof vent or gable vent will promote airflow, reducing moisture buildup and protecting your shed from mold, mildew, and wood rot. This step not only enhances durability but also keeps your shed in top condition for years to come.
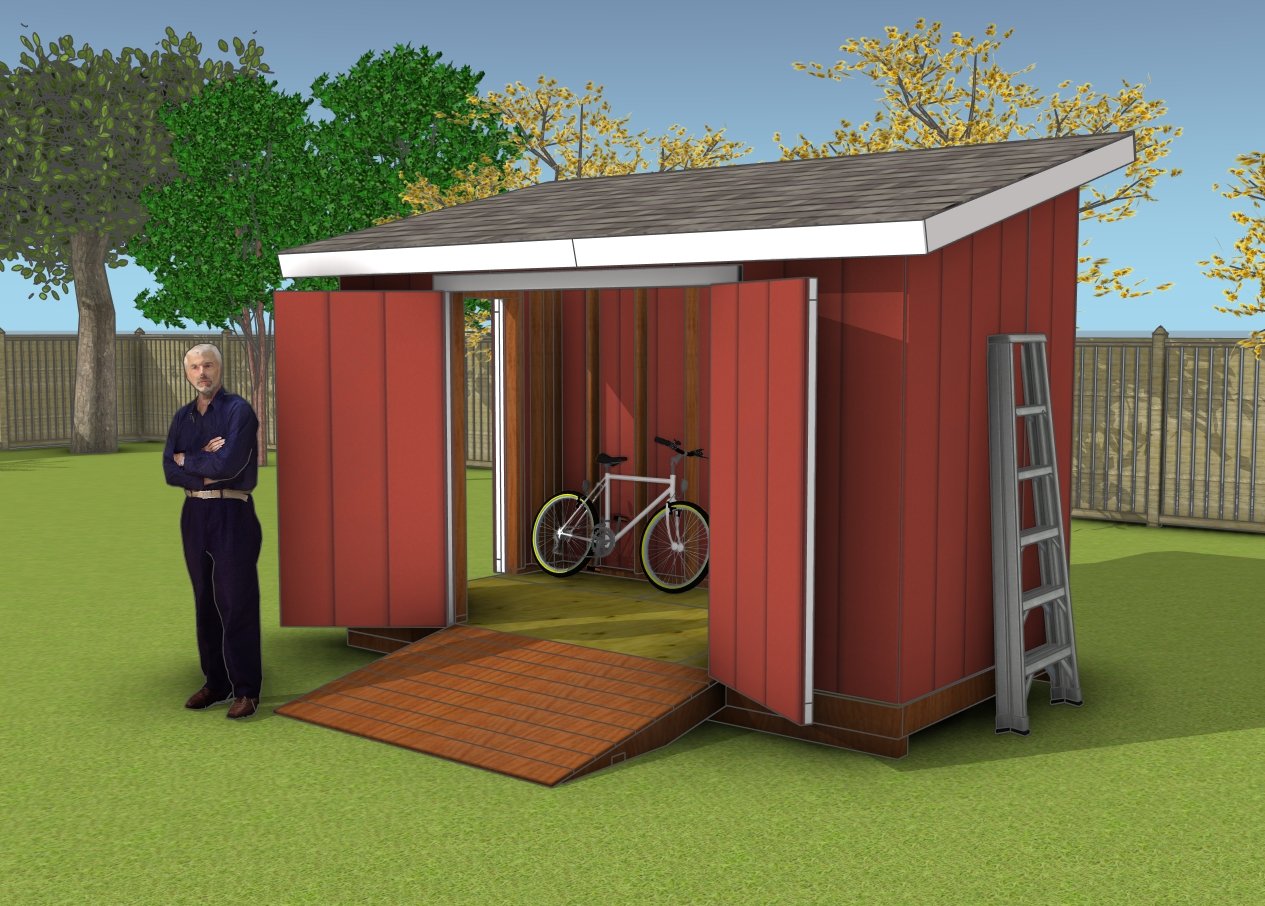
DIY 6×12 shed plans
Take a look over PART 1 where I show you how to build the floor and main frame of the lean to shed.
For a complete guide to building this shed, including detailed plans for a front ramp, check out our premium plans for the ultimate step-by-step experience!
This woodworking project was about 6×12 lean to shed plans. If you want to see more outdoor plans, check out the rest of our step by step projects and follow the instructions to obtain a professional result.

