Welcome to PART 2 of the DIY outdoor project, where we bring the structure closer to completion by focusing on the roof and additional features. In this phase, we’ll install the roof decking, underlayment, and final roofing material to ensure your pavilion is both sturdy and weatherproof. We’ll also explore ways to enhance the structure’s functionality and style, from adding privacy elements to finishing touches that make it truly stand out. Let’s dive in and transform this framework into a polished, long-lasting centerpiece for your outdoor space!
When buying the lumber, you should select the planks with great care, making sure they are straight and without any visible flaws (cracks, knots, twists, decay). Investing in cedar or other weather resistant lumber is a good idea, as it will pay off on the long run. Use a spirit level to plumb and align the components, before inserting the galvanized screws, otherwise the project won’t have a symmetrical look. If you have all the materials and tools required for the project, you could get the job done in about a day.
Projects made from these plans
Building a Modern 12×20 Lean to Gazebo
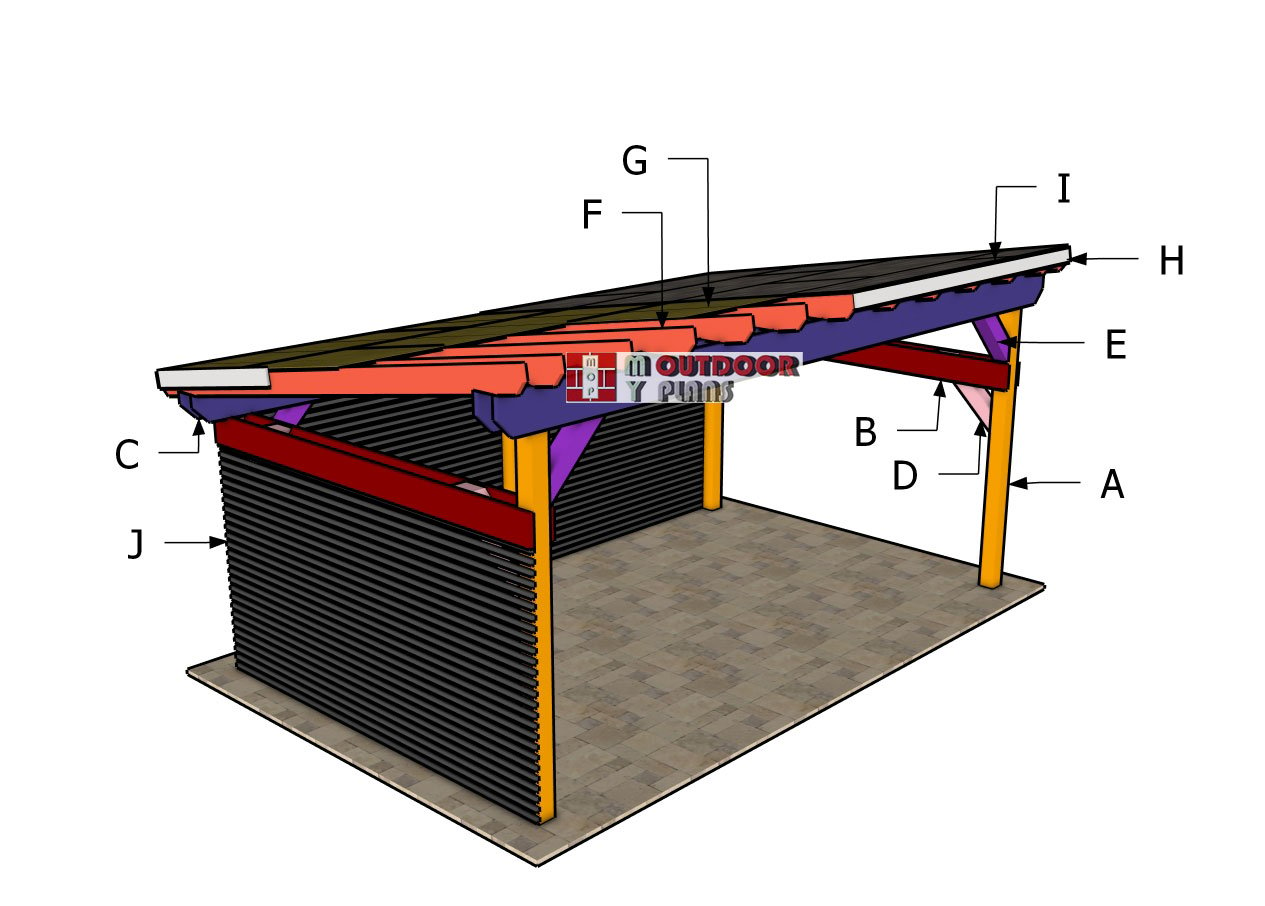
Building-a-12×20-lean-to-pavilion
Cut & Shopping Lists
- F – 13 pieces of 2×8 lumber – 14 ft RAFTERS
- G – 4 pieces of 3/4″ plywood – 4’x8′, 4 pieces – 4’x7′, 2 pieces – 3’x4′, 2 piece – 2’x3′, 2 pieces – 2’x8′ ROOF SHEETS
- H – 2 pieces of 1×6 lumber – 14 ft, 4 pieces – 132 3/4″ TRIMS
- I – 350 sq ft of tar paper, 350 sq ft of asphalt shingles ROOFING
- J – 26 pieces of 1×2 lumber – 12 ft, 58 pieces – 10 ft WALL SLATS
Tools
![]() Hammer, Tape measure, Framing square, Level
Hammer, Tape measure, Framing square, Level
![]() Miter saw, Drill machinery, Screwdriver, Sander
Miter saw, Drill machinery, Screwdriver, Sander
![]() Post hole digger, Concrete mixer
Post hole digger, Concrete mixer
![]() Safety Gloves, Safety Glasses
Safety Gloves, Safety Glasses
Time
Related
- 18×20 Pavilion Plans
- PART 1: 12×20 Lean to pavilion
- PART 2: 12×20 Lean to pavilion
STEP 4: Building the roof
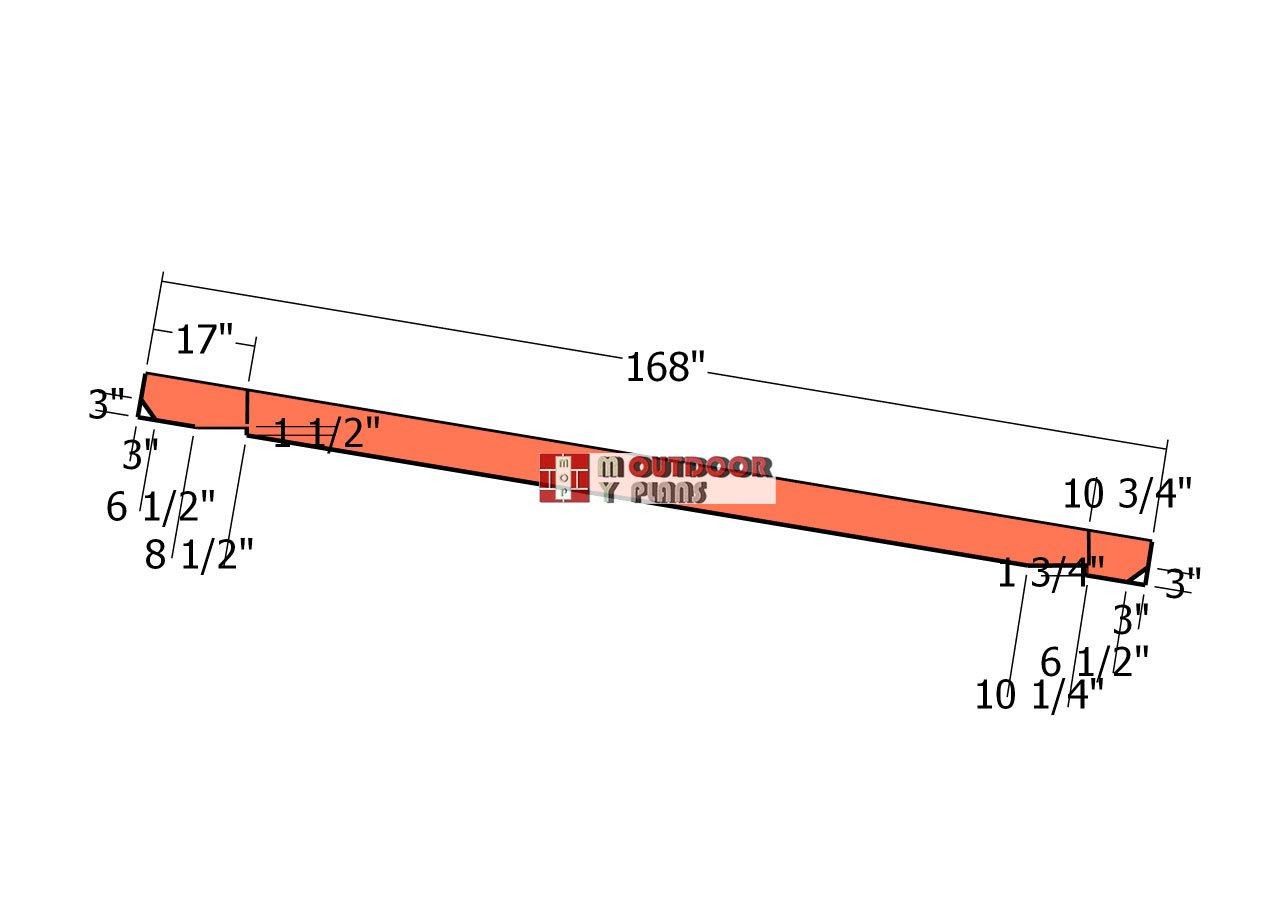
Rafters
Use 2×8 lumber for the rafters to ensure strength and stability. Mark the cut lines on each board according to the measurements in your plans, and use a circular saw to make precise cuts. For an added touch of style, create decorative cuts on both ends of the rafters, giving your pavilion a polished and professional appearance.
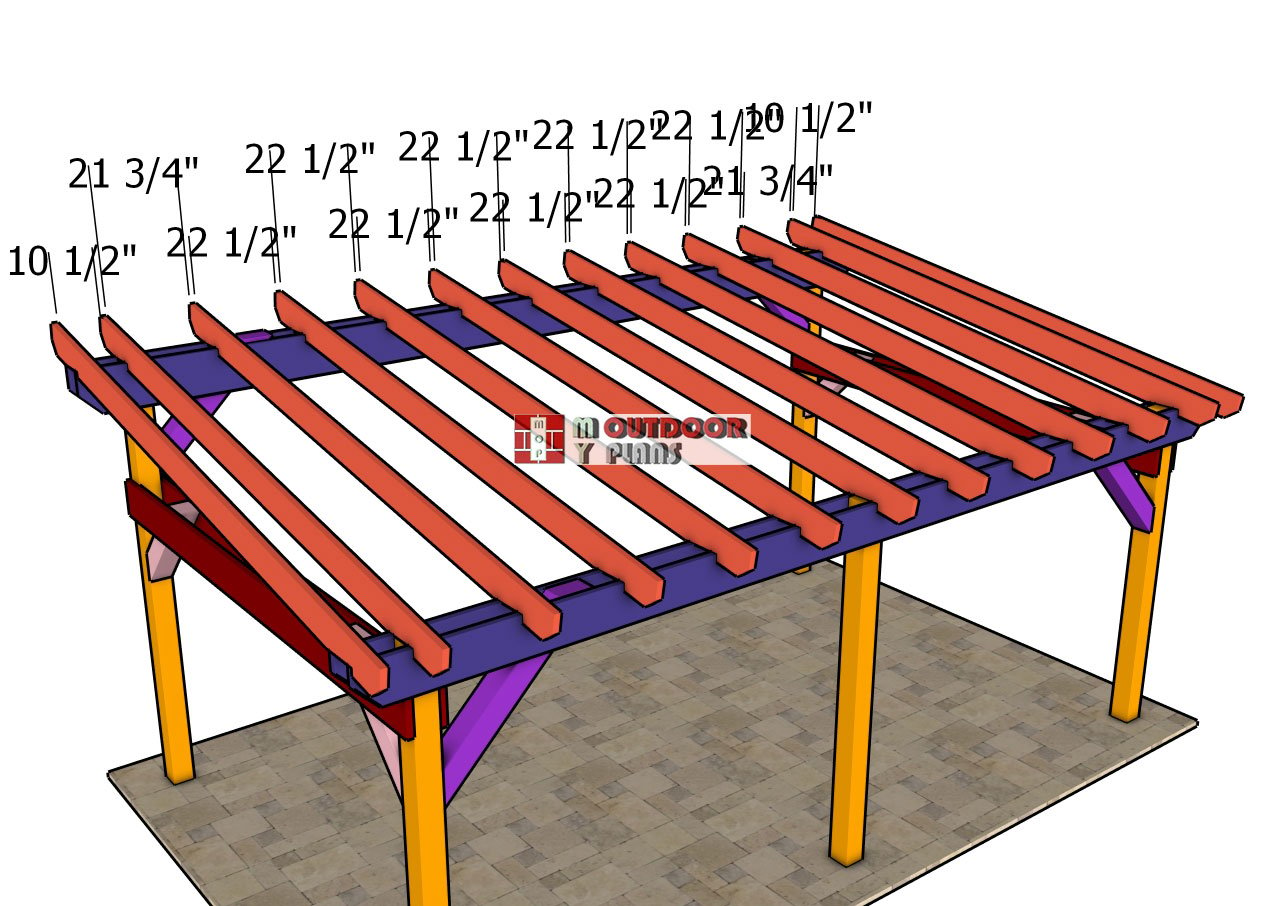
Fitting-the-rafters
Secure the rafters to the top of the structure, ensuring they are evenly spaced at 24″ on center (OC), as shown in the diagram. Align each rafter carefully to maintain uniform spacing and a level roofline, which will contribute to the overall strength and appearance of the pavilion.
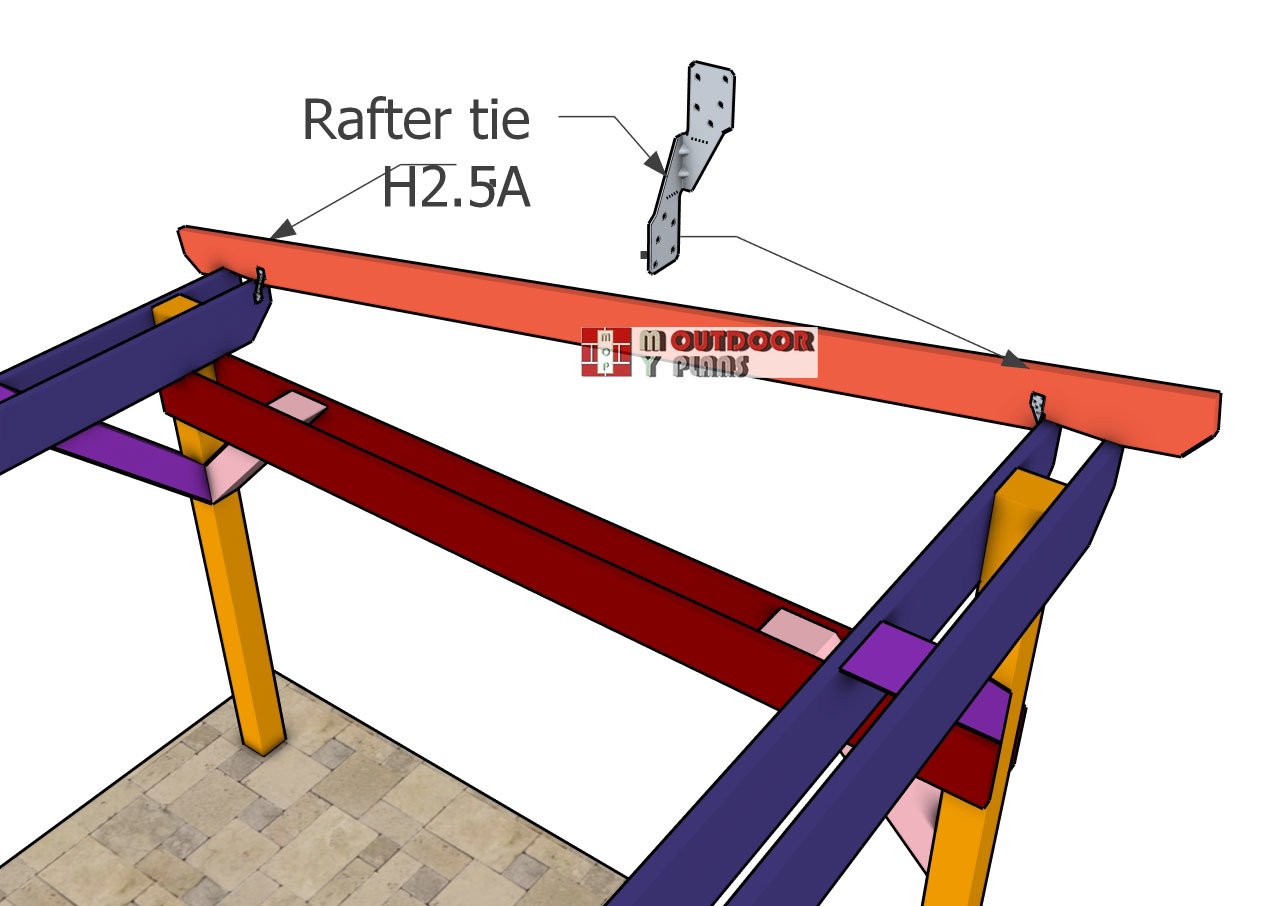
Fitting-the-rafter-ties
As illustrated in the diagram, secure the rafters to the beams using rafter ties. Attach each rafter tie with 1 1/2″ structural nails or screws at both ends of the rafters to ensure a strong and stable connection. This step is crucial for reinforcing the structure and keeping everything firmly in place.
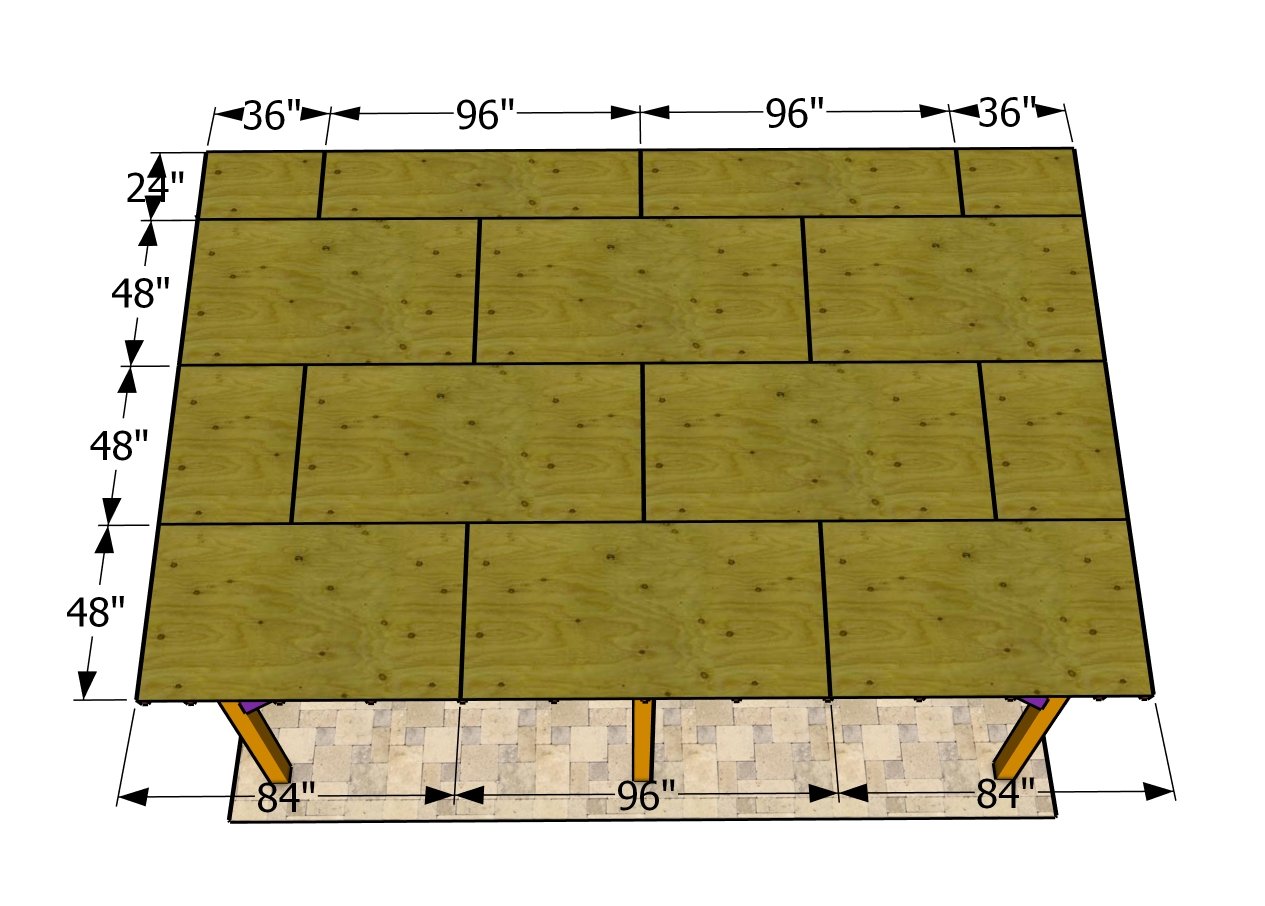
Roof sheets
Install the 3/4″ plywood sheets to create a sturdy and durable roof deck. Carefully position each sheet over the rafters, aligning the edges for a clean and seamless finish. Leave a small gap between the sheets to allow for natural expansion and prevent any warping or buckling over time.
Secure the plywood to the rafters using 1 5/8″ exterior-grade screws, spacing the screws every 8-10 inches along each rafter. This will ensure the sheets are tightly fastened, providing a strong base for the roofing material. With this solid foundation, your roof will be built to withstand the elements and stand the test of time.
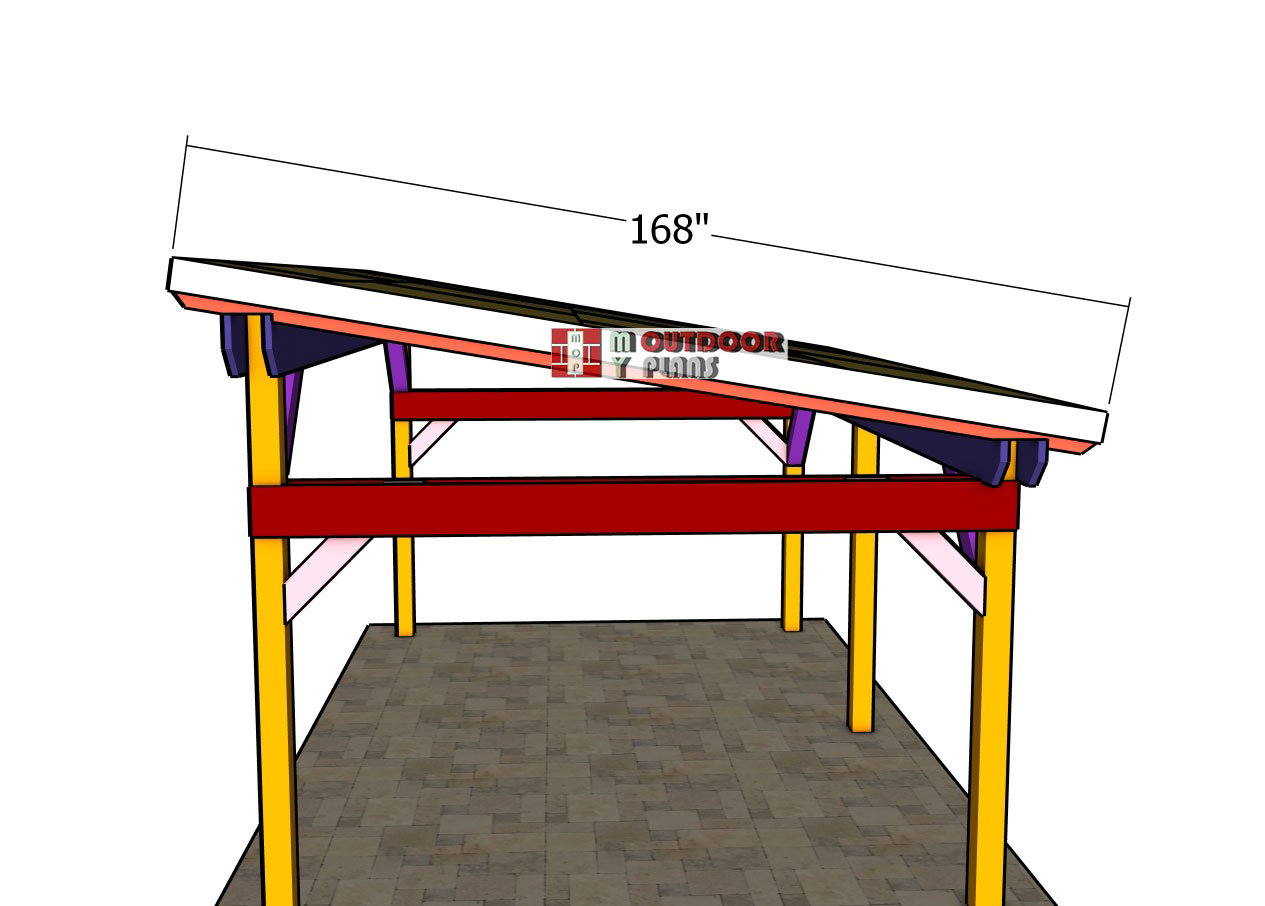
Side-roof-trims
Attach 1×6 trim boards to the sides of your DIY garden pavilion, aligning the edges flush with the plywood roof decking for a sleek, polished appearance. Secure each trim board using 2″ nails, driving them into the end of every rafter for a firm and reliable hold. These trim boards not only enhance the overall look of the pavilion but also protect the edges of the roof decking, ensuring durability and a refined finish.
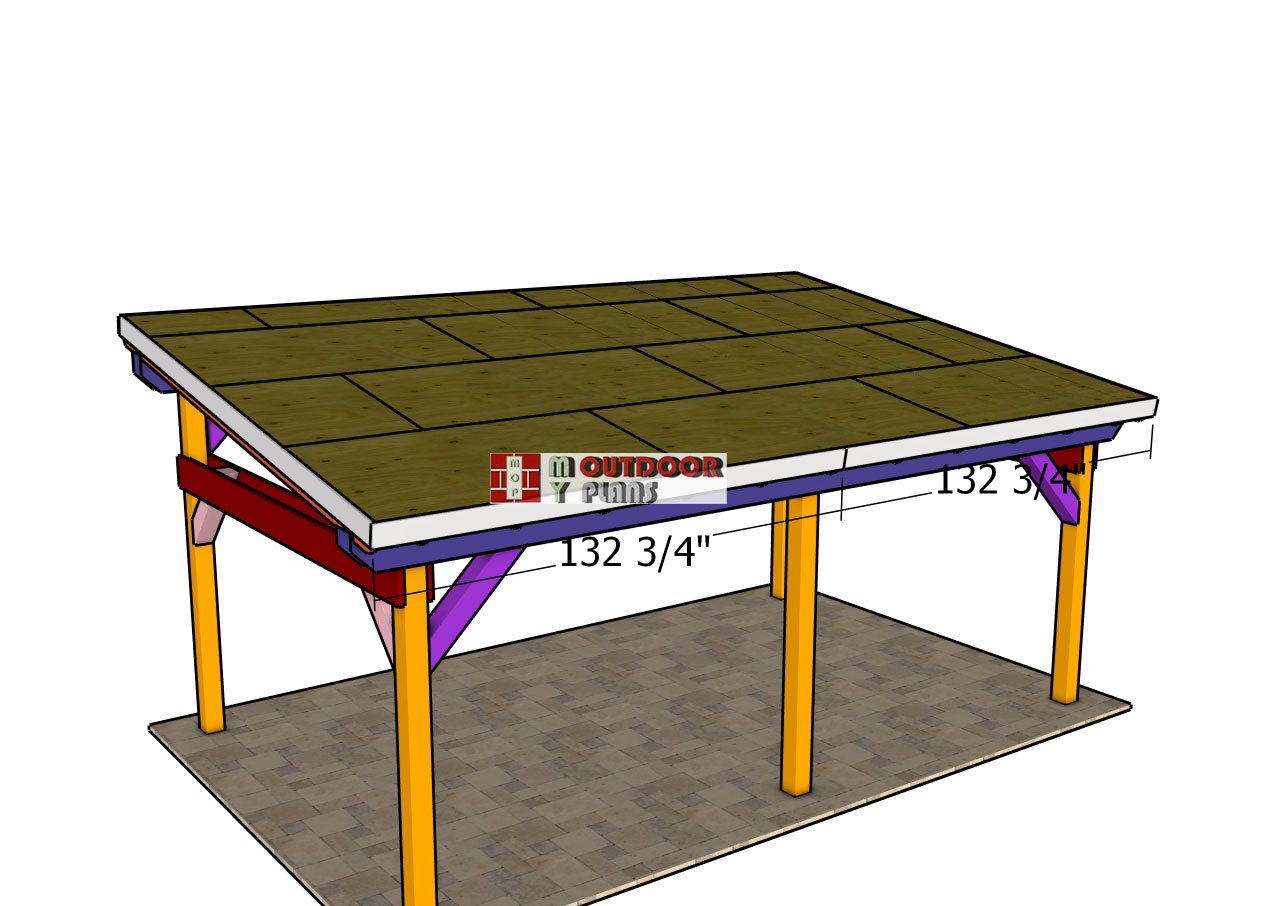
Front-roof-trims
Install the trim boards to the front and back of the gazebo, ensuring the edges are perfectly aligned and flush for a seamless appearance. Secure the trims with 2″ nails, driving them firmly into place. Make sure there are no gaps between the trim boards for a clean and professional finish.
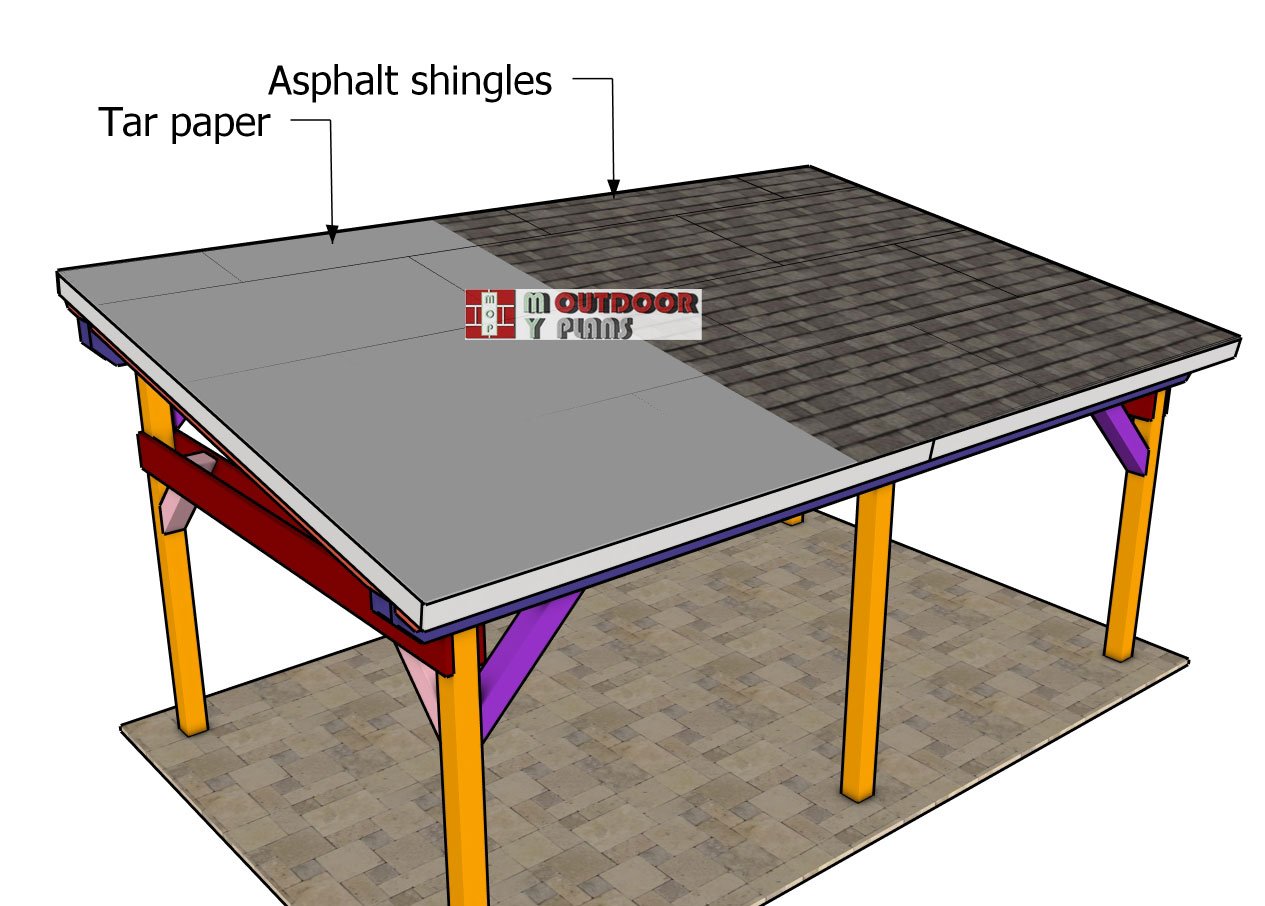
Fitting-the-roofing
With the plywood decking in place, the next step is to prepare the roof for asphalt shingles and ensure it is fully protected from the elements. Start by installing drip edges along the edges of the roof. Secure the metal drip edges with roofing nails, placing them along the eaves first and then along the rakes. These drip edges direct water away from the roof and protect the edges of the plywood from moisture damage.
Next, roll out a synthetic roofing felt or self-adhering membrane over the entire plywood surface, overlapping each row by at least 2 inches to create a watertight barrier. Secure the underlayment with roofing nails, following the manufacturer’s guidelines.
Now, you’re ready to install the asphalt shingles. Begin at the bottom edge of the roof, laying down a starter strip or cutting shingles to create one. This prevents water from seeping under the shingles. Lay the first row of full shingles directly above the starter strip, aligning them carefully and securing them with roofing nails placed just above the tabs. Work your way up the roof, staggering the seams of each row for a professional look and better water resistance. The result is a durable, weather-resistant roof that’s built to last.
STEP 5: Privacy screens
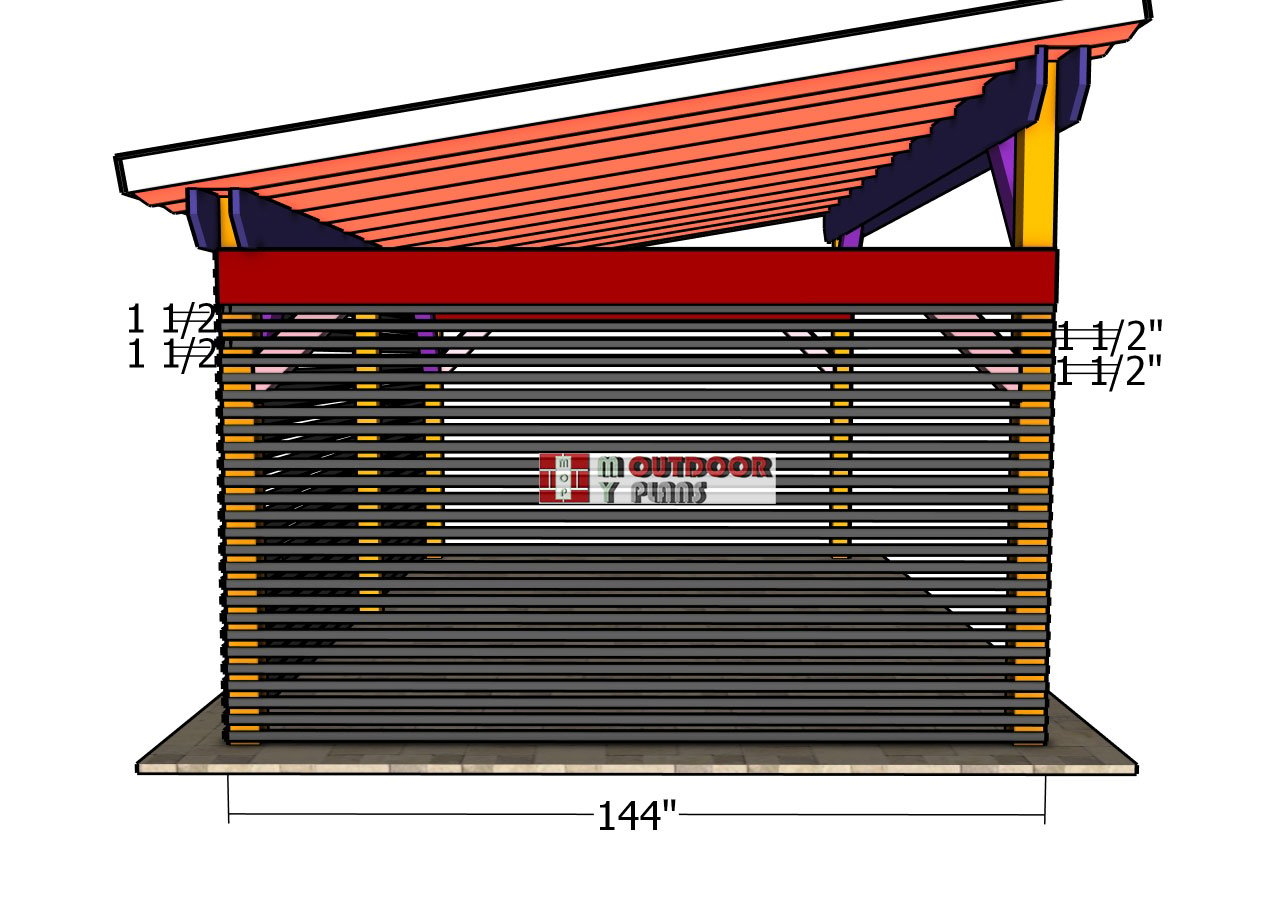
Side-slats
If you’d like to add some privacy or extra shade to your pavilion, consider installing 1×2 slats on one or both side walls. Space the slats evenly using a 1 1/2″ spacer to maintain consistent gaps. Drill pilot holes at each end of the slats, then secure them to the posts using 1 5/8″ screws. This simple addition not only enhances privacy but also adds a stylish touch to your pavilion.
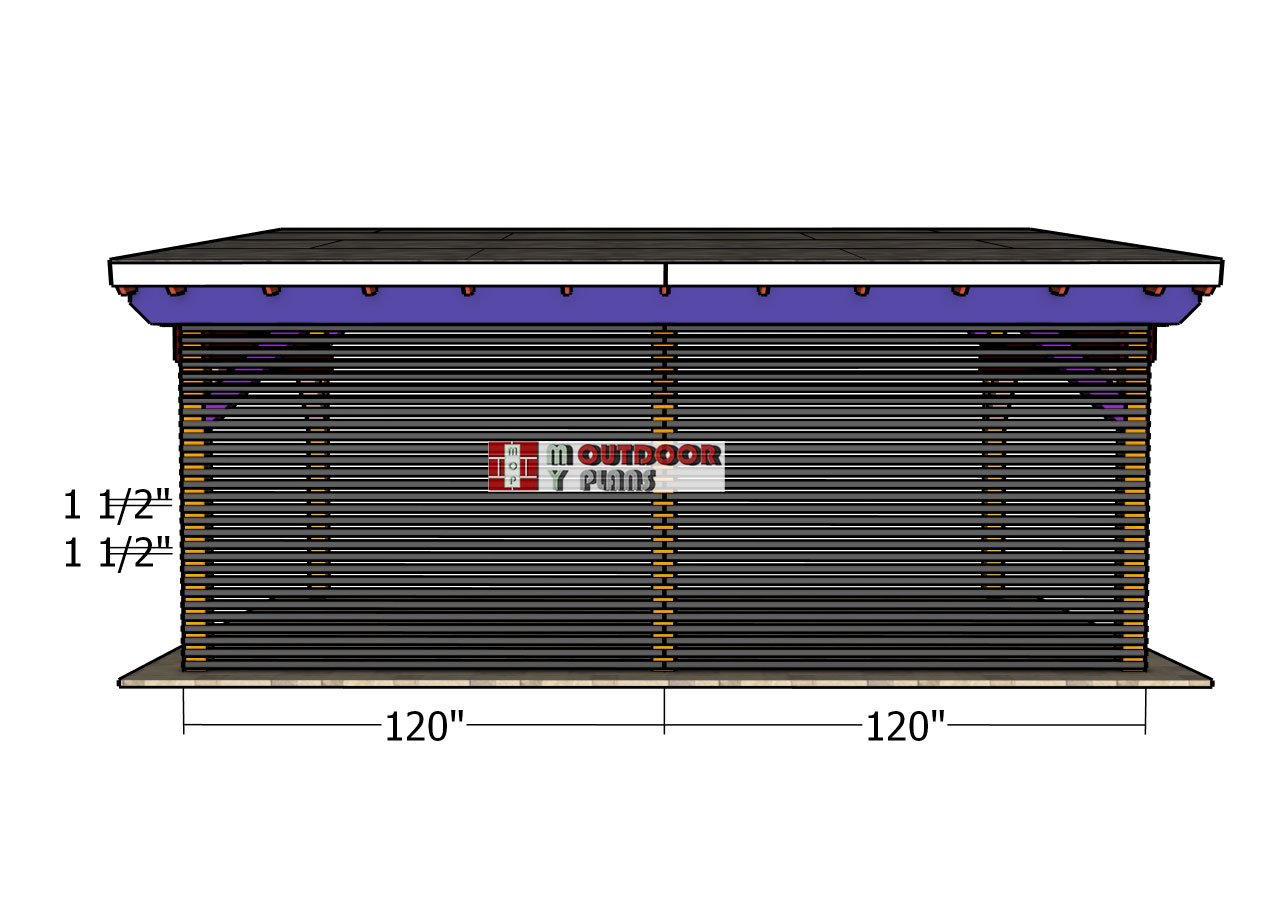
Fitting-the-back-slats
Attach the slats to the back of the structure as well, ensuring they are spaced evenly using 1 1/2″ spacers for uniform gaps. Align each slat flush with the pavilion’s frame for a clean and cohesive look. These slats not only improve the overall aesthetic appeal but also add a touch of visual interest to the open sides, giving your pavilion a balanced and finished appearance.
Finishing touches
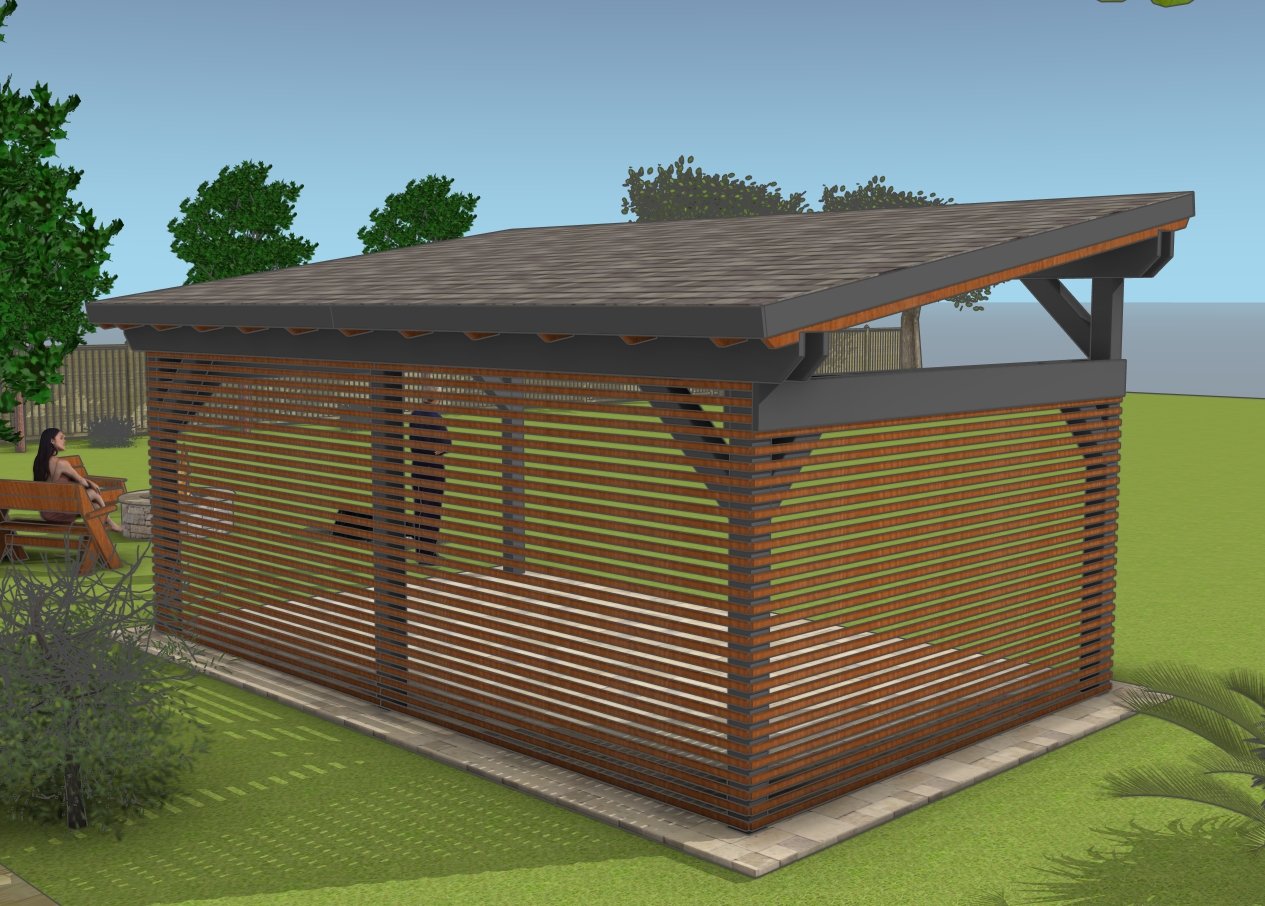
12×20 pavilion plans – back view
The finishing touches are what truly bring your project to life, giving it a polished and professional look. Start by sanding any rough edges on the wood to ensure a smooth surface, especially around the cuts and corners. This step not only improves the appearance but also makes the structure safe to touch.
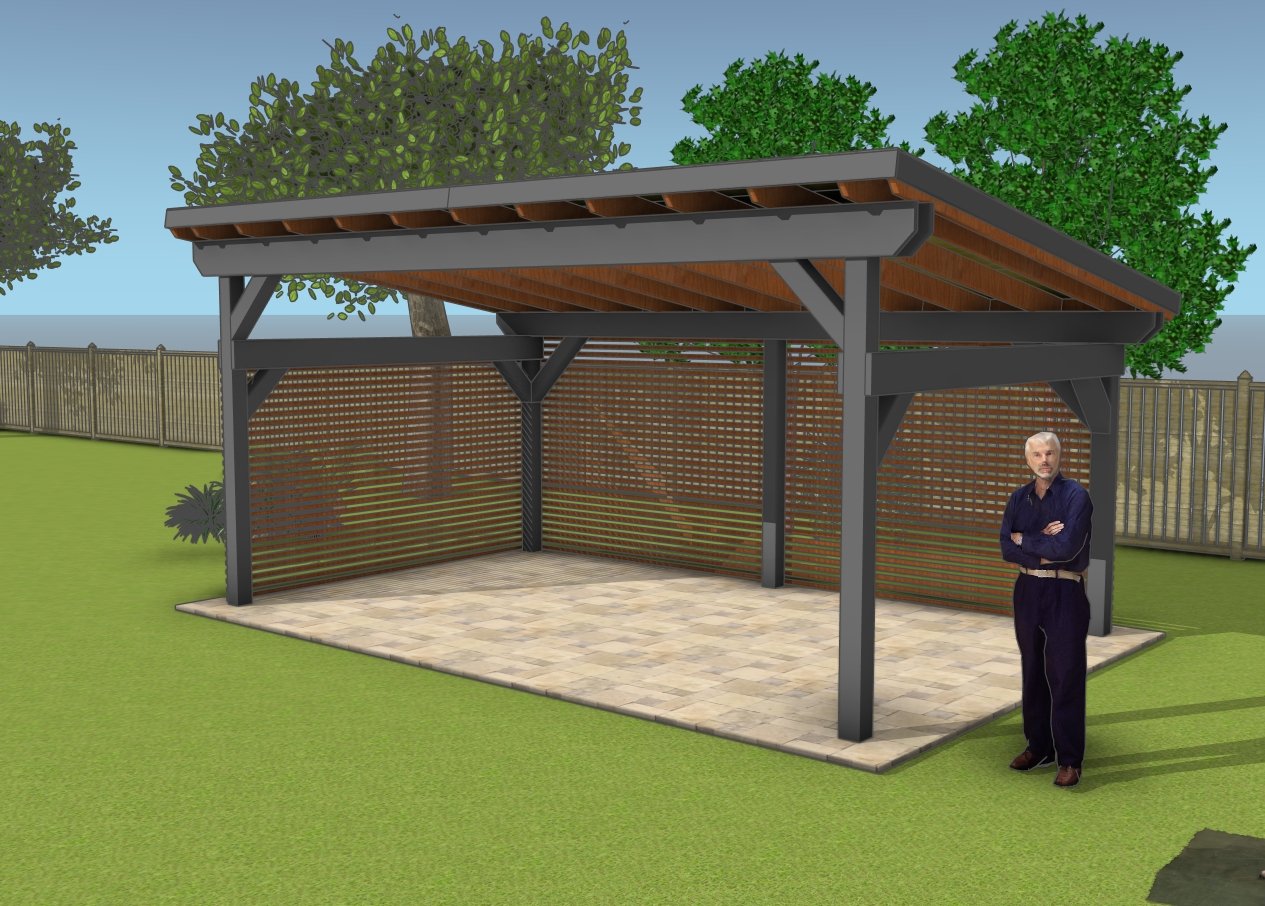
DIY 12×20 lean to pavilion plans
Next, apply a high-quality wood stain, paint, or sealant, depending on the look and level of protection you want. Staining enhances the natural beauty of the wood while protecting it from the elements, while painting allows you to match the pavilion to your outdoor décor. Be sure to use products designed for outdoor use to ensure durability.
Finally, add decorative or functional elements such as hooks for hanging plants, string lights for a cozy ambiance, or even outdoor curtains for added privacy and style. These small details not only elevate the pavilion’s aesthetics but also personalize the space, making it a perfect retreat in your backyard.
Check out PART 1 of the project, so you learn how to build the base for the carport.
This woodworking project was about modern lean to pavilion roof plans. If you want to see more outdoor plans, we recommend you to check out the rest of our step by step projects.

