This step by step diy woodworking project is about a 12×18 outdoor lean to pavilion plans. This pavilion is built on a sturdy 6×6 and 6×8 framing and it features a design made to keep the costs down. The roof for this pavilion has a pitch of 4:12. Make sure you take a look over the local building codes, so you comply with the regulations. Take a look over the rest of our woodworking plans, if you want to get more building inspiration. Check out the Shop, as well, for full list of Premium Plans.
I am over the moon to share our latest plans for a stunning 12×18 lean-to pavilion with 6 posts. This spacious and stylish design is perfect for crafting an outdoor oasis, whether you’re dreaming of alfresco dining or a cozy lounging spot. With my fun and easy-to-follow plans, you’ll have this beautiful pavilion up and ready to make your backyard the ultimate hangout in no time!
When buying the lumber, you should select the planks with great care, making sure they are straight and without any visible flaws (cracks, knots, twists, decay). Investing in cedar or other weather resistant lumber is a good idea, as it will pay off on the long run. Use a spirit level to plumb and align the components, before inserting the galvanized screws, otherwise the project won’t have a symmetrical look. If you have all the materials and tools required for the project, you could get the job done in about a day.
Projects made from these plans
12×18 Lean to Pavilion Plans – PDF Download
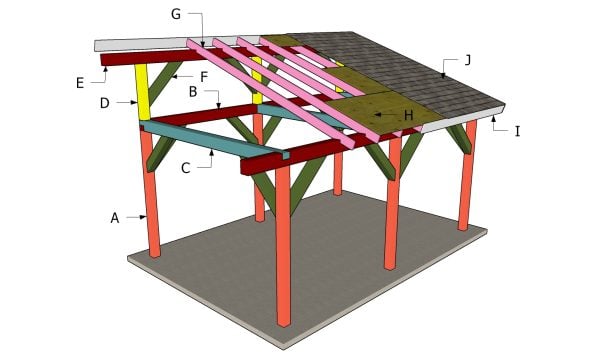
Building a 12×18 lean to pavilion
Cut and Shopping Lists
A – 6 pieces of 6×6 lumber – 8 ft POSTS
B – 2 pieces of 6×8 lumber – 132”, 2 pieces – 108” TOP PLATES
C – 3 pieces of 6×8 lumber – 12 ft CROSSBEAMS
D – 3 pieces of 6×6 lumber – 38 7/8” TOP SUPPORTS
E – 2 pieces of 6×8 lumber – 132” RIDGE BEAMS
F – 16 pieces of 6×6 lumber – 42” BRACES
G – 12 pieces of 2×6 lumber – 14 ft RAFTERS
H – 6 pieces of ¾” plywood – 4’x8’, 2 pieces – 4’x6’, 1 piece – 4’x4’, 2 pieces – 2’x8’, 1 piece – 2’x2’, 2 pieces – 2’x4’ ROOF SHEETS
I – 4 pieces of 1×8 lumber – 10 ft, 2 pieces – 12 ft, 2 pieces – 49 ½” TRIMS
Tools
![]() Hammer, Tape measure, Framing square, Level
Hammer, Tape measure, Framing square, Level
![]() Miter saw, Drill machinery, Screwdriver, Sander
Miter saw, Drill machinery, Screwdriver, Sander
Time
Related
- PART 1: 12×18 Pavilion Plans
- PART 2: 12×18 Lean to Pavilion Roof Plans
How to build a 12×18 pavilion
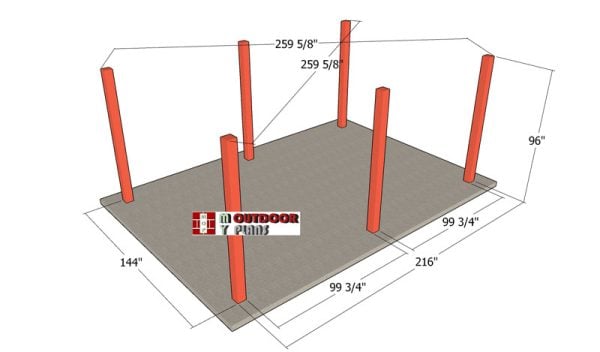
Laying-out-the-posts
First, layout the posts for the outdoor lean to pavilion. Use batter boards and string to determine the location of the posts. Apply the 3-4-5 rule to every corner of the pavilion, so you make sure they are right angled. Make sure the diagonals are equal.
Determining the location for the pavilion is essential, as you have to comply with the local building codes. Make sure the surface is level and remove the vegetation layer.
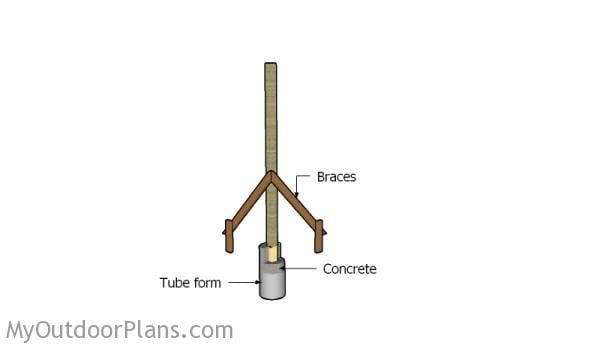
Setting the posts in concrete
Dig 3 ft holes into the ground, making sure they have about 14″ in diameter. Fit the tubes then the posts into the ground and plumb them with a spirit level. Fit the anchors and align them, then let the concrete dry out for several days. Read the local codes for more details on how to secure the posts.
Use lag screws to secure the posts to the anchors. Before pouring the concrete you need to make sure the top of the posts are horizontal one to another. Use a laser to mark the level to the top of the posts and use a circular saw, if you need to make cuts.
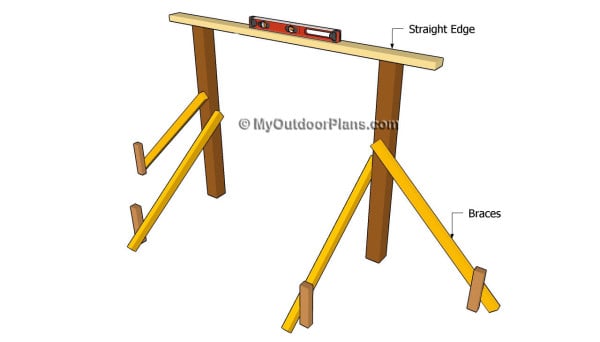
Installing the posts
After setting the posts into place, check if they are level and user a circular saw to make corrections. Notice the temporarily braces that hold the posts plumb. Leave the braces into place until you finish the assembly of the pergola. The temporarily braces will give support to the structure.
Now is the time when you can also adjust the height of the posts. If 8 ft is too tall for your needs, you can make them 7 ft, for example.
Building the frame of the pavilion
Top-plates
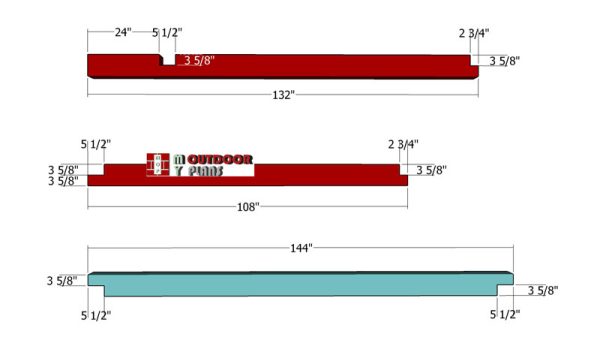
Next, we will be building the top plates for the lean to pavilion. Therefore, this pavilion requires 6×8 lumber, due to the large spans on the front and back. As you can see in the diagram, you need to make 3 5/8″ notches to the beams, so you can lock them together tightly.
Use a circular saw to make parallel cuts inside the marked areas and remove the excess with a chisel. Smooth the recesses with sandpaper.
Fitting-the-top-side-plates
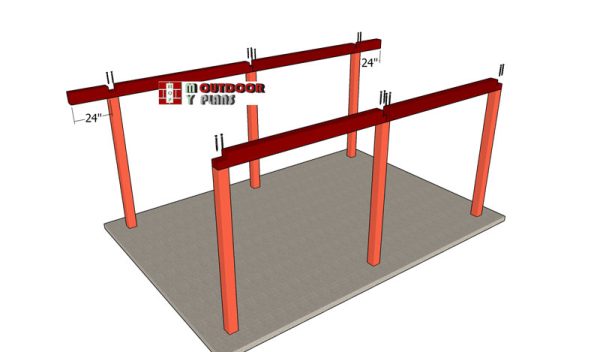
Fit the top rails to the sides of the pavilion. Notice the 24″ overhangs to the back of the pavilion. Drill pilot holes through the plates and insert 8″ screws to lock them to the posts. Use 2 screws for each joint. Make sure the corners are square and plumb the posts vertically.
Attaching-the-crossbeams
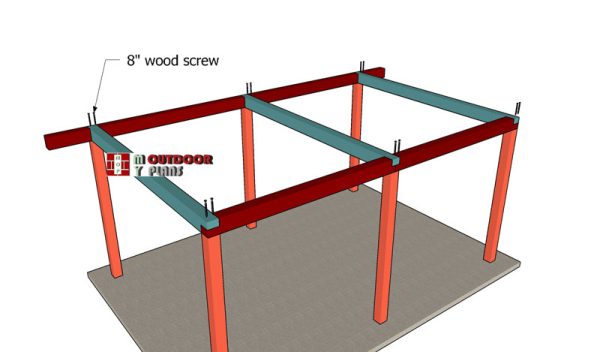
Next, fit the cross plates to the pavilion. Align the edges flush and drill pilot holes. Insert the 8″ screws to lock the cross plates into place tightly.
Fitting-the-braces
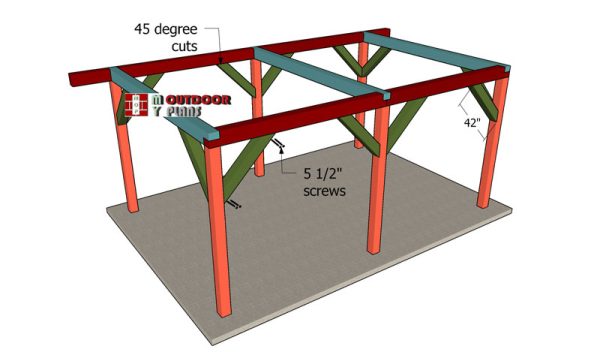
Build the braces for the front and back of the pavilion from 6×6 lumber. Use a miter saw to make 45 degree cuts to both ends of the braces. Fit the braces to the posts, after you plumb them vertically. Drill pilot holes and insert 5 1/2″ screws to secure the braces into place tightly. Insert 2 screws for each joint.
Framing the roof structure
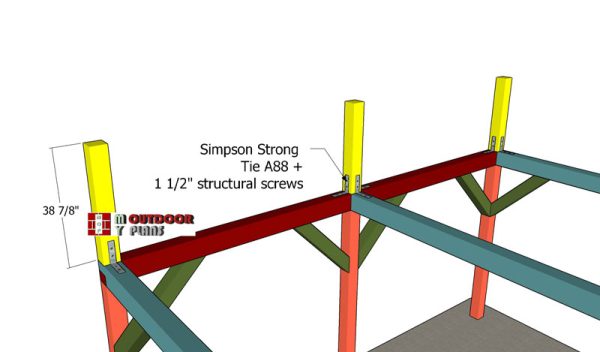
Fitting-the-ridge-beam-supports
Fit the 6×6 supports to the top of pavilion. Plumb the supports with a spirit level. Use L tie connectors to secure the each support to the frame of the pavilion (2 for the end supports, 3 for the middle support). Insert 1 1/2″ structural screws to lock the beams together tightly, using the connector.
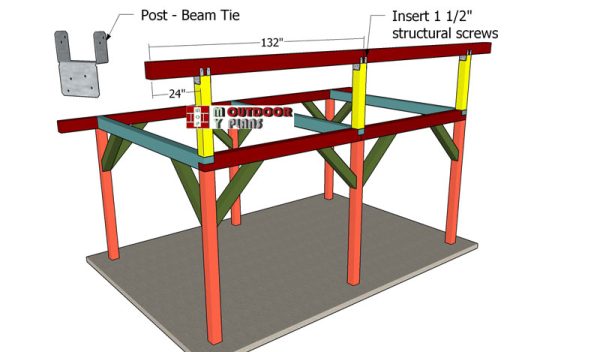
Setting-the-ridge-beams
Fit the 6×6 beams to the top of the supports. Notice the 24″ overhangs to the front and back of the pavilion. Use post to beam connectors with 1 1/2″ structural screws to lock everything together tightly. Insert 1 1/2″ structural screws through the connector. Make sure the corners are square and align the edges flush.
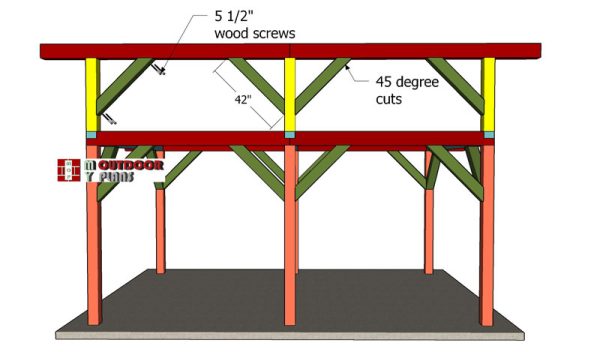
Ridge-beam-braces
Use 6×6 lumber for the braces. Make 45 degree cuts at both ends of the braces. Secure the braces into place with 5 1/2″ screws. Drill pilot holes before inserting the screws. Use at least 2 screws for each joint. These braces will really reinforce the structure and add extra-support to the ridge beams.
Finishing touches
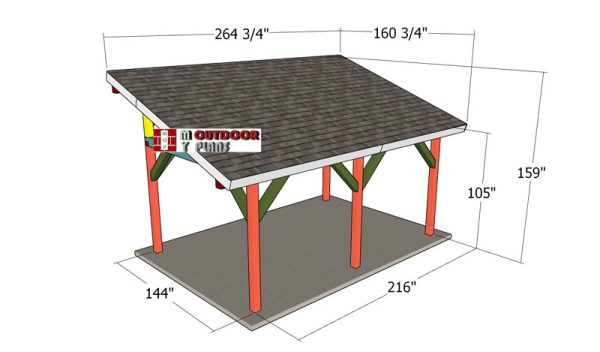
12×18-Lean-to-Pavilion-Plans—overall-dimensions
Check out PART 2 of the project to learn how to build the lean to roof. You can see in this image the overall dimensions for the slanted pavilion. This is medium sized pavilion, ideal for a table and a few chairs. With several adjustments, you can even attach this pavilion to an already existing building. It is really cool, but also relatively affordable and easy to build.
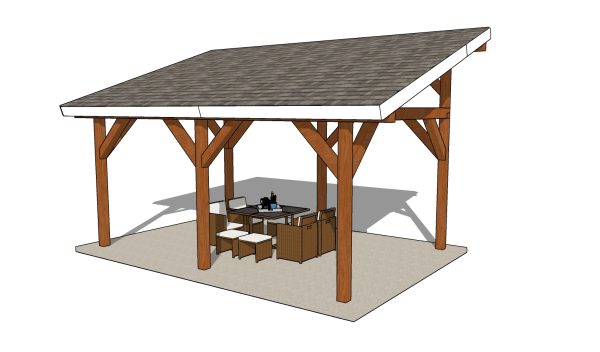
12×18 Lean to Pavilion Plans
For the cost estimate on our fabulous 12×18 lean-to pavilion with 6 posts, you’re looking at around $1,200-$1,600 for all the lumber and framing materials. Add in about $400-$600 for roofing materials and another $150-$300 for hardware like screws and nails. So, overall, this project will run you approximately $1,750-$2,500, making it an amazing investment for your ultimate backyard hangout!
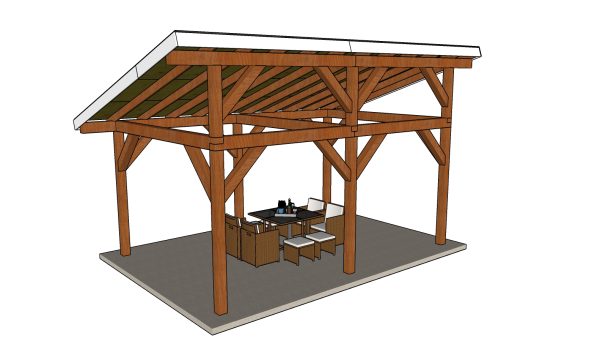
12×18 Lean to Pavilion Plans – back view
Fill the holes with wood putty and let them dry out for a few hours. Smooth the surface with 100-220 grit sandpaper and remove the residues with a damp cloth.
Top Tip: Apply a few coats of paint or stain to the components, to enhance the look of the project. Check out the Shop, as well, for full list of Premium Plans.
This woodworking project was about 12×18 lean to pavilion plans free. If you want to see more outdoor plans, check out the rest of our step by step projects and follow the instructions to obtain a professional result.


