Welcome to today’s DIY project, where I’ll be guiding you through the steps to build your very own outdoor wooden Christmas manger with my free plans. This classic piece is not only a beautiful way to celebrate the holiday season but also a fulfilling woodworking project that you can take pride in. Whether you’re looking to add a personal touch to your holiday decor or create a family heirloom that can be cherished for years to come, these easy-to-follow plans will help you bring the nativity scene to life right in your home. Take a look over the rest of my woodworking plans, if you want to get more building inspiration. Premium Plans for this project available in the Shop.
Based on the materials and steps outlined in this project, you can expect to spend around $50 to $100 on lumber, screws, glue, and finishing supplies, depending on local prices and the quality of materials you choose. In terms of time, this project should take about 6 to 8 hours to complete from start to finish, including cutting, assembling, and finishing touches.
For this project, I recommend using cedar or hardwood for their durability and natural resistance to the elements. Cedar is a fantastic option because it’s lightweight, rot-resistant, and has a beautiful, rustic look. Hardwood, on the other hand, provides superior strength and longevity, making your project a sturdy and stylish addition to your home.
Projects made from these plans
Christmas Nativity Scene Plans – Free Woodworking Plans
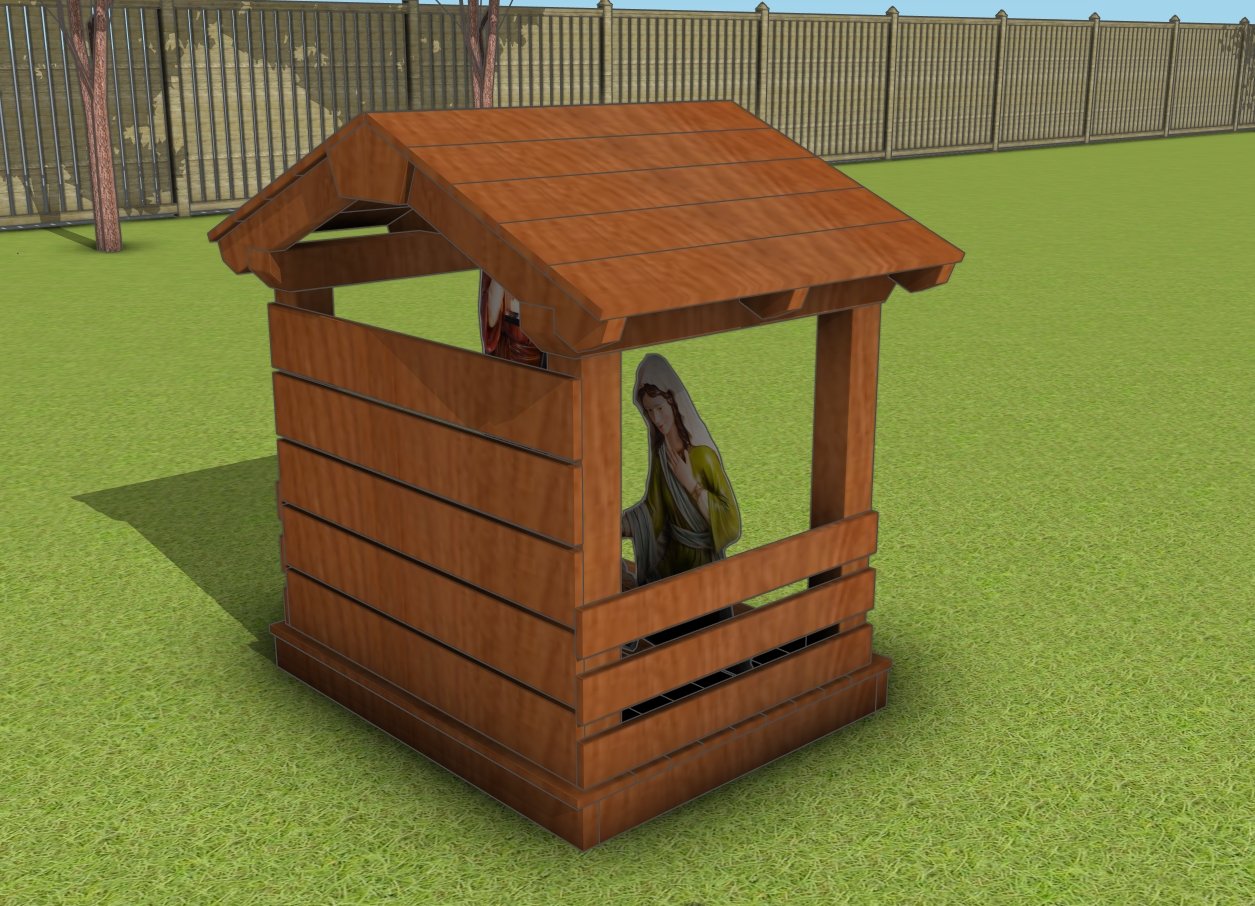
Building-a-Christmas-manger
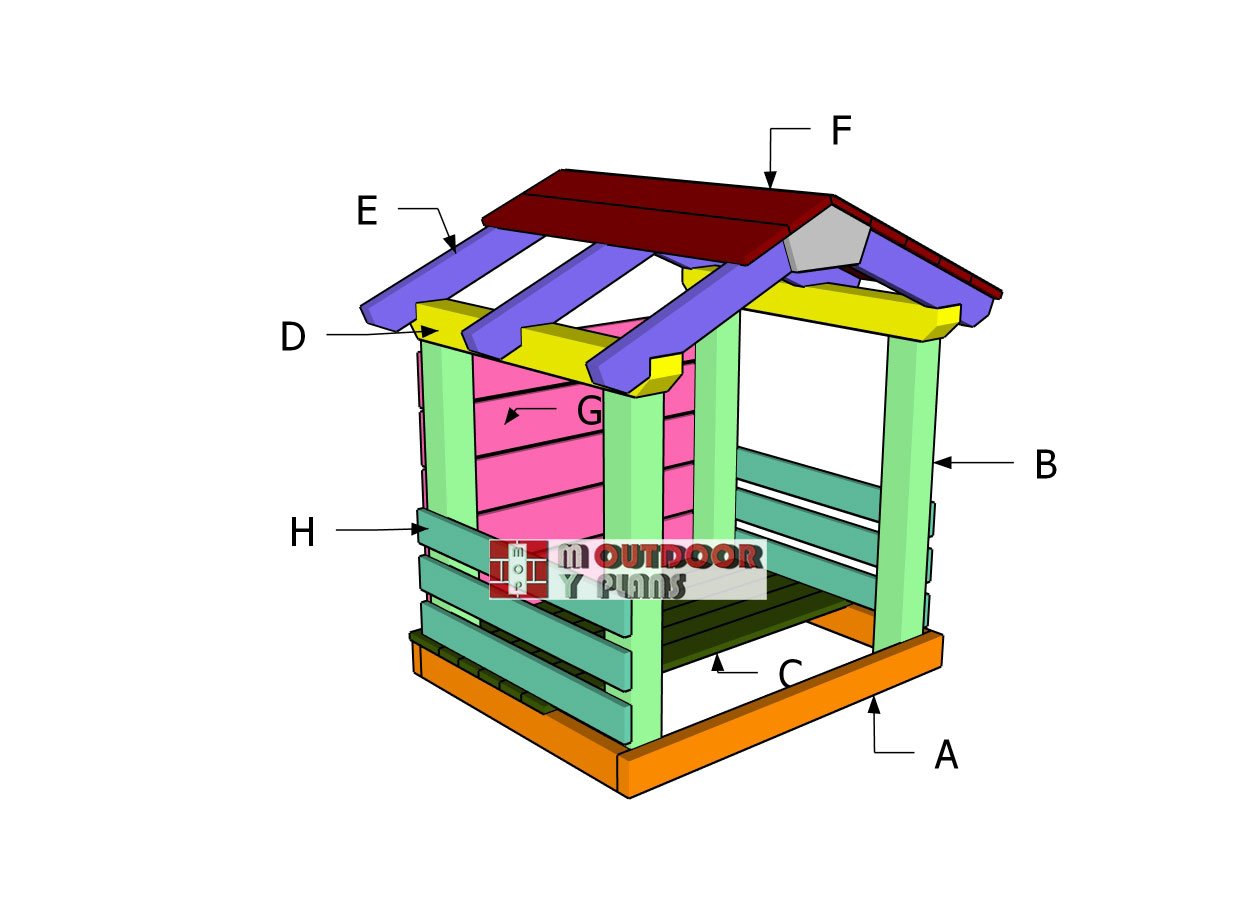
Cut and Shopping Lists
A – Seat frame – 2×4 lumber 24″ long – 2 pieces
A – Seat frame – 2×4 lumber 19 3/4″ long – 3 pieces
B – Supports – 2×4 lumber 12″ long – 2 pieces
B – Supports – 2×4 lumber 12 3/4″ long – 2 pieces
C – Backrest Supports – 2×4 lumber 23 1/2″ long – 2 pieces
D – Seat – 1×4 lumber 24″ long – 6 pieces
E – Backrest – 1×4 lumber 24″ long – 5 pieces
F – Armrests – 1×6 lumber 24 3/4″ long – 2 pieces
G – Cupholder – 1×6 lumber 4 3/4″ long – 4 pieces
G – Cupholder – 1×4 lumber 7 1/4″ long – 2 pieces
- 2×4 lumber 8 ft – 1 piece
- 2×4 lumber 10 ft – 1 piece
- 1×4 lumber 8 ft – 3 pieces
- 1×6 lumber 8 ft – 1 piece
- 2 1/2″ screws – 100 pieces
- 1 5/8″ screws – 100 pieces
- Swing chair kit – 1 set
- Wood glue – 1 can
- Stain – 1 can
Tools
![]() Hammer, Tape measure, Framing square, Level
Hammer, Tape measure, Framing square, Level
![]() Miter saw, Drill machinery, Screwdriver, Sander
Miter saw, Drill machinery, Screwdriver, Sander
Time
![]() One weekend
One weekend
Related
Pin for Later!
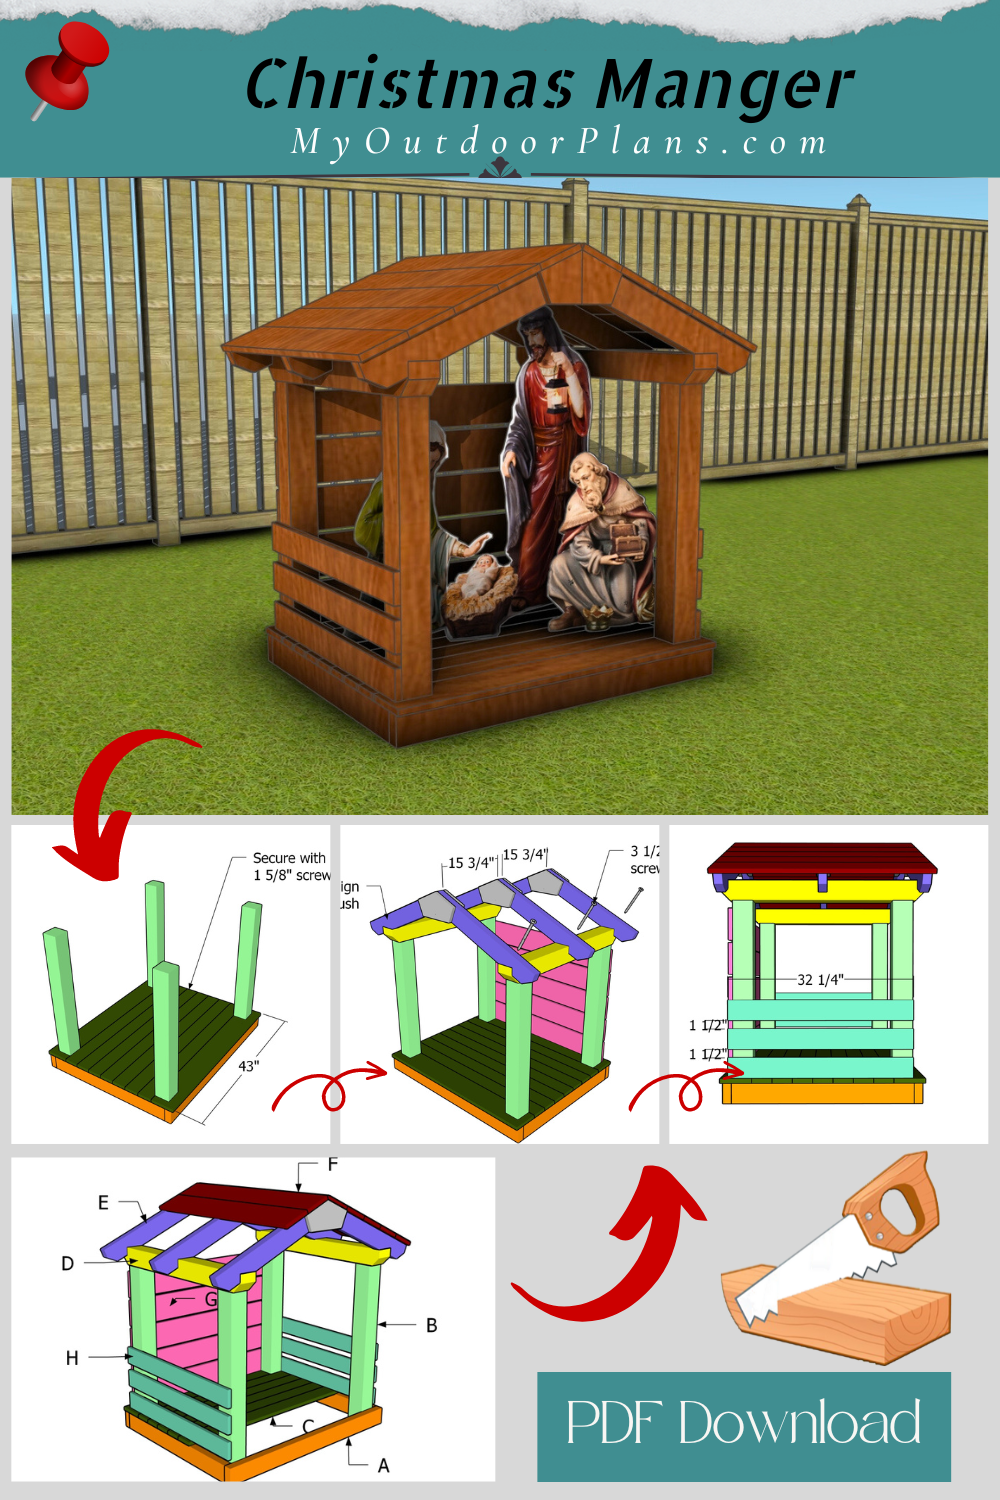
Outdoor Christmas Manger Plans
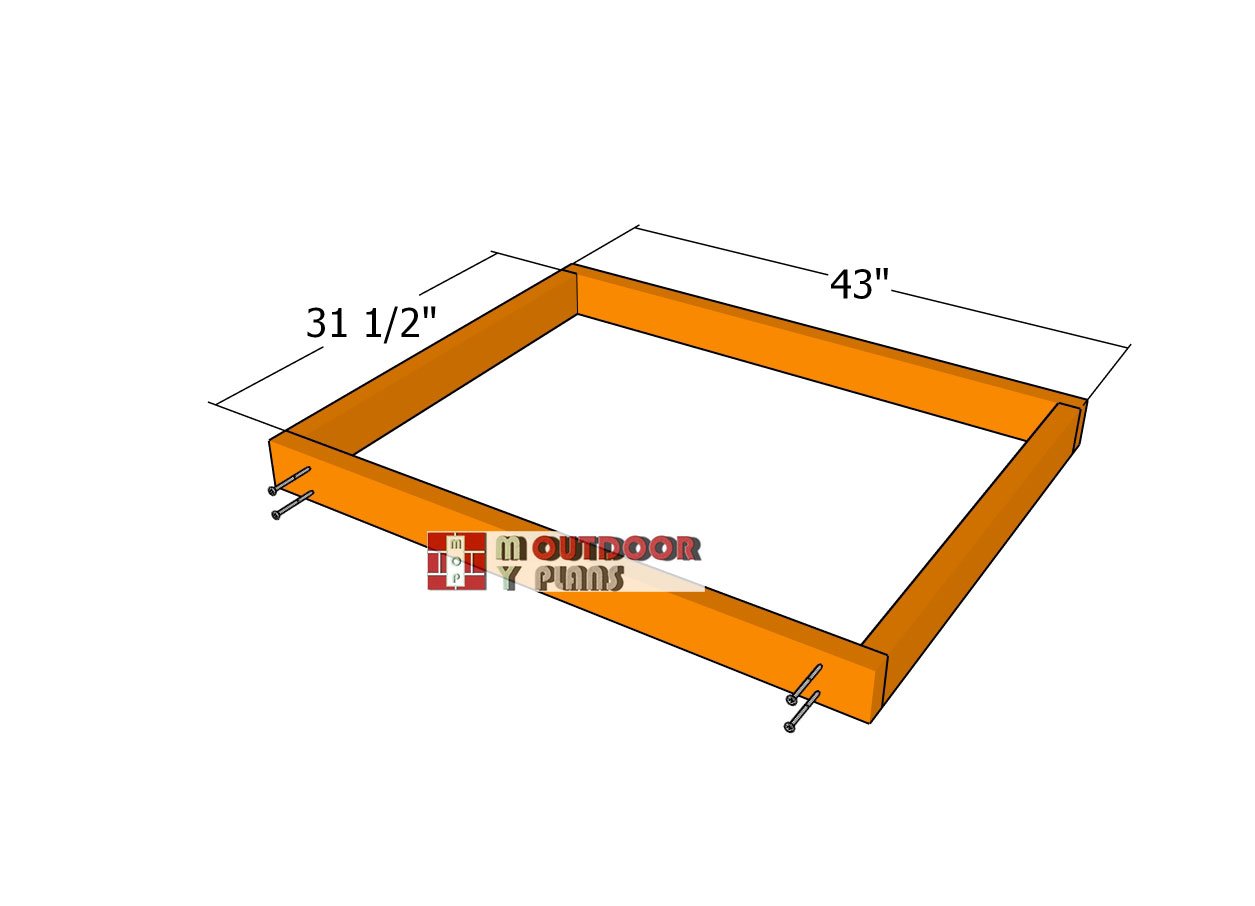
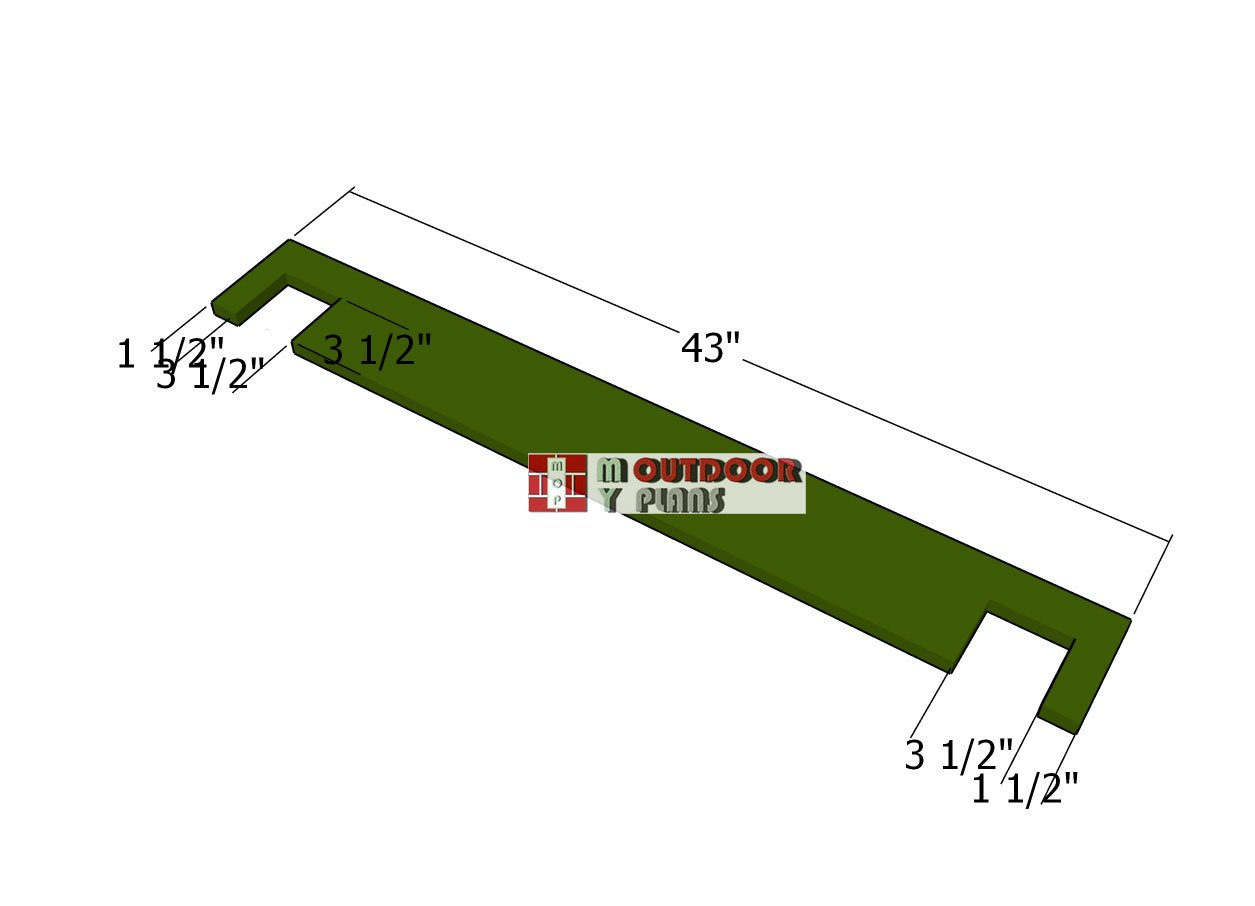
Assembling-the-floor-frame
To kick off this project, start by building the floor frame for your Christmas nativity scene. You’ll need some 2×4 lumber—cut it down to 43″ for the longer pieces and 31 1/2″ for the shorter ones. Lay the pieces out on a flat, level surface, making sure the edges are flush and the corners are perfectly square.
Before securing, drill some pilot holes to avoid splitting the wood, then drive in 3 1/2″ screws, using two screws at each joint. This will ensure your frame is sturdy and well-aligned.
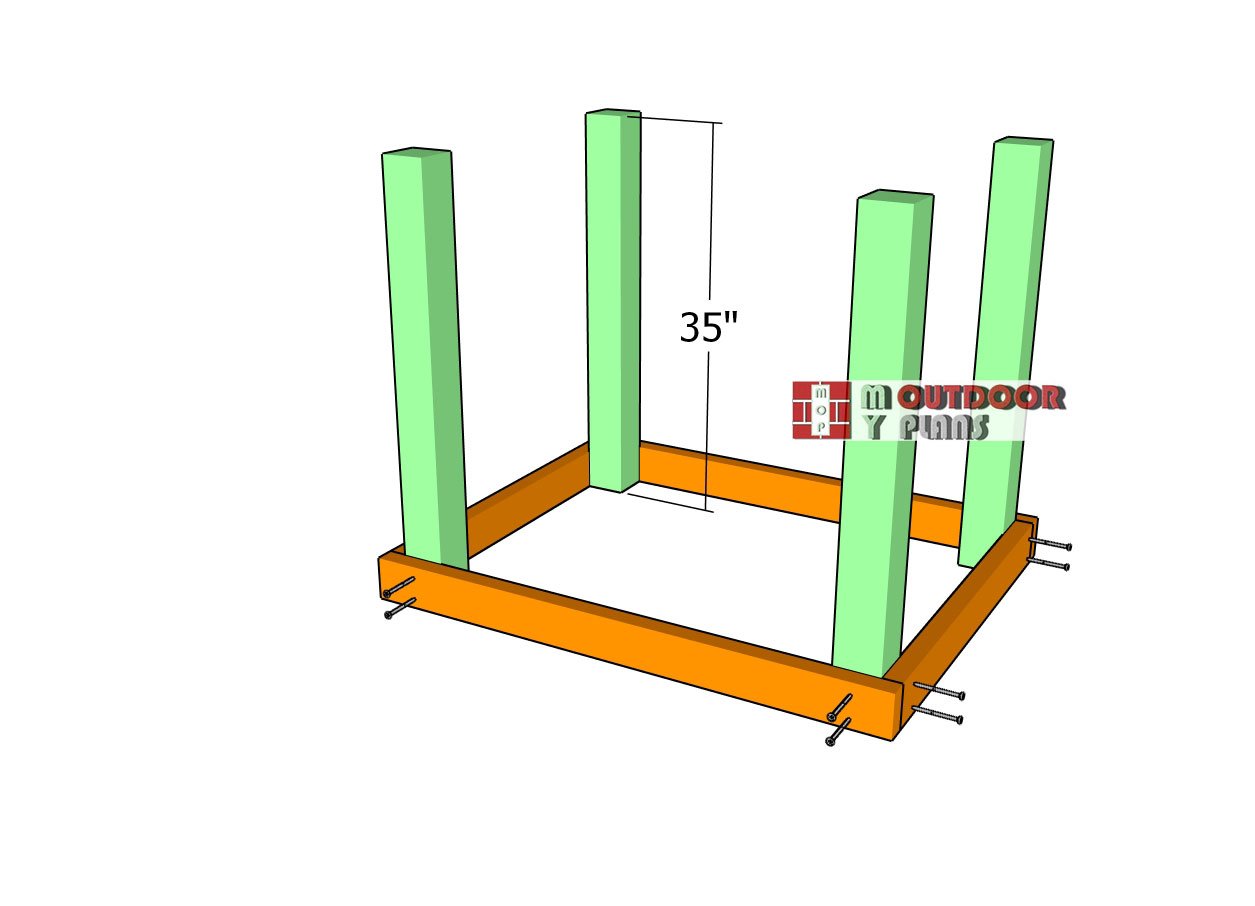
Attaching-the-uprights
Next, it’s time to secure the 4×4 uprights to the floor frame. Start by drilling pilot holes through the frame where the uprights will go—this will make it easier to drive in the screws without splitting the wood. Once the holes are ready, use 3 1/2″ screws to attach the uprights, following the placement shown in the diagram. This will give your structure the sturdy support it needs.
End-boards
To create the end boards for the floor, you’ll need to use 1×6 lumber. Measure and mark where the boards will meet the vertical corner posts, then use a jigsaw to cut out the notches. This will allow the boards to fit perfectly around the posts, ensuring a tight and secure fit for a polished finish.
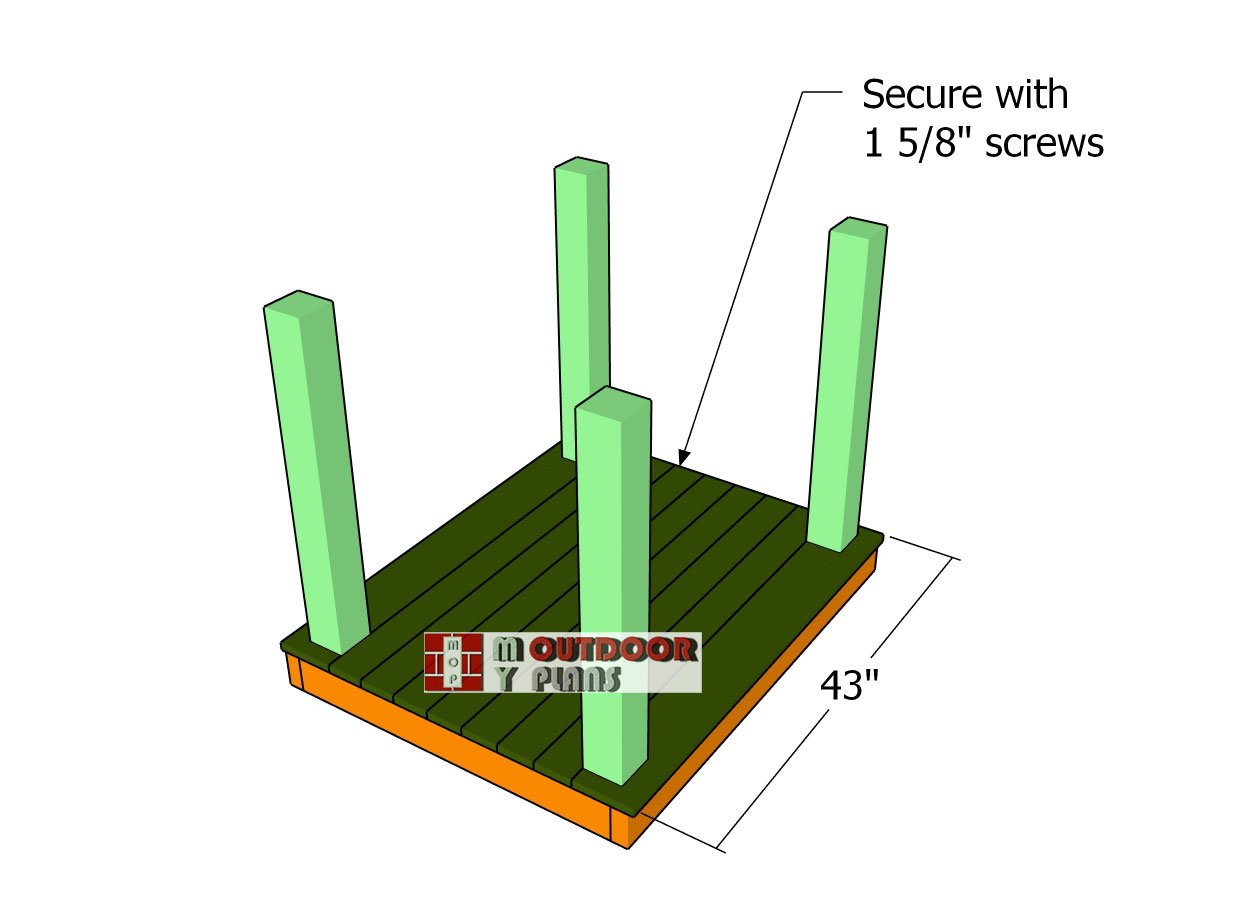
Fitting-the-floor-boards
Once the end boards are in place, go ahead and fit the rest of the floor slats. Align the edges flush with both ends, making sure everything lines up nicely. Drill pilot holes to prevent splitting, then secure the boards using 1 5/8″ screws. For each board, drive in two screws at both ends to keep everything firmly locked into place. This will give your floor a sturdy, even finish.
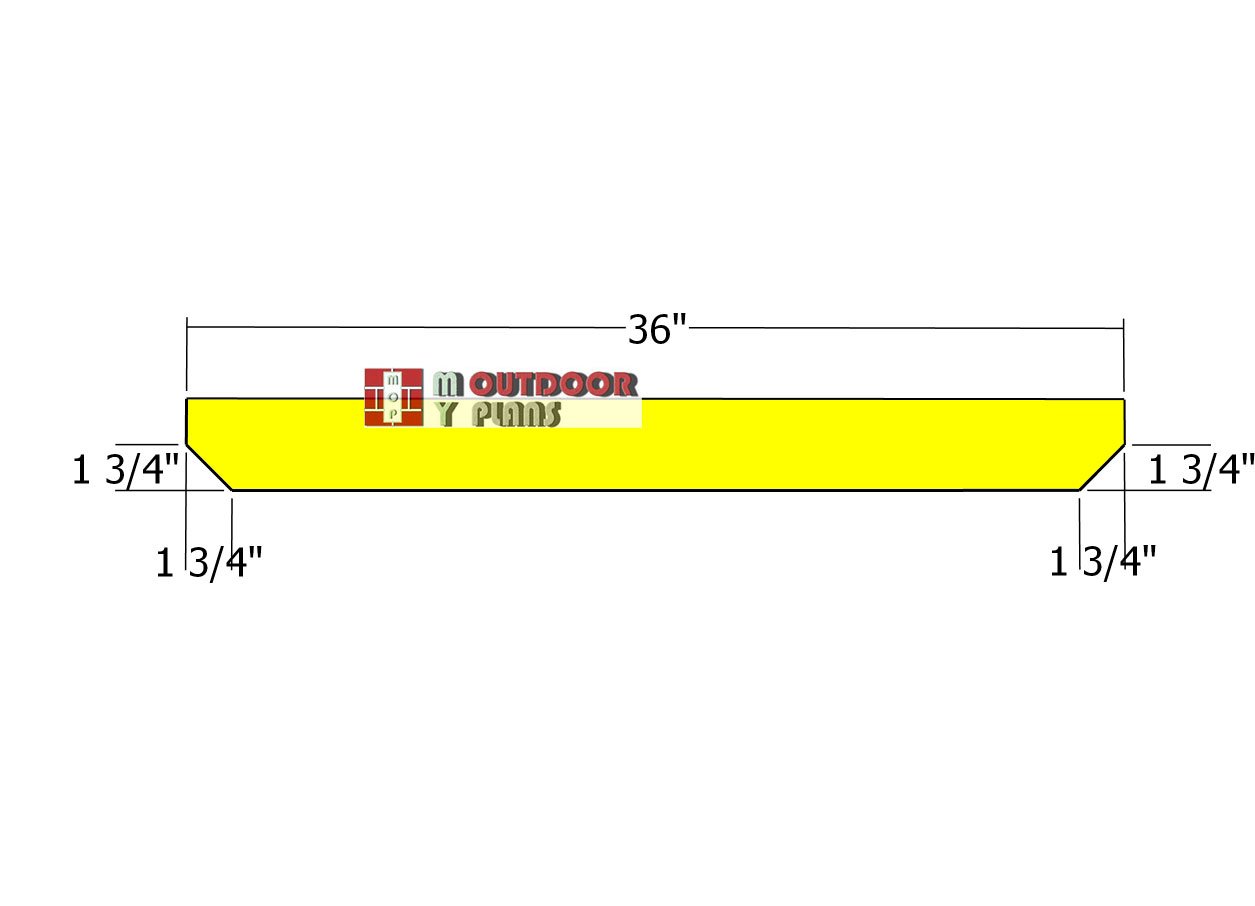
Top-side-plates
We’ll be using 4×4 lumber for the top side plates as well. To add a decorative touch, make 45-degree cuts on both ends of the beams. After cutting, smooth the edges with sandpaper to ensure a clean, polished look. This will not only enhance the appearance but also provide a nice finish to your project.
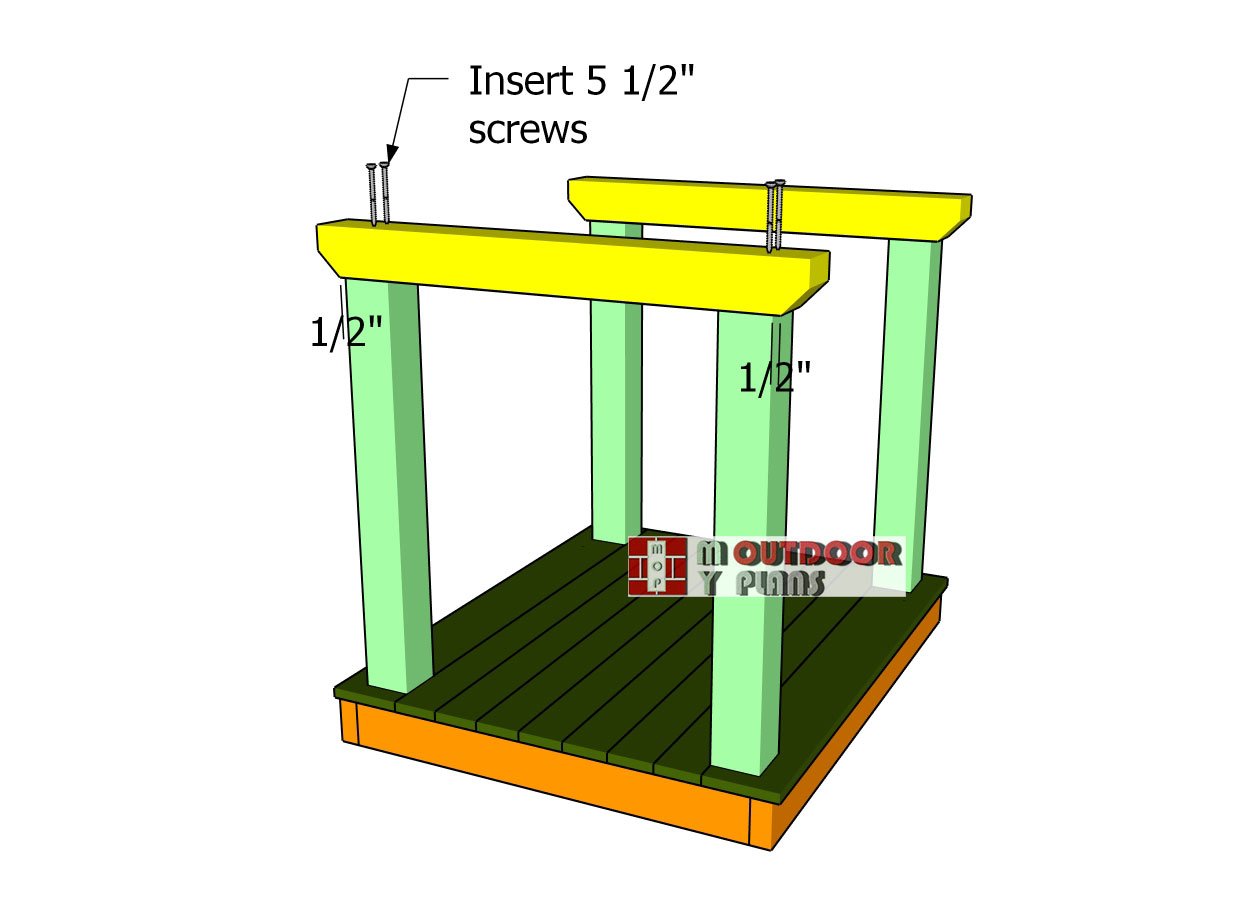
Fitting-the-top-side-plates
Position the plates onto the posts, making sure to center them so you have a 1/2″ overhang on each side. Once everything is aligned, drill pilot holes through the plates to avoid splitting the wood. Then, secure the plates by driving in 5 1/2″ screws, using two screws for each joint. This will ensure the plates are locked tightly into place, providing strong support for the structure.
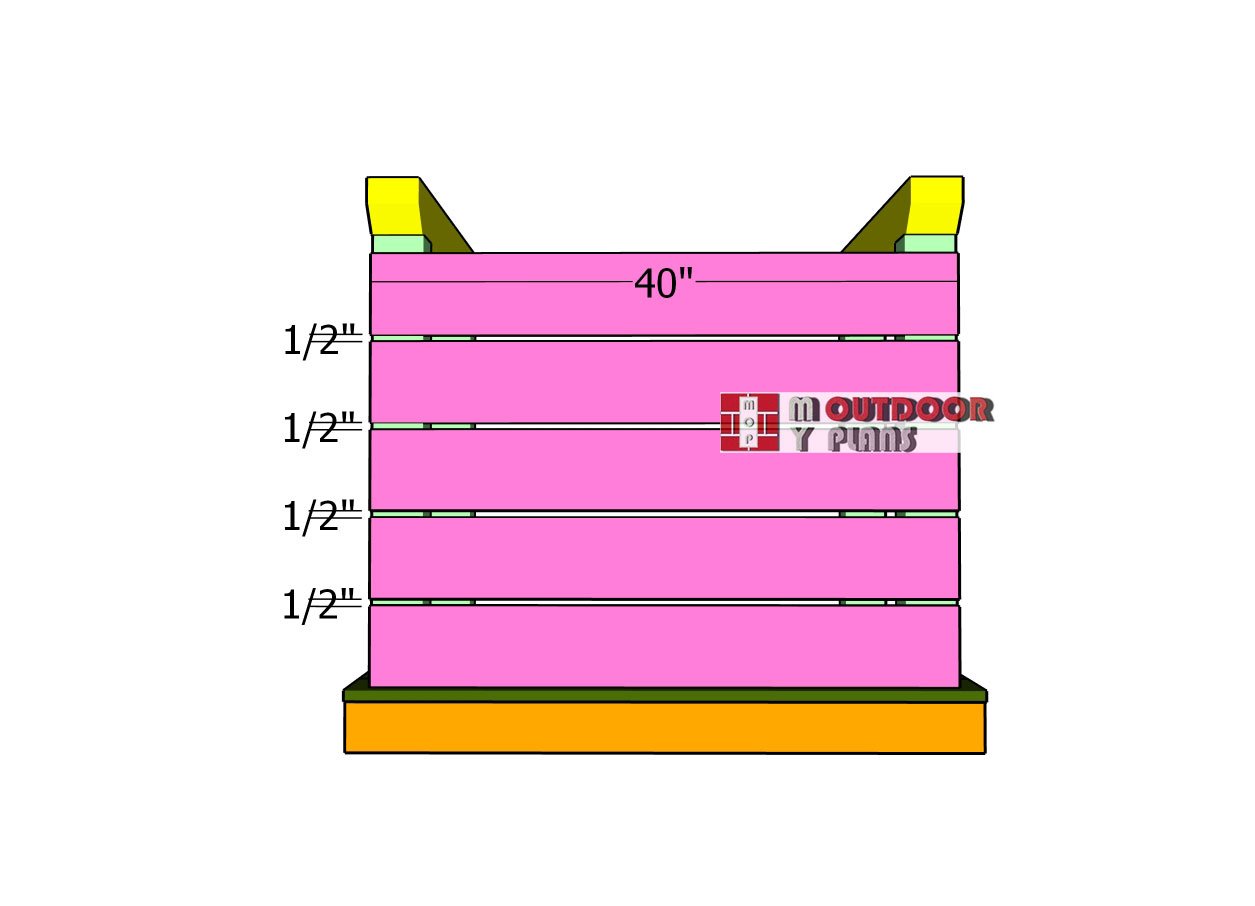
Back-wall-slats
Attach the 1×6 boards to the back of the manger, making sure to space them evenly. To achieve this, use 1/2″ plywood spacers between each board. Align the edges flush with both ends for a neat finish. Drill pilot holes to prevent any splitting, then secure the boards with 1 5/8″ screws. Drive two screws into each end of the boards to lock everything securely in place, ensuring a sturdy and even back panel.
Building the roof – Christmas Decor
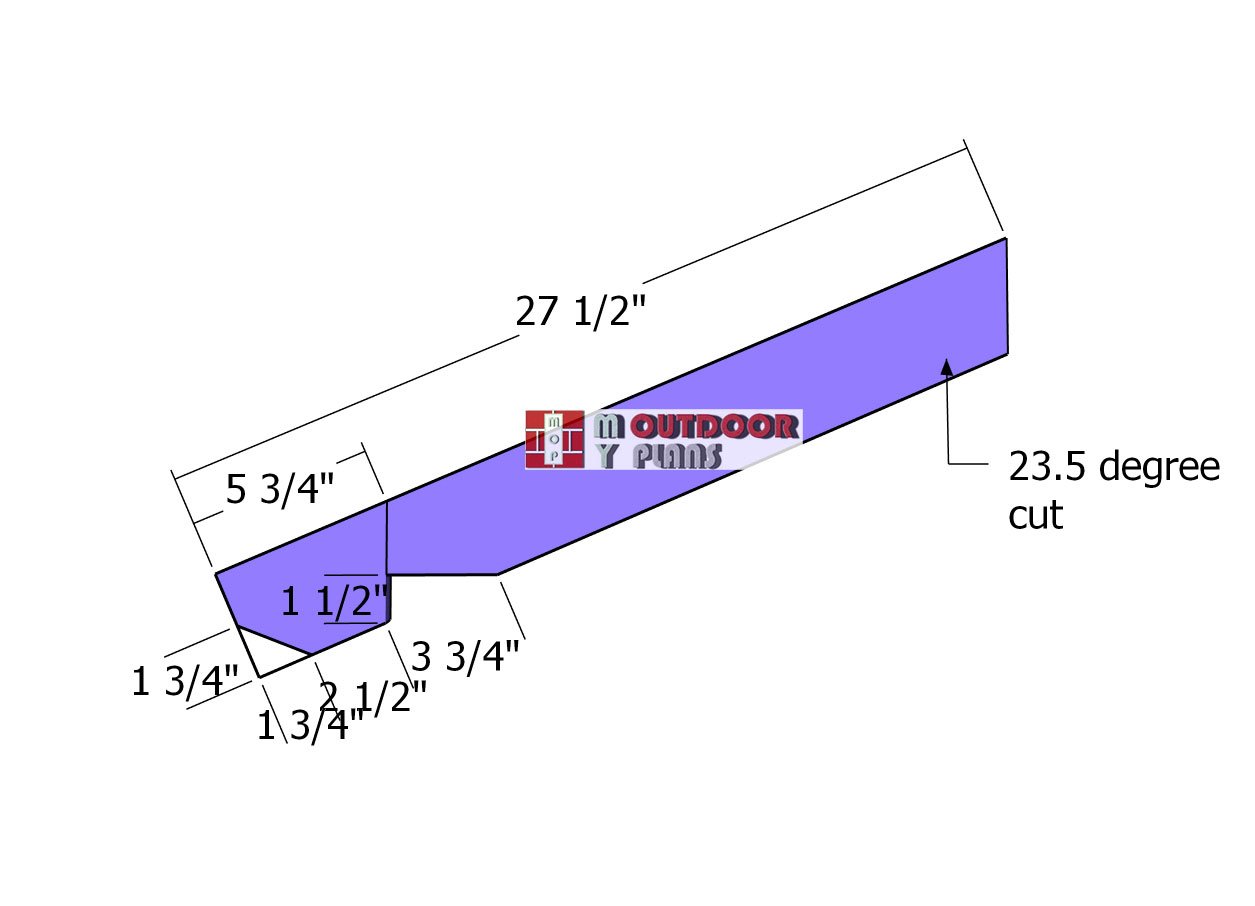
Rafters
For the rafters, we’ll be using 2×4 lumber. Start by making a 23.5-degree angle cut on one end of each rafter. On the opposite end, you’ll need to cut a birdsmouth notch to ensure a snug fit on the frame. Mark the cut lines carefully on the boards, and then use a saw to make your cuts. This will give your rafters the precise fit they need for a solid and well-aligned roof structure.
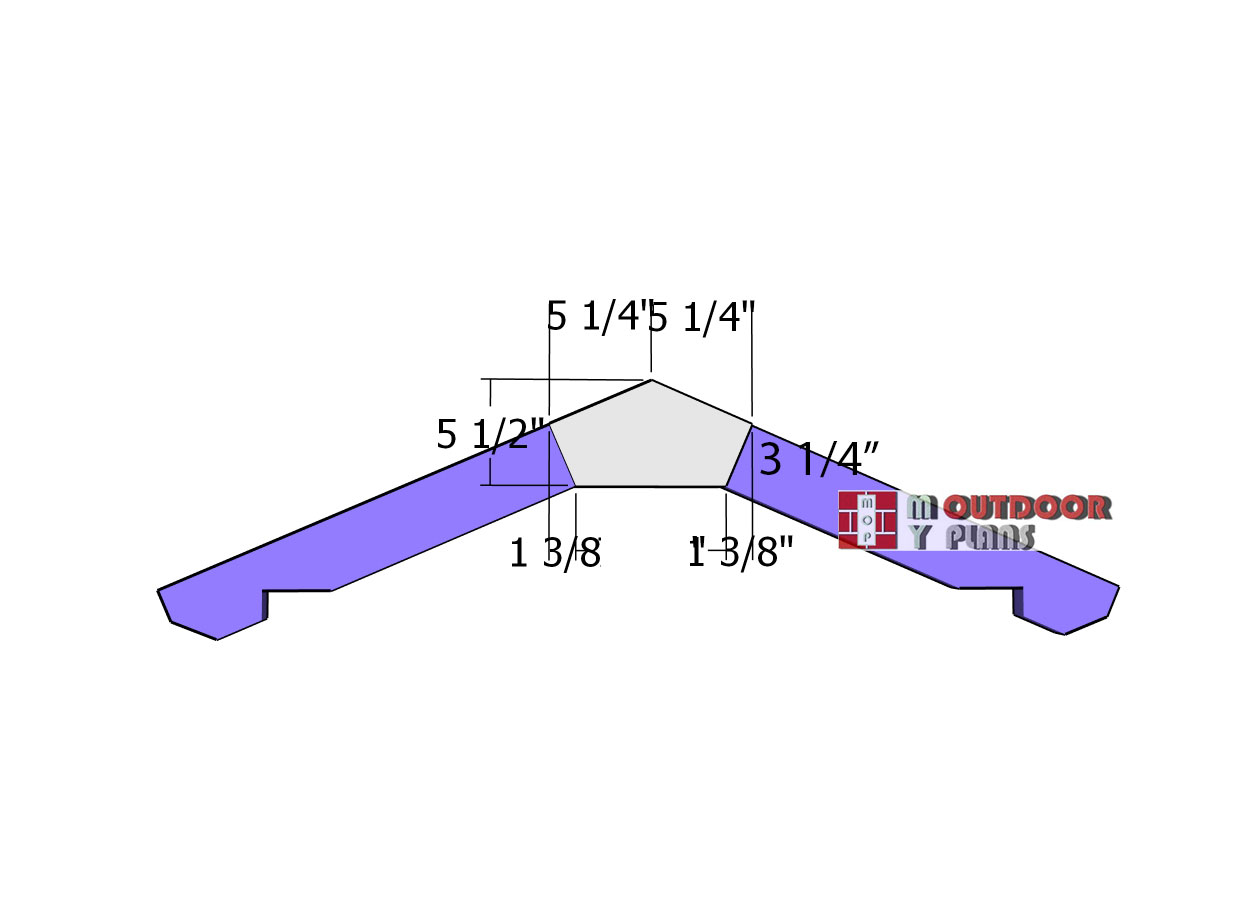
Gussets
For the gussets, use 1/2″ plywood. Begin by marking the cut lines on the plywood sheets, then use a saw to cut out the gusset shapes. Once they’re ready, position the gussets on both sides of the trusses. Secure them by drilling pilot holes and then driving in 1 5/8″ screws, making sure they are locked tightly into place. Attaching the gussets on both sides will provide extra strength and stability to the trusses.
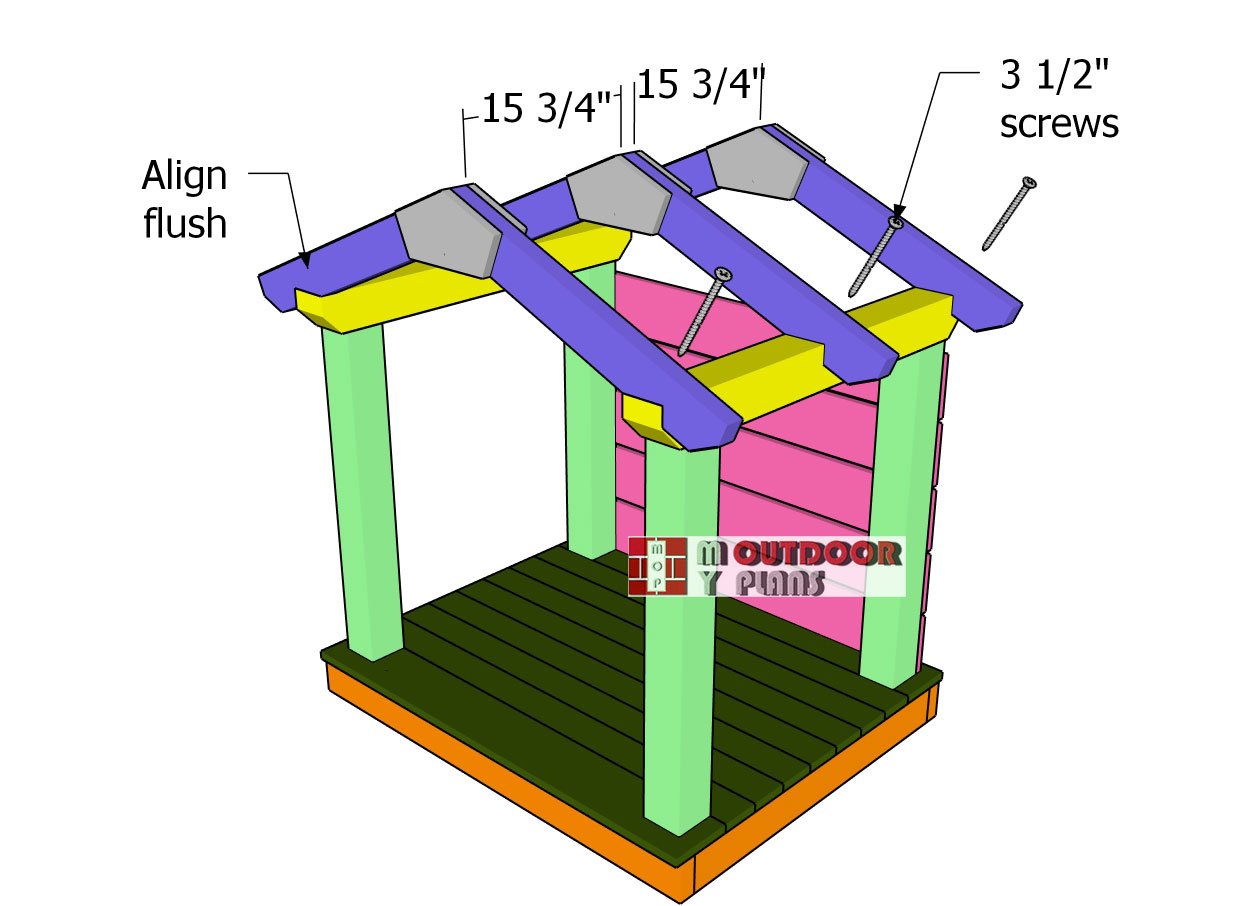
Fitting-the-trusses
Position the trusses on top of the manger, aligning them according to the measurements shown in the diagram. The spacing indicated represents the distance between the rafters, not including the gussets. Once the trusses are in place, secure them by drilling pilot holes and then driving in 3 1/2″ screws. Make sure everything is aligned properly to ensure a solid and secure roof structure.
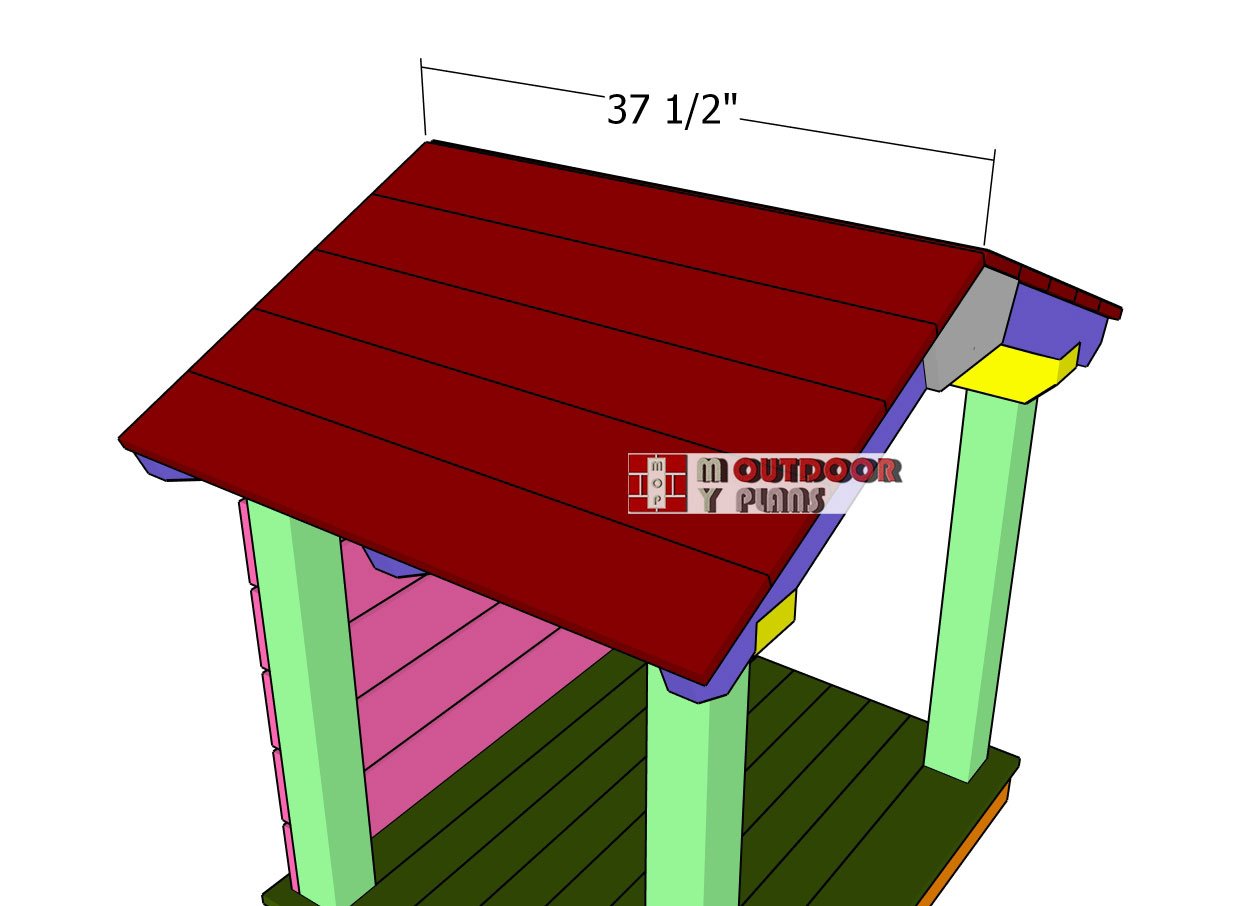
Fitting-the-roof-boards
Attach the 1×6 boards to the top of the roof to create a solid, weather-resistant surface. Before securing the boards, apply outdoor glue between the slats to help waterproof the roof. Align the edges of the boards flush with the gussets for a clean, even look. Once everything is in position, secure the boards by drilling pilot holes and driving in 1 5/8″ screws, using two screws at each end of the boards. This will ensure the roof is both sturdy and well-protected from the elements.
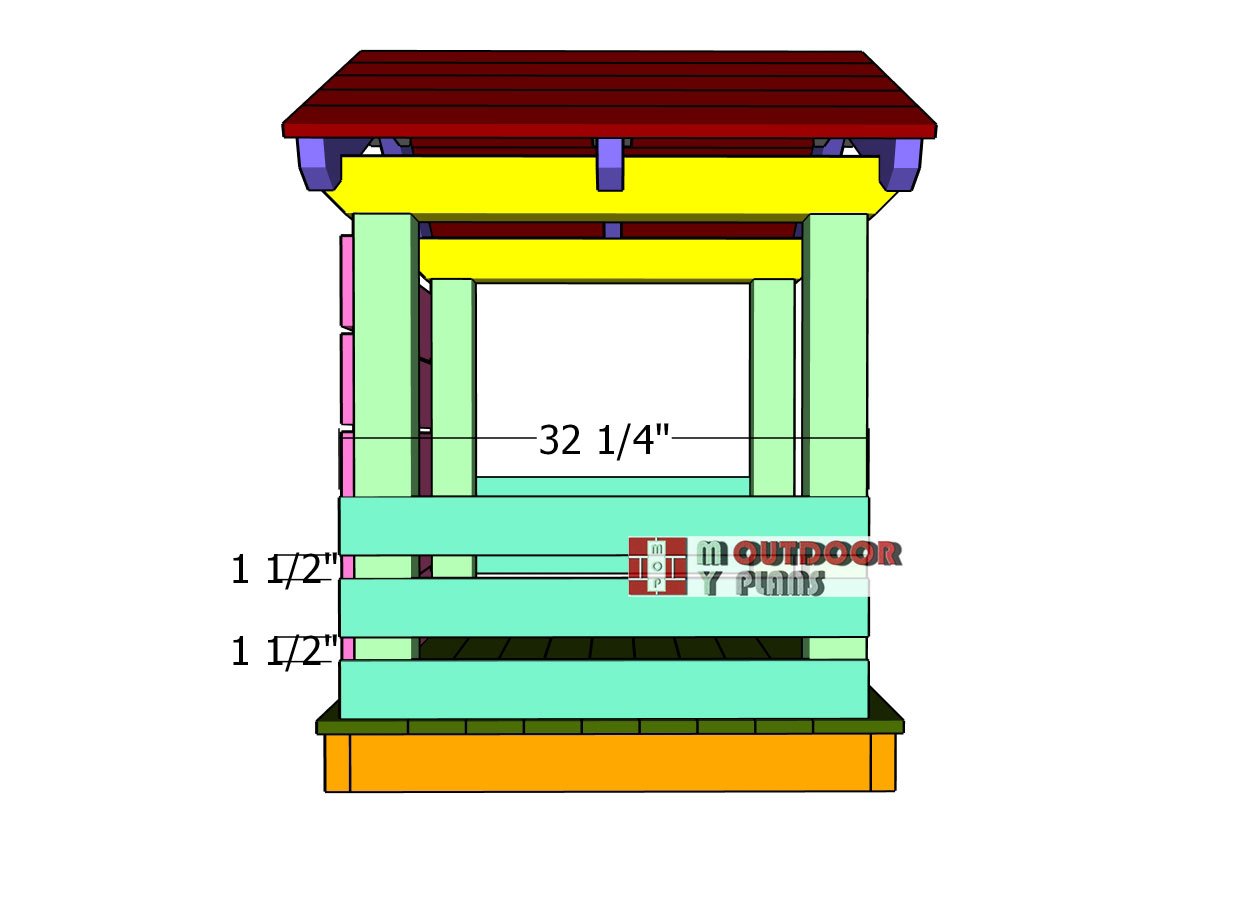
Attaching-the-side-boards
Finally, attach the 1×4 boards to the sides of the nativity scene. To create even gaps, use 1 1/2″ spacers between the boards as you position them. Once everything is aligned, drill pilot holes and secure the boards with 1 5/8″ screws.
Finishing touches
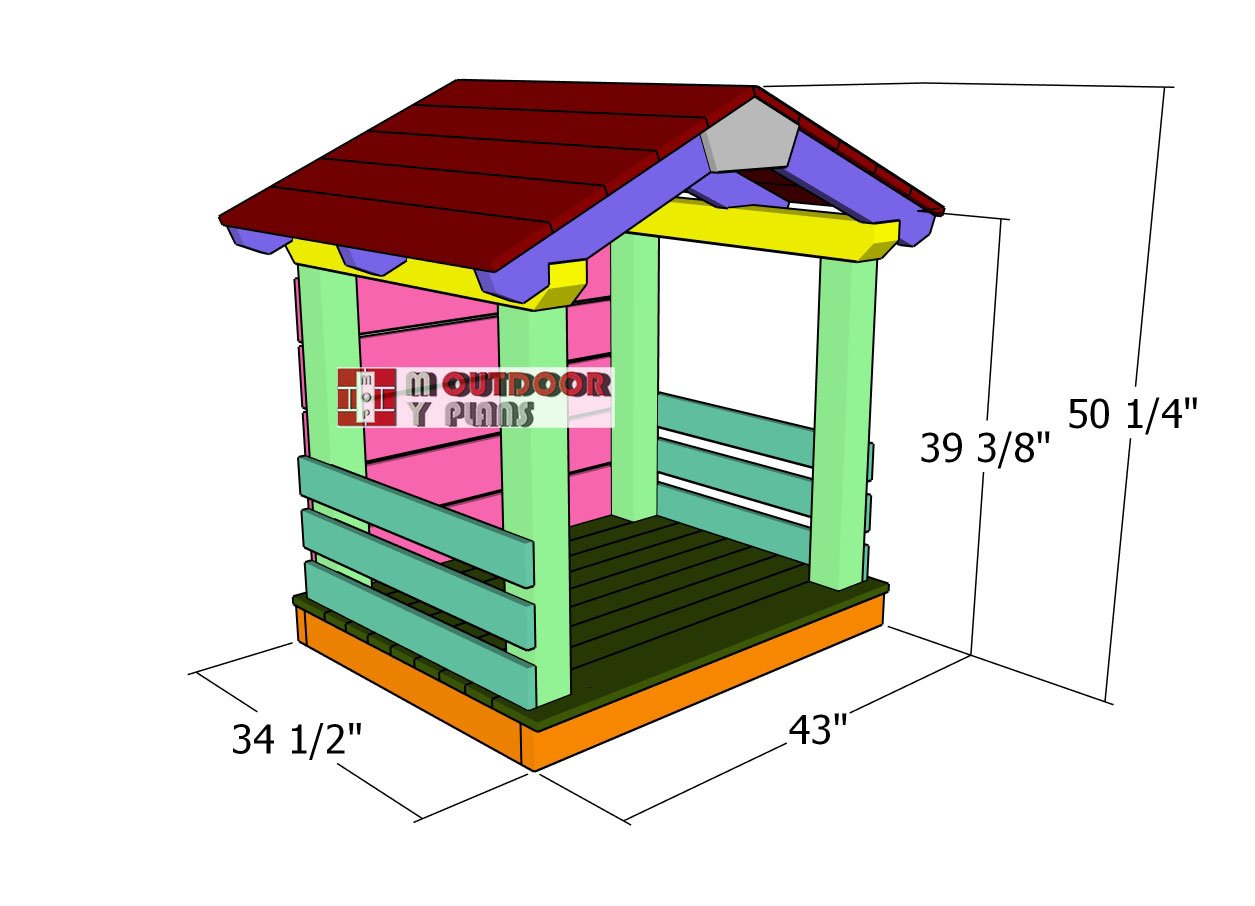
Christmas-manger—dimensions
With the main structure complete, it’s time to add the finishing touches to your wooden Christmas manger. Start by sanding down any rough edges and surfaces to ensure everything is smooth and splinter-free. If you want to enhance the natural beauty of the wood, consider applying a stain or a clear sealant, which will also help protect the manger from the elements if it’s placed outdoors.
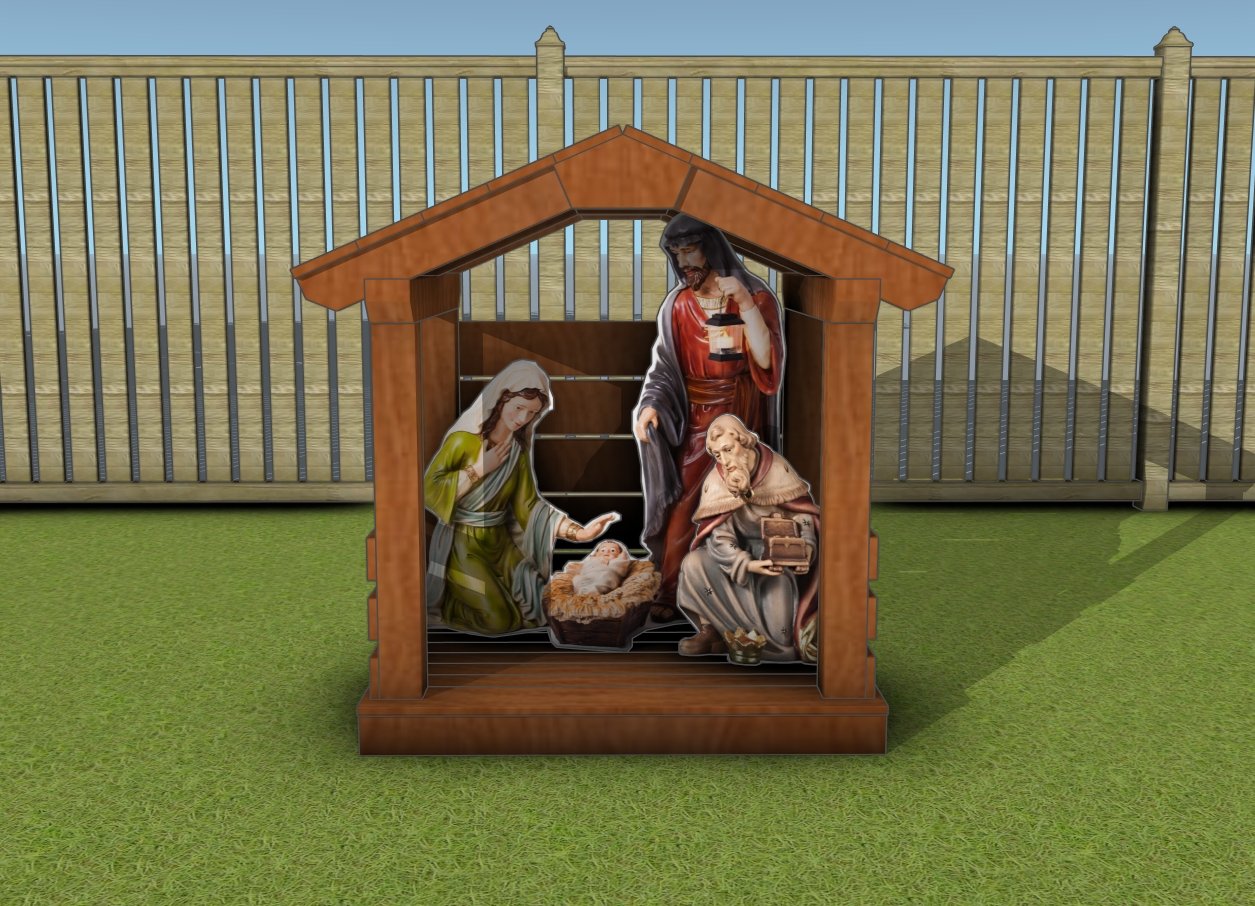
How to build a Christmas manger
For a more traditional look, you could paint the manger in warm, rustic tones or add decorative accents like stars or garland. Finally, check all the screws and joints to make sure everything is secure, and then step back to admire your handcrafted nativity scene, ready to bring a touch of Christmas spirit to your home.

Christmas belen plans
Manger – Back view
As you wrap up this project, I hope these detailed plans have inspired you to create a beautiful and meaningful addition to your Christmas decor. Building your own wooden manger is not only a rewarding experience but also a wonderful way to bring the true spirit of the season into your home. I can’t wait to see how your nativity scene turns out, so be sure to share your finished projects.
If you want to get the Premium plans with all the extras, just press the GET PREMIUM PLANS button bellow. If you want to get the free plans, just read the blog FAQs.

This woodworking project was about outdoor Christmas manger – free plans. If you want to see more outdoor plans, check out the rest of our step by step projects and follow the instructions to obtain a professional result.