Ready to tackle a fun and easy woodworking project? In this guide, I’ll walk you through building a simple, stylish wooden Christmas tree plans that’s perfect for adding a homemade touch to your holiday decor. Whether you’re looking for a space-saving option or just want to try something different this year, this tree is a great choice. It’s budget-friendly and beginner-friendly, so you’ll be able to whip it up in no time with just a few tools and some lumber. Let’s dive in and get this Christmas tree built! Take a look over the rest of my woodworking plans, if you want to get more building inspiration. Premium Plans for this project available in the Shop.
When it comes to time and cost, this wooden Christmas tree project is a win-win. You can expect to spend about $10 to $15 on materials, depending on what you have on hand and the type of wood you choose. As for time, you’re looking at around 1 to 2 hours from start to finish—perfect for a weekend project. It’s quick, affordable, and you’ll end up with a festive piece that you can proudly display year after year. Plus, it’s a fun way to get some woodworking practice in without breaking the bank!
For this project, I recommend using cedar or hardwood for their durability and natural resistance to the elements. Cedar is a fantastic option because it’s lightweight, rot-resistant, and has a beautiful, rustic look. Hardwood, on the other hand, provides superior strength and longevity, making your mailbox stand a sturdy and stylish addition to your home.
Projects made from these plans
How to Make a Wood Christmas Tree
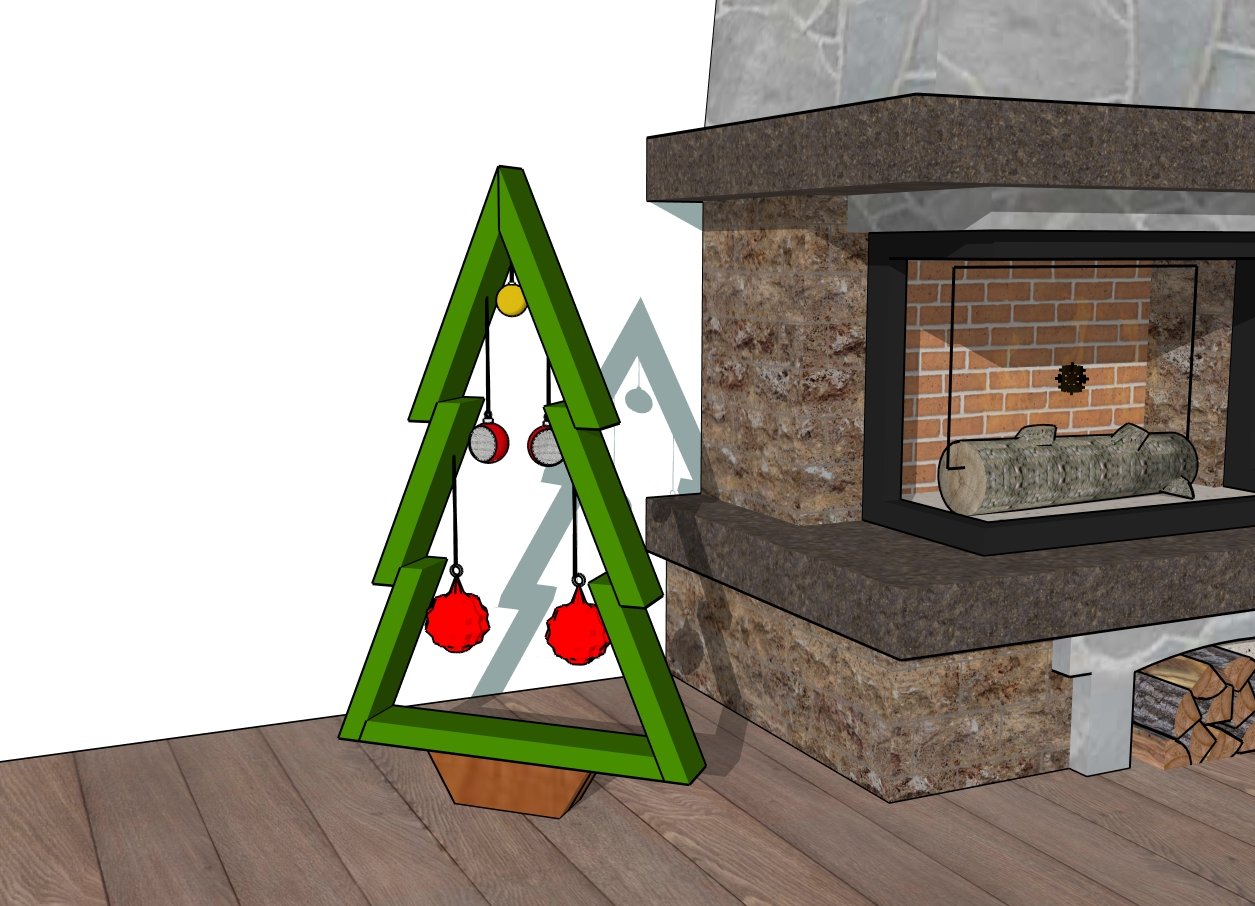
Building-a-Christmas-Tree
Cut and Shopping Lists
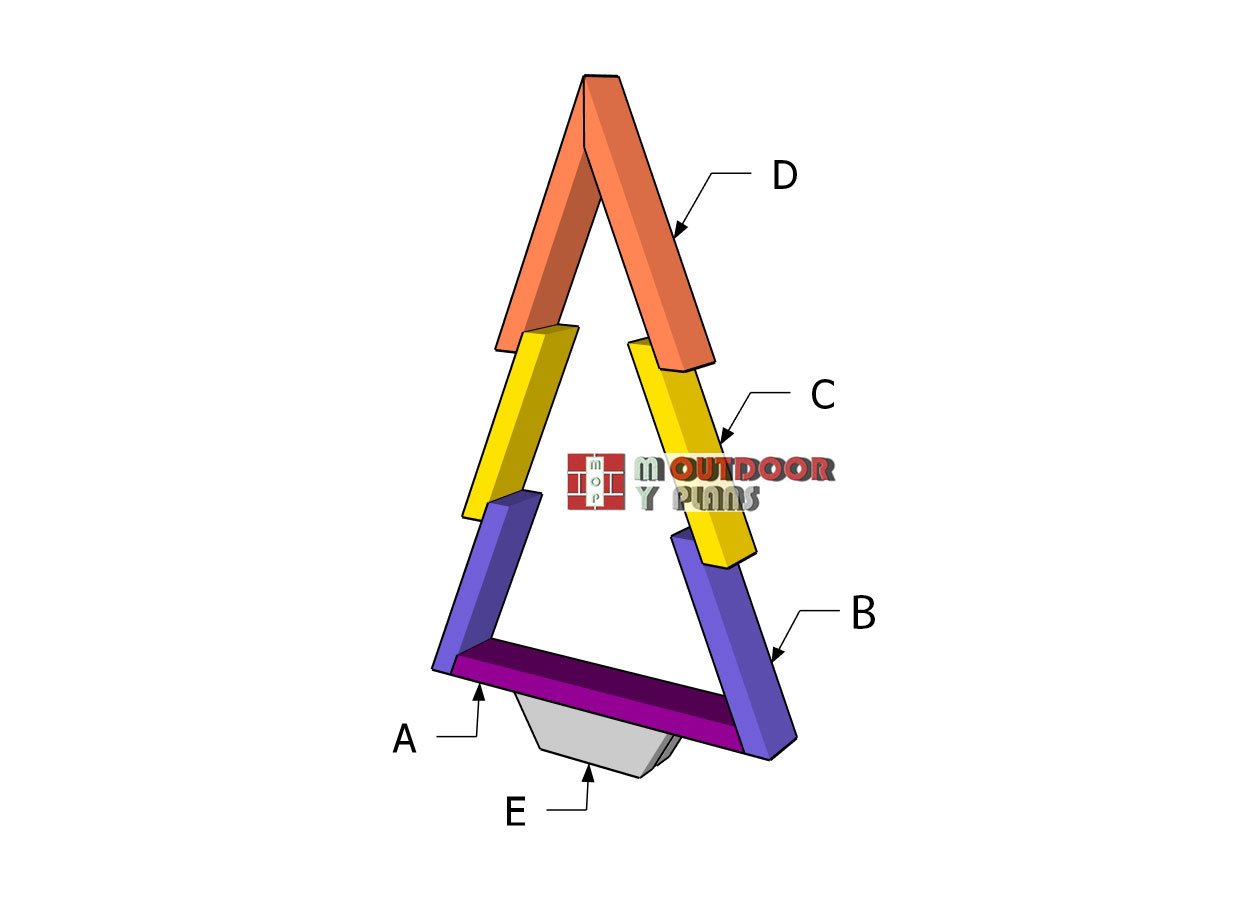
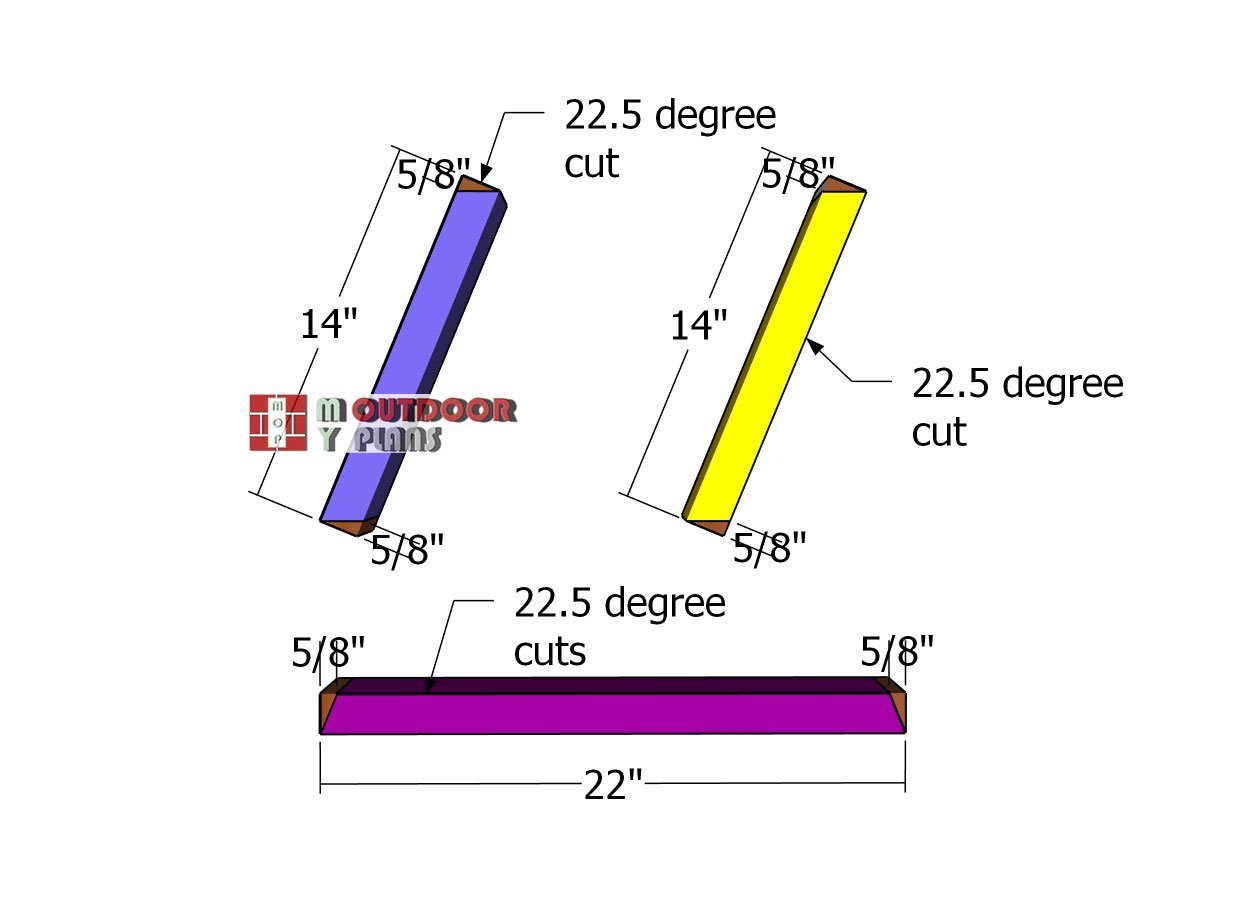
A – Bottom – 2×4 lumber 22″ long – 1 piece
B – Sides – 2×4 lumber 14″ long – 2 pieces
C – Sides – 2×4 lumber 14″ long – 2 pieces
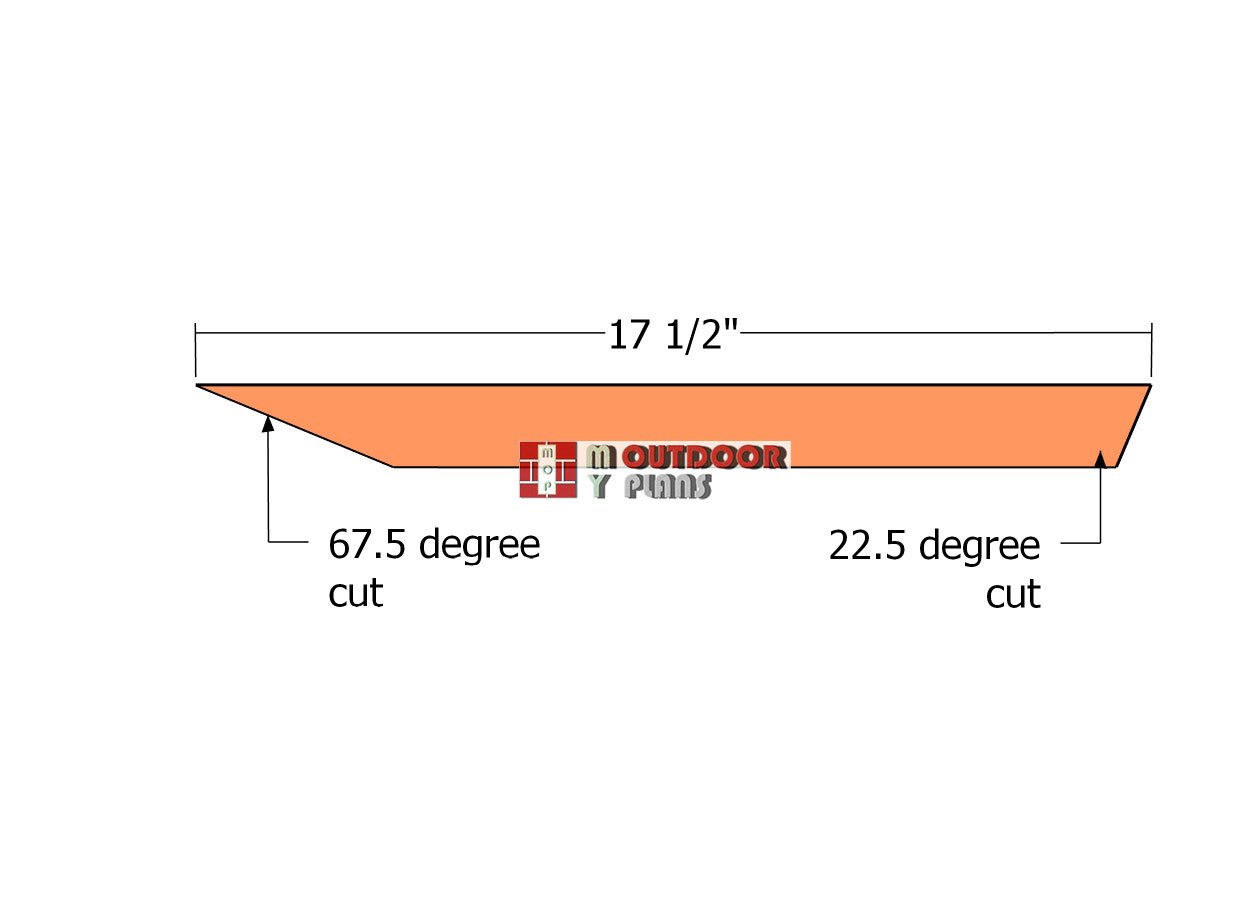
D – Peak – 2×4 lumber 17 1/2″ long – 2 pieces
E -Base – 2×4 lumber 11 1/2″ long – 2 pieces
- 2×4 lumber 8 ft – 2 pieces
- 2 1/2″ screws – 20 pieces
- Wood glue – 1 can
- Stain / Paint – 1 can
Tools
![]() Hammer, Tape measure, Framing square, Level
Hammer, Tape measure, Framing square, Level
![]() Miter saw, Drill machinery, Screwdriver, Sander
Miter saw, Drill machinery, Screwdriver, Sander
![]() Safety Gloves, Safety Glasses
Safety Gloves, Safety Glasses
Time
![]() One weekend
One weekend
Related
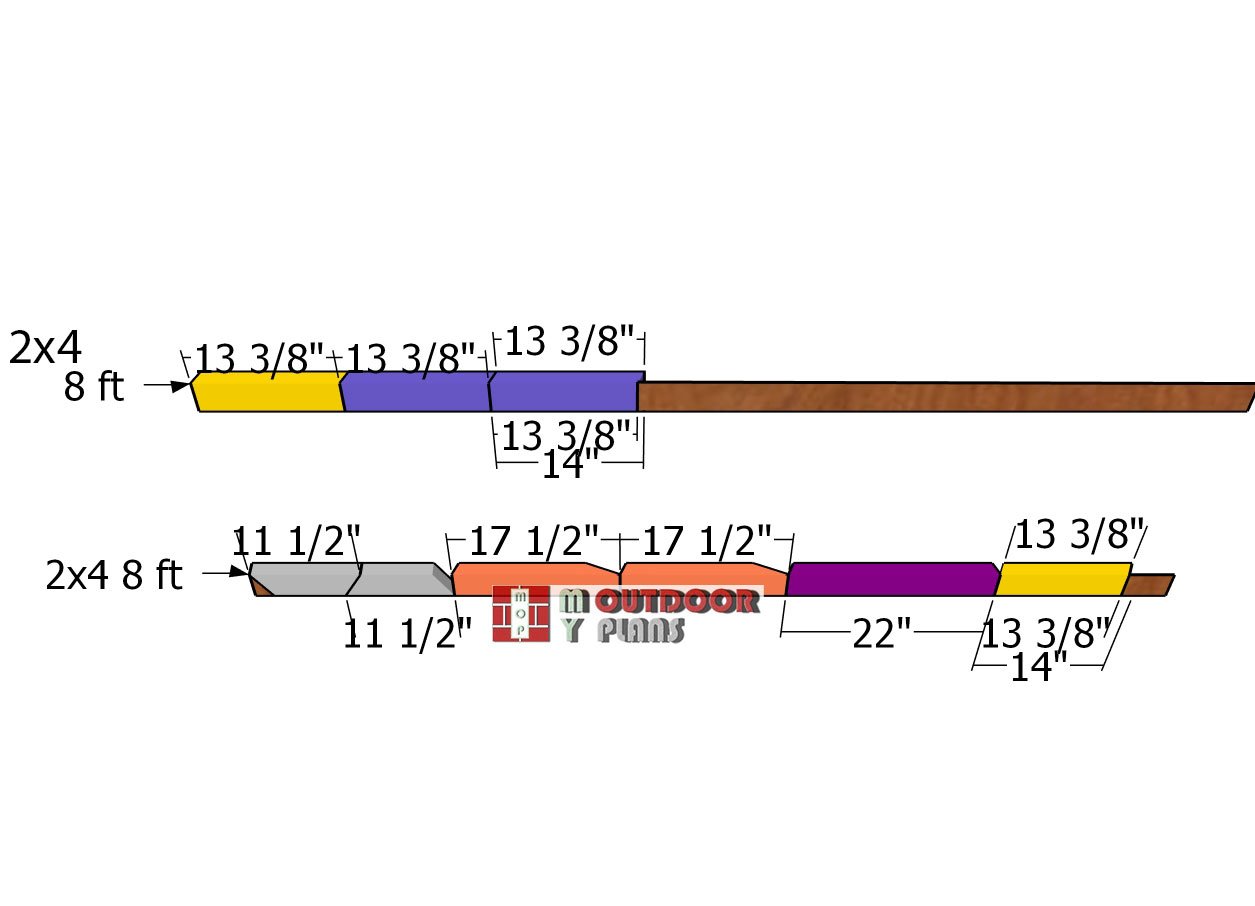
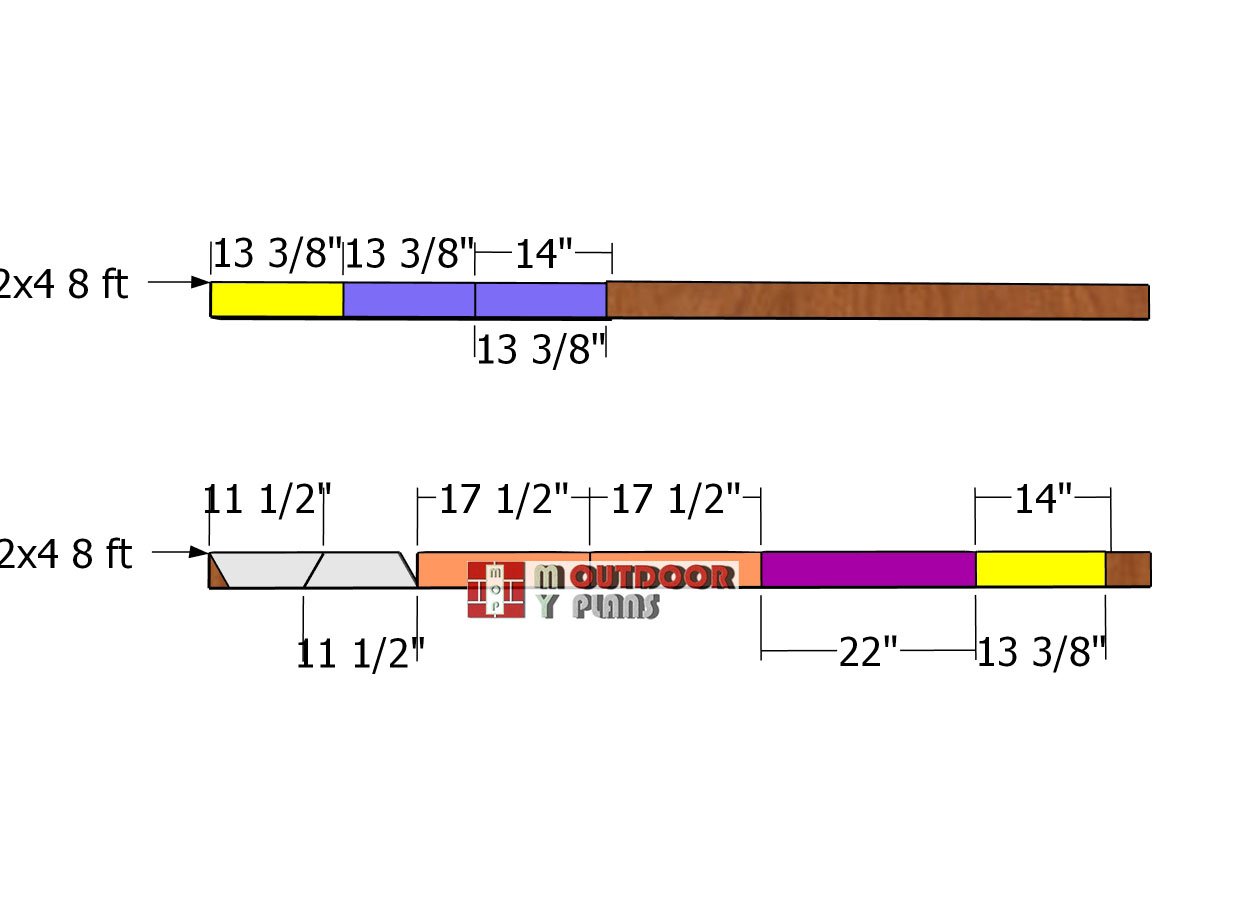
Cut Layout Diagram
Pin for Later!
Wood Christmas Tree Plans
Wooden Christmas Tree – Free Plans
Cutting-the-components
For this project, we’ll be using 2×4 lumber. You’ll need to make the angle cuts on the wood pieces according to the diagram. To get those cuts done quickly and accurately, I recommend grabbing your miter saw—it’ll make the job a breeze.

Assembling-the-base
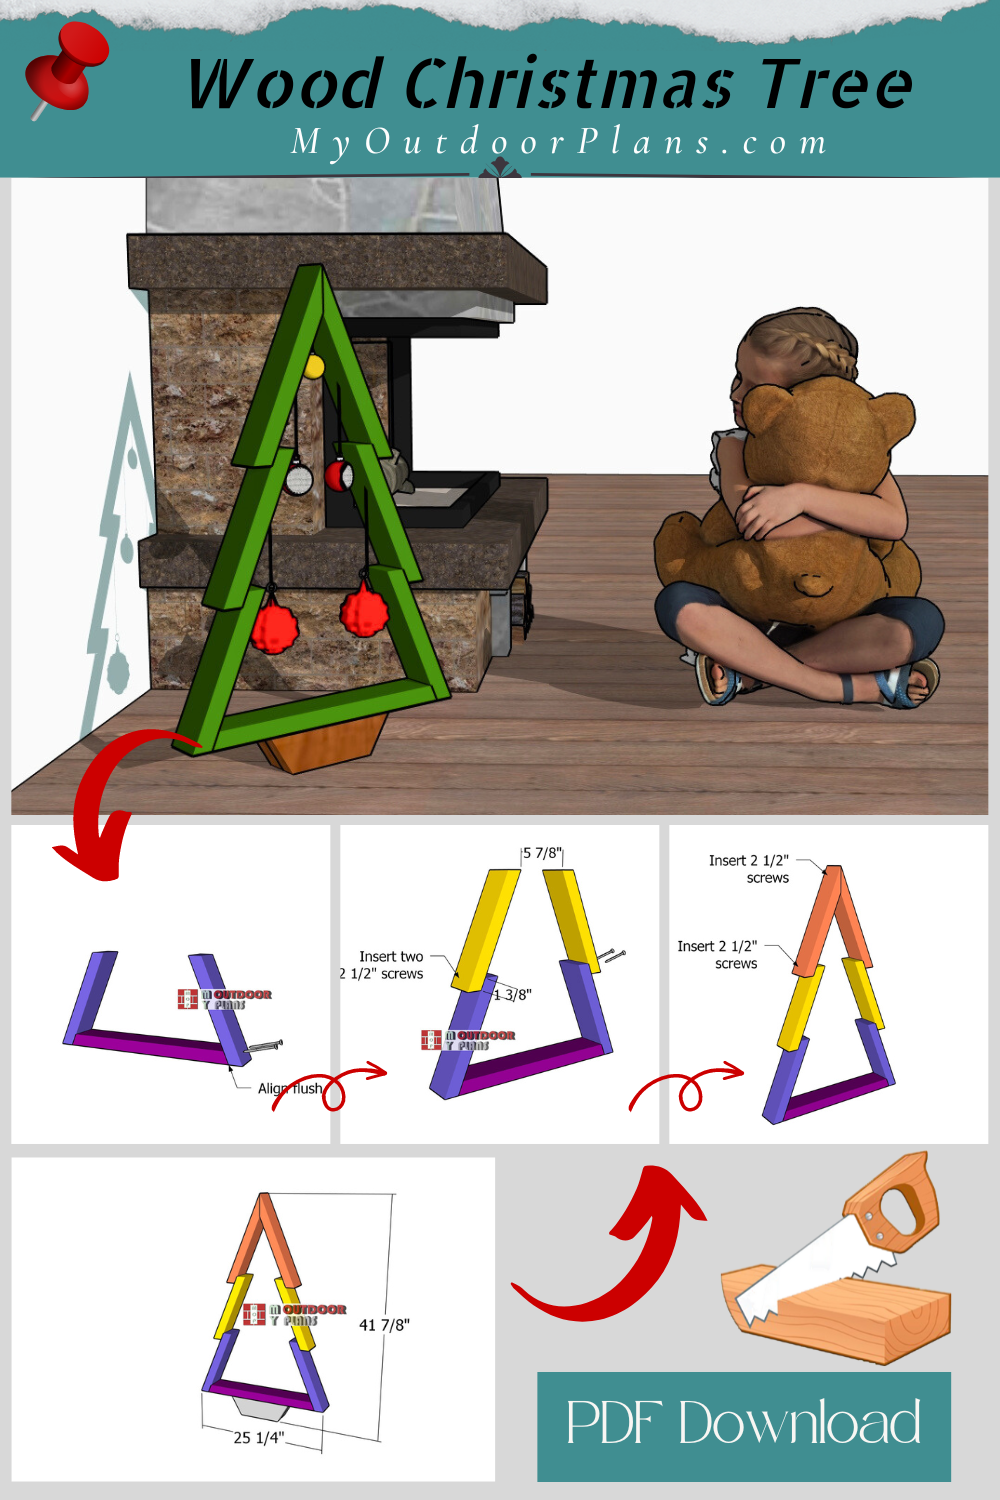
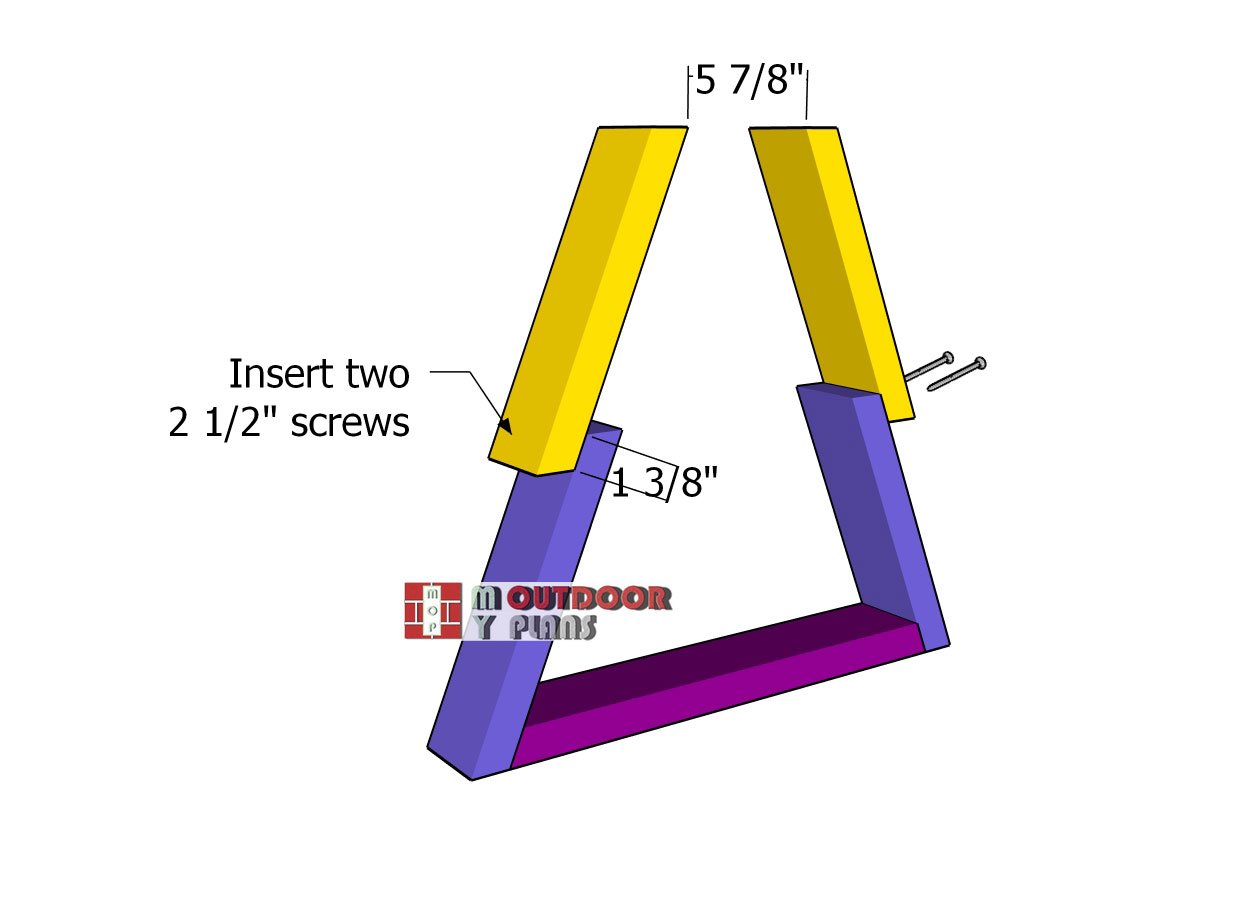
Begin by assembling the base for your wooden tree. Lay out all the pieces on a flat, level surface, and then secure the side boards using 2 1/2″ screws, just like in the diagram. Make sure the edges are aligned flush, and don’t forget to drill pilot holes first to avoid splitting the wood.
Fitting-the-middle-piece
Next up, attach the middle slats to the Christmas tree. Overlap each board by 1 3/8″, following the diagram, and secure them in place with 2 1/2″ screws. Make sure you’re working on a level surface to ensure the boards are properly aligned for a smooth finish.
Top-boards
For the top boards, you’ll need to make angle cuts at both the peak and the base. Using a miter saw is your best bet for getting those cuts precise and clean. This will ensure the top of your tree comes together nicely.
Fitting-the-top
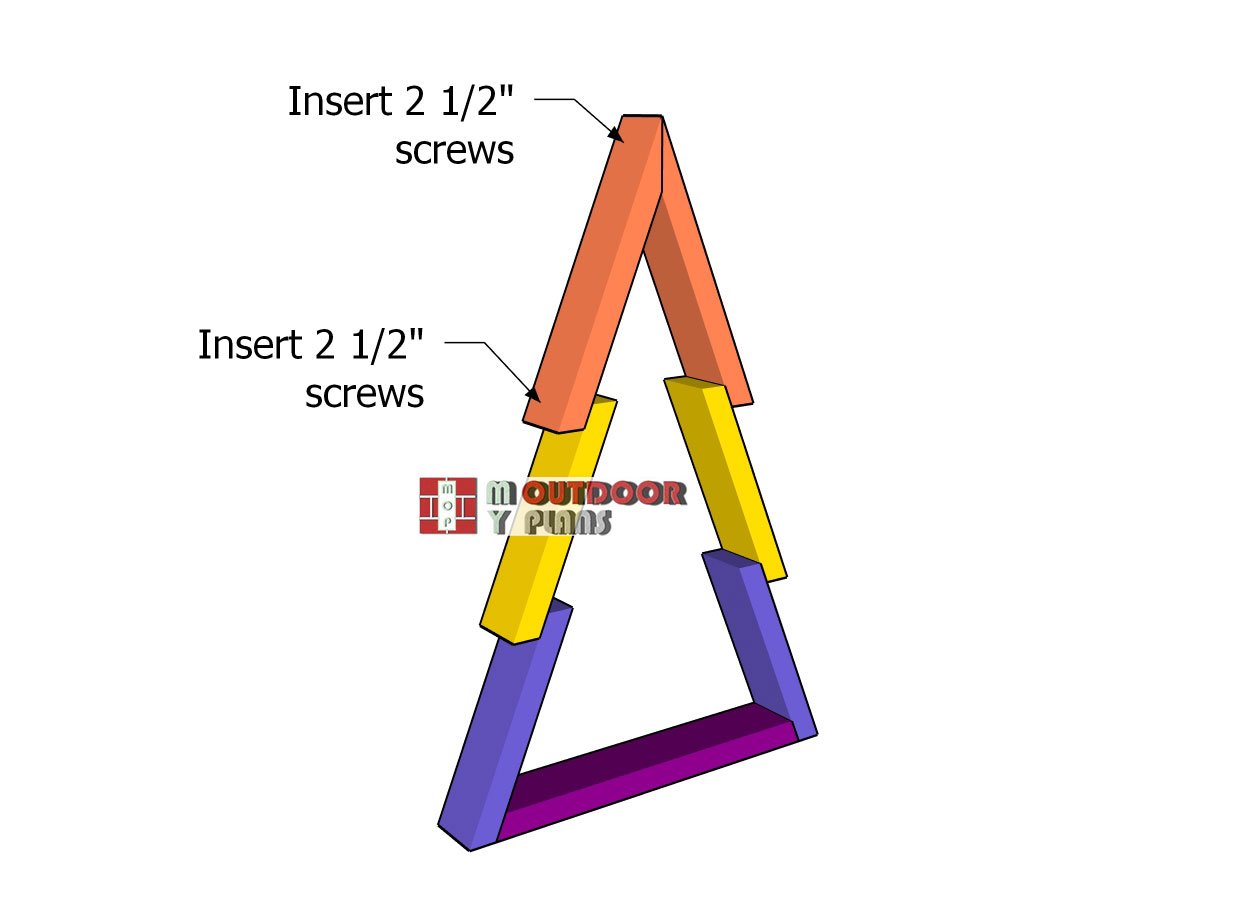
Attach the top slats to the peak of your Christmas decoration, overlapping the boards by 1 3/8″ just like before. Secure them in place with 2 1/2″ screws, making sure to also lock the boards to the peak by driving screws in at an angle. This will ensure everything stays sturdy and aligned.
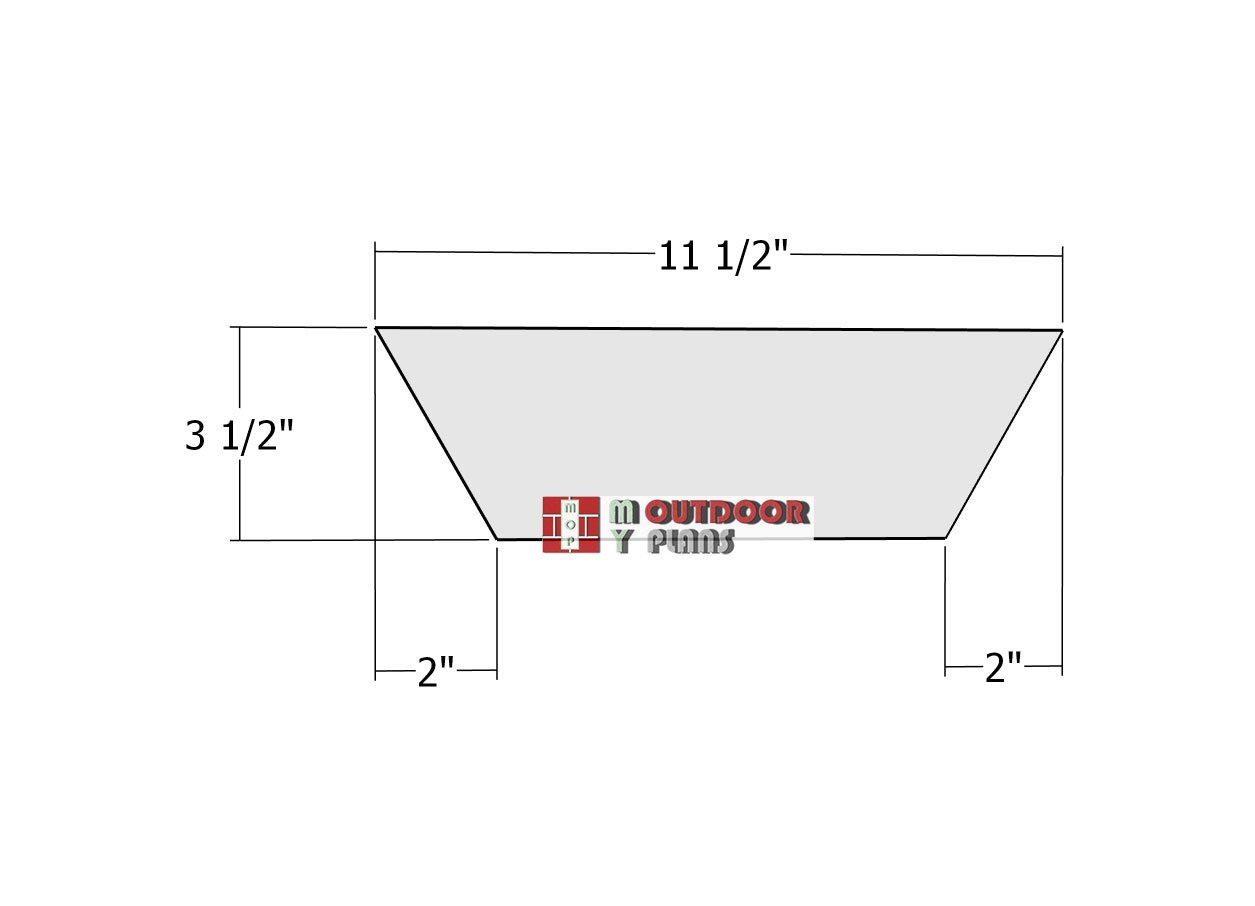
Base
For the base, we’ll be using two 2×4 pieces cut according to the diagram. Start by marking the cut lines on your lumber, then grab a circular saw to get the job done. This will give you the precise cuts needed to create a sturdy base for your project.
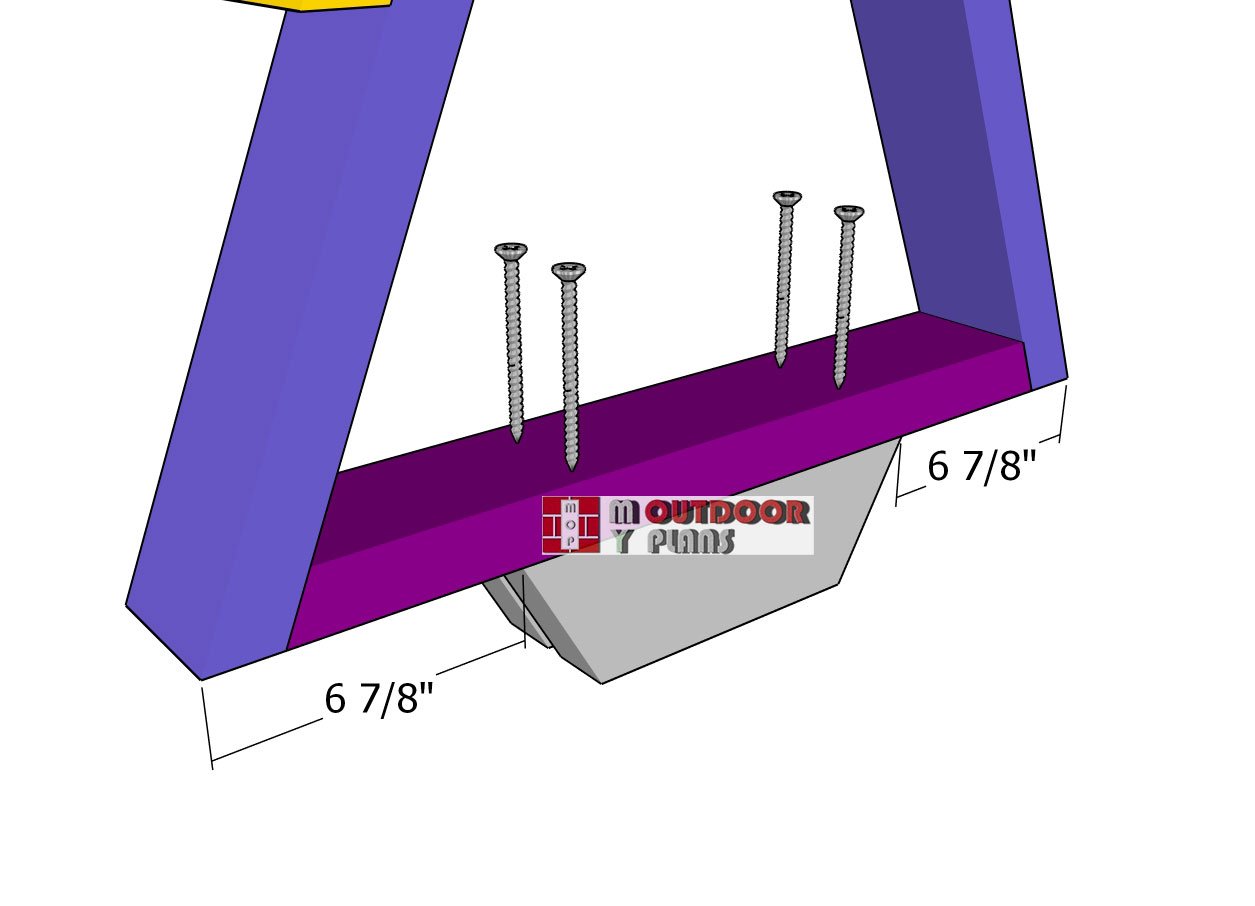
Attaching-the-base
Center the base boards under the tree and secure them with 2 1/2″ screws. To avoid splitting the wood, be sure to drill pilot holes before driving in the screws. This will ensure a strong and stable foundation for your Christmas tree.
Finishing touches
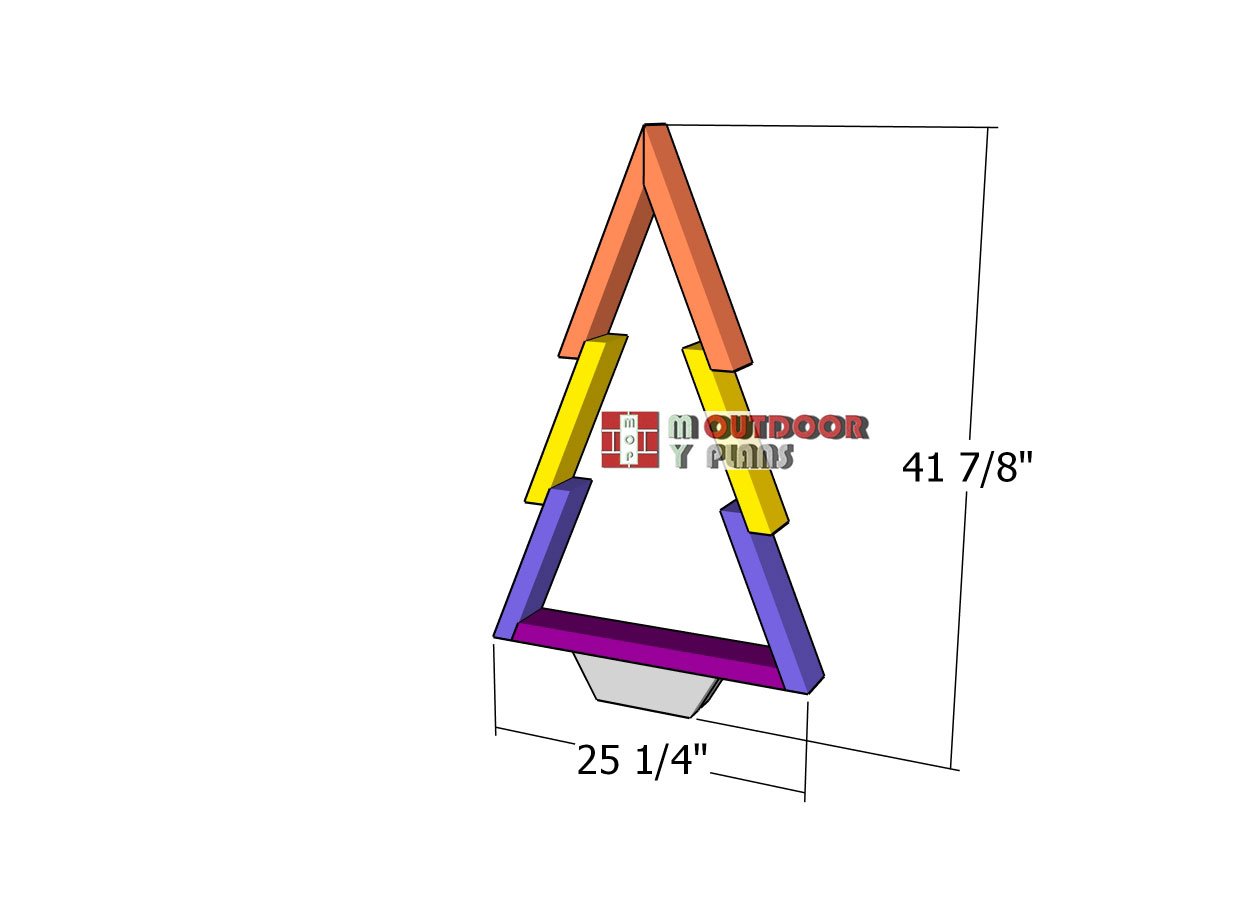
Assembling-the-base—dimensions
As you finish building your wooden Christmas tree, you’ll have a unique and charming piece that perfectly captures the spirit of the season. These plans are designed to be simple yet effective, allowing you to create a festive decoration that stands out in any space.
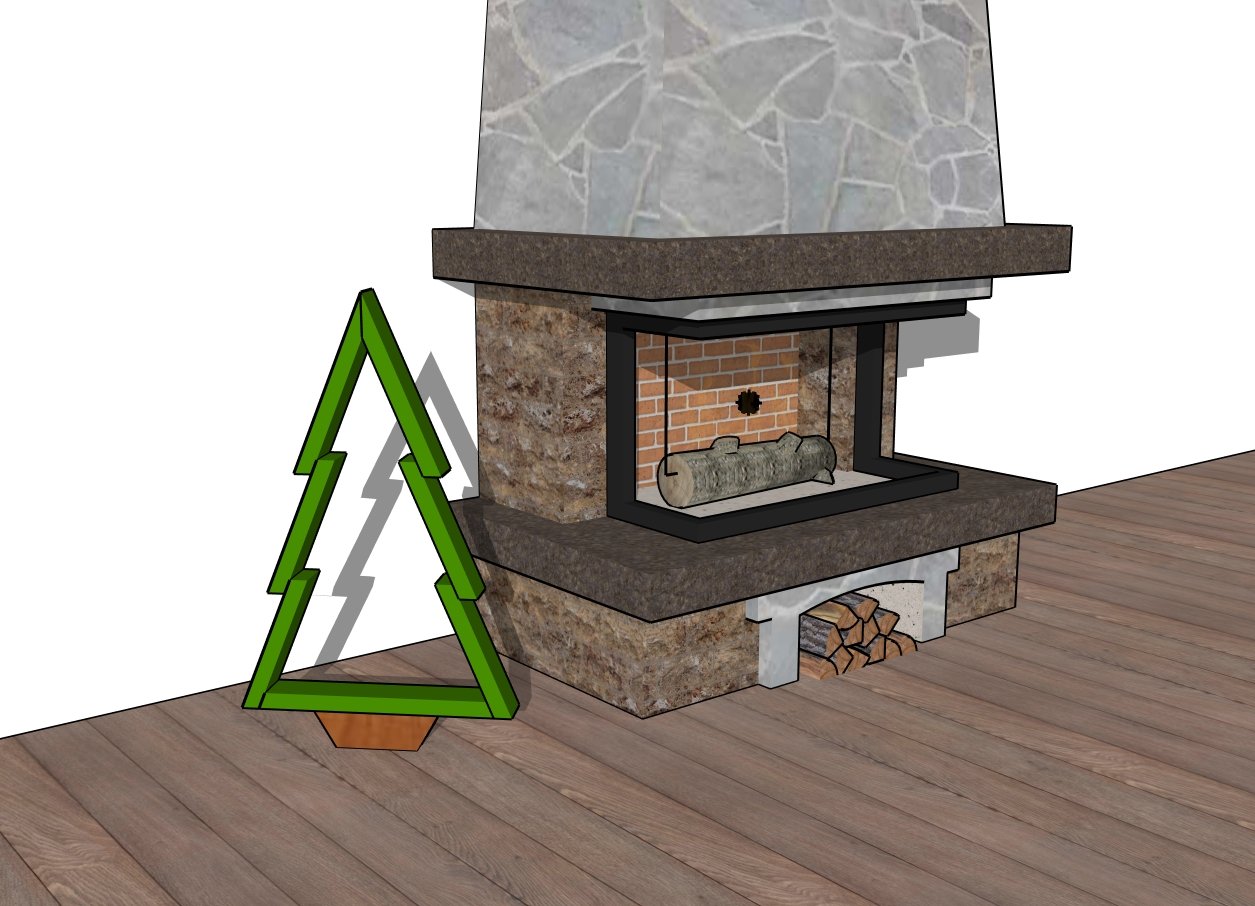
Wood Christmas tree plans
Whether you choose to keep it natural or add your own creative touches with paint and ornaments, this wooden tree will become a cherished part of your holiday tradition for years to come. Enjoy the satisfaction of bringing your project to life and the warmth it brings to your home during the holidays!

How to make wood Christmas tree
DIY Wood Christmas tree plans
If you want to get the Premium plans with all the extras, just press the GET PREMIUM PLANS button bellow. These plans are free to download.

This woodworking project was about DIY wooden Christmas tree plans. If you want to see more outdoor plans, check out the rest of our step by step projects and follow the instructions to obtain a professional result.