This step by step diy woodworking project is about simple 2×4 bench plans. This bench is sturdy and really simple to build from 2x4s. This bench has a modern look and it features a generous seat. All the components are made from 2x4s. Check out all my planter plans HERE. If you enjoy my design, don’t forget to take a look over the rest of my free plans HERE.
There are so many designs and materials to choose from, that we really recommend you to spend some time researching the most suitable plans for your needs. If you still haven’t found what you are looking for, we strongly recommend you to pay attention to these instructions and to check out the related projects, if you want to get more ideas and potential projects for your home and garden. See all my Premium Plans HERE.
Projects made from these plans
Simple 2×4 Bench Plans
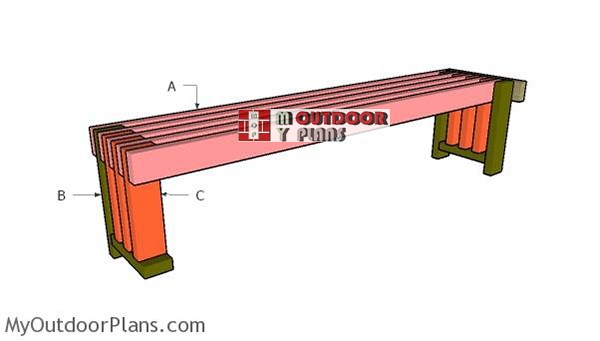
Building-a-simple-2×4-bench
Cut & Shopping Lists
- A – 6 pieces of 2×4 lumber – 69″ long LEGS
- B – 4 pieces of 2×4 lumber – 17″ long, 2 pieces – 10 1/2″ long LEGS
- C – 6 pieces of 2×4 lumber – 13 1/2″ long BLOCKINGS
- 7 pieces of 2×4 lumber – 8′
- 2 1/2″ screws
- wood filler , wood glue, stain
Tools
![]() Kreg Jig
Kreg Jig
![]() Hammer, Tape measure, Framing square, Level
Hammer, Tape measure, Framing square, Level
![]() Miter saw, Drill machinery, Screwdriver, Sander
Miter saw, Drill machinery, Screwdriver, Sander
Time
Related
How to build a 2×4 bench
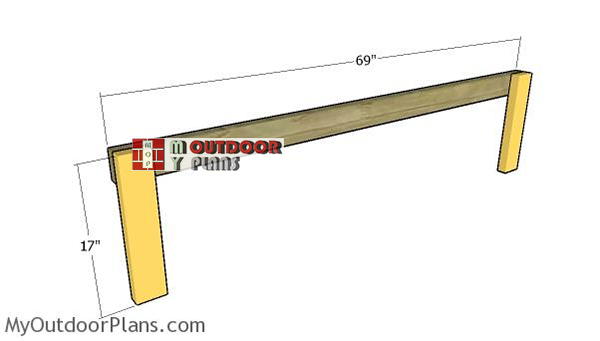
Fitting-the-legs
The first step of the project is to build the sides for the 2×4 bench. Cut the components at the right dimensions from 2×4 lumber. Make sure the corners are square and align the edges with attention. Drill pilot holes and insert 2 1/2″ screws to lock them together tightly.
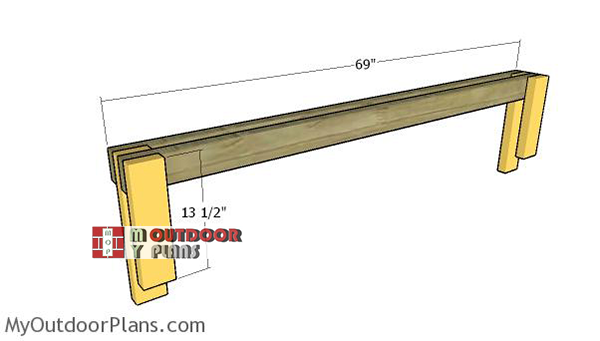
Fitting-the-middle-supports
Attach the next layers of 2×4 lumber. Cut the components at the dimensions shown in the diagram, drill pilot holes and insert 2 1/2″ screws to lock them tightly together. Align the edges with attention.
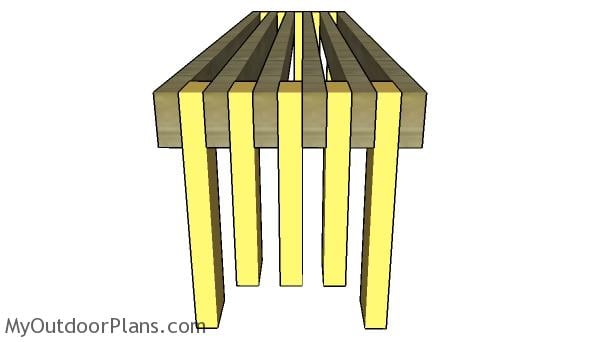
Assembling the bench
Add the rest of the modules to the 2×4 bench. Align the edges with attention and make sure the corners are square.
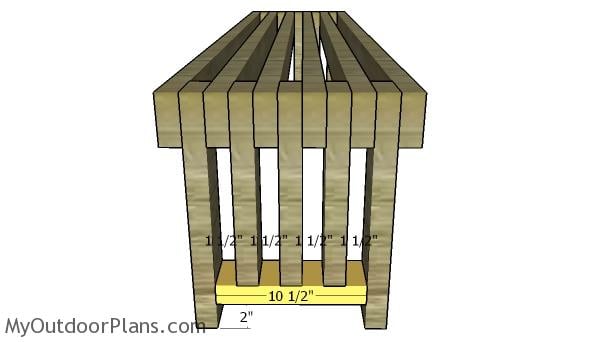
Side supports
Fit the 2×4 support to the sides of the bench. Align the edges flush and drill pilot holes through the legs, before inserting 2 1/2″ screws. In addition, drill pilot holes through the supports and insert 2 1/2″ screws into the middle vertical blockings.
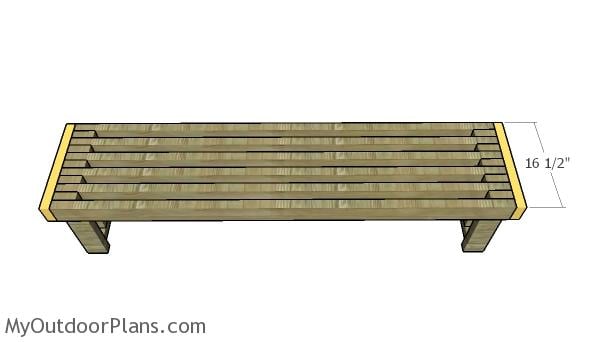
Fitting the side trims
Last but not least, attach the 2×4 trims to the sides of the bench. Drill pilot holes through the trims and insert 2 1/2″ screws to lock them into place tightly. Fill the holes with wood putty and then smooth the surface with 120-220 grit sandpaper. Apply a few coats of paint or stain over the components to enhance the look of the project.
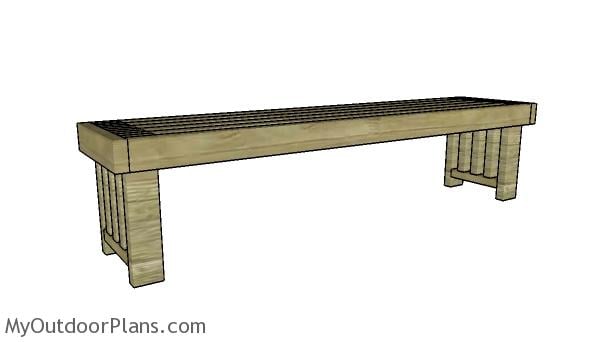
Simple 2×4 bench plans
This is a simple woodworking project, so any person with basic diy skills can get the job done in a few hours. check out all my furniture plans HERE, for even more building inspiration.
If you like my project, I recommend you to take a look over the rest of my woodworking plans HERE. Choose from thousands of free designs and fill your life with DIY joy!
This woodworking project was about free simple 2×4 bench plans. If you want to see more outdoor plans, we recommend you to check out the rest of my step by step projects. LIKE us on Facebook and Google + to be the first that gets out latest projects.

3 comments
Hi, Thanks for the 2×4 bench plan. Came out great. Just some corrections to the material list
6 (not five) seating cuts
change the 1×4 to 2×4 for
add side trims
Thanks again!
Thank you. I’ve updated the list. You can send pics here: http://myoutdoorplans.com/contact/ I would love to see your project!
I made the bench a bit smaller and fit into 6 2x4x8s 🙂 Yet to add the side trims (leaving it for the next weekend)
This was my first ever piece of furniture made, lots of fun – thank you!