This step by step diy project is about how to build a hammock stand. Building a wooden hammock stand is a quick project that will enhance the look of your backyard, while keeping the costs at minimum. If you want to create a rustic recreating corner in your backyard or on your patio, we strongly recommend you to consider building a wooden stand for a hammock.
A wooden hammock stand requires basic materials and tools, so any person that knows the basic woodworking techniques can get the job done in just a few hours. Cedar, pine or redwood are excellent choices if you want to create a durable structure. Take accurate measurements and always adjust the size and the design of the hammock stand to suit own needs and to fit within your budget. See all my Premium Plans HERE.
Projects made from these plans
Building a hammock stand
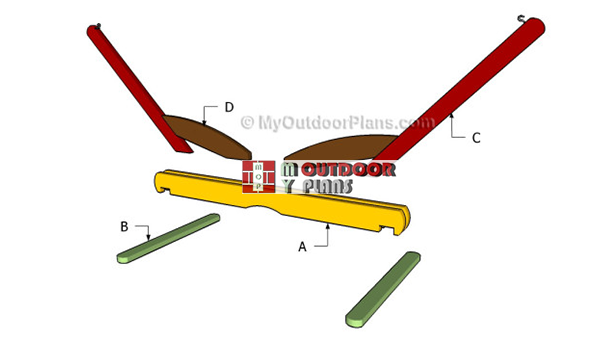
Building-a-hammock-stand
Cut & Shopping Lists
- A – 2 pieces of 2×6 lumber – 72” long BEAMS
- B – 2 pieces of 2×4 lumber – 40″ long BASE
- C – 2 pieces of 2×4 lumber – 48″ long SUPPORTS
- D – 2 pieces of 2×6 lumber – 32″ long BRACES
- 3 pieces of 2×6 lumber – 8 ft
- 2 pieces of 2×4 lumber – 8 ft
- hanging kit
- 2 1/2″ screws
- 1 5/8″ screws
- 1 1/4″ screws
- wood filler
- wood glue
- stain/paint
Tools
![]() Hammer, Tape measure, Framing square
Hammer, Tape measure, Framing square
![]() Miter saw, Drill machinery, Screwdriver, Sander, Post-hole digger
Miter saw, Drill machinery, Screwdriver, Sander, Post-hole digger
Time
![]() One weekend
One weekend
Related
How to Build a Hammock Stand
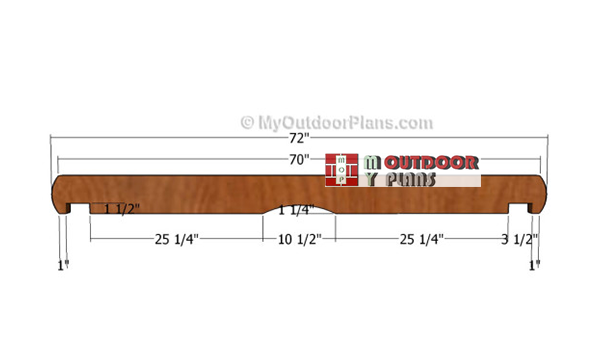
Building-the-base-beams
The first step of the project is to build the joists for the hammock stand. As you can easily notice in the plans, we recommend you to cut the components out of 2×6 lumber.
Mark the cut lines on the beams and get the job done with a jigsaw. Smooth the cut edges with a sandpaper and remove the residues with a cleaner. Make the notches in the beams for the 2×4 supports and clean the recess with a chisel.
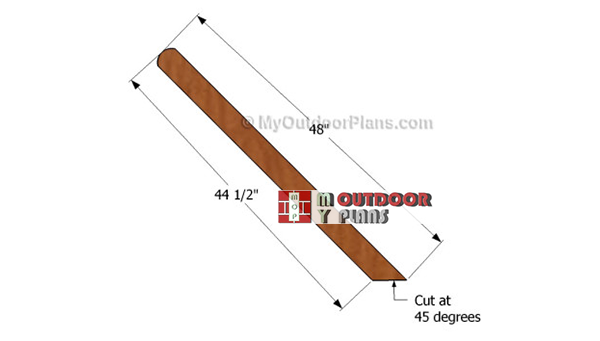
Building-the-vertical-supports
Next, you need to build the diagonal supports for the hammock stand. As you can easily notice in the plans, we recommend you to round one end of the component using a jigsaw.
Top Tip: Next, cut the opposite end of the supports at 45 degrees, by using a proper circular saw. Repeat the process for the opposite wooden support, making sure they have the same shape and size.
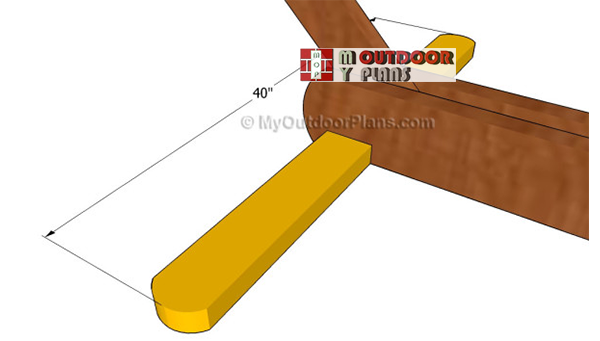
Fitting-the-base-supports
Fit the 2×4 slats to the frame of the hammock stand. Drill pilot holes through the slats and insert 2 1/2″ screws into the 2×6 beams. Make sure you leave no gaps between the components and add glue to enhance the rigidity of the structure.
Building the braces
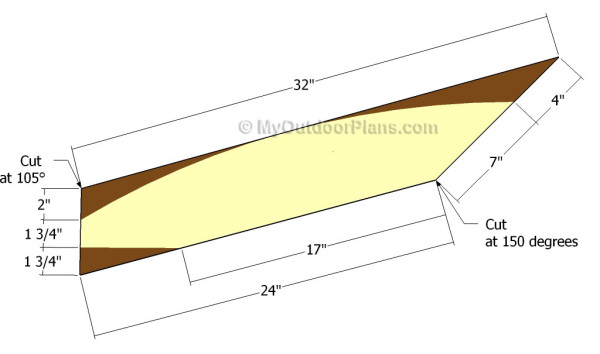
Build the braces out of 2×6 lumber by using the instructions described in the diagram. Makes the curved cuts with a jigsaw and smooth the edges with fine-grit sandpaper. Take accurate measurement before making the cuts, to get the job done in a professional manner.
Fitting the braces
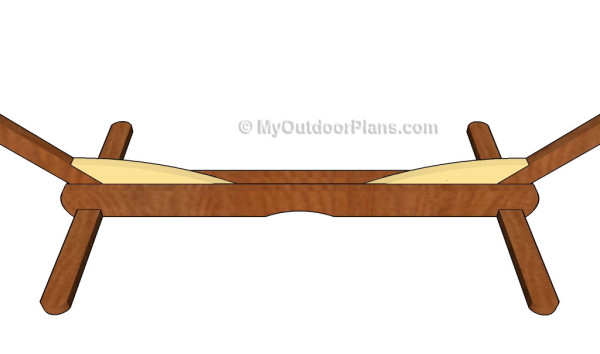
As you can easily notice in the plans, we recommend you to attach the braces to the frame of the hammock stand. Drill pilot holes at secure the braces to the diagonal supports and to the base beams. Make sure you leave no gaps between the components and add glue to enhance the bond of the joints.
Fitting the eye screws
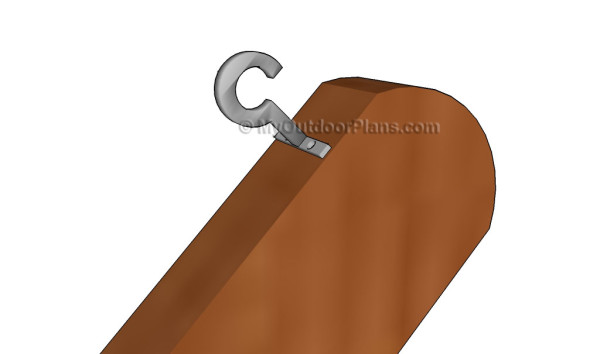
One of the last step of the garden project is to attach the eye screws to the diagonal supports. Make sure you adjust the height at which you place the hooks and secure them into place tightly.

How to build a hammock stand
Last but not least, you have to take care of the finishing touches. Therefore, fill the holes and the cracks with wood filler and let it dry out for several hours, before sanding the surface with 120-grit sandpaper.
Top Tip: Protect the wooden components from rot by applying several coats of paint. Choose colors that match the design of the rest of your property, as to enhance the look of the hammock stand.
This woodworking project was about hammock stand plans. If you want to see more outdoor plans, we recommend you to check out the rest of our step by step projects. SHARE our projects and follow us on the social networks to help us keep adding free woodworking plans. LIKE us on Facebook to be the first that gets our latest updates and submit pictures with your DIY projects.


5 comments
These plans did not work for me. Although I have what I consider a normal size hammock, the stand was far too short. I extended each of the supports by more than a foot and the stand was far too short. I think it needs to be about 4 feet longer.
Sorry to hear that. Before building the hammock stand you need to lay the diagonal supports on the ground and then fit the hammock between them. Measure the distance between the bottom of the supports before cutting the base. That should work irrespective of the hammock size. I’m looking forward to seeing how it turns out eventually.
How long of a top arch do these plans make? I’m looking to make a stand with only about an 11 foot gap– this seems like it would make closer to 15′ gap. Does this seem right to you?
These plans make for an opening between the supports of about 10′. If you adjust the base to 11′ (the horizontal beams), you will get a 14 1/2′ opening. If you make the distance between the base of the supports of 11′, the top opening will be 16 1/2′. Hope this helps. If you have more questions, feel free to ask.
I like the fact that the support are arched.
The 1 inch left after the 2×4 notch on the base is too short and will be a weak point,short grain. The notch should be moved toward the center a couple of inches at least.