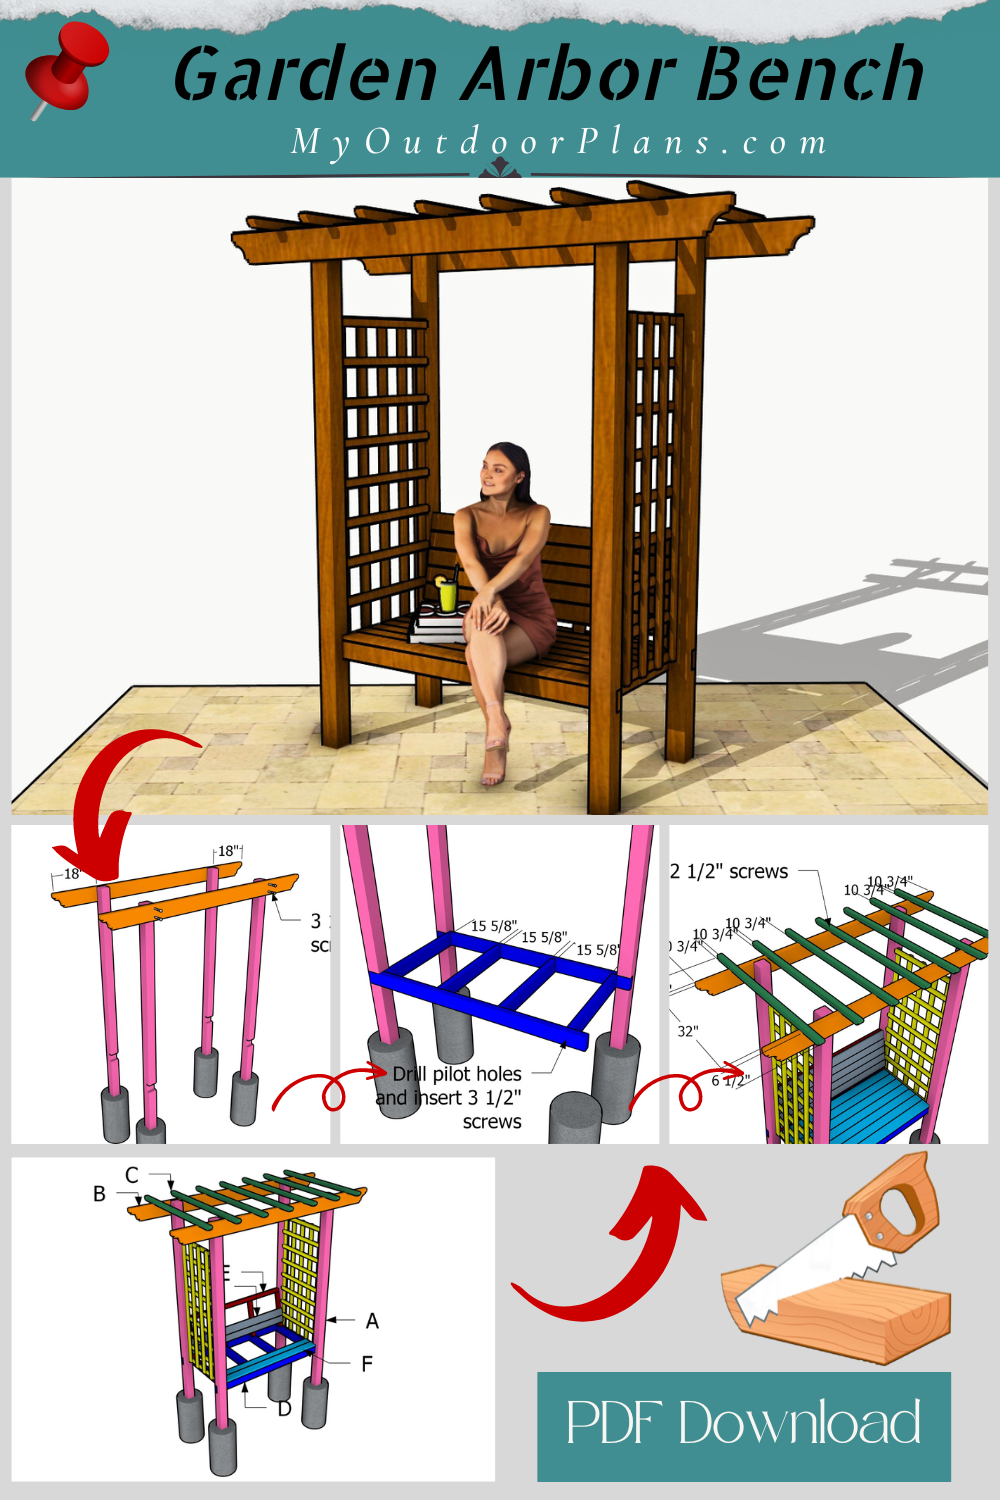
I’m excited to share a project that’s perfect for adding charm and functionality to your garden—my garden arbor bench – free plans! This project is a cool way to create a cozy spot where you can relax, read, or simply enjoy the beauty of your outdoor space. We’ll be building a stunning arbor bench that not only provides a comfy seating area but also adds an elegant, architectural element to your garden. With a little bit of lumber and some basic tools, you’ll have a beautiful, sturdy bench that offers a perfect spot for climbing plants to grow and flourish. Take a look over the rest of my woodworking plans, if you want to get more building inspiration. Premium Plans for this project available in the Shop.
Let’s break down the cost and time for this garden arbor bench project! You can expect to spend around $100-$150 on materials, including lumber, screws, and stain or paint. As for time, set aside a good weekend for this build—around 8-10 hours from start to finish—so you can take your time and enjoy the process. It’s a fun, rewarding project that will add beauty and functionality to your garden for years to come!
For this project, I recommend using cedar or hardwood for their durability and natural resistance to the elements. Cedar is a fantastic option because it’s lightweight, rot-resistant, and has a beautiful, rustic look. Hardwood, on the other hand, provides superior strength and longevity, making your project a sturdy and stylish addition to your home.
Projects made from these plans
DIY Garden Arbor – Easy Weekend Project
Building-a-garden-arbor-bench
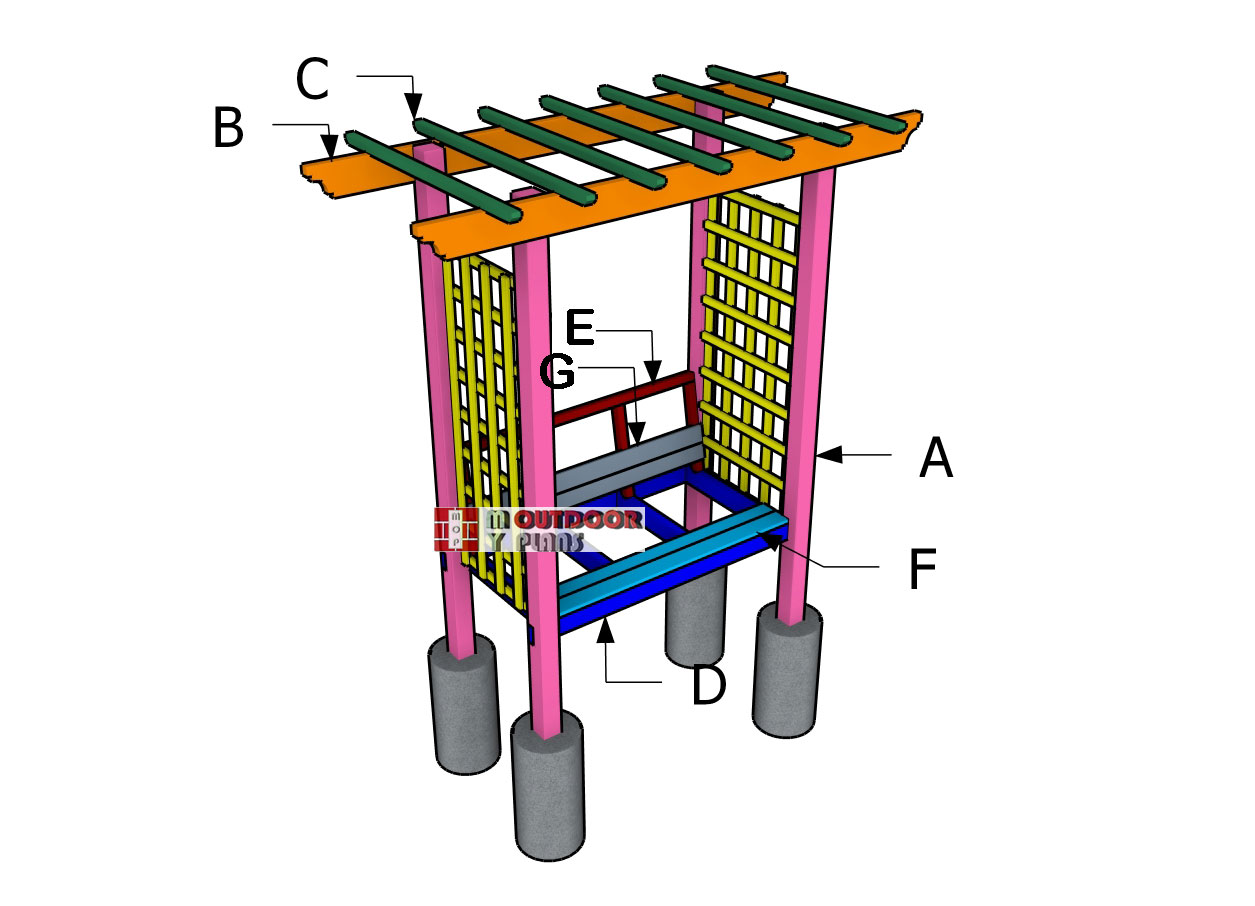
Cut and Shopping Lists
A – Posts – 4×4 lumber 120″ long – 4 pieces
B – Beams – 2×6 lumber 96″ long – 2 pieces
C – Top Slats – 2×2 lumber 48″ long – 7 pieces
D – Seat Frame – 2×4 lumber 60″ long – 2 pieces
D – Seat Frame – 2×4 lumber 27″ long – 4 pieces
E – Backrest Support – 2×2 lumber 18 3/4″ long – 4 pieces
E – Backrest Support – 2×2 lumber 53″ long – 1 piece
F – Seat – 1×4 lumber 53″ long – 7 pieces
G – Backrest – 1×4 lumber 53″ long – 5 pieces
H – Lattice – 1×2 lumber – 60″ long – 10 pieces
H – Lattice – 1×2 lumber – 25″ long – 18 pieces
- 4×4 lumber 10 ft – 4 pieces
- 2×2 lumber 12 ft – 1 piece
- 2×2 lumber 8 ft – 4 pieces
- 2×6 lumber 8 ft – 2 pieces
- 2×4 lumber 10 ft – 2 pieces
- 1×4 lumber 10 ft – 6 pieces
- 1×2 lumber 10 ft – 10 pieces
- 3 1/2″ lag screws – 8 pieces
- 3 1/2″ screws – 20 pieces
- 2 1/2″ screws – 100 pieces
- 1 5/8″ screws – 150 pieces
- 1 1/4″ screws – 100 pieces
- Wood glue – 1 pieces
- Stain – 1 pieces
- Concrete – 2 bags
- Tube form 12″ diameter – 8 ft
Tools
![]() Hammer, Tape measure, Framing square, Level
Hammer, Tape measure, Framing square, Level
![]() Miter saw, Drill machinery, Screwdriver, Sander
Miter saw, Drill machinery, Screwdriver, Sander
Time
![]() One weekend
One weekend
Related
Pin for Later!
Garden Arbor Bench Plans – Setting the posts
Laying-out-the-posts
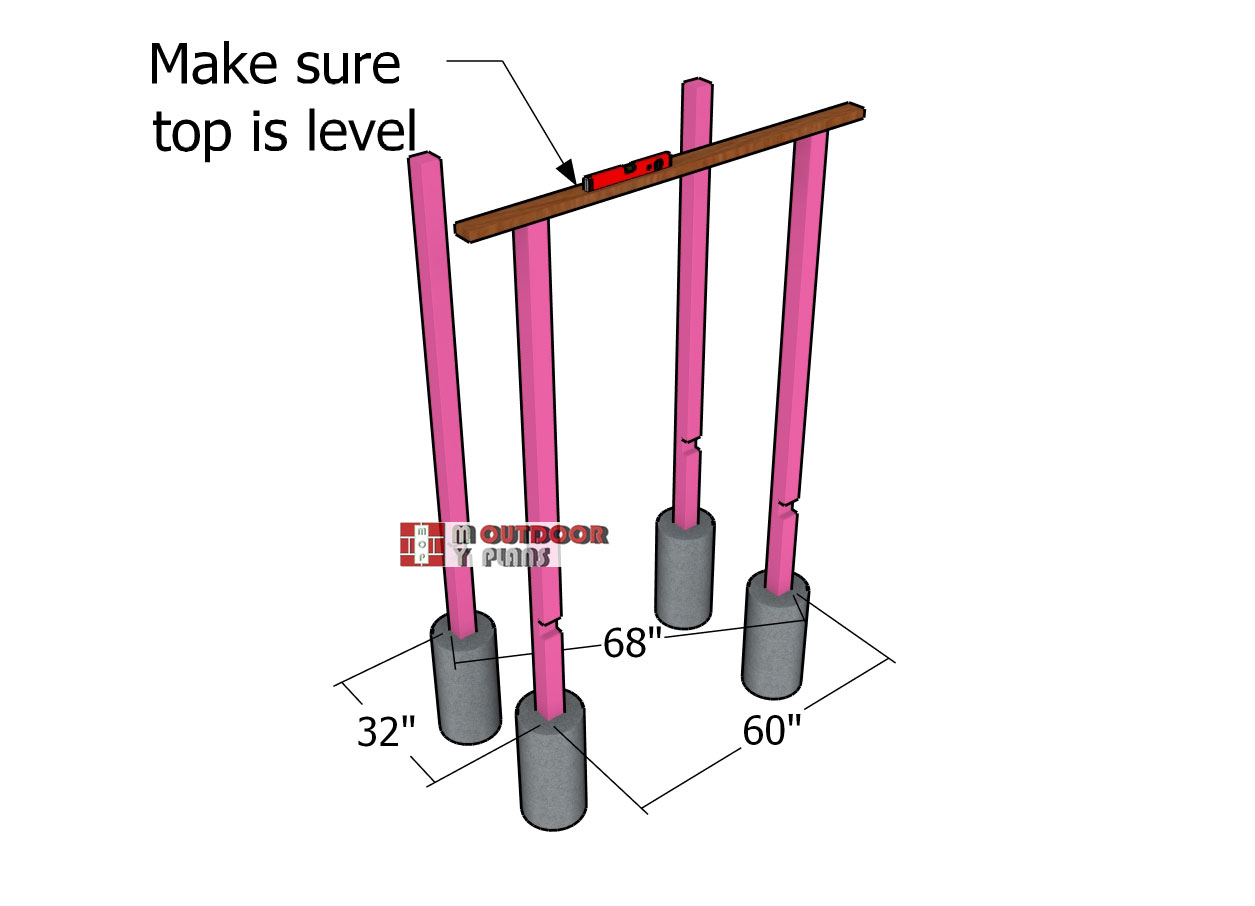
First, let’s layout the posts for the garden arbor. Remove the vegetation layer and level the surface thoroughly. Mark the location for the posts, as shown in the diagram. Dig 2 ft deep holes and 12″ in diameter. Measure the diagonals and make adjustments, if necessary.
Posts
Setting-the-post
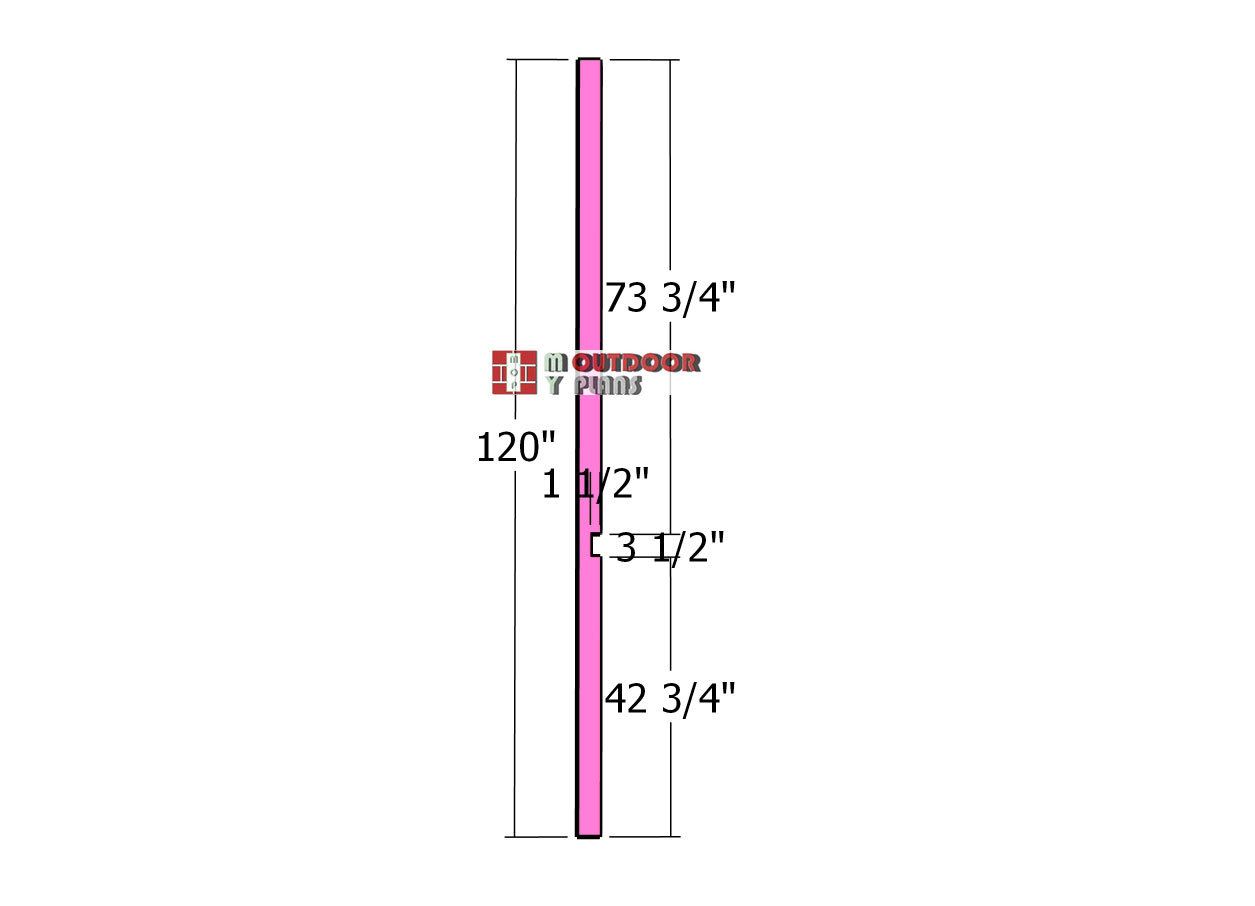
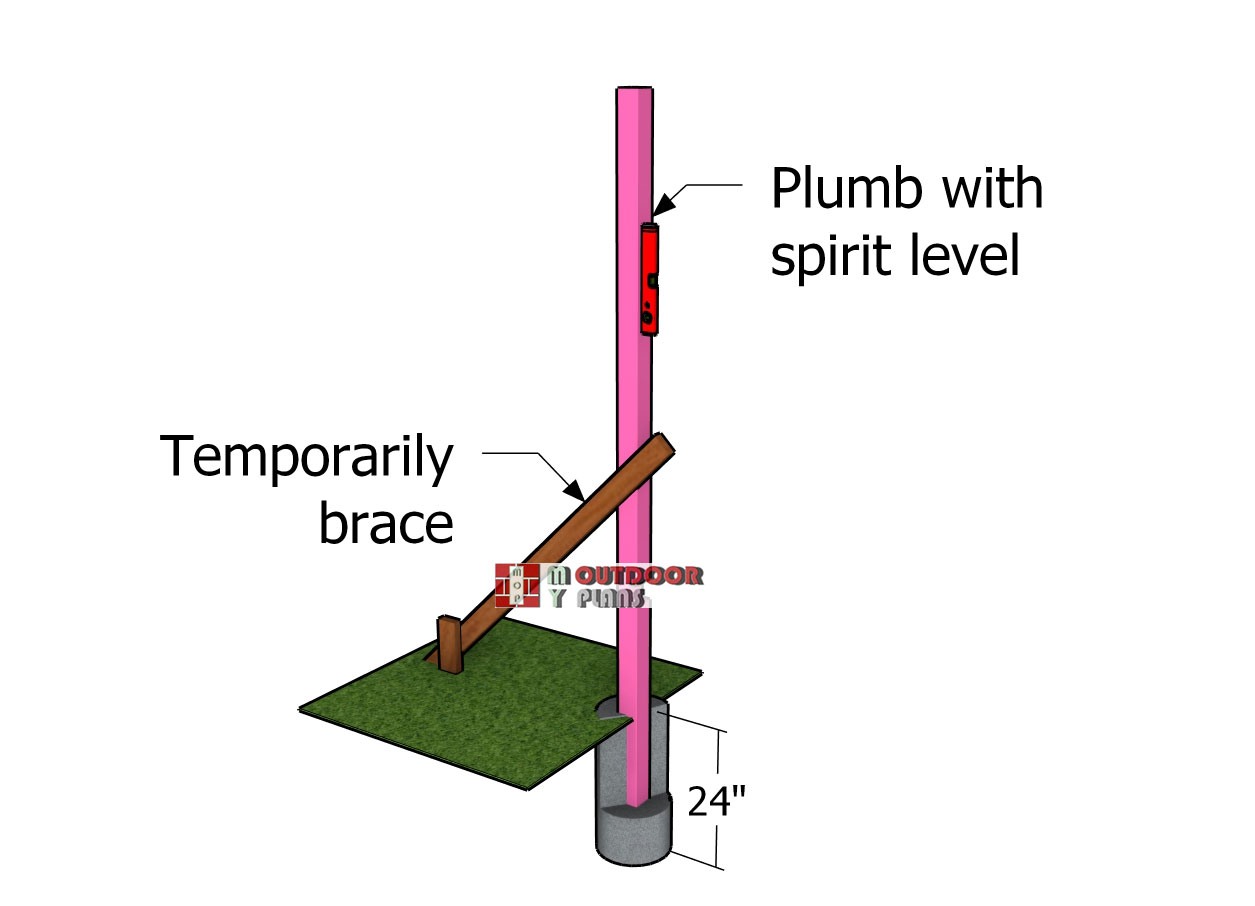
Next up, we need to cut the posts from 4×4 lumber. Mark the cut lines for the notches and then make parallel cuts inside the marked areas. Remove the excess material with a hammer and a chisel. Smooth the recess with sandpaper. Place the post in the hole, making sure it’s level, and secure it with temporary braces to keep it steady.
Pour in the concrete mix around the post and let it cure for at least 24 hours before removing the braces to ensure the post is firmly set and stable. When setting the posts, make sure the top is level one to another.
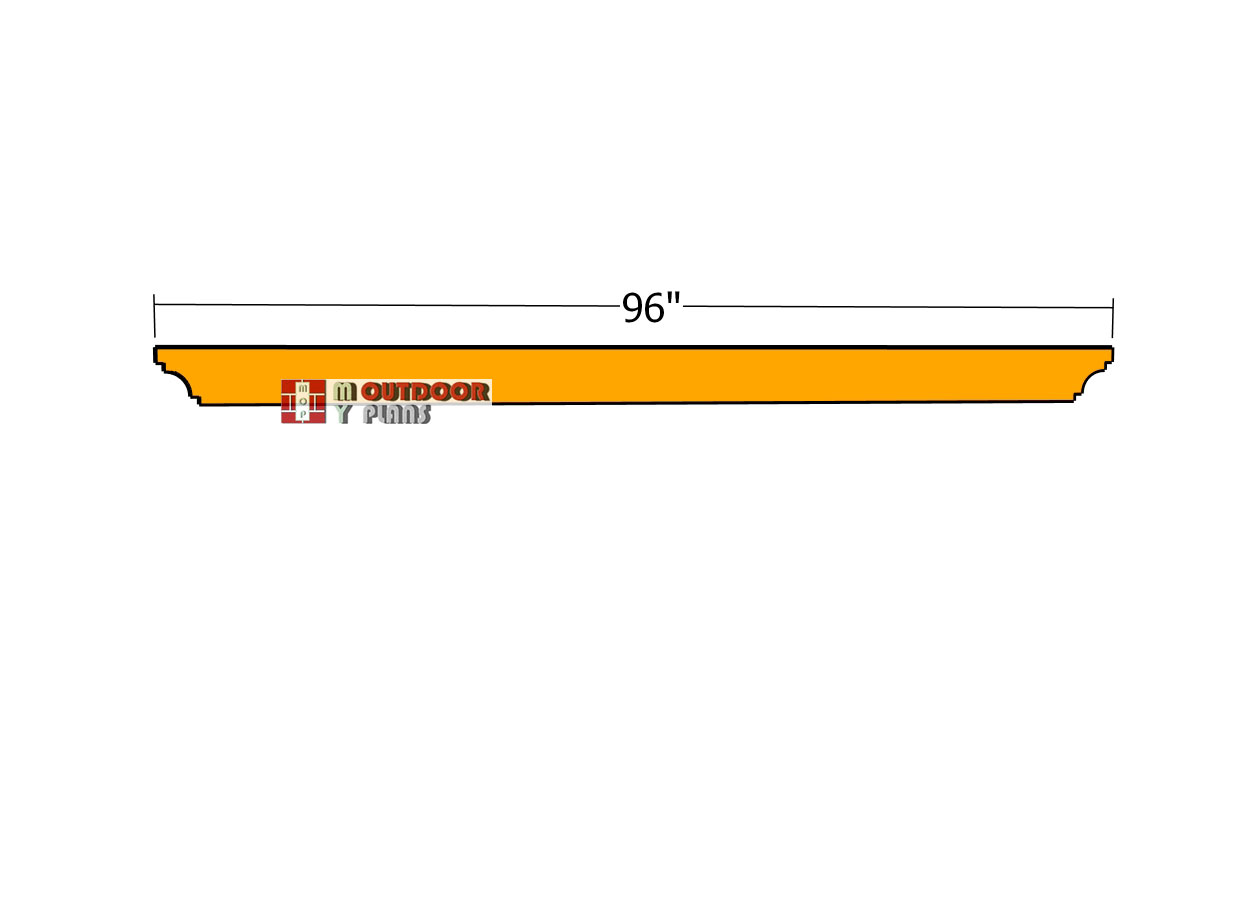
Top-beams
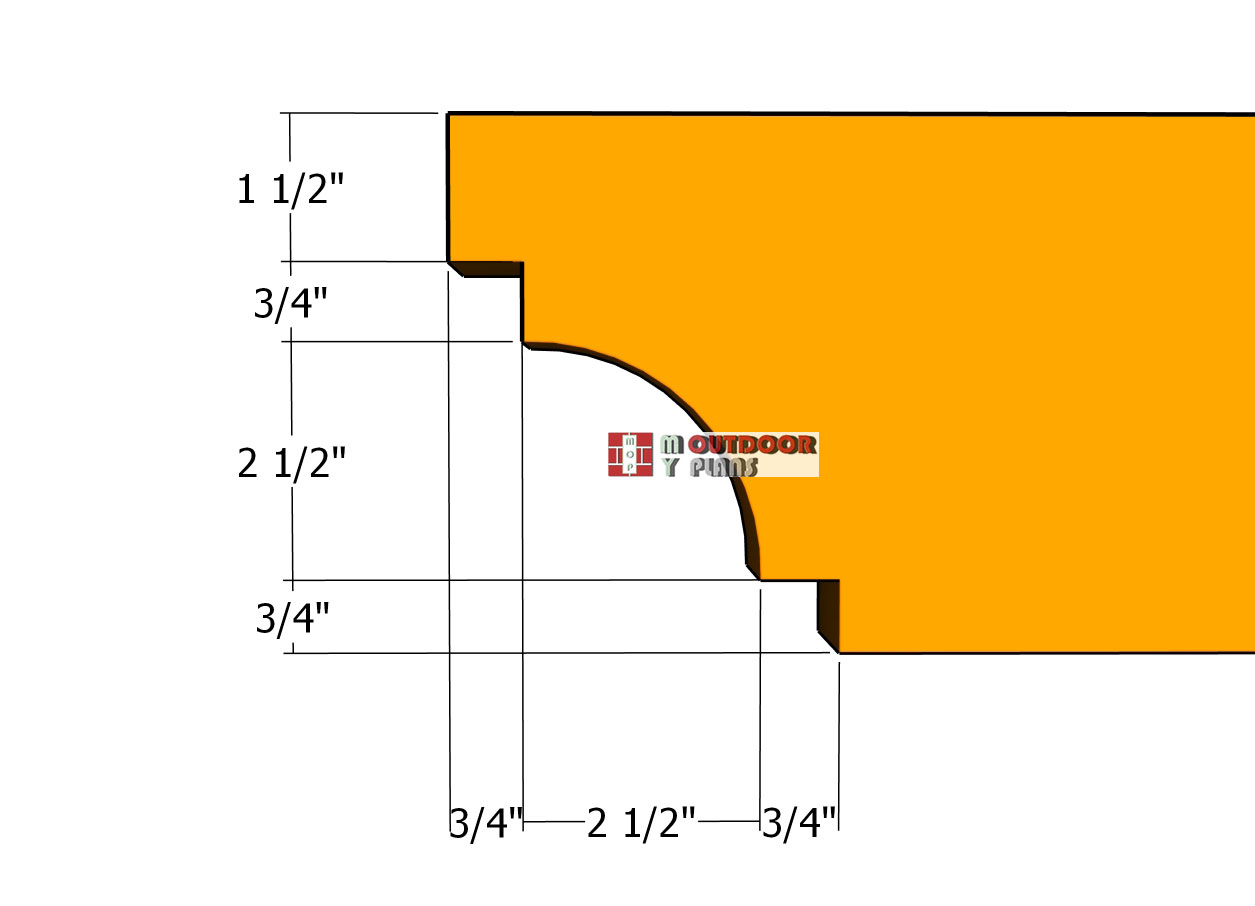
Decorative-ends
Now, we need to cut the two top beams. Notice the decorative cuts made to both ends of the beams. Use a jigsaw to make the curved cuts. Smooth the edges with sandpaper or round them over with a router and a bit.
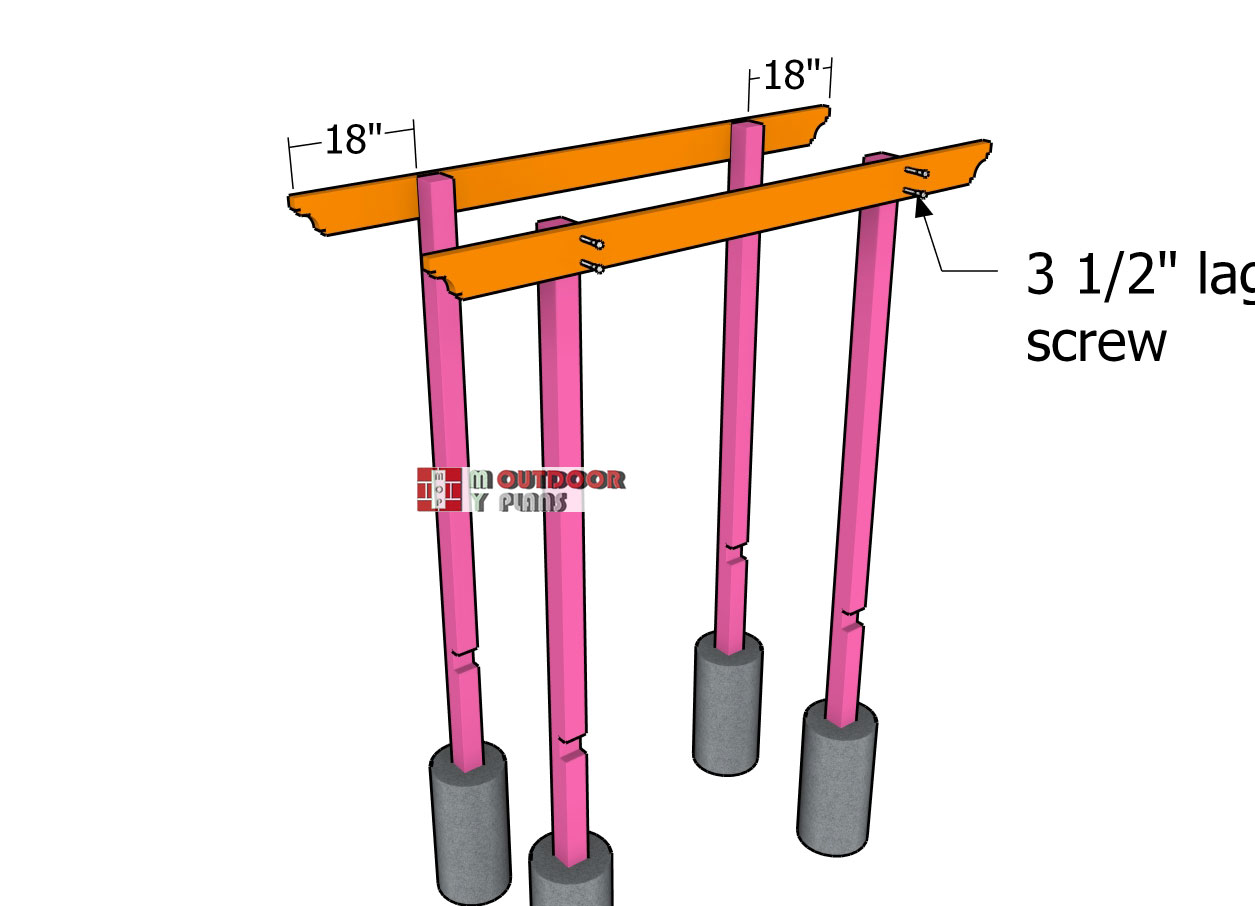
Fitting-the-top-beams
Last but not least, fit the top beams to the posts. Make sure you have 18″ overhangs on both sides before attaching the beams into place. Clamp the beams to the posts, align the top to the posts flush and drill pilot holes. Insert 3 1/2″ lag screws to secure the beams into place tightly.
Building the outdoor bench with arbor
Attaching-the-seat-frame
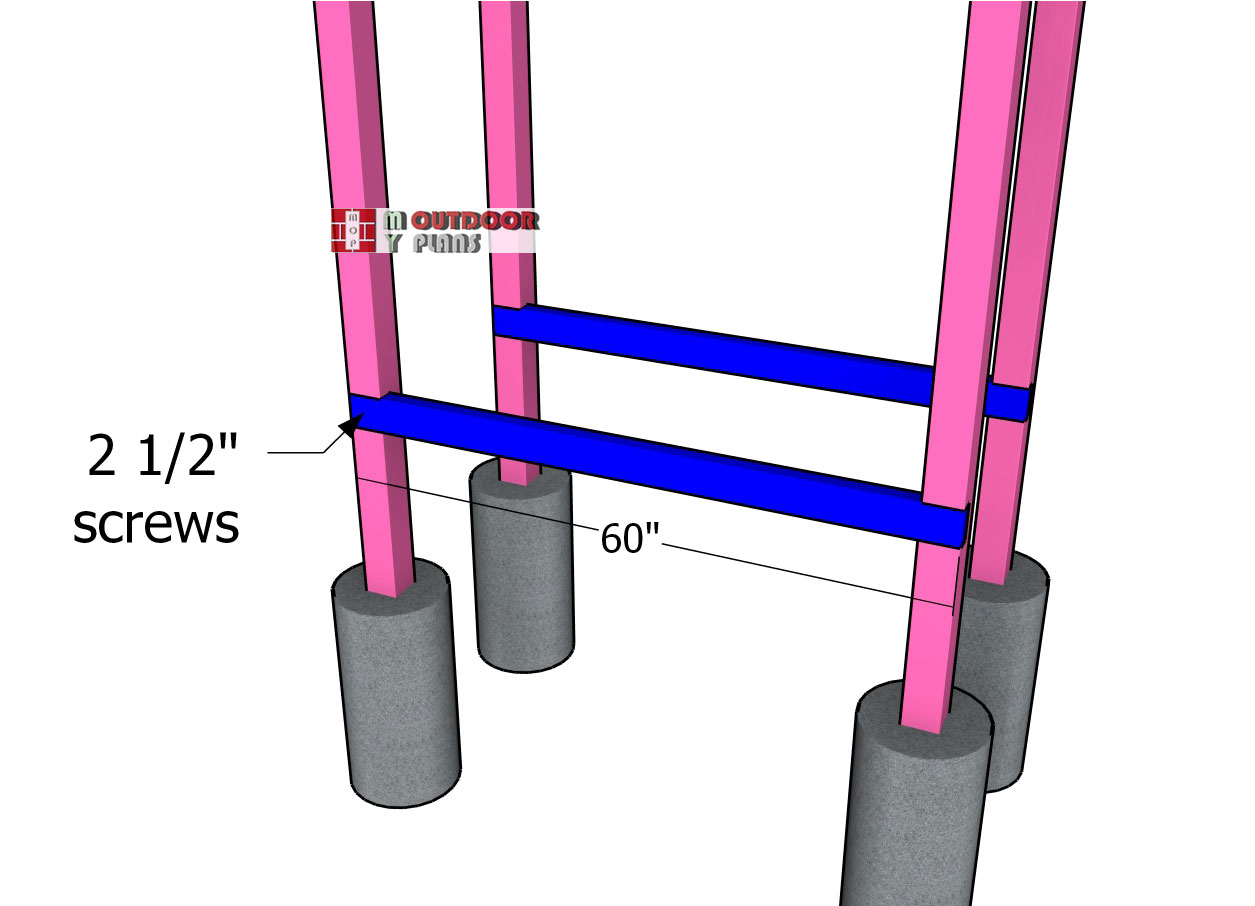
Next, attach the 2×4 supports for the bench frame. Fit the boards to the notches and then secure them into place with 2 1/2″ screws. Use 2 screws for each joint Drill pilot holes to prevent the wood from splitting.
Assembling-the-bench-frame
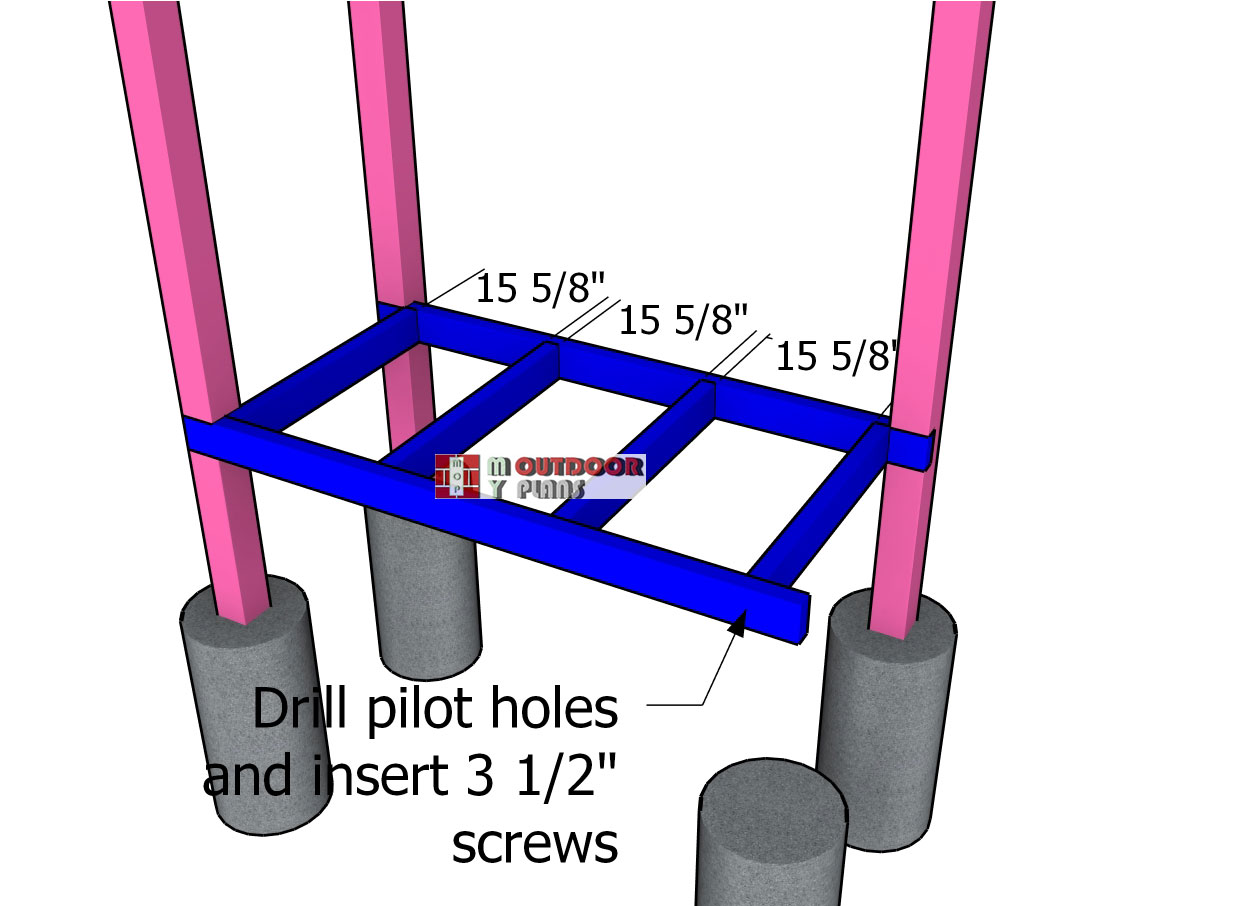
Attach the rest of the supports to the bench frame. Cut the components from 2×4 lumber at 27″ and fit them between the end supports. Drill pilot holes through the front and back boards and insert 2 1/2″ screws into the perpendicular elements.
Attaching-the-backrest-supports
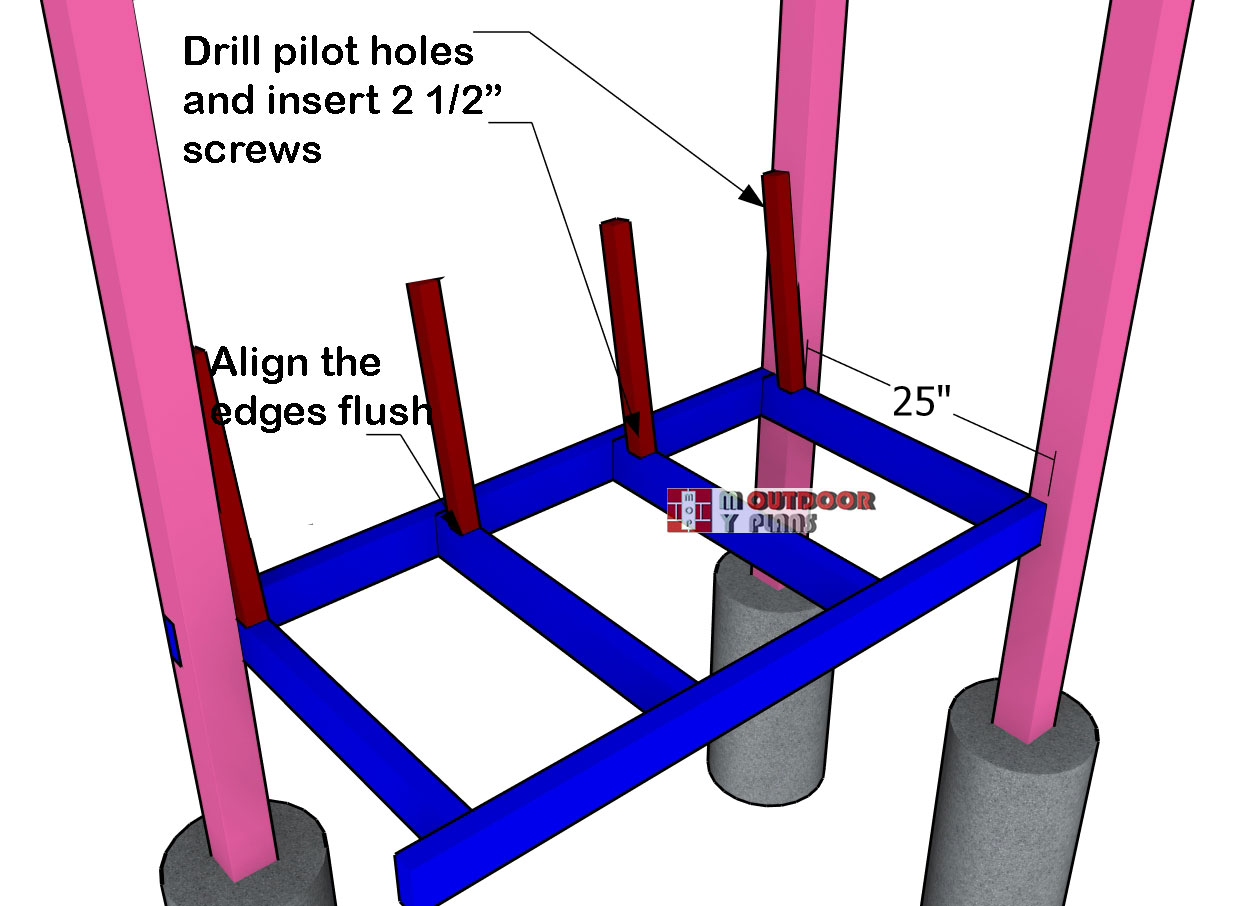
Now, let’s attach the backrest supports. Use 2×2 lumber and make a 10 degree cut to one end. Fit the supports to the seat frame, as shown in the diagram.
Top-backrest-support
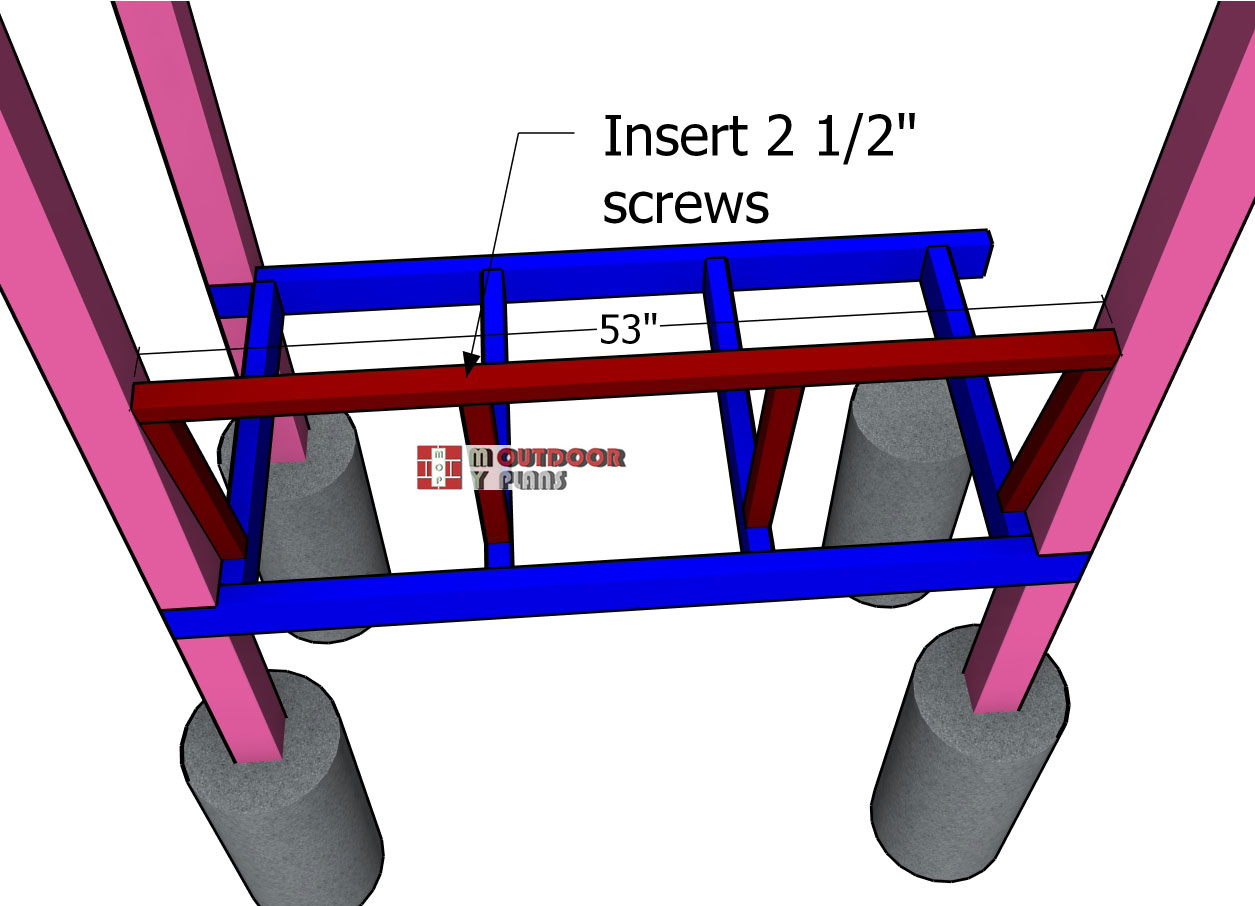
Drill pilot holes through the supports and insert 2 1/2″ screws into the bench frame. Secure the end supports to the posts with 2 1/2″ screws, as well. Attach the 2×2 board to the top of the supports, as shown in the diagram.
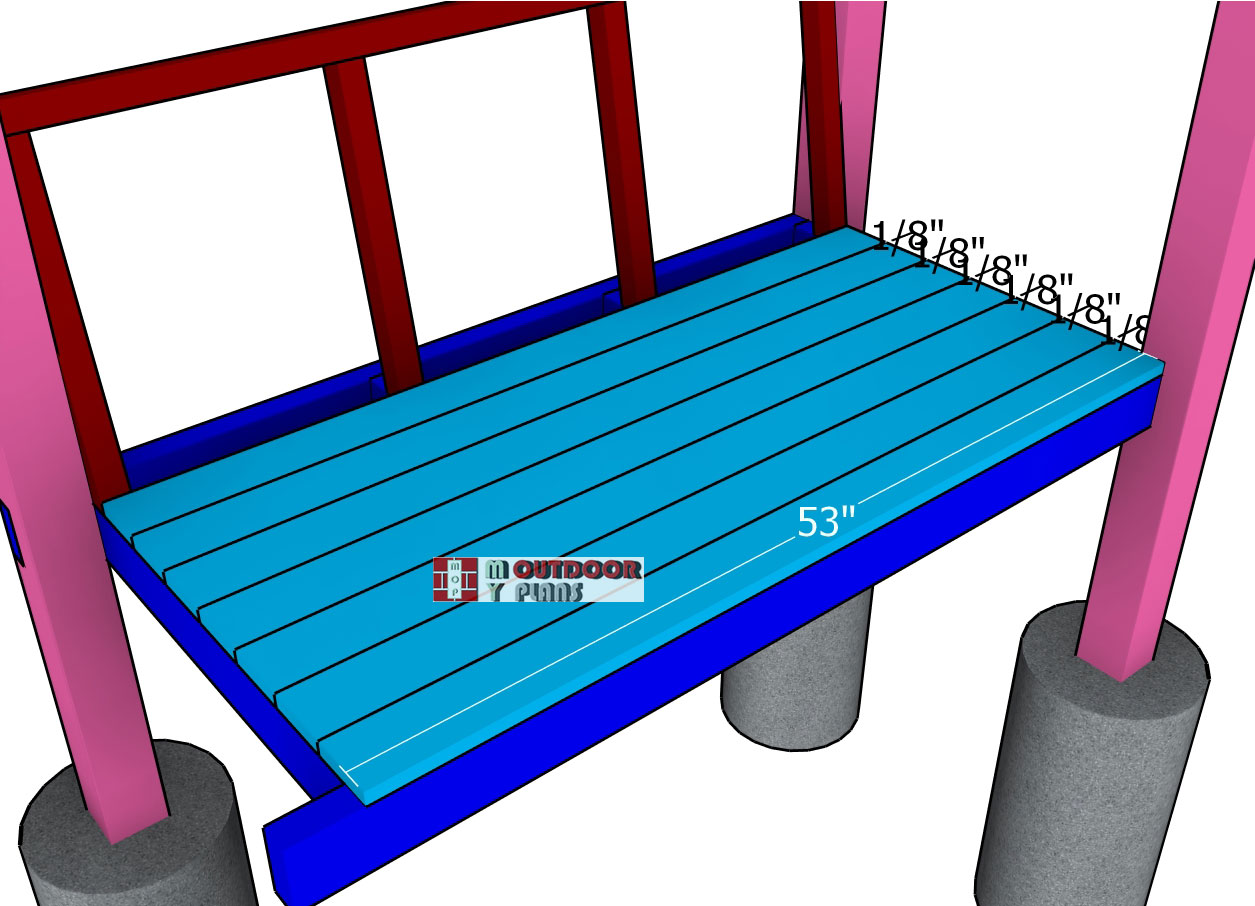
Attaching-the-seat-slats
Attach the 1×4 boards to the seat of the bench. Align the boards flush to the sides, drill pilot holes and insert 1 5/8″ screws to lock them into place tightly. Fit a 1/8″ spacer between the boards or a nail, to leave space for water drainage.
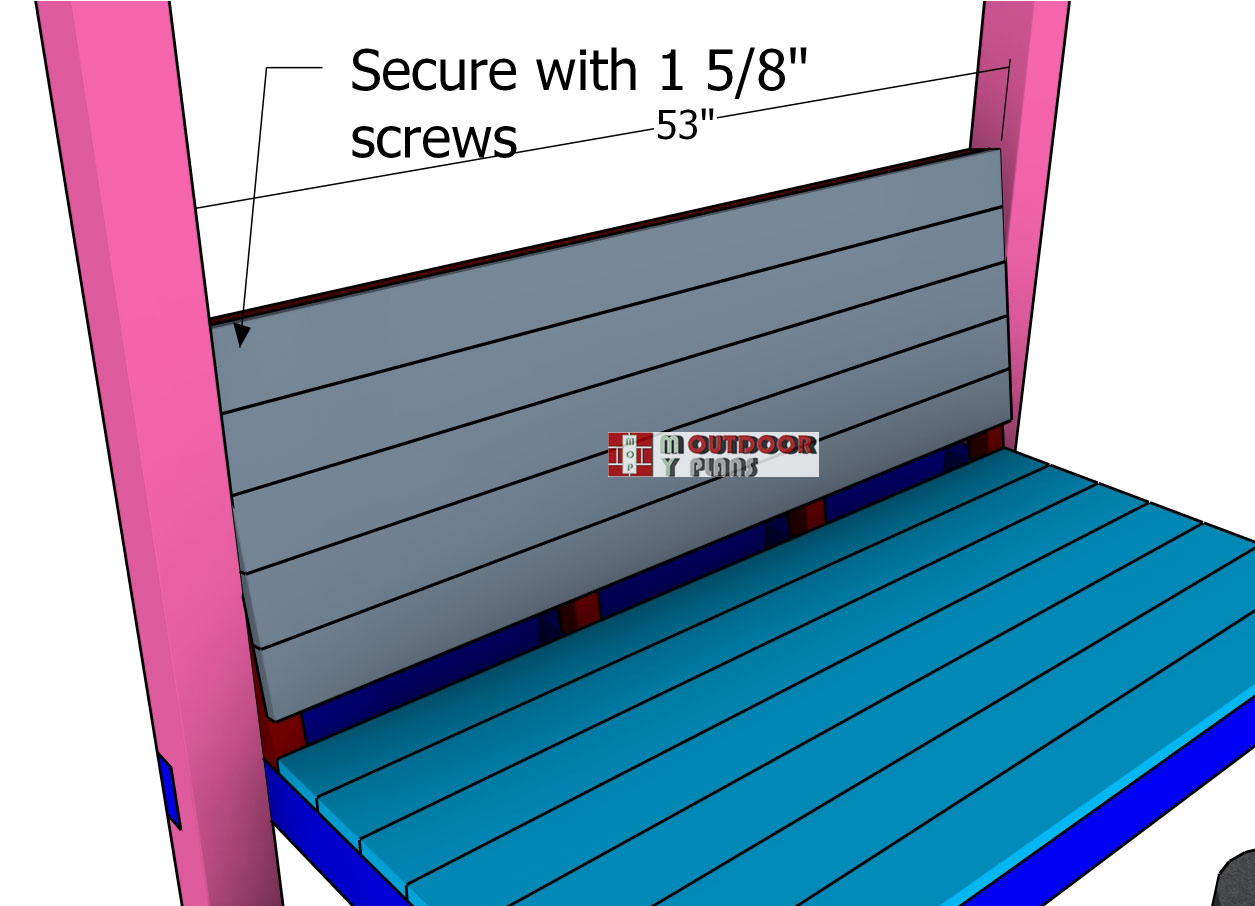
Attaching-the-backrest-slats
Attach the 1×4 boards to the backrest of the bench. Start with the top (make sure the board is flush with the top). Drill pilot holes and insert 1 5/8″ screws to lock the boards to the supports. Use 2 screws for each joint. You don’t have to leave any gaps between the backrest boards.
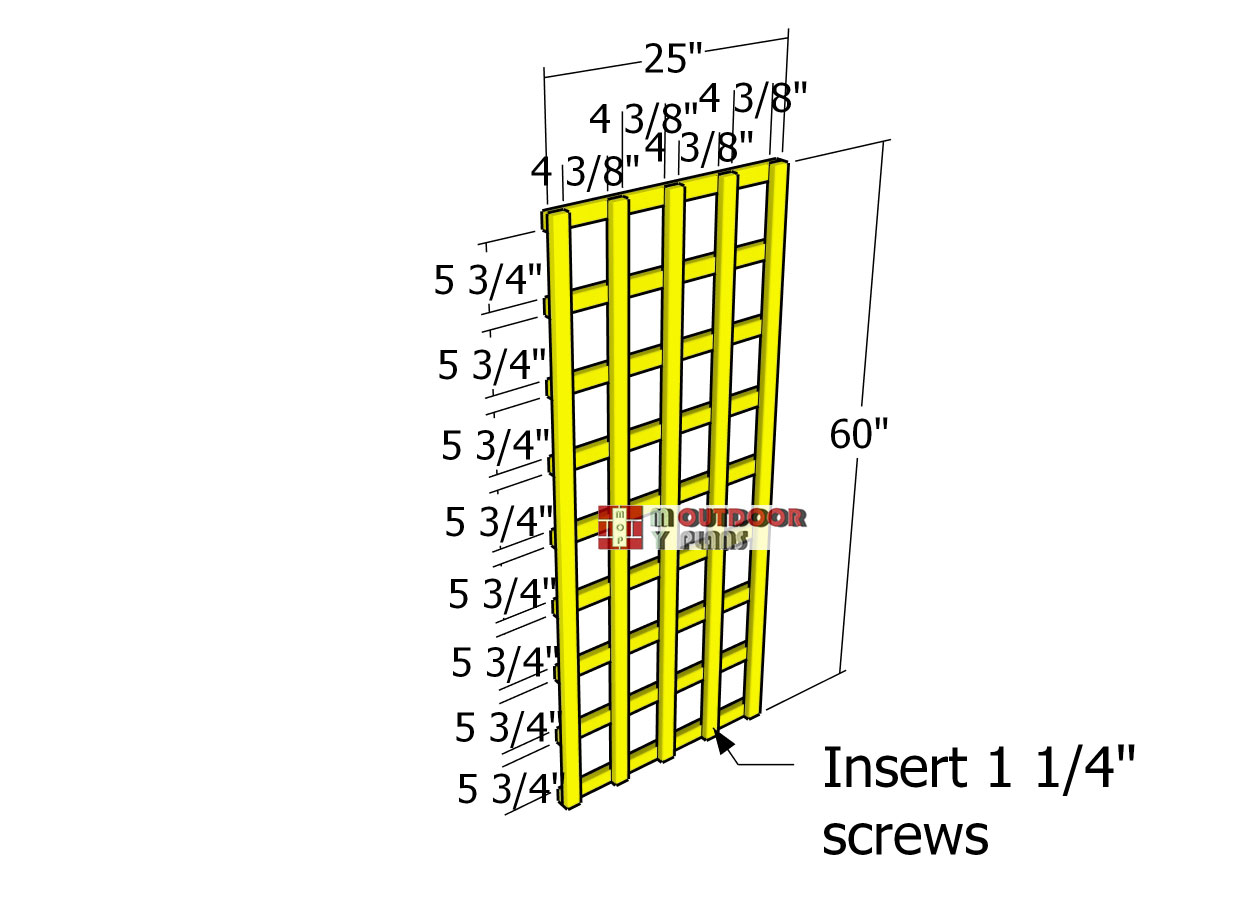
Assembling-the-lattice-panel
Use 1×2 lumber for the side lattice panels. Lay them on a level surface and place spacers between them, to create even gaps. Drill pilot holes and insert 1 1/4″ screws to lock them together tightly. Insert screws for each
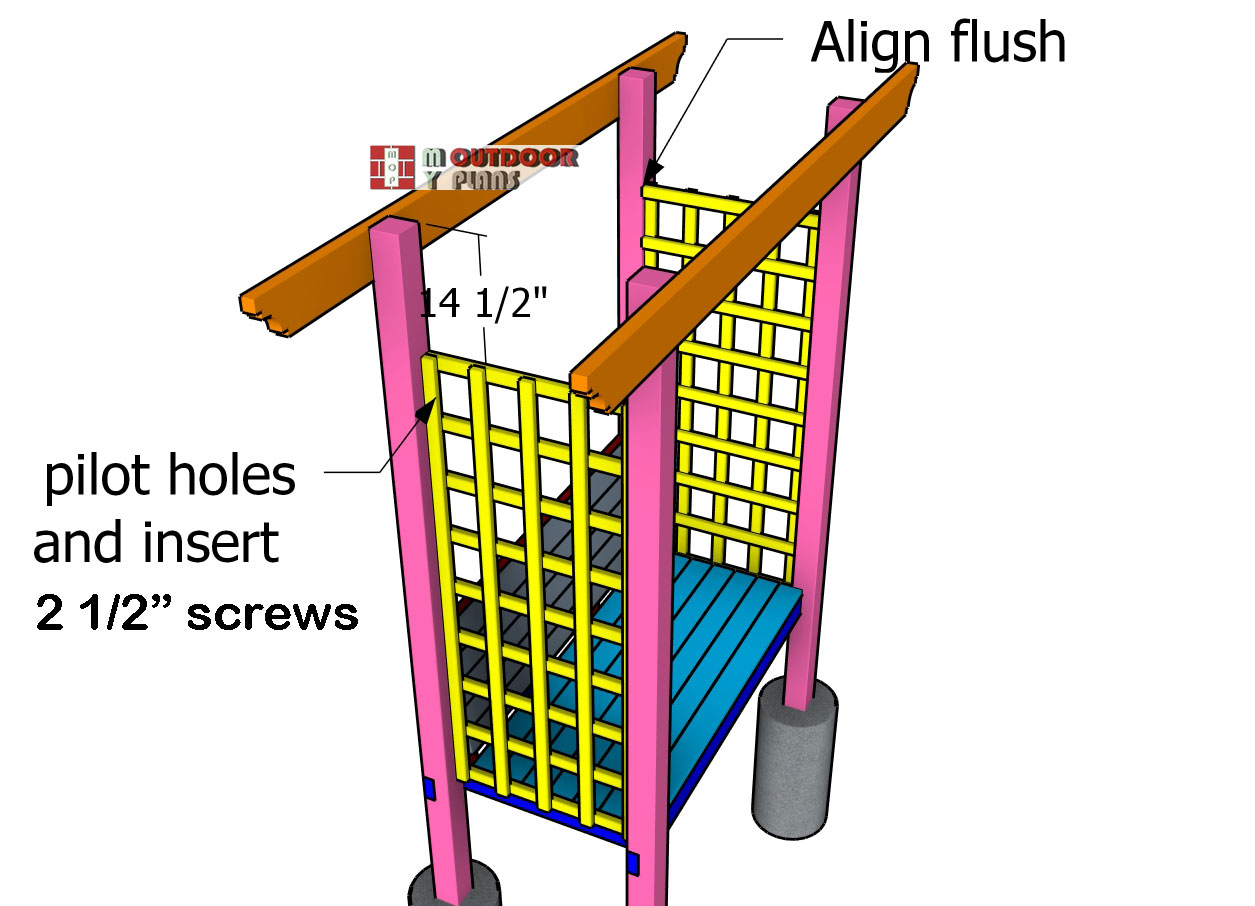
Attaching-the-side-panels
Last but not least, let’s focus on the finishing touches. Fill any holes with wood putty and smooth the surface with 120-220 grit sandpaper. Apply a few coats of stain or paint to enhance the look and protect it from the elements. Now, attach the house numbers and the solar lamp for that extra bit of functionality. Finally, set the mailbox in place following the manufacturer’s instructions.

Top-pieces
Use 2×2 lumber for the top slats (shade elements). Make decorative cuts to both ends of the boards and set them on top of the garden arbor.
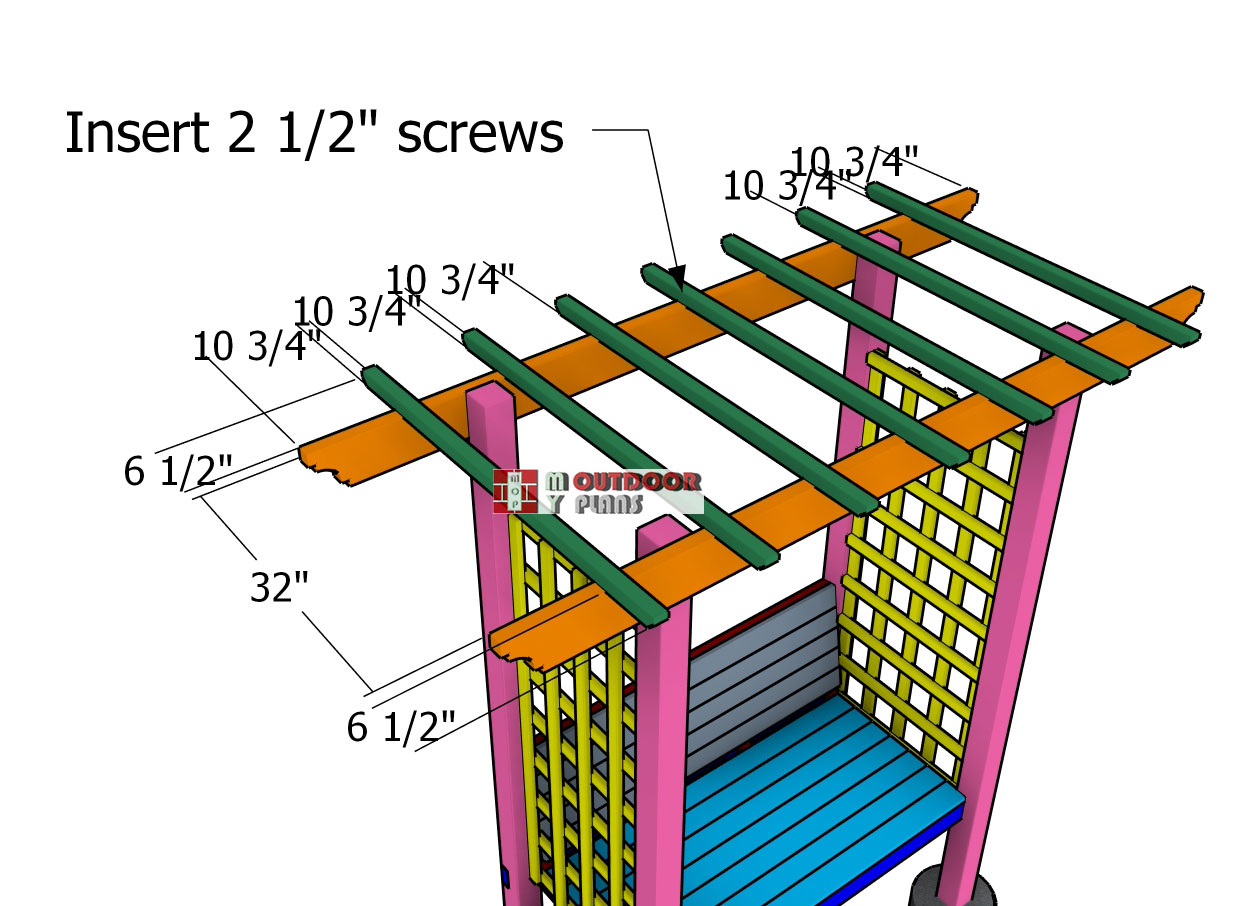
Fitting-the-top-slats
Place the slats equally spaced and create 6 1/2″ overhangs to the front and back of the arbor. Drill pilot holes and insert 2 1/2″ screws to lock them into place.
Finishing touches – Garden Bench with Pergola

Garden arbor bench plans
For the finishing touches on your garden arbor, start by filling any gaps or holes with wood filler and sanding everything smooth. Next, apply a quality outdoor paint or stain to protect the wood and give it a great finish.
DIY Garden Arbor Bench Plans
Finally, add some personal touches like climbing plants or hanging lanterns to make it a standout feature in your garden. And there you have it! Your custom arbor bench is ready to add some charm to your yard. I hope you enjoyed this project as much as I did—now go out there and build your outdoor world!
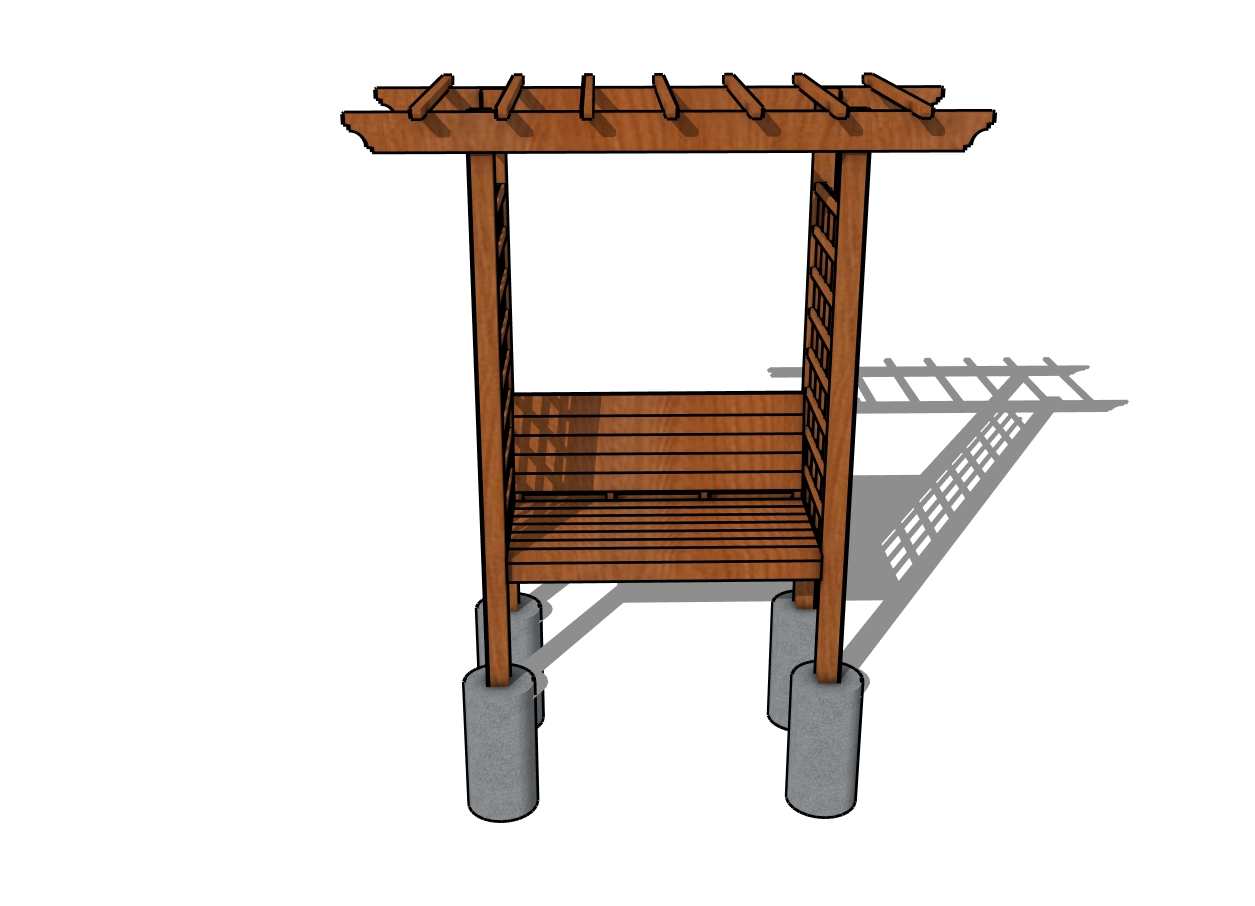
Garden arbor bench plans – front view

How to build a garden arbor bench
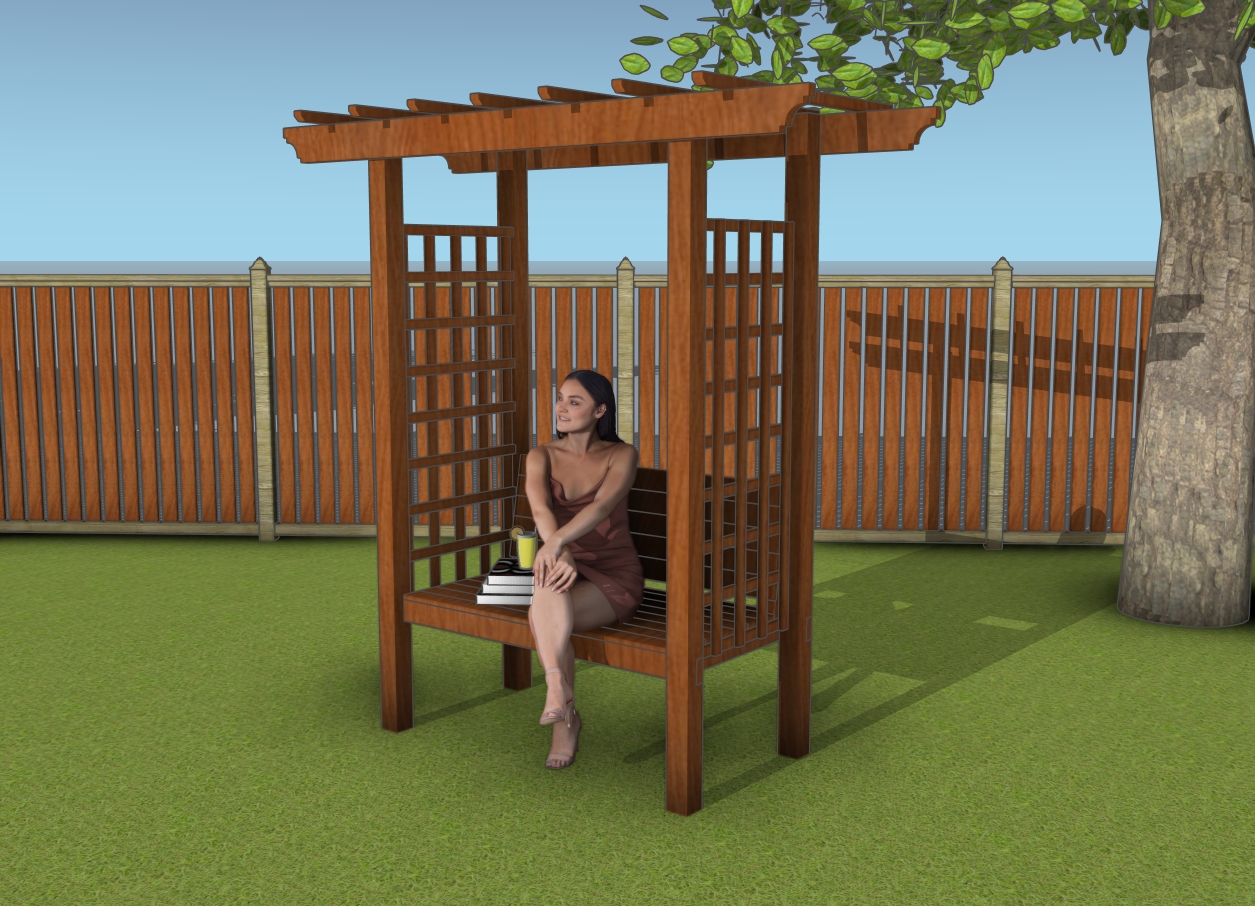
Imagine stepping into your garden and finding your perfect spot on the new arbor bench. The roses are starting to climb, creating a beautiful canopy above you. With a cup of coffee and a good book, you’re surrounded by the peaceful sounds of nature. It’s not just a bench, it’s your cozy retreat in the garden.

Arbor with bench
If you want to get the Premium plans with all the extras, just press the GET PREMIUM PLANS button bellow. If you want to get the free plans, just read the blog FAQs.

This woodworking project was about DIY garden arbor bench – free plans. If you want to see more outdoor plans, check out the rest of our step by step projects and follow the instructions to obtain a professional result.