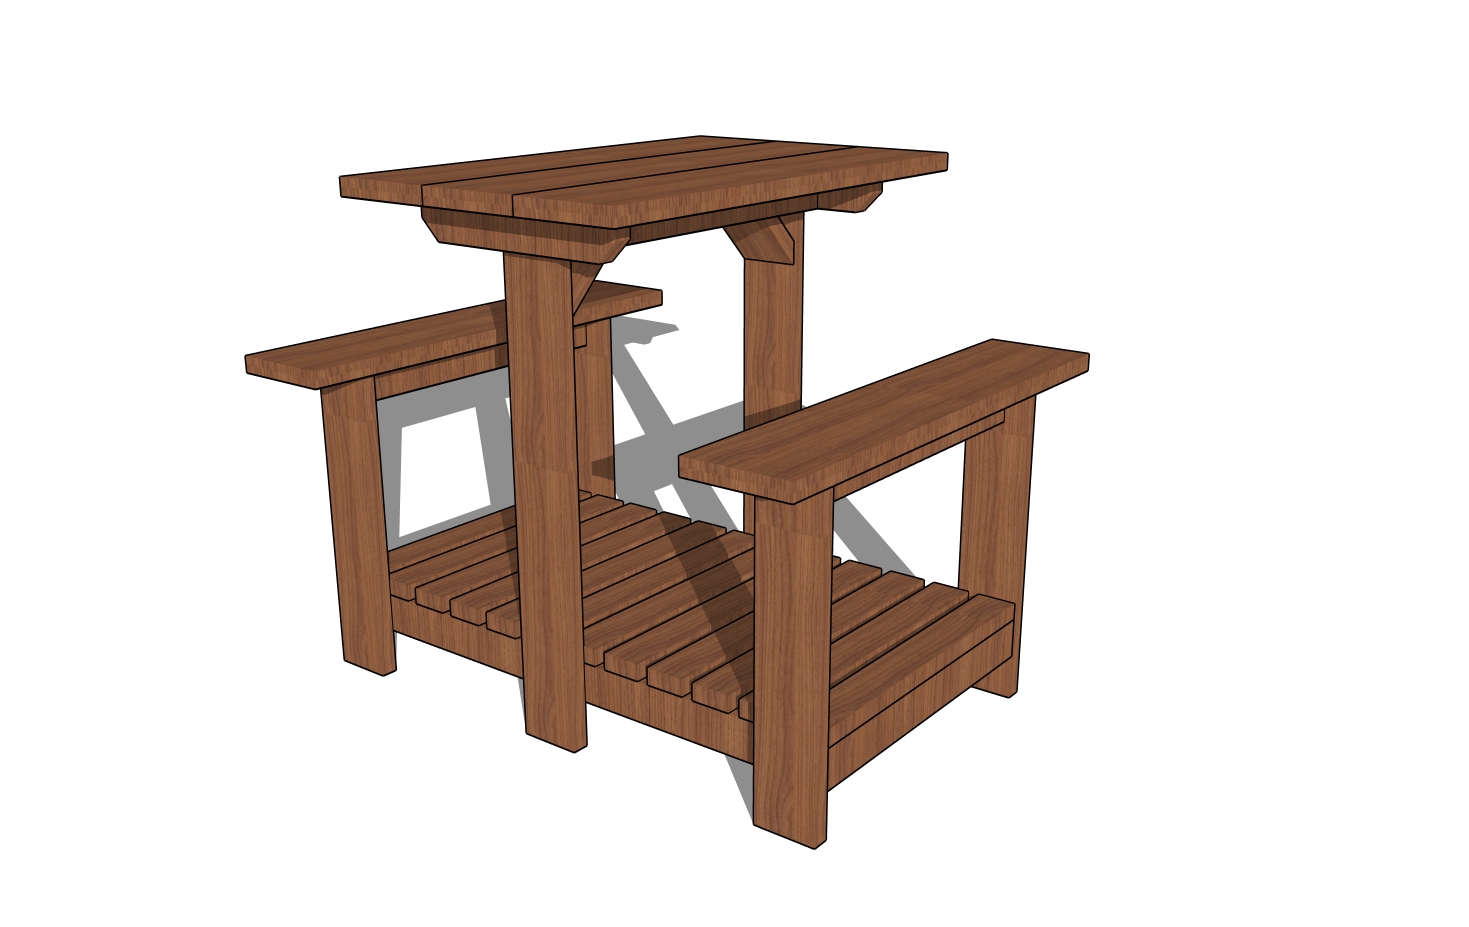
There’s something about a beach picnic table that just feels like summer. Whether it’s tucked under a shady tree in your backyard, set up by the lake, or resting on a sandy dune near the shore, it invites people to gather, eat, and unwind. This project brings that laid-back coastal vibe home—with a sturdy table, built-in benches, and a floor deck that keeps your feet clean and your setup feeling polished.
What makes this build special is that it’s not just functional—it’s a showpiece. With simple tools and a weekend’s worth of work, you’ll end up with a rock-solid picnic table that’s built to last and easy on the eyes. Perfect for family meals, morning coffee, or just soaking up the view, this beach picnic table is all about making outdoor living easy and beautiful.
For this project, I recommend using cedar or hardwood for their durability and natural resistance to the elements. Cedar is a fantastic option because it’s lightweight, rot-resistant, and has a beautiful, rustic look. Hardwood, on the other hand, provides superior strength and longevity, making your project a sturdy and stylish addition to your home.
Projects made from these plans
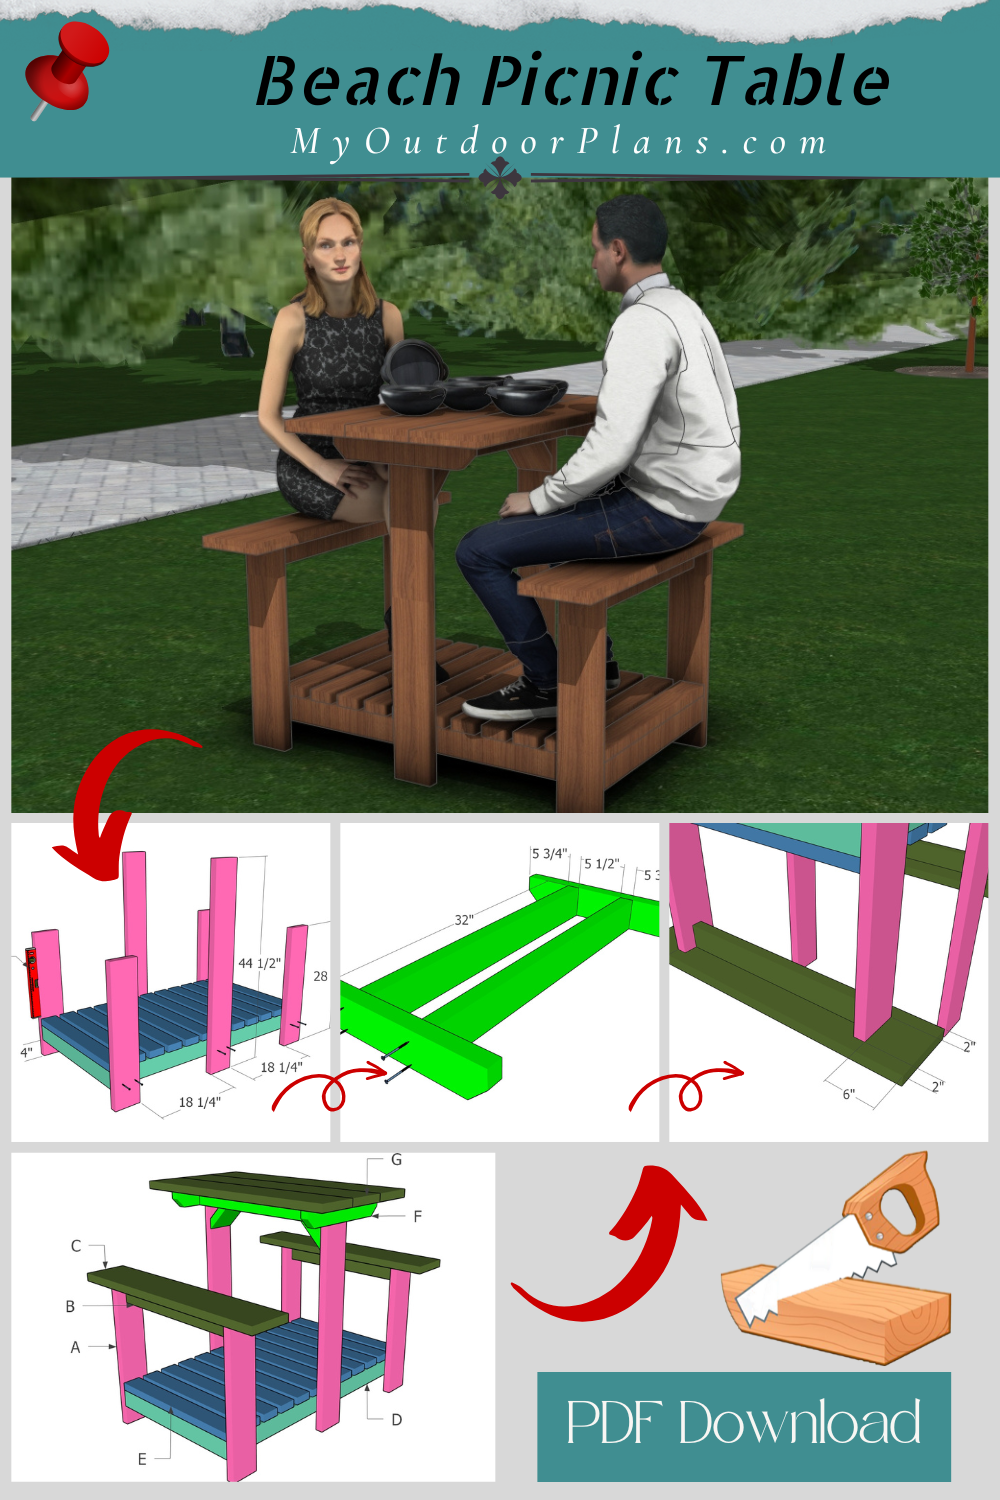
Beach Picnic Table Plans – Free Woodworking Plans
Cut and Shopping Lists
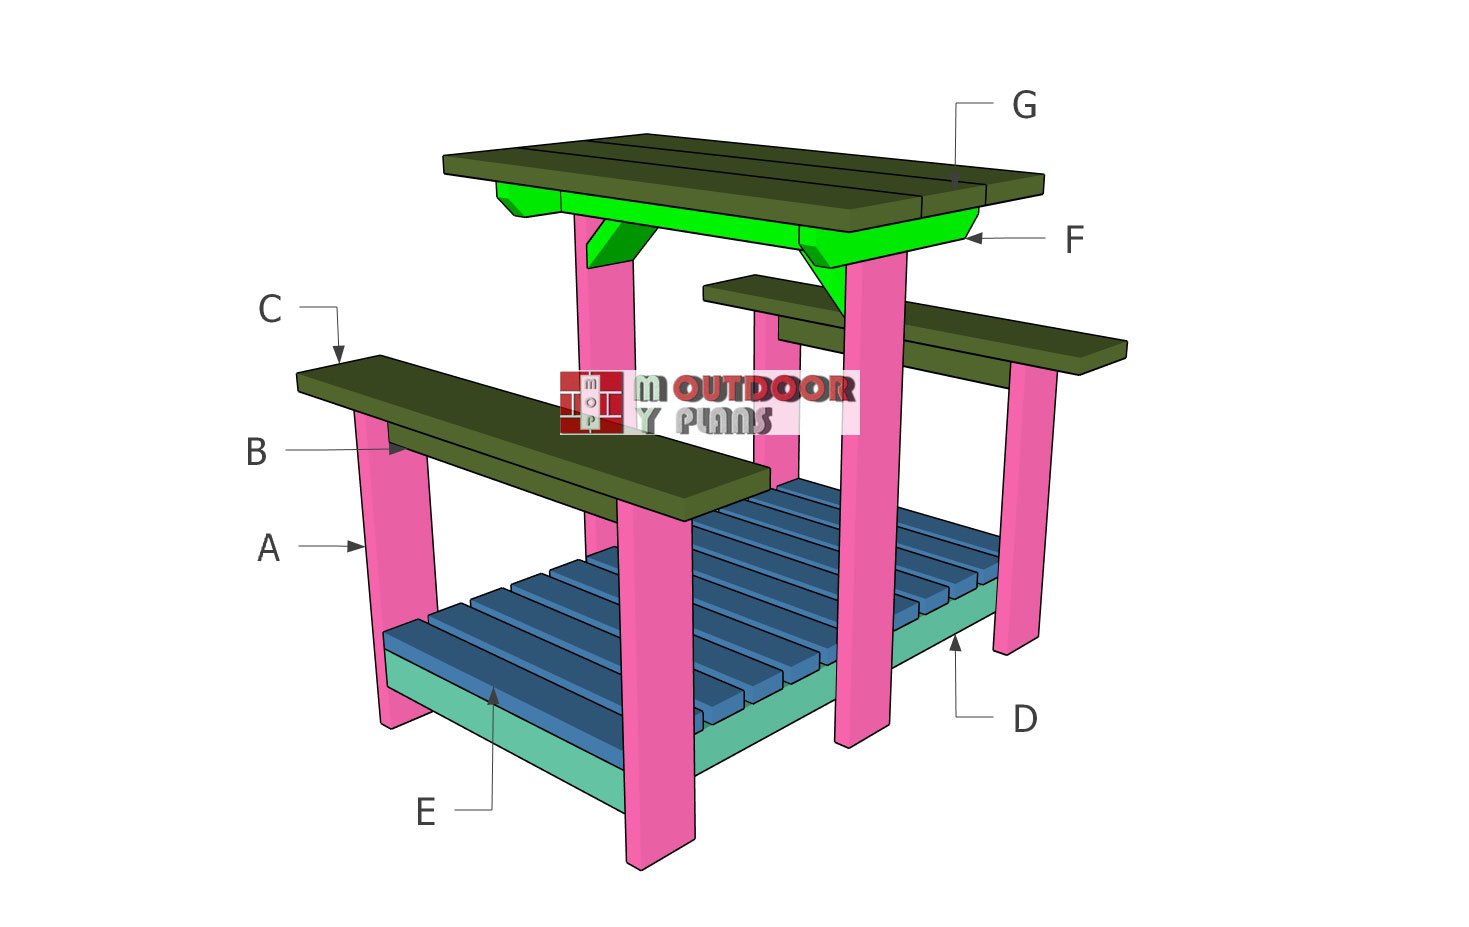
A – Seat Legs- 2×6 lumber 28 1/2″ long – 4 pieces
A – Tabletop frame – 2×6 lumber 44 1/2″ long – 2 pieces
B – Seat Supports – 2×4 lumber 29″ long – 2 pieces
C – Seat Slats – 2×10 lumber 44″ long – 2 pieces
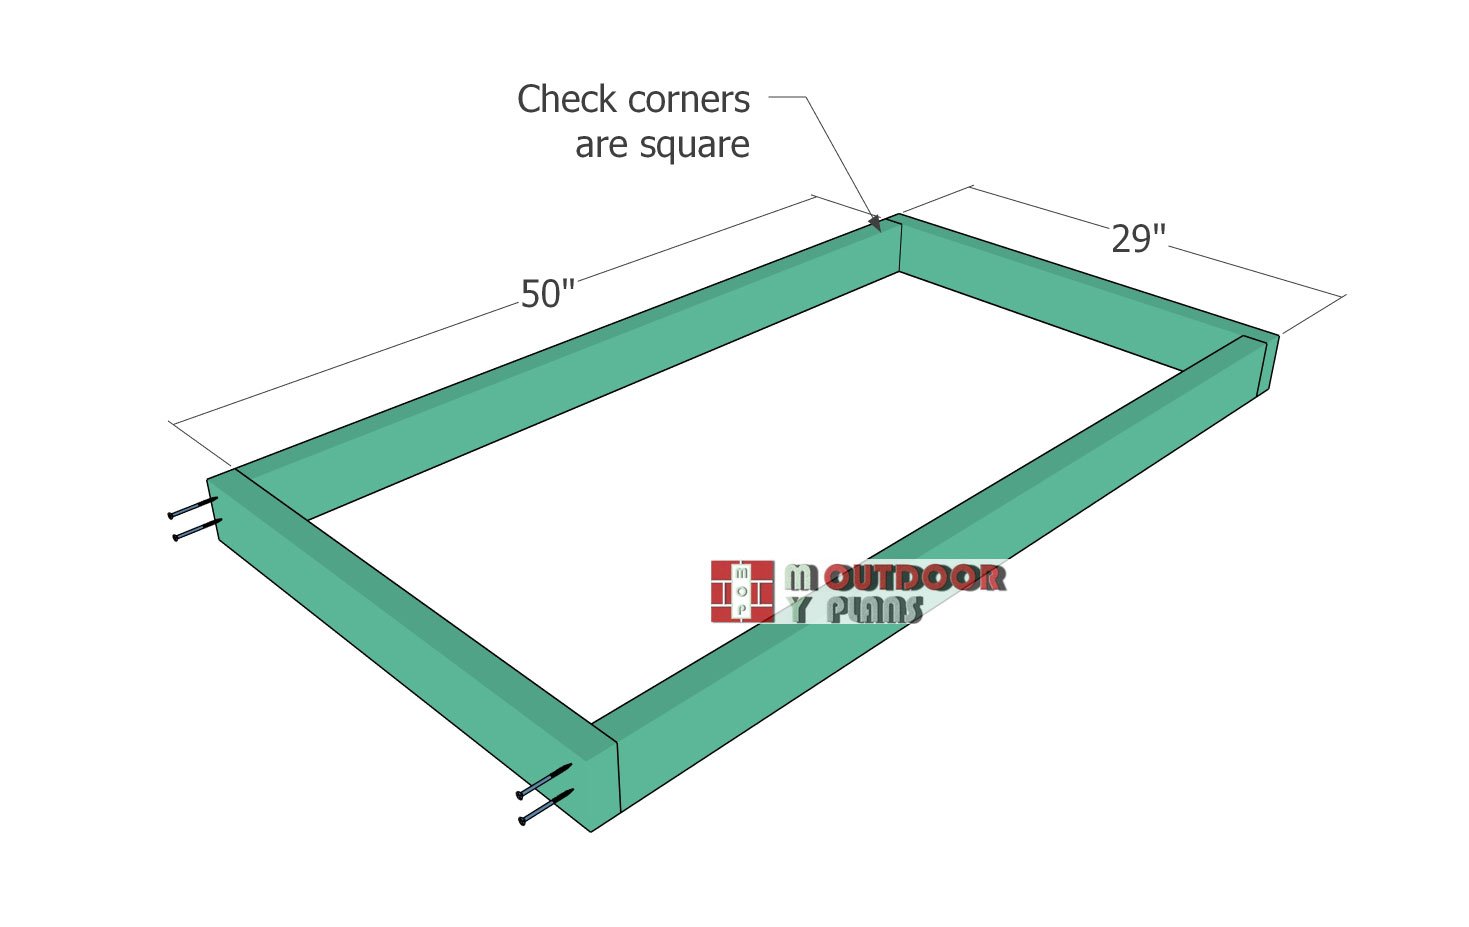
D – Floor Frame – 2×4 lumber 50″ long – 2 pieces
D – Floor Frame – 2×4 lumber 29″ long – 2 pieces
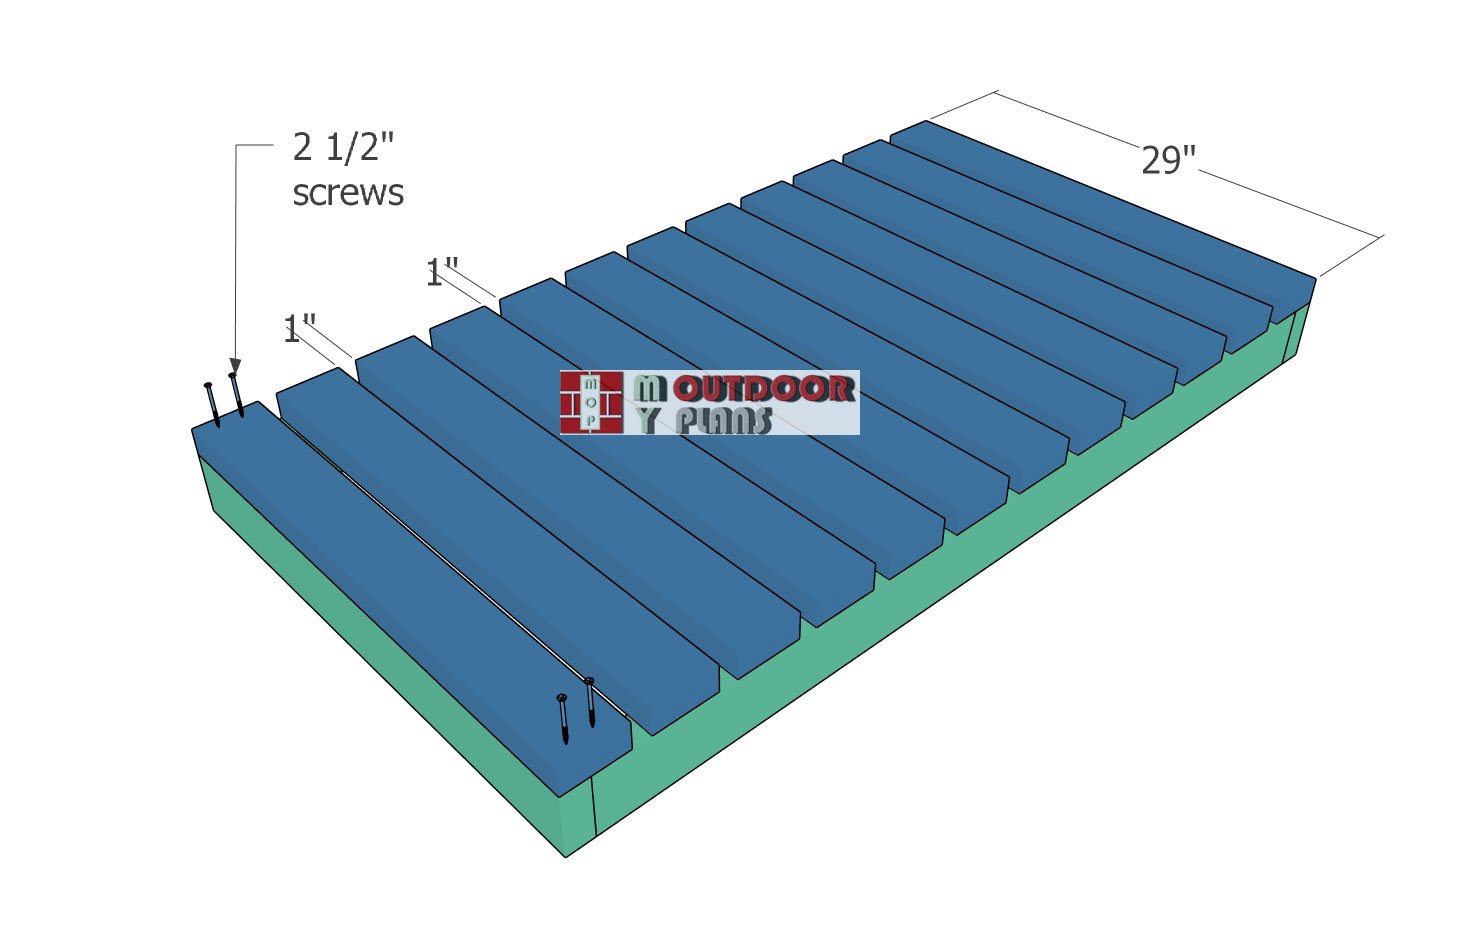
E – Deck Boards – 2×4 lumber 29″ long – 12 pieces
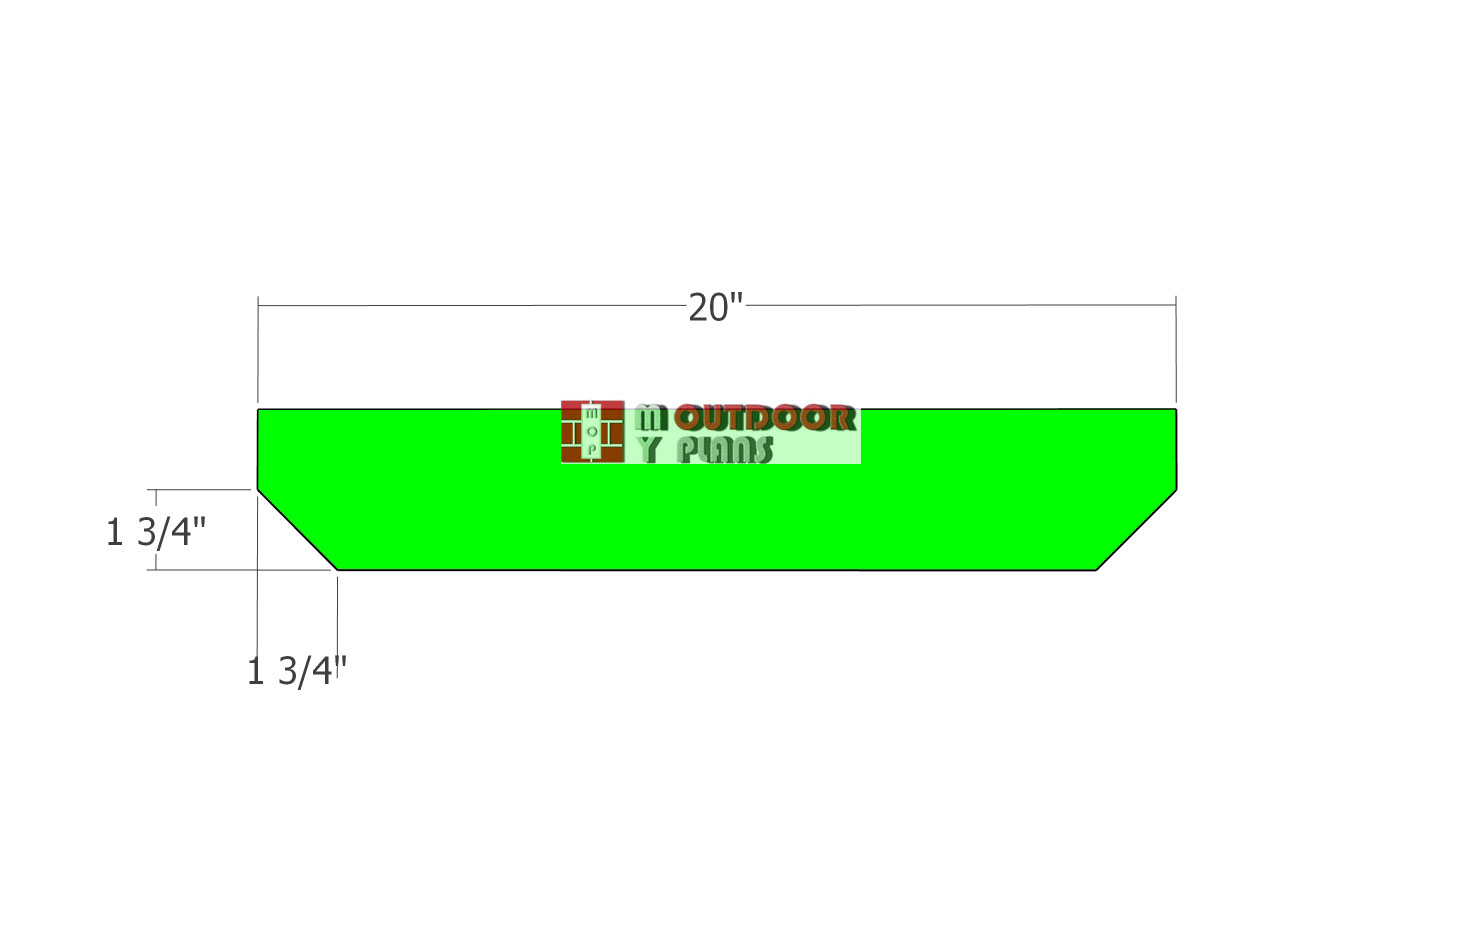
F – Tabletop Frame – 2×4 lumber 20″ long – 2 pieces
F – Tabletop Frame – 2×4 lumber 32″ long – 2 pieces
F – Diagonal Braces – 2×4 lumber 12″ long – 2 pieces
G – Tabletop – 2×10 lumber 44″ long – 3 pieces
- 2×4 lumber 8 ft – 1 piece
- 2×4 lumber 10 ft – 1 piece
- 1×4 lumber 8 ft – 3 pieces
- 1×6 lumber 8 ft – 1 piece
- 2 1/2″ screws – 100 pieces
- 3 1/2″ screws – 20 pieces
- Wood glue – 1 can
- Stain – 1 can
Tools
![]() Hammer, Tape measure, Framing square, Level
Hammer, Tape measure, Framing square, Level
![]() Miter saw, Drill machinery, Screwdriver, Sander
Miter saw, Drill machinery, Screwdriver, Sander
![]() Safety Gloves, Safety Glasses
Safety Gloves, Safety Glasses
Time
![]() One weekend
One weekend
Related
Pin for Later!
Step 1: Building the Floor Frame
Assembling-the-base-frame
Let’s kick things off with the floor frame. Grab your 2x4s and cut them down to size according to your plan. Once you’ve got your pieces ready, lay them out on a nice, flat surface—your driveway or garage floor works great. Now it’s time to put it all together.
Drill some pilot holes to keep the wood from splitting, then drive in 3 1/2″ screws to secure the corners and sides. Make sure all your edges line up flush, and double-check that your corners are square before moving on. A little extra time here keeps things solid and square down the line.
Fitting-the-deck-slats
Next up, it’s time to deck out the frame with your 2×4 slats. Line them up across the top, and be sure to use 1″ spacers between each board so your gaps stay nice and consistent. Those gaps aren’t just for looks—they help with drainage and airflow too.
Once everything’s spaced evenly and the ends are flush with the frame, drill your pilot holes to prevent splitting. Then drive in 2 1/2″ screws to lock those boards down tight. It should feel nice and solid when you’re done—like it’s ready for business.
Step 2: Building the Legs
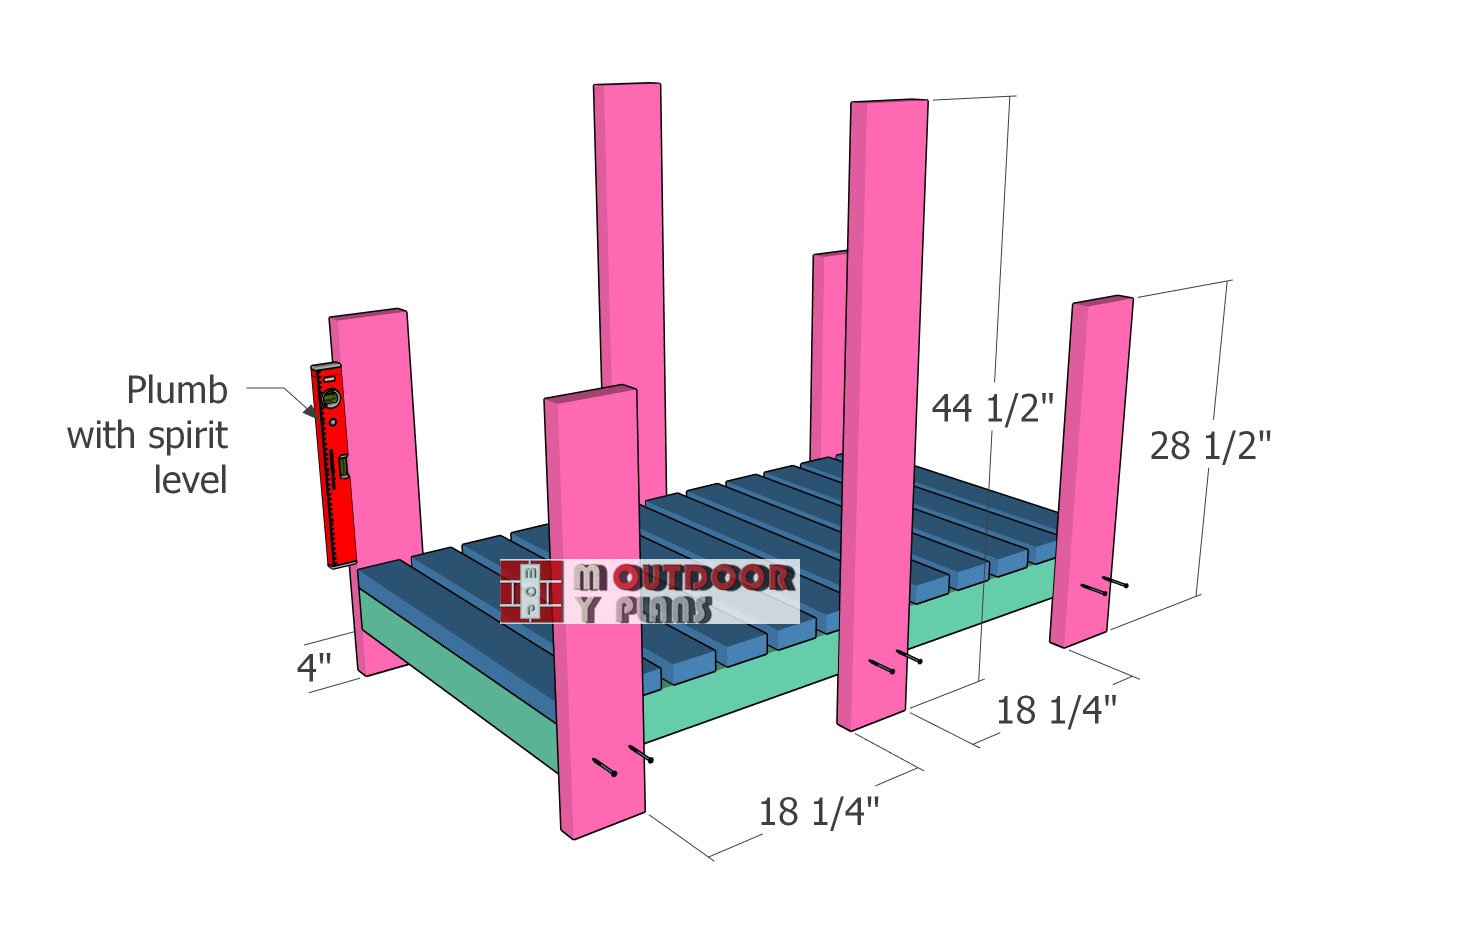
Attaching-the-legs
We’ll be using 2×6 lumber for the legs. Cut the boards to 28 1/2″ and 44 1/2″, then attach them to the floor frame as shown in the diagram. Use a spirit level to make sure the legs are plumb, drill pilot holes, and drive in 2 1/2″ screws to lock everything together securely. Make sure there are no gaps and double-check that all joints are tight and solid.

Bench-support
Fit 2x4s between the bench legs and center them into place. Drill pilot holes and drive in 3 1/2″ screws to secure them tightly. These boards add crucial support for the weight of anyone sitting on the benches, so don’t skip this step—it’s what keeps everything strong and sturdy.

Attaching-the-bench-seat
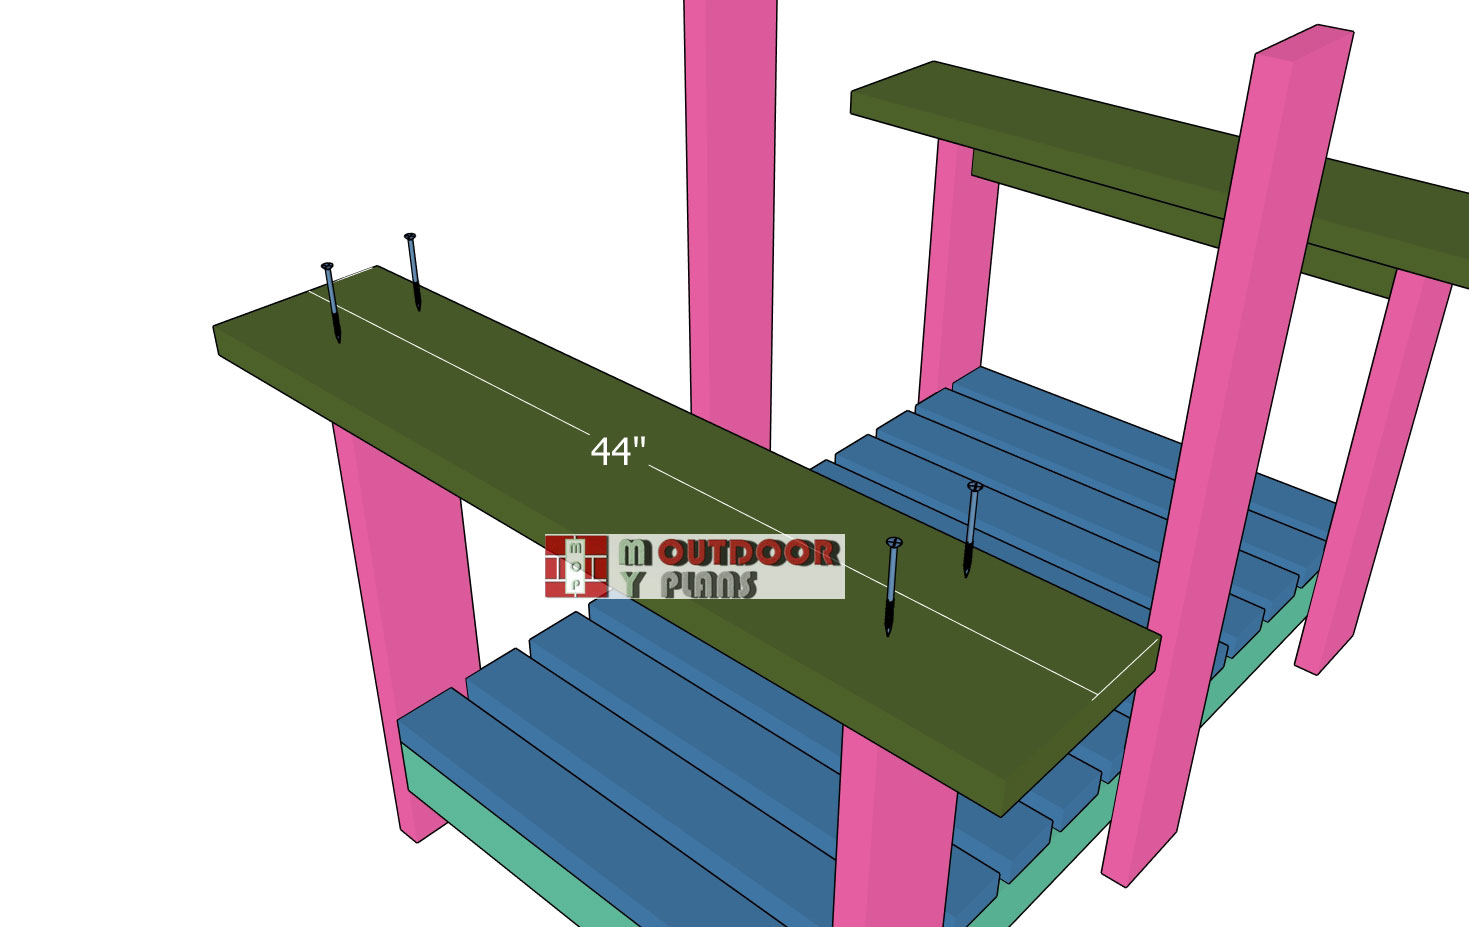
Attaching-the-seat-slats
Attach the 2×10 boards to the seat frames and center them into position, just like in the diagram. Drill pilot holes through the seat boards, then drive in 3 1/2″ screws to fasten them down securely. Make sure everything is tight and flush for a clean, sturdy finish.
Step 3: Attaching the Tabletop
Tabletop-supports
Alright, let’s get started on the tabletop frame. Grab your 2x4s and cut two side supports to length. For a nice custom touch, go ahead and make some decorative cuts on both ends—nothing too fancy, just enough to give it that clean, finished look.
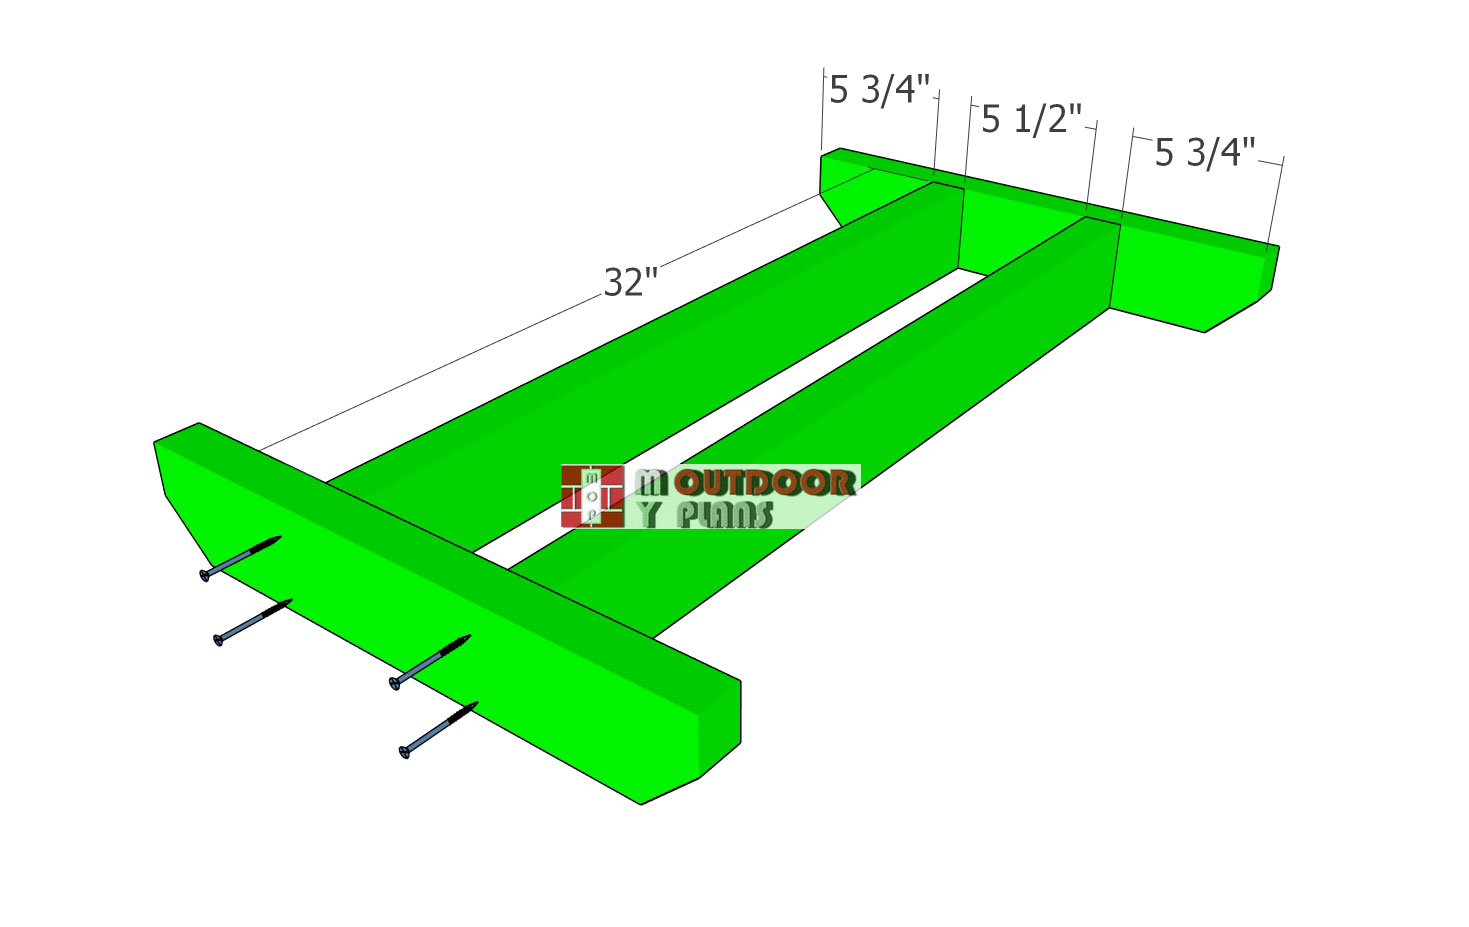
Tabletop-frame
Assemble the tabletop frame using 3 1/2″ screws. Line everything up nice and straight, and drill pilot holes before driving in the screws to keep the wood from splitting. Take your time here—getting everything square now will make the rest of the build go a whole lot smoother.
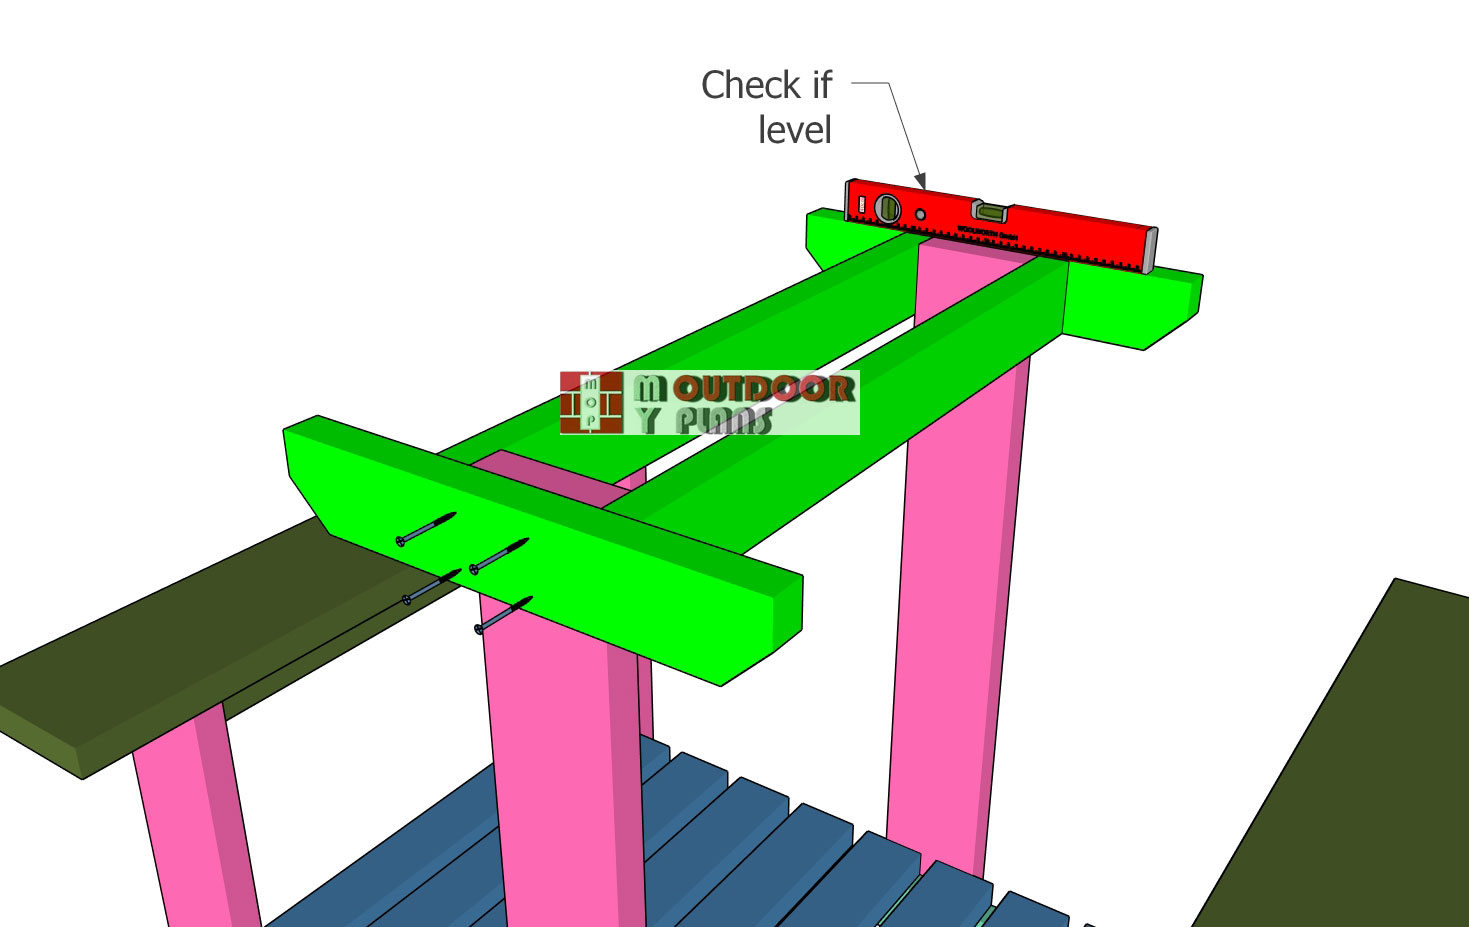
Fitting-the-tabletop-frame
Set the frame on top of the table legs and take a moment to get everything aligned just right. Use a spirit level to make sure the frame is sitting perfectly horizontal. Once it’s in position, clamp it down, drill your pilot holes, and drive in 2 1/2″ screws to lock it in place solid.

Fitting-the-tabletop-slats
Center the tabletop boards to the frame, drill pilot holes and insert 2 1/2″ screws to secure them into place. Align the boards to both ends, leave no gaps between the boards and sand over once installed into place.
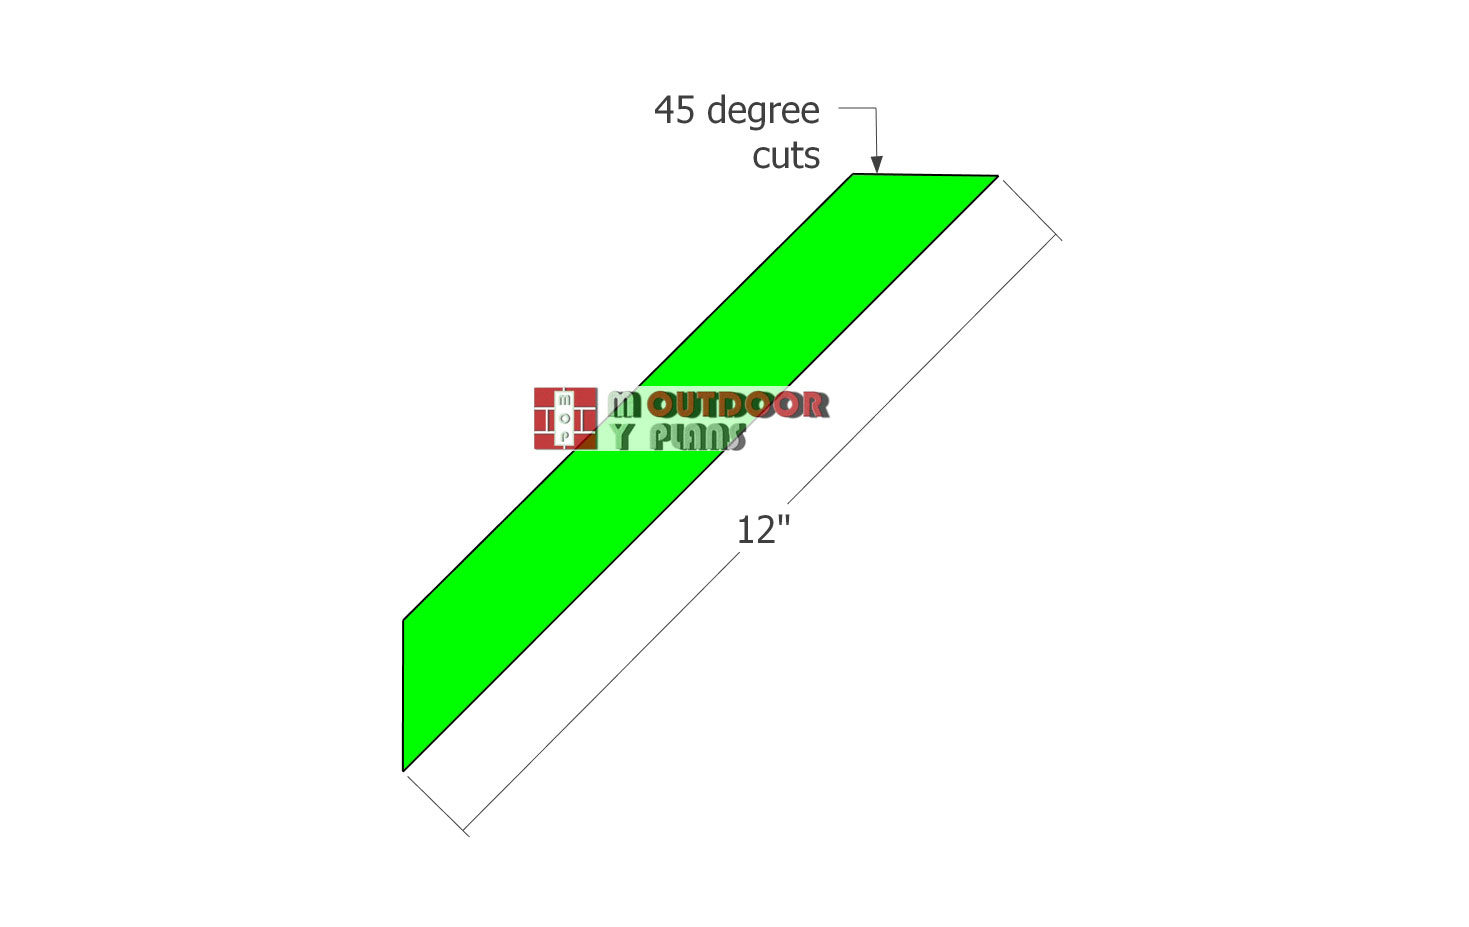
Diagonal-brace
To keep the table rock solid and prevent any side-to-side wobble, we’ll add diagonal braces to the tabletop frame. Cut both ends of each brace at a 45-degree angle using a miter saw or circular saw for a snug fit.
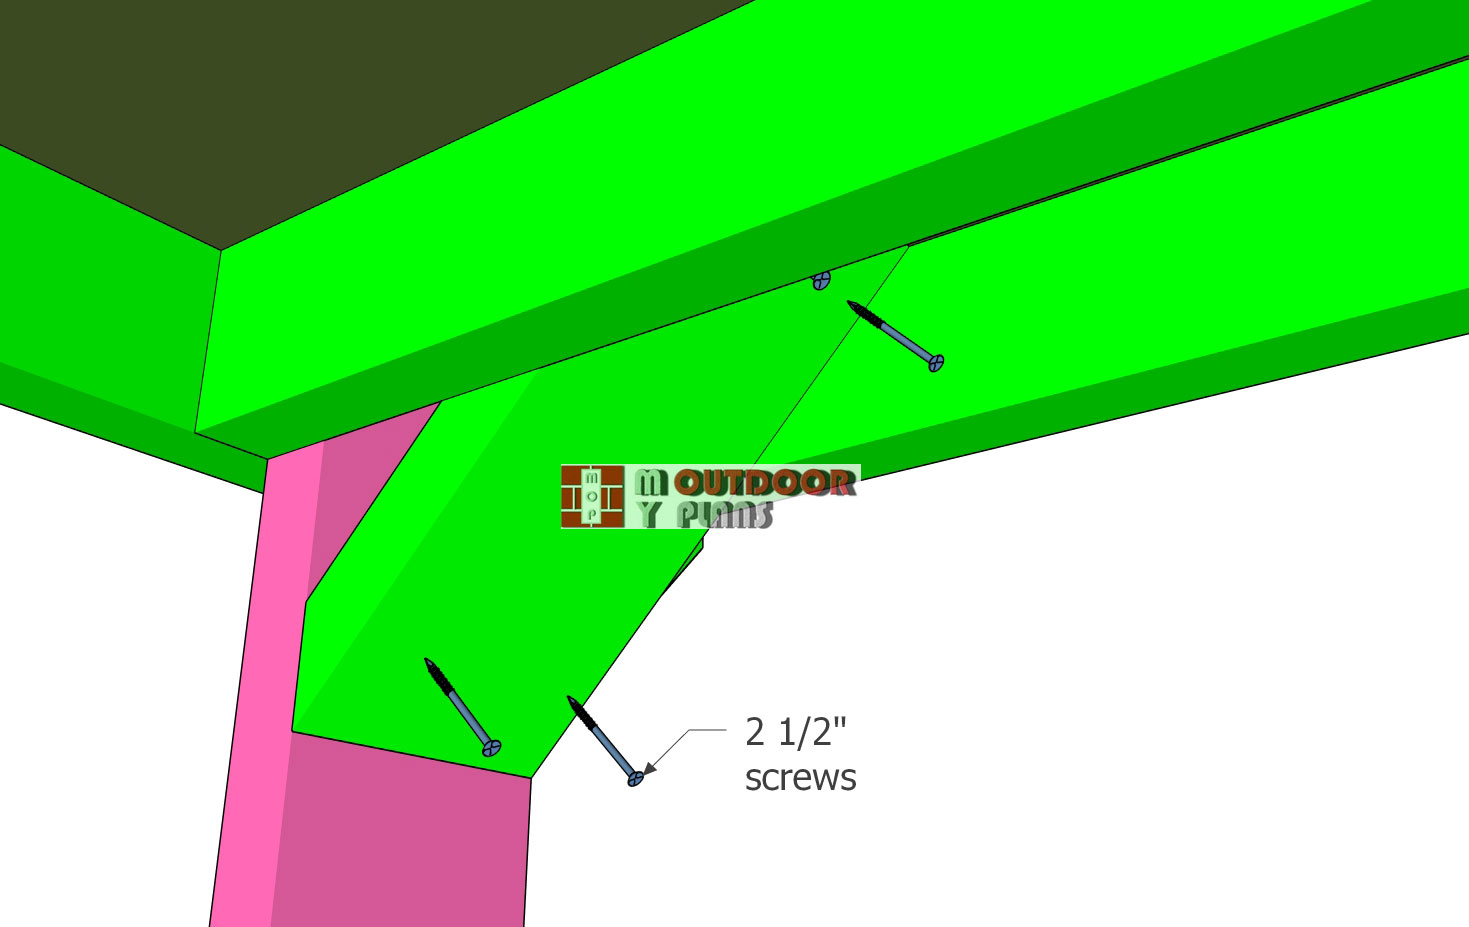
Fitting-the-diagonal-braces
Fit the braces under the tabletop so they sit snug against the frame. Drill pilot holes and drive in 2 1/2″ screws to lock them in place nice and tight. Two screws at each joint will keep everything sturdy and solid for the long haul.
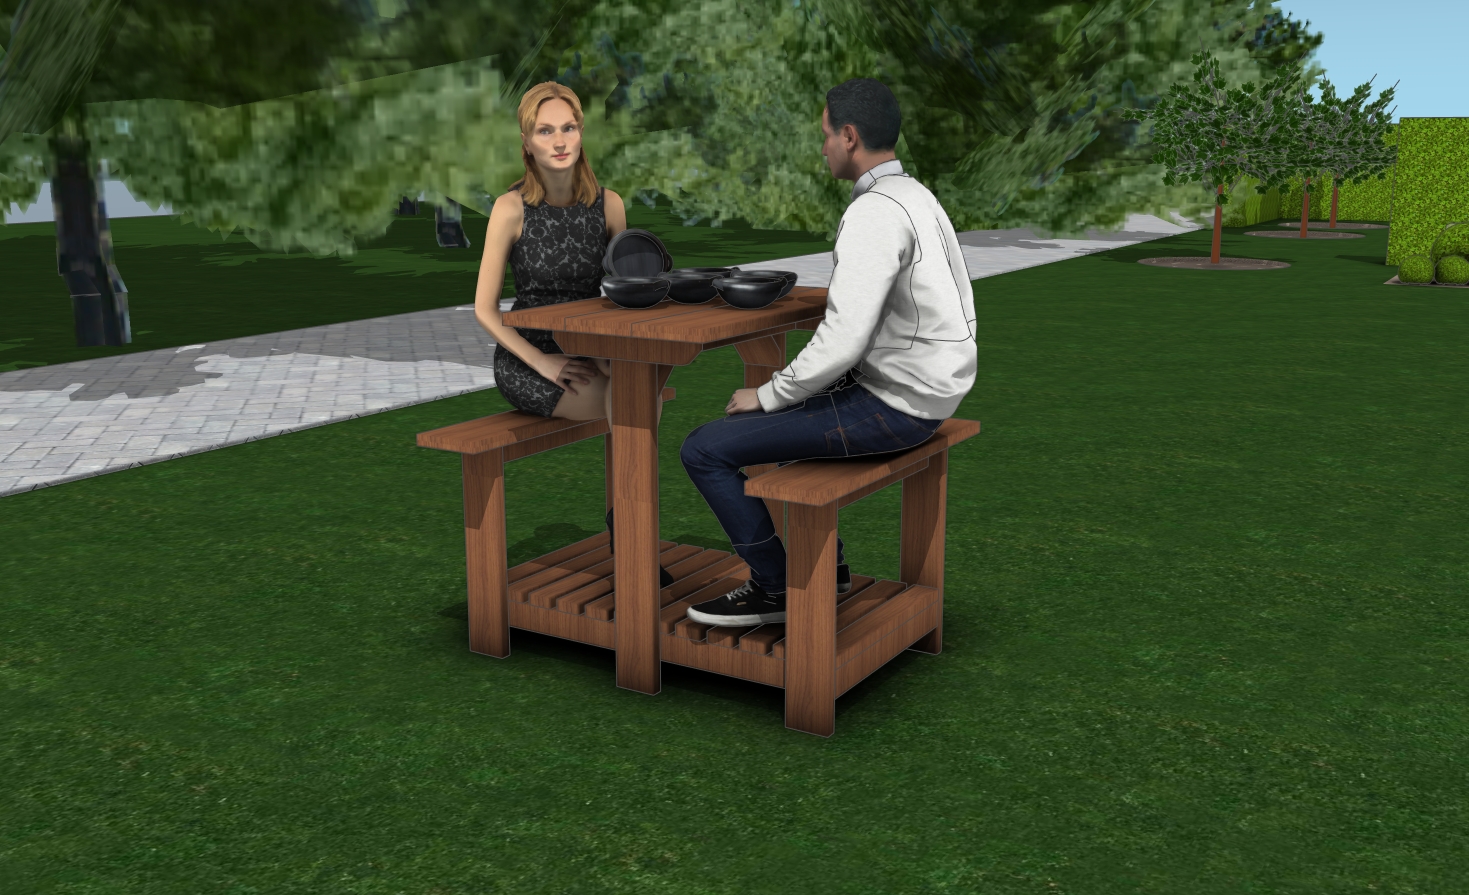
Step 4: Attaching the Tabletop and Seats
Beach picnic table plans
With the build complete, it’s time to bring everything together with the finishing touches. Start by sanding down all surfaces, especially the tabletop, bench seats, and edges. This not only smooths out any rough spots but also gives the wood a clean, polished look. Use 120-grit sandpaper to knock down sharp edges and follow up with 220-grit for a buttery finish. If you’re going for a rustic beach vibe, you can even round over the corners just a bit for that soft, weathered look. Take your time here—this step makes a big difference in both comfort and appearance.
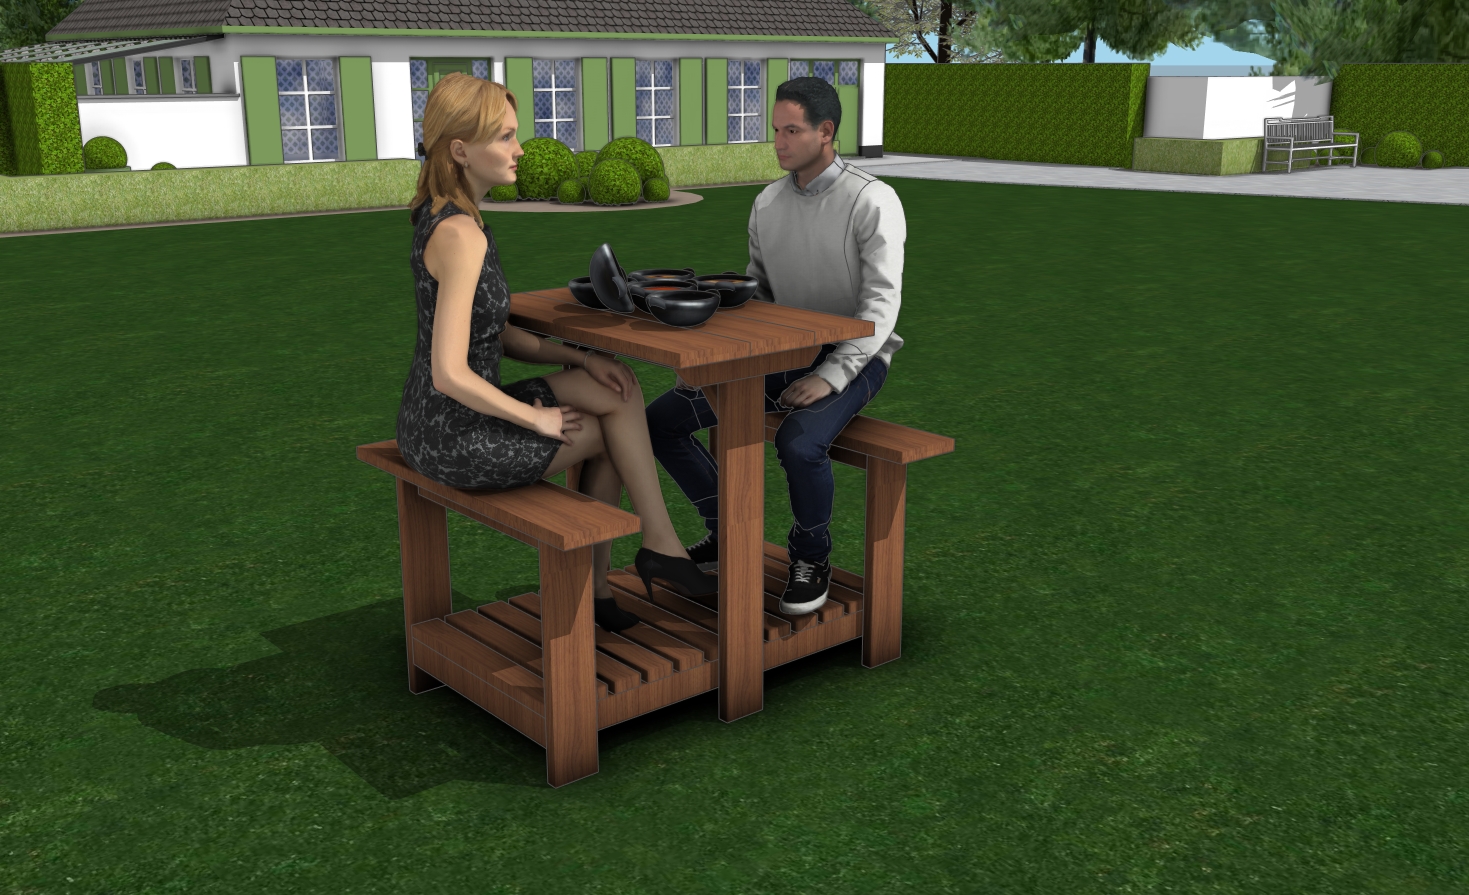
DIY tall picnic table
Once everything’s sanded and wiped clean, go ahead and apply your choice of exterior finish. A weather-resistant stain or sealant will protect the table from salty air, sun, and moisture, which is especially important in a coastal setting. For a more natural look, consider a clear UV-protective finish to let the wood grain shine through. If you’re feeling creative, a whitewash or beachy pastel could also give it that classic boardwalk charm. Let the finish dry completely before using the table, and just like that—you’ve got yourself a beautiful, durable beach picnic table that’s ready for sunset meals, sandy feet, and good company.
How to build a picnic table
And there you have it—a sturdy, stylish beach picnic table with a built-in floor deck that’s ready for years of coastal gatherings, backyard barbecues, or lazy Sunday lunches. This project blends functionality with charm, giving you a solid spot to relax, eat, and make memories. Whether it’s your first build or your fiftieth, there’s something satisfying about stepping back and seeing what you created with your own two hands.
If you want to get the Premium plans with all the extras, just press the GET PREMIUM PLANS button bellow. If you want to get the free plans, just read the blog FAQs.

This woodworking project was about diy beach picnic table plans. If you want to see more outdoor plans, check out the rest of our step by step projects and follow the instructions to obtain a professional result.