Looking to protect your car with style? This modern lean-to carport free plan brings a sleek, minimalist vibe while offering solid coverage. Sized at 12×20 feet, it’s built for one vehicle, blending practicality with a touch of modern design. With a 2:12 roof pitch that keeps things simple and effective, the carport features an open front and sides to ensure easy access. The slatted back wall adds a clean, contemporary look while providing extra shade and privacy without closing off the space. This DIY project is perfect for anyone wanting a stylish, functional carport that enhances their outdoor area.
Building this modern lean-to carport is a rewarding project that you can complete over a weekend with a bit of planning. Depending on your experience level and tools on hand, the framework and slatted wall assembly should take around 8 to 12 hours. Budgeting is key, as lumber and roofing materials can vary; however, a standard estimate ranges from $1000 to $1,500, depending on the type of wood, roof sheathing, and finishes you choose. For a simple yet durable build, using pressure-treated wood and metal roofing offers both affordability and longevity. This carport is designed to be an achievable DIY project without breaking the bank, making it a perfect weekend venture for those looking to upgrade their outdoor space on a budget.
When buying the lumber, you should select the planks with great care, making sure they are straight and without any visible flaws (cracks, knots, twists, decay). Investing in cedar or other weather resistant lumber is a good idea, as it will pay off on the long run. Use a spirit level to plumb and align the components, before inserting the galvanized screws, otherwise the project won’t have a symmetrical look. If you have all the materials and tools required for the project, you could get the job done in about a day.
Projects made from these plans
Pin it for later!
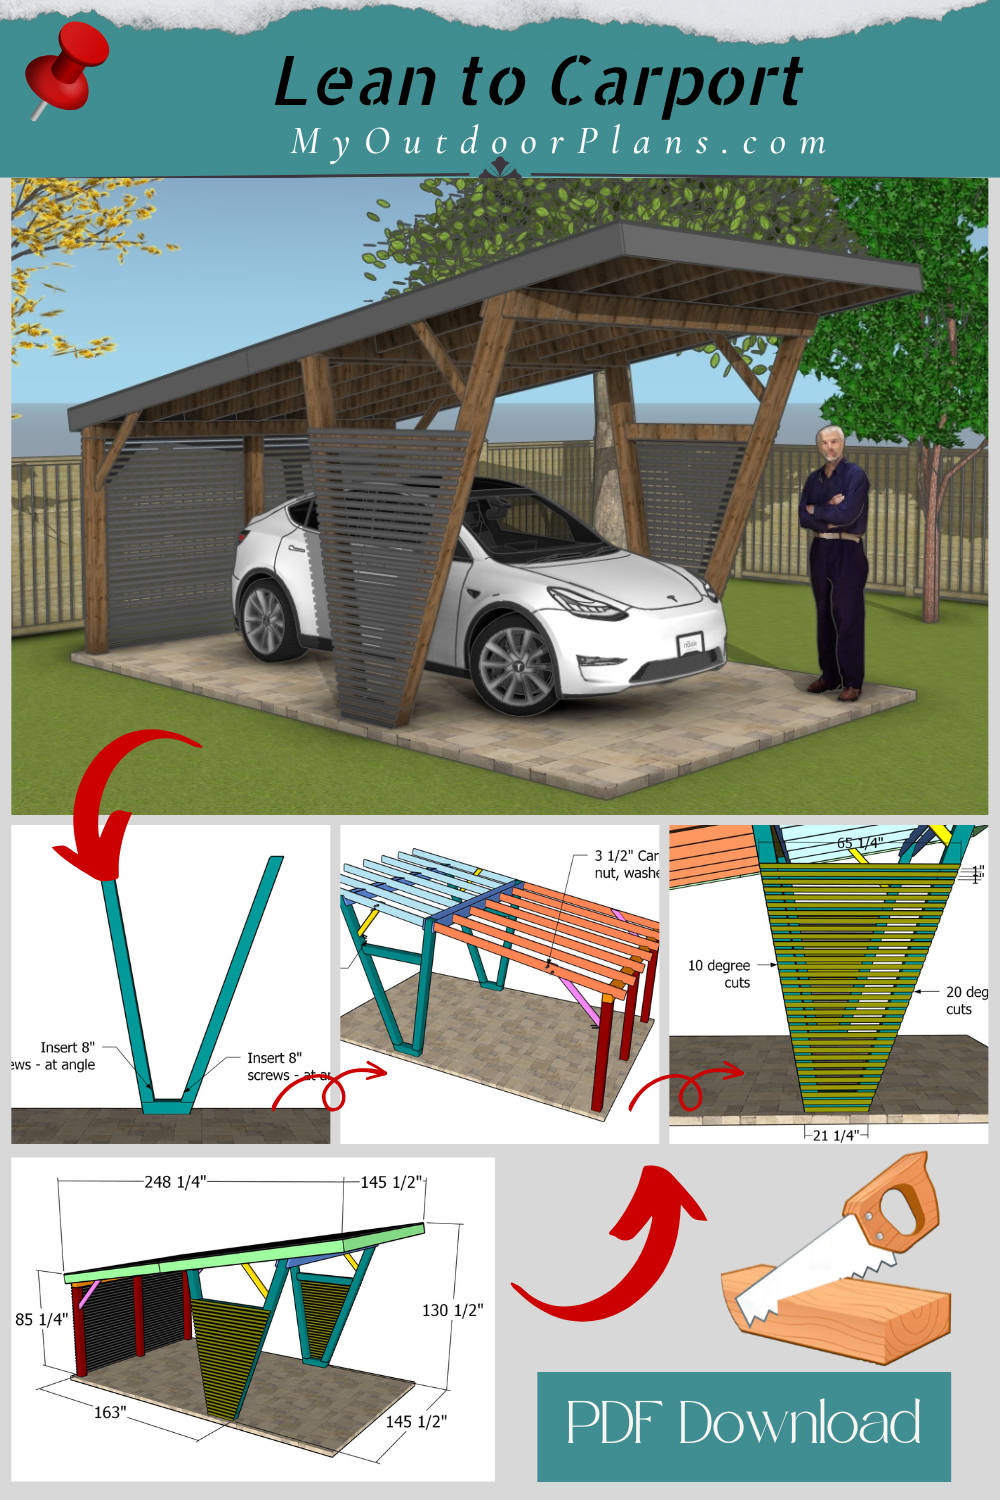
Building a Modern 12×20 Lean to Carport
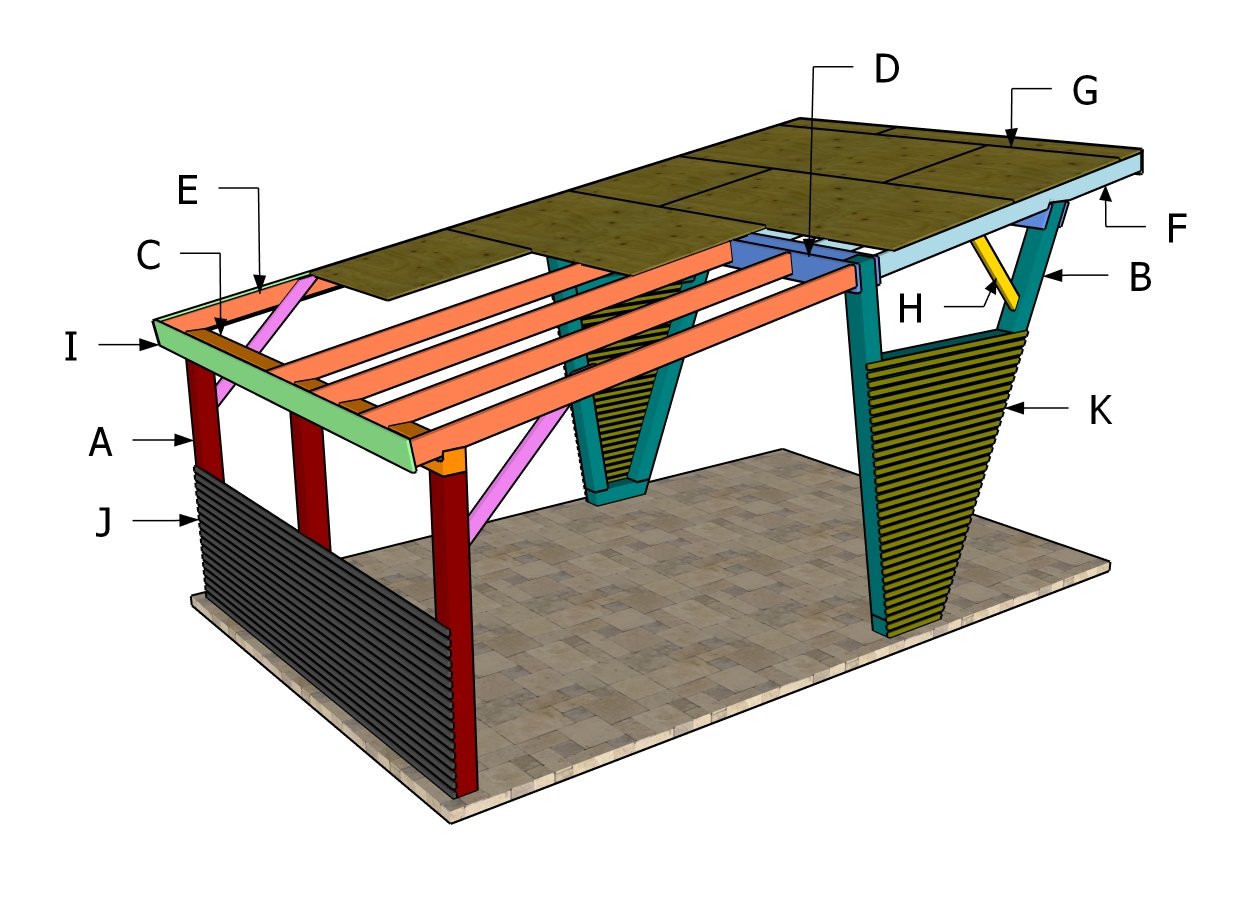
Building a modern carport
Cut & Shopping Lists
- A – 3 pieces of 6×6 lumber – 76 1/2″ POSTS
- B – 2 pieces of 6×6 lumber – 24″ BASE PLATES
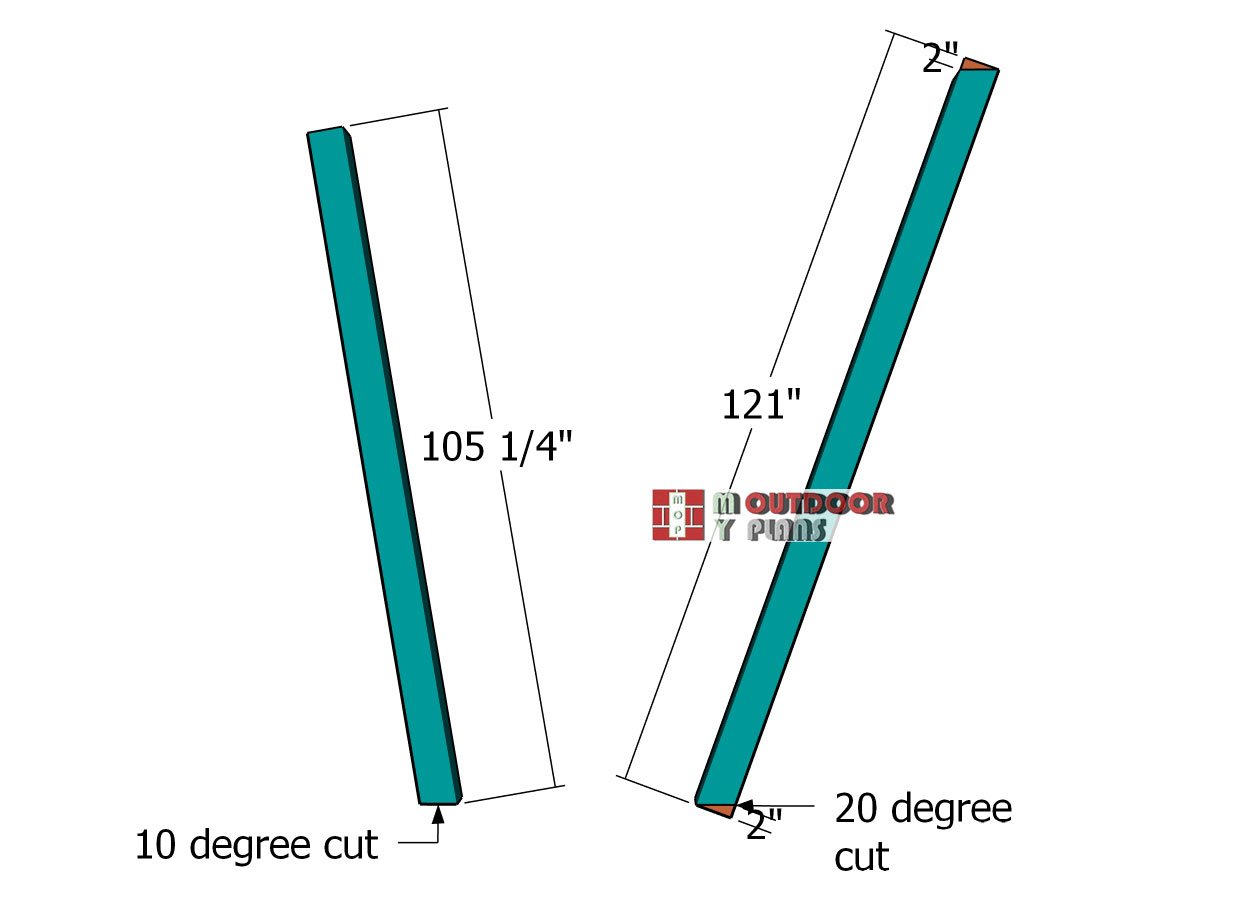
- B – 2 pieces of 6×6 lumber – 105 1/4″ FRONT POSTS
- B – 2 pieces of 6×6 lumber – 121″ FRONT POSTS
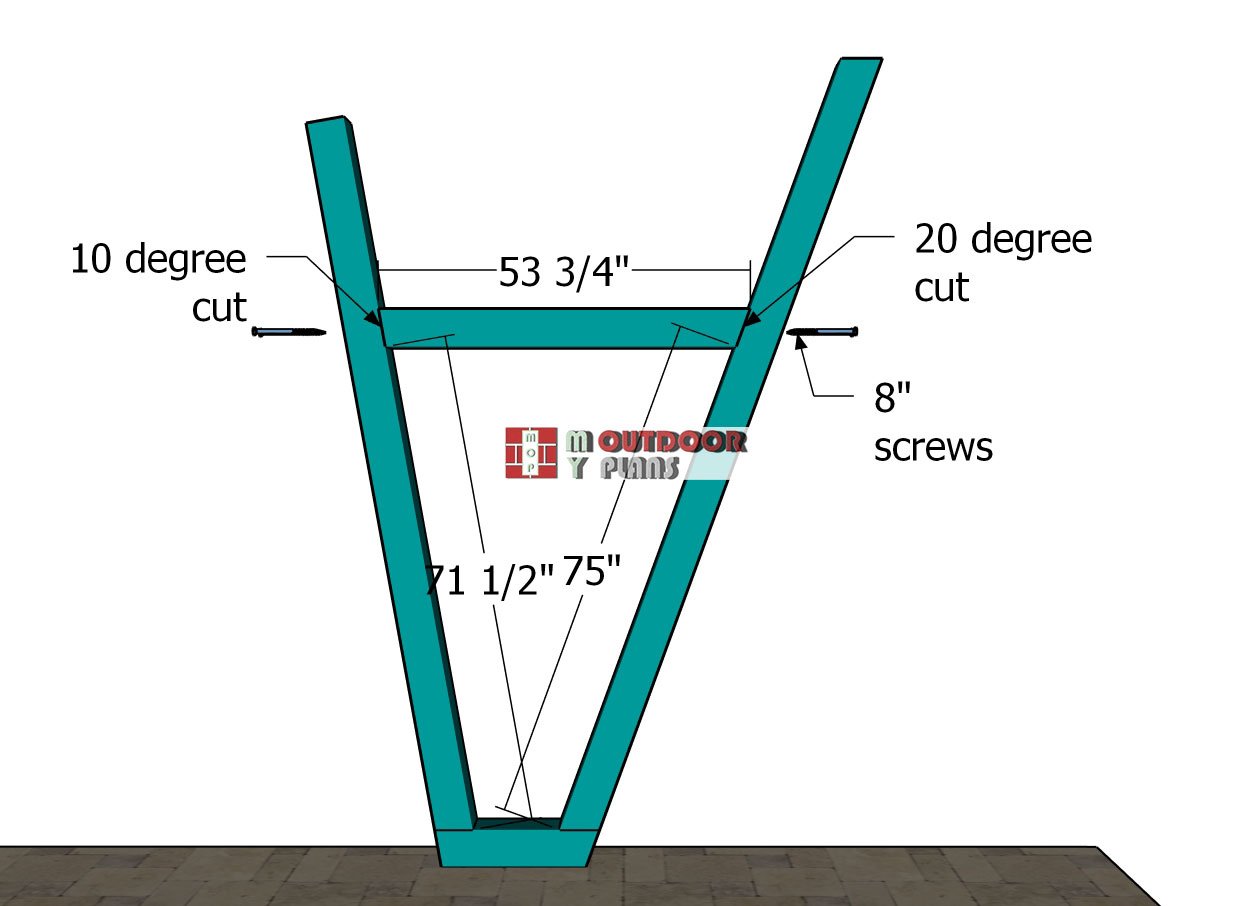
- B – 2 pieces of 6×6 lumber – 53 3/4″ FRONT SUPPORTS
- C – 1 piece of 6×6 lumber – 12 ft TOP BEAM
- D – 4 pieces of 2×8 lumber – 12 ft BEAMS
- 6×6 lumber 8 ft – 5 pieces
- 6×6 lumber 10 ft – 2 pieces
- 6×6 lumber 12 ft – 2 pieces
- 2×8 lumber 12 ft – 4 pieces
- post anchor for 6×6 – 7 pieces
- 12″ tube forms 3 ft – 7 pieces
- post to beam connectors for 6×6 – 3 pieces
- TP37 plate – 4 pieces
- Angle plate – 4 pieces
- 1 1/2″ structural screws – 1 box
- 8″ screws – 16 pieces
- 9″ carriage bolts with washers and nut – 8 pieces
- concrete – 7 bags
Tools
![]() Hammer, Tape measure, Framing square, Level
Hammer, Tape measure, Framing square, Level
![]() Miter saw, Drill machinery, Screwdriver, Sander
Miter saw, Drill machinery, Screwdriver, Sander
![]() Post hole digger, Concrete mixer
Post hole digger, Concrete mixer
![]() Safety Gloves, Safety Glasses
Safety Gloves, Safety Glasses
Time
Related
- Modern Carport Plans – Part 1
- Modern Carport Plans – Part 2
- 18×20 Double Carport Plans
- 3 Car Carport Plans
Modern Lean to Carport Plans

Layout
To kick off the project, the first step is laying out the posts for the modern carport. In the diagram, you’ll see the distances marked between each axis, indicating the precise center points for each post. This layout ensures that your structure will be stable and aligned, setting a solid foundation for the carport’s frame. Take your time with this step—it’s the groundwork for a smooth build ahead!
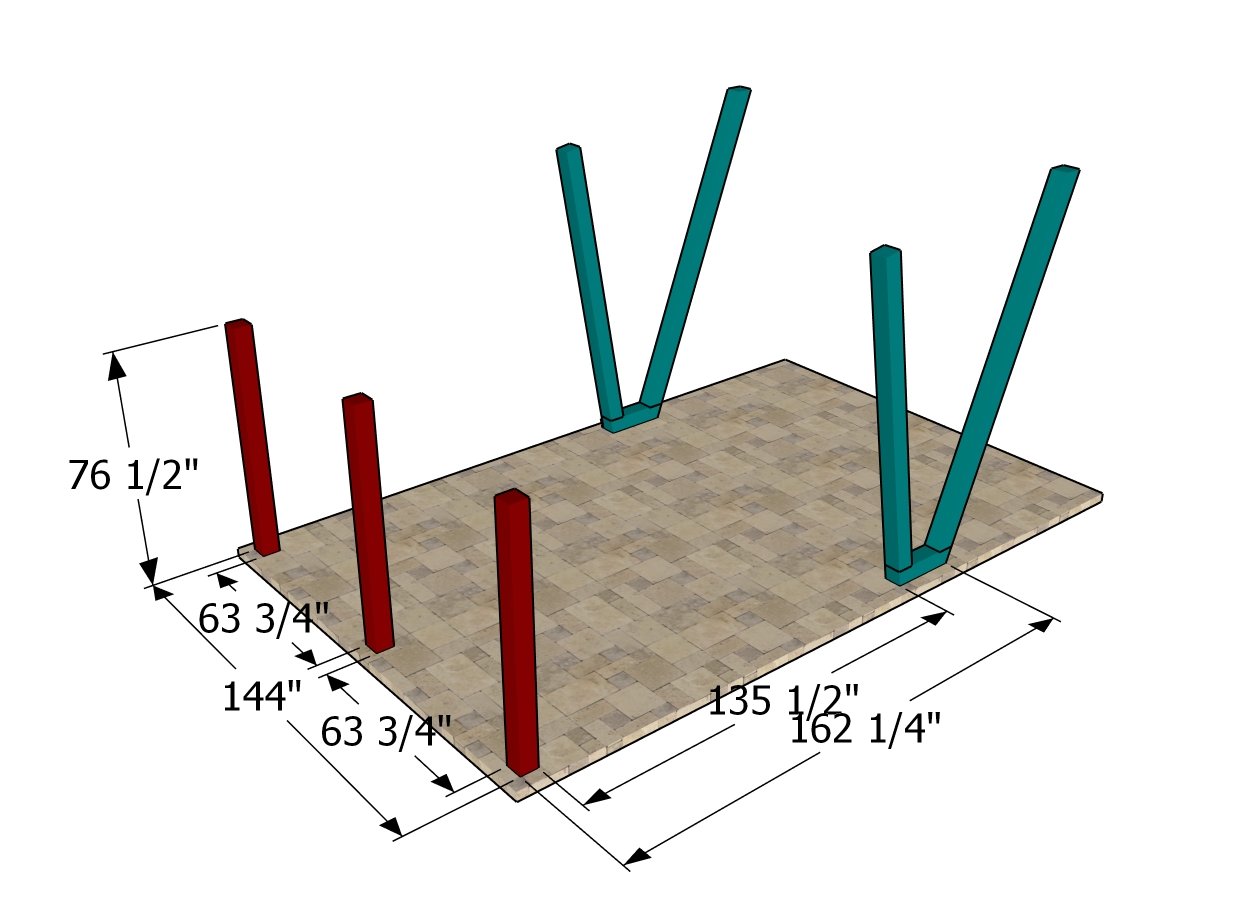
Post layout
In this second layout diagram, you’ll find the exact distances between each post, giving you a complete view of the spacing as you set up the posts and base plate for the carport. This detailed layout ensures accuracy, making it easier to build a strong, well-aligned frame. With this clear visual guide, you’ll have confidence that everything is measured and positioned just right for a sturdy, finished carport.

Anchoring the post into concrete
After marking your spots, dig holes that are 3 feet deep and 12 inches wide. Place concrete tubes in each hole and fill them with concrete. While the concrete is still wet, carefully set the post anchors, ensuring they’re aligned for accuracy. Once the concrete has cured, you’re ready to attach the posts to the anchors.
Use a spirit level to make sure each post is perfectly plumb, and temporarily brace them with 2x4s for stability. Finally, secure each post with lag screws to lock everything into place, creating a solid foundation for your carport.
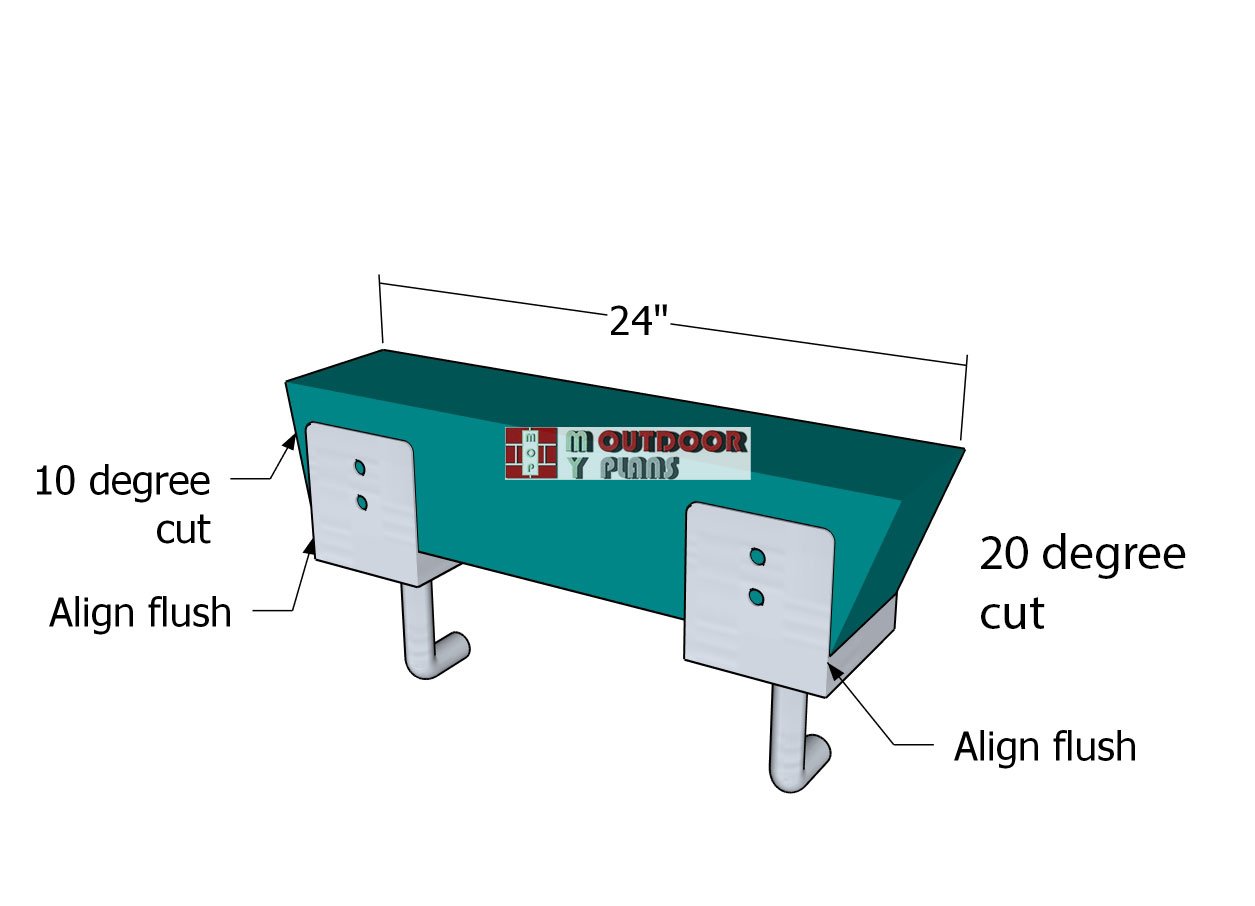
Base-plate-anchors
To firmly secure the base plates, you’ll need to set two footings and use two post anchors. This setup will provide the stability needed to support the base plate, ensuring it’s solidly in place to hold the carport roof securely. Be sure to orient the end with the 20-degree cut toward the front of the carport, as this positioning will align the roof angle correctly and contribute to the overall stability and design.
Front-posts
For the front posts, use sturdy 6×6 lumber for added support. As shown in the diagram, both posts require angle cuts to fit the carport’s design. Use a saw to make these cuts precisely, ensuring they align correctly with the roof’s angle. After cutting, smooth out the edges with sandpaper to create a clean, finished look. This step adds both strength and style to the front of your carport, setting the tone for a professional, polished build.
Fitting-the-front-posts
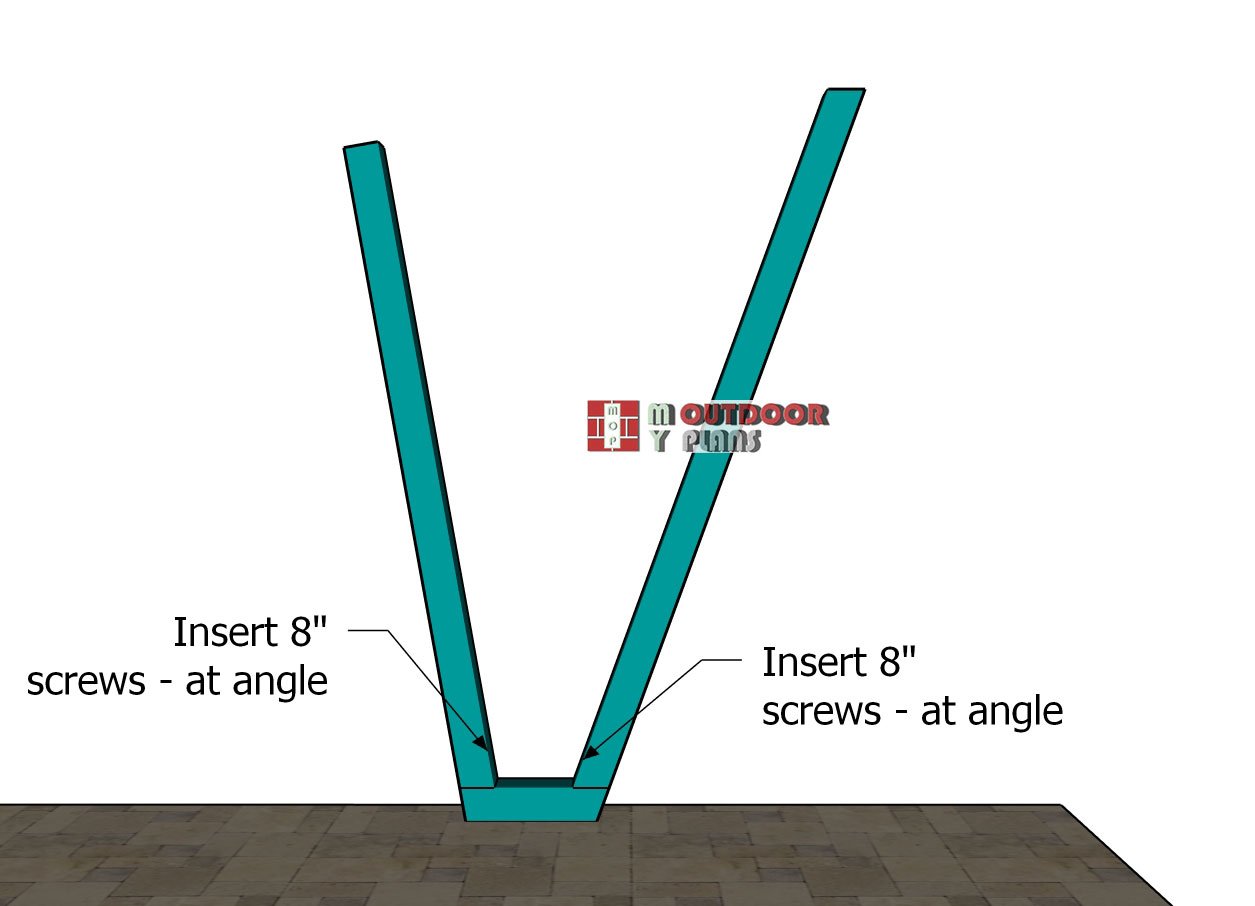
To attach the posts to the base plate, position each post as shown in the diagram, aligning the edges so they’re flush for a clean fit. Drill pilot holes at an angle for extra stability, then insert two 8″ screws into each joint. This angled approach provides a stronger hold, ensuring the posts and base plate are securely connected for long-lasting stability in your carport structure.
Assembly-detail
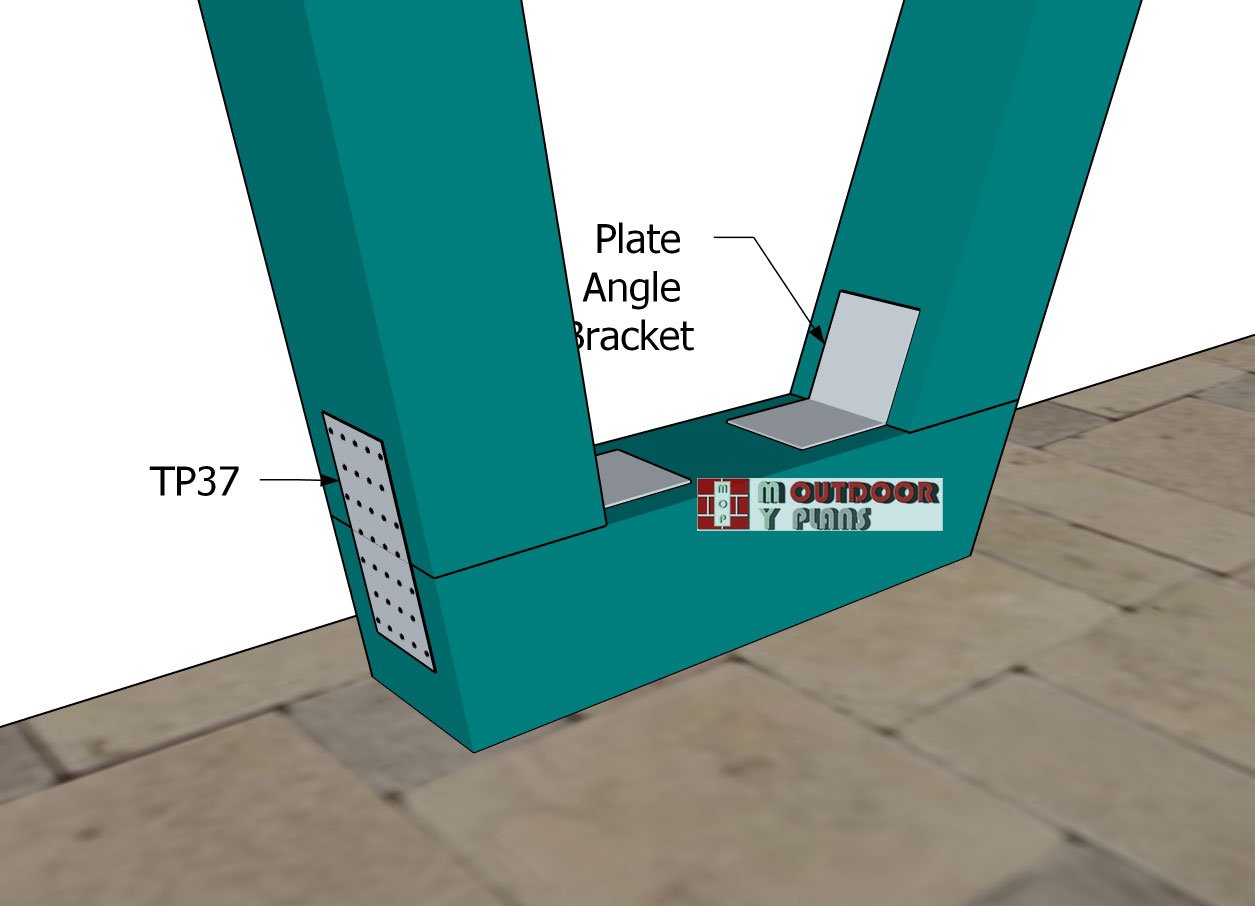
For added stability, reinforce the joints by attaching metal plates, as indicated in the diagram. Use 1 1/2″ structural screws or nails to secure each plate, ensuring a tight, sturdy connection. These plates will lock the joints in place, adding strength to the overall structure and helping your carport withstand the elements for years to come.
Side-supports
Next, attach the horizontal brace to the front posts using a sturdy piece of 6×6 lumber. Make angle cuts to both ends as shown in the diagram, with one end cut at 10 degrees and the other at 20 degrees to fit seamlessly into the frame. Position the brace and secure it with 8″ screws, using two screws per joint for a firm hold. Be sure to drill pilot holes before inserting the screws to prevent splitting, ensuring a strong and stable connection for your carport’s front support.
Attaching-the-top-beam
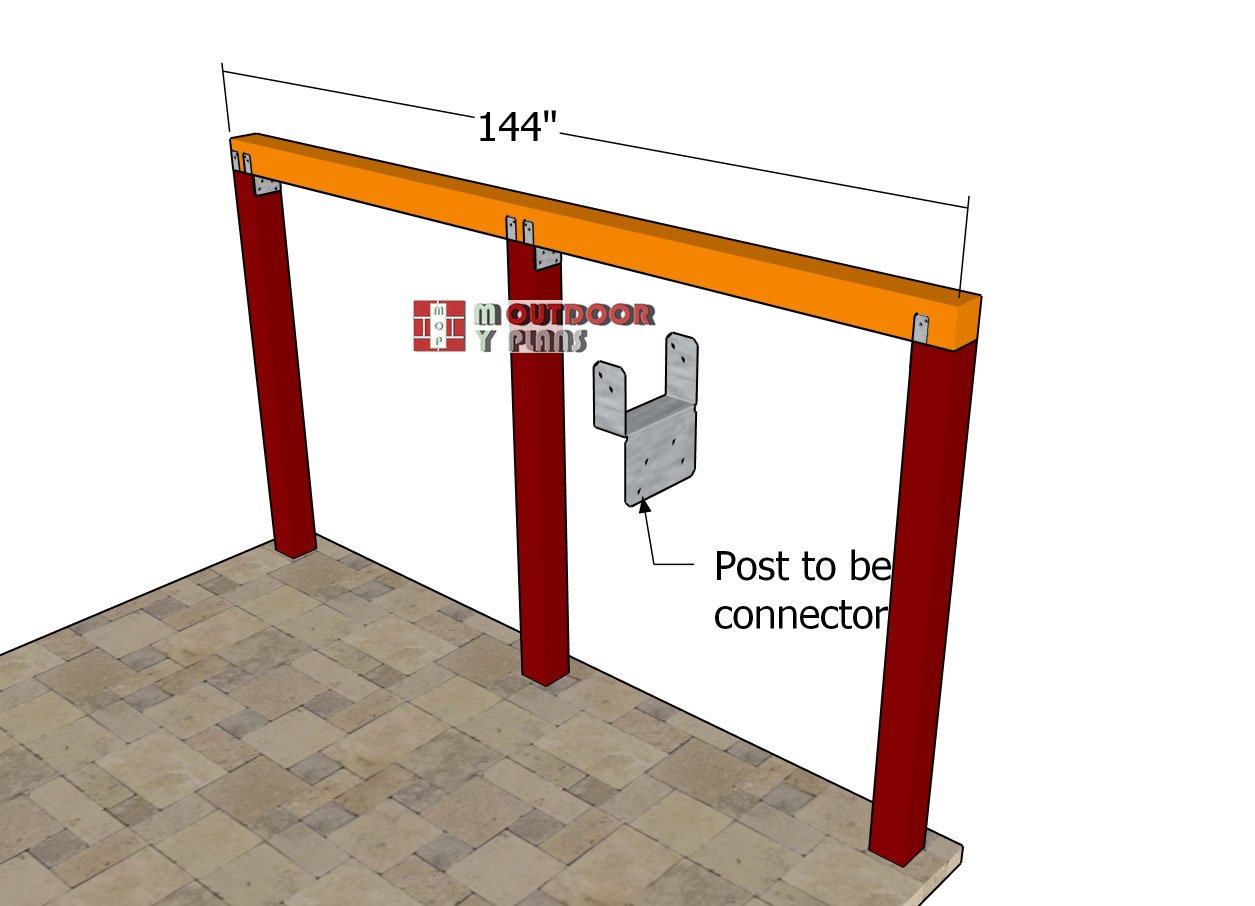
Attach the 6×6 beam to the back of the carport, securing it with post-to-beam connectors and 1 1/2″ structural screws or nails. Carefully align the edges so they’re flush, and double-check that the corners are square for a precise fit.
Once everything is properly aligned, position the beam at the top of the posts and fasten it firmly into place. This beam will provide critical support for the back of the carport, so taking time with alignment ensures a strong and stable structure.
Fitting-the-support-beams
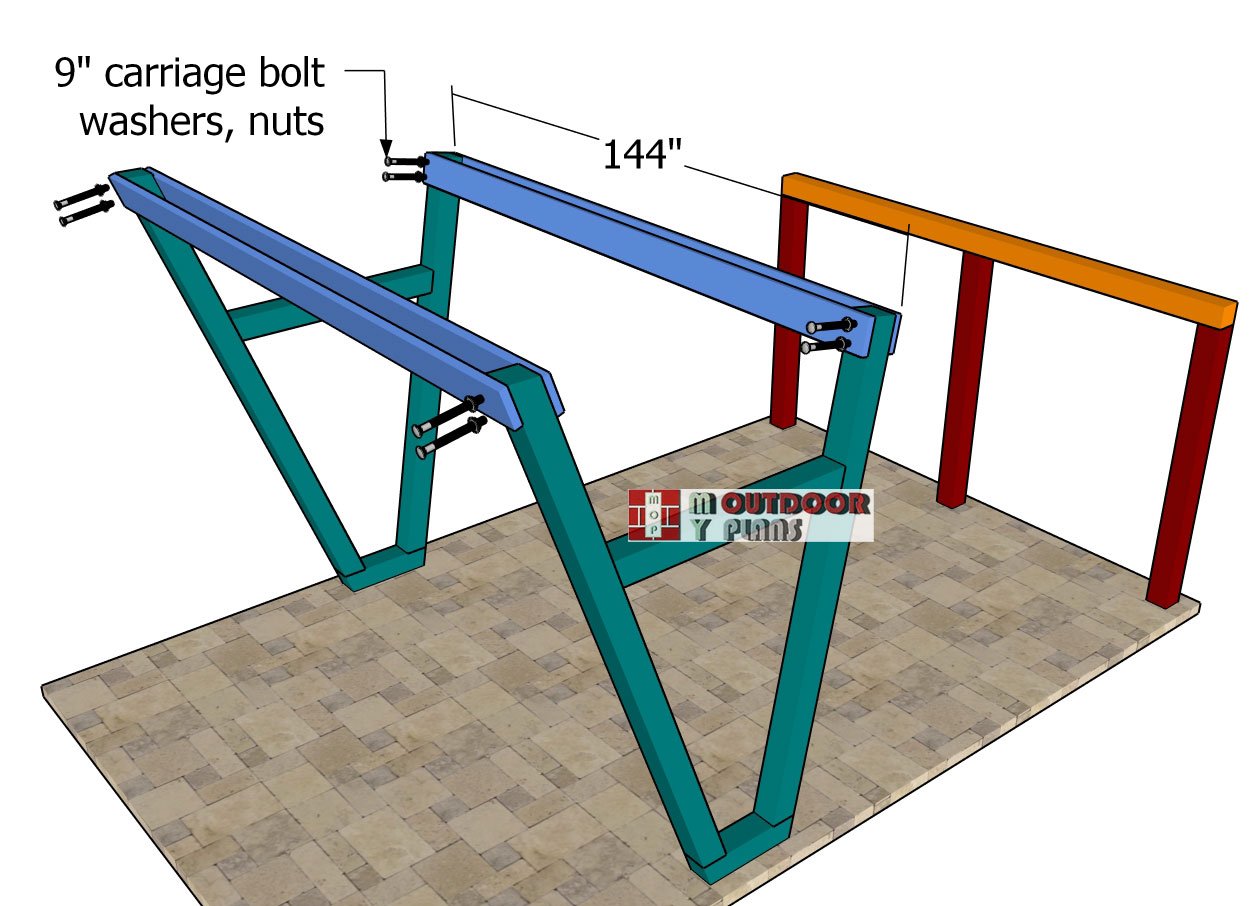
With the posts securely in place, the next step is to attach the 2×8 support beams to the tops of the front posts. Align the edges of the beams flush with the tops of the posts, and clamp them firmly in position. Drill pilot holes through both the beams and posts to prevent wood splitting, then insert 9″ carriage bolts to lock everything together. Use two bolts for each joint to ensure maximum stability, creating a solid framework that will support the carport’s roof structure.
Finishing touches
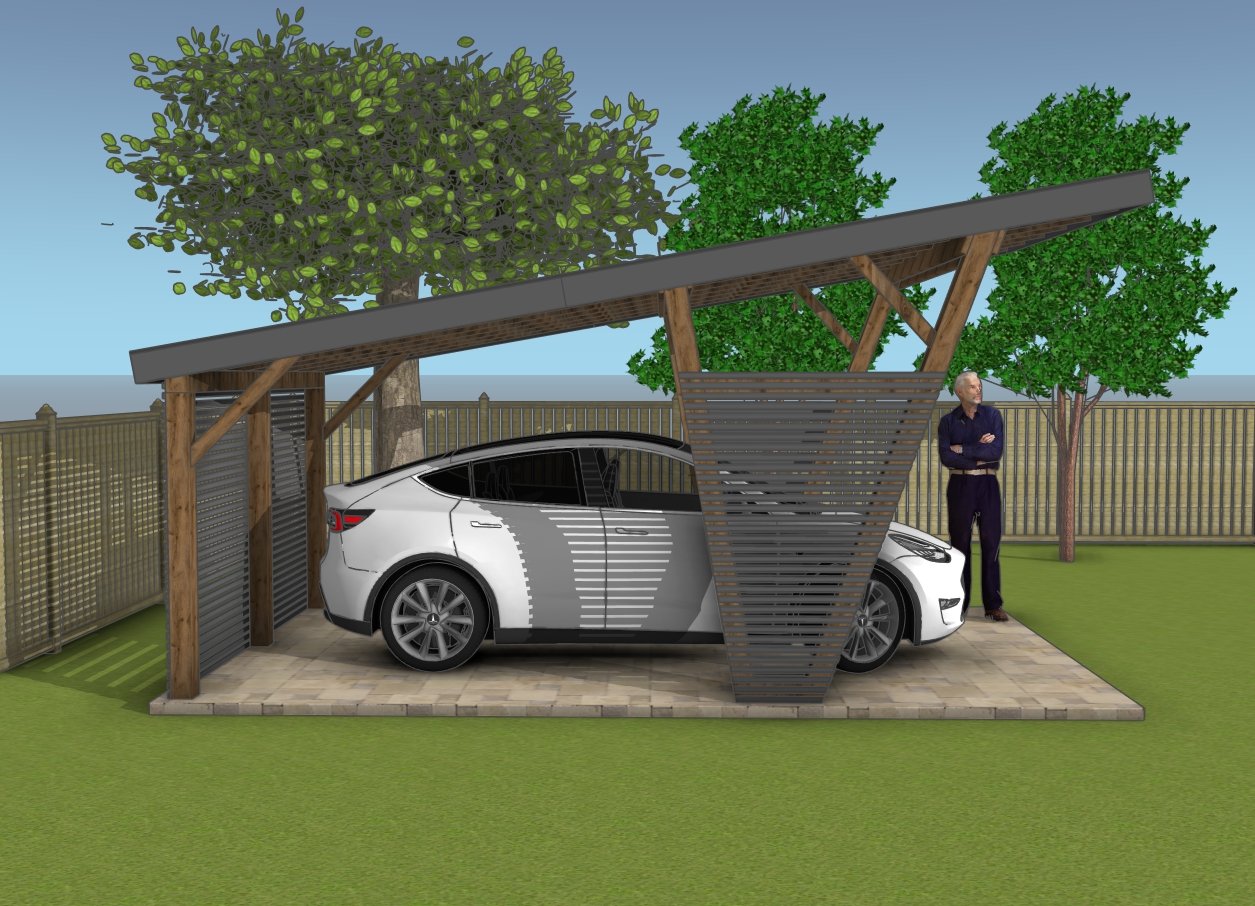
Side view – 12×20 carport
To take this modern lean-to carport to the next level, consider a few functional add-ons that enhance both style and usability. Adding motion-sensor LED lights around the perimeter is perfect for nighttime visibility and security. For extra storage, integrate a small wall-mounted cabinet or hooks along the back slatted wall to keep tools, gardening supplies, or car essentials within reach but out of sight.
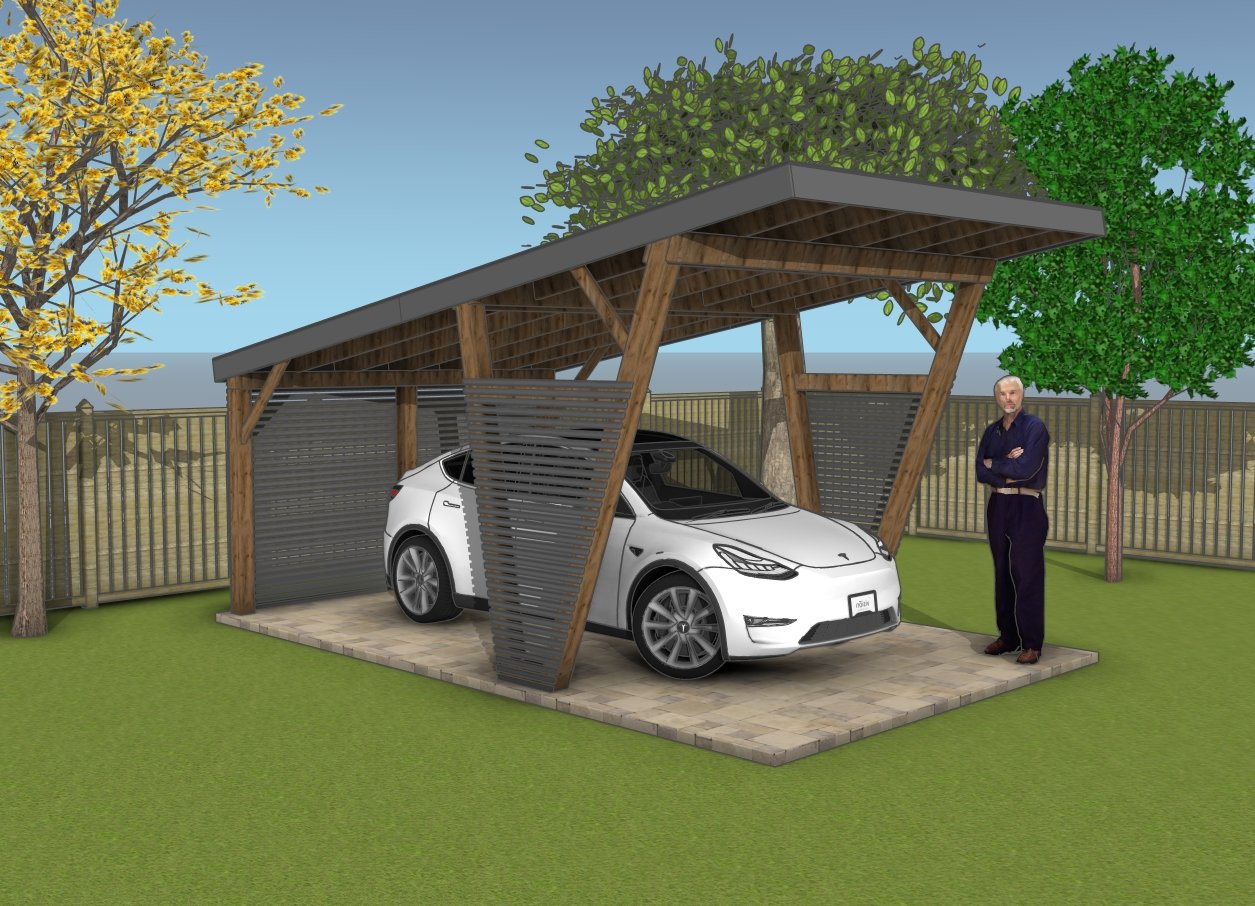
Modern carport plans
If you’re in a windy area, side panels made from lattice or decorative screens can offer added shelter without closing off airflow. Each of these add-ons keeps the space organized and functional while complementing the carport’s clean, modern design.
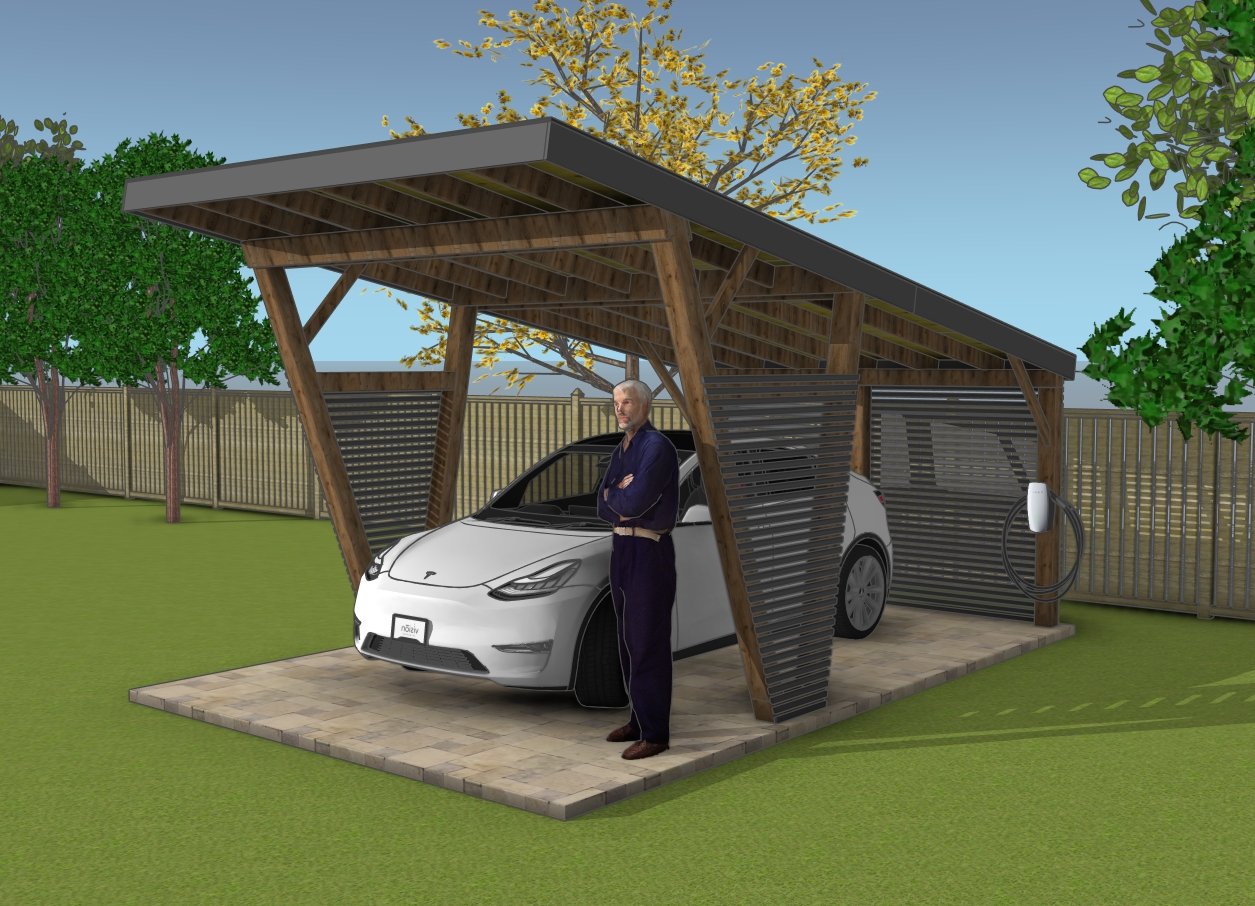
How to build a lean to carport
This modern lean-to carport is an ideal match for electric car owners looking to protect their vehicle with style and practicality. The open design makes charging a breeze, allowing easy access for running cables from a home charging station without obstruction. The slatted back wall provides a sleek, ventilated area to mount charging equipment or an outdoor outlet, keeping everything neatly arranged and accessible.
Plus, the added coverage shields your electric car from the elements, which can help extend battery life by avoiding temperature extremes. This carport seamlessly combines function with a modern aesthetic, making it a perfect solution for today’s EV drivers.
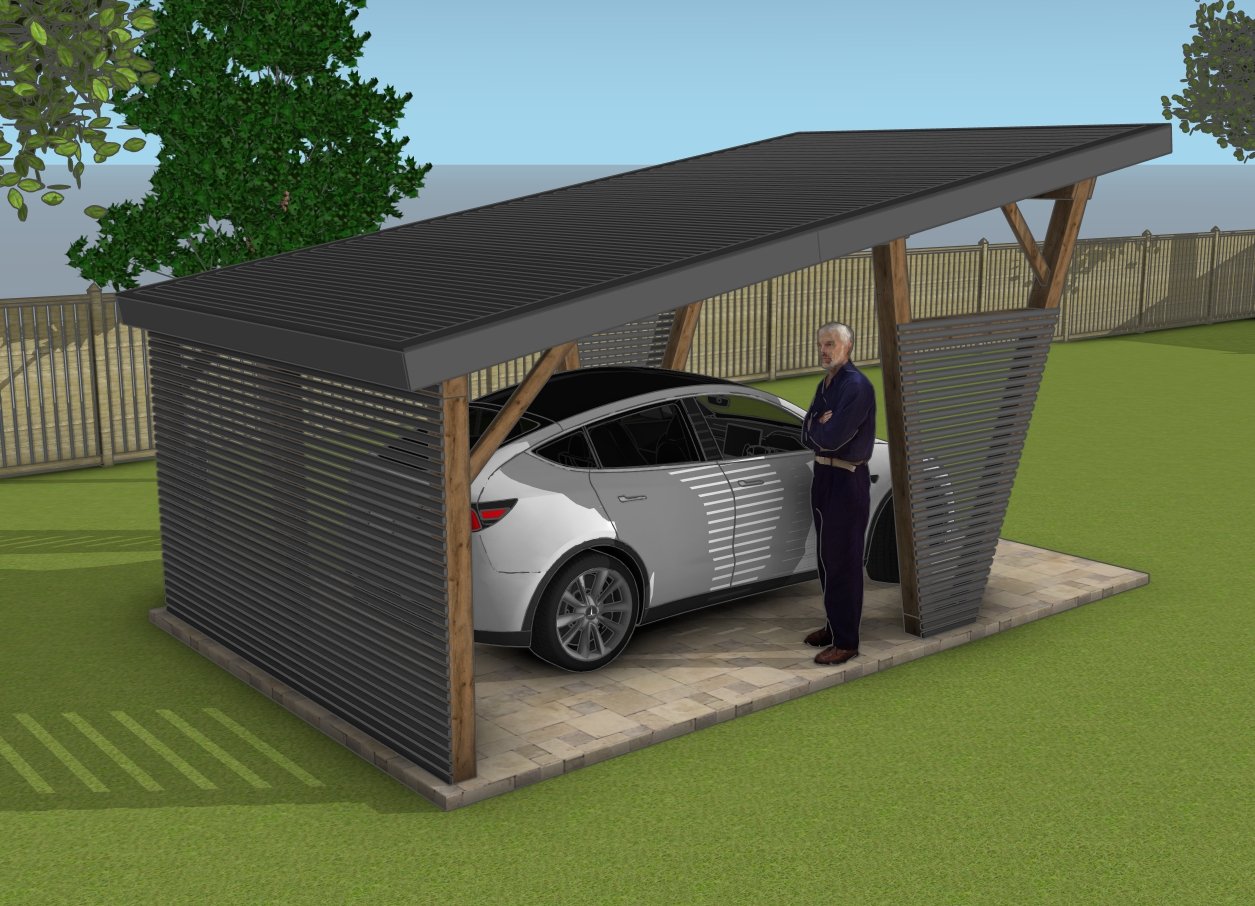
Carport – back view
Check out PART 2 of the project, so you learn how to frame the roof and take care of the finishing touches.
Top Tip: If you want to get PREMIUM PLANS for this project, in a PDF format, please press GET PDF PLANS button bellow. If you want the free version of the plans, please read the blog FAQs. Thank you for your support.
This woodworking project was about lean to carport plans. If you want to see more outdoor plans, we recommend you to check out the rest of our step by step projects.


