How to build a rolling cabinet
The first step of the project is to build the side panels for the cabinet. I use three 1×4 slats locked together with glue and pocket holes. I really wanted to get that farmhouse rustic look for the rolling cabinet, but you can easily use 3/4″ plywood to save time.
Next, I attached the 2×2 supports to the top and bottom of the panels. I drilled pilot holes along the top and bottom edges of the panels and inserted 1 1/4″ screws into the supports. I added glues to enhance the bond of the components. I placed pieces of 1/4″ plywood under the slats to create a recess.

Next, I attached the 2×2 legs to the side panels. I used glue and 1 1/4″ pocket screws to secure everything together tightly.
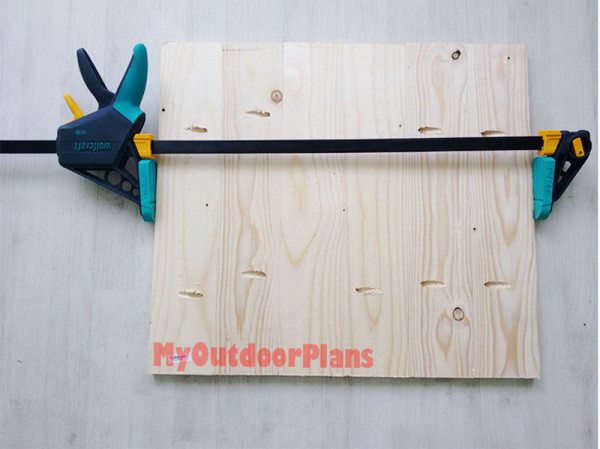
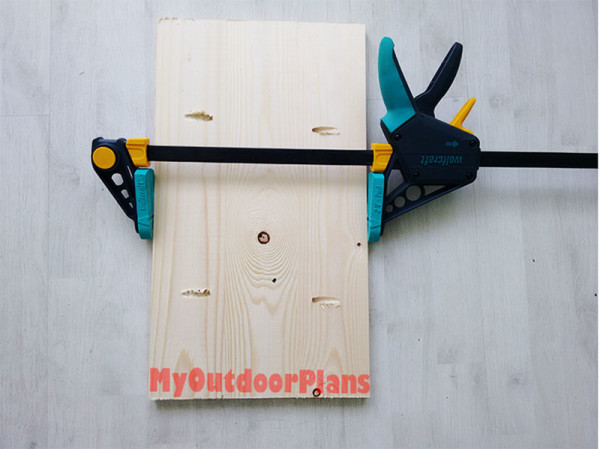
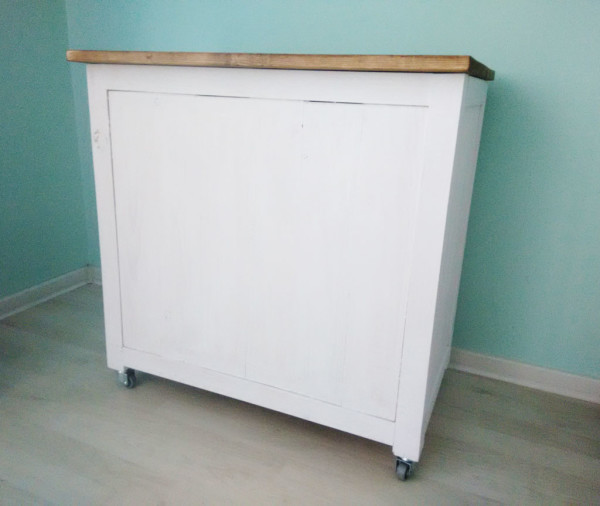
I continued the project by assembling the front panel of the cabinet. I locked the six 1×4 slats together by using 1 1/4″ screws and glue. I clamped everything together tightly to get rigid joints between the slats.

I attached the 2×2 supports to the top and to the bottom of the front panel by using 1 1/4″ screws. Next, I had to assemble the frame of the cabinet, by attaching the sides to the front face. As you can see in the diagram, I drilled pocket holes at both ends of the 2×2 front face supports. I aligned everything with attention and inserted 2 1/2″ screws to lock the components together. I added glue to the joints and removed the excess with a damp cloth. Check if the corners are right-angled before inserting the screws.
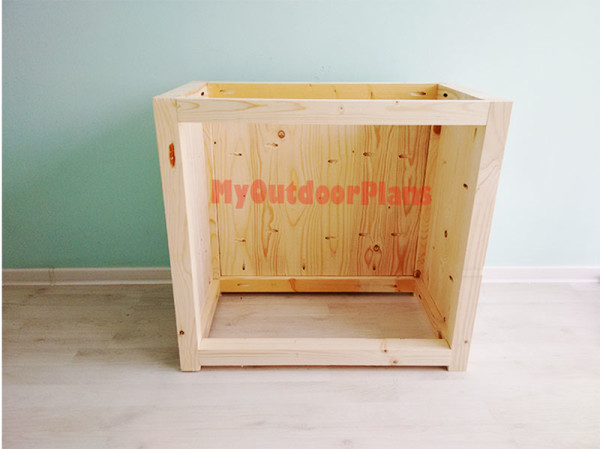
Next, I attached the 2×2 supports to the front face of the cabinet, by using pocket holes and 2 1/2″ screws. Make sure everything is locked together tightly.
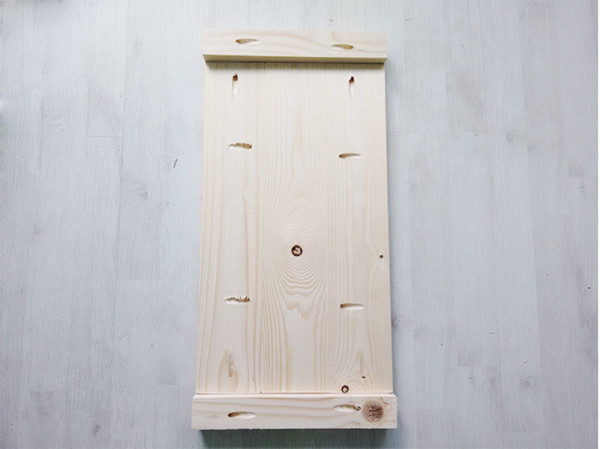
Next, I assembled the bottom for the rolling cabinet. Make sure you smooth the cut edges.

I fitted the bottom to the cabinet and locked it into place using brad nails.
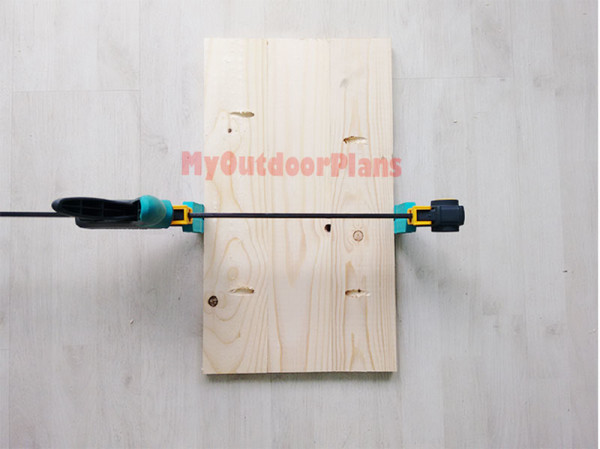
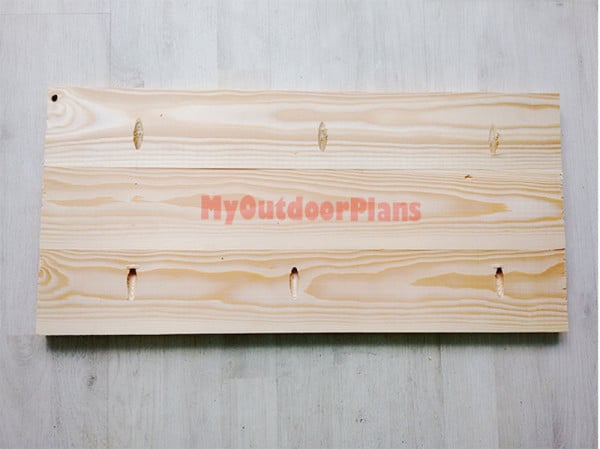
I used three 1×4 slats for the doors. I drilled pocked holes and added glue to the joints before inserting the 1 1/4″ screws.
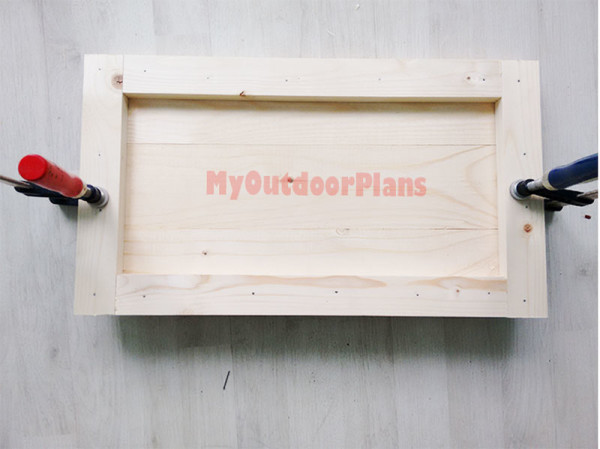
I used glue and brad nails to secure the 1×2 trims to the door panels. Use clamps to lock the trims into place for several hours. Align the trims before inserting the nails, to get a professional result.
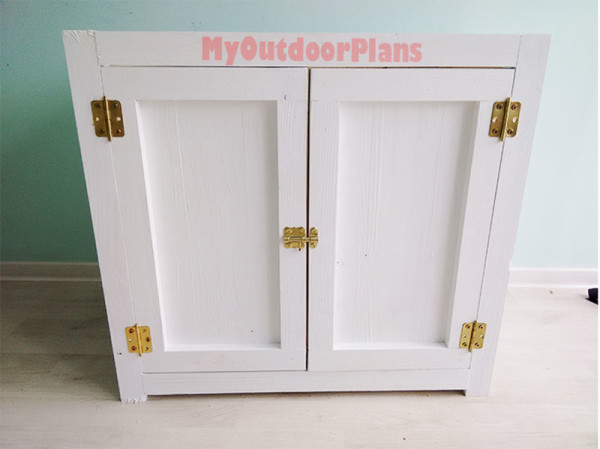
I fitted the door to the openings and secure them to the legs using hinges. In addition, I attached a latch to create a rustic look and to keep the doors shut. Make sure you leave enough space around the doors to allow them to open easily. Use a planer to skim the wood, if needed.

I attached 2″ caster wheels to the bottom of the cabinet. I used screws to lock them into place.

Last but not least, I assembled the tabletop. Similarly to the previous steps I used pocked screws and glue to lock everything together tightly. I clamped the slats after making sure the edges were flush. I attached the tabletop to the rolling cabinet by using glue and brad nails. Alternatively, you could insert nails though the frame of the cabinet into the tabletop.
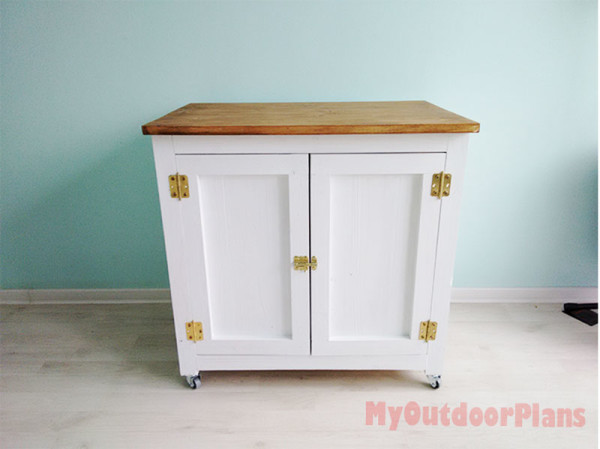
I applied water based white pain over the cabinet. Two layers were enough to cover everything evenly. I use walnut stain for the tabletop.
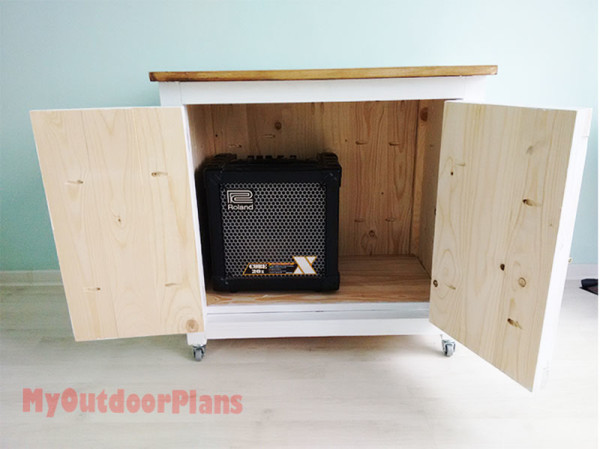
The rolling cabinet is large enough to store my guitar gear.
From Jack Sander
This was a fun 4 hour project. This rolling cabinet is a great addition to my craft room. I will use it to store my amp and other guitar related items. However, the rolling cabinet will be a great laptop table. I like the farmhouse look and I have already got a positive feedback from family and friends. What I like about this project is that it can easily be used as an outdoor bar, especially by making the legs taller. Well spent 50 $!
EXPLORE MORE IDEAS FOR:
 |
 |
 |
 |
1 comment
Fantastic job! I really like the face mounted hardware and all wood construction.