DIY Kids Stool


From Matt,
I chose to use Oak for this project. I purchased:
1:1″x12″x6′ board for about $50
1:1″x2″x6′ board for about $8
1: small diameter, 3′ dowel rod about $2
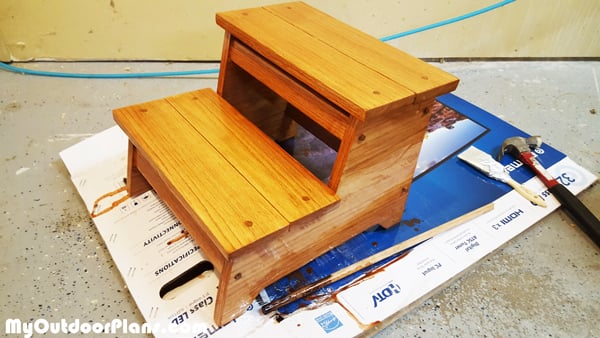
and some Pecan 2 in 1 stain and poly about $12
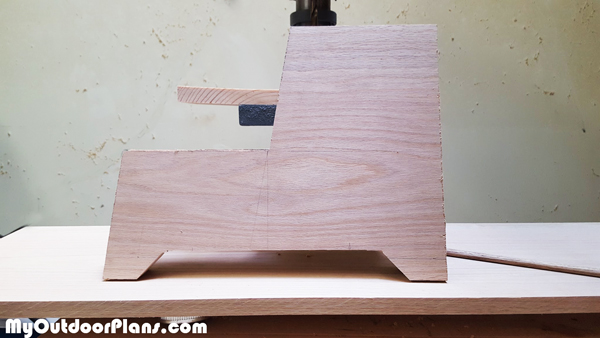
First I cut the 1×12 into pieces for the sides and steps. Then cut the 1×2 into lengths for the support bars. Then cut the dowel rod into 2″ sections for pins. I then marked out the cut lines for the sides and used a circular saw or hand saw depending on the cut to cut along the lines.
Once it was all cut out, I marked an X on the end of the 1×2 cross bars to find the middle and drilled out a hole the same diameter as the dowel rod; then I marked the side pieces for where I wanted the cross supports to be. I clamped the side pieces together and drilled out the holes in the side pieces with a drill press. I then put glue onto the dowel rods and placed a dowel rod in each of the support bars, and placed each of the support bars in their respective holes.
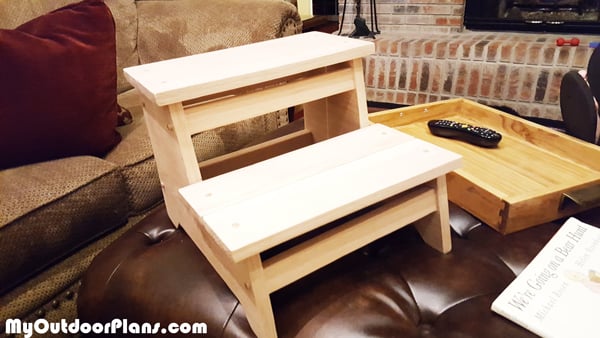
Once the bars were put tougher I had a basic structure built and decided it was a good time to sand. I sanded down the entire project, first 120 grit, then 220 grit, then i sanded any end grain with 320 grit to help minimize the penetration of the stain. I then assembled the rest of the project, then applied stain.
EXPLORE MORE IDEAS FOR:
 |
 |
 |
 |
1 comment
Congratulations for your awesome project, Matt, and thank you for sharing! I love the modifications you made to my plans and I appreciate you took the time to take pictures and document the process. I am sure the rest of the reader will find your project and techniques really useful! Looking forward to seeing your next projects!