DIY 2×4 Swing
From Bren,
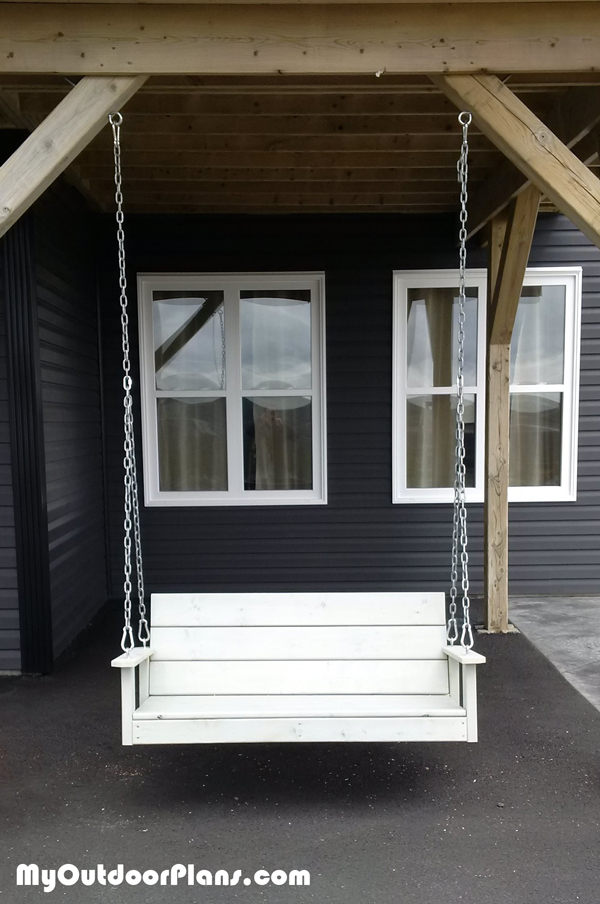
I picked up an outdoor project book called “2X4 Projects for Outdoor Living” at a local book sale. It’s actually a clever play on words since most of the projects are made from 2X4 lumber but there are also 24 projects in the book. The projects are all fairly straight forward and range from a birdhouse table to a mini gazebo. The project that first struck my eye was a porch swing. We have a large south facing raised deck out back that would be ideal to hang a porch swing. Altogether this took about a day and cost around $150.
The materials were fairly inexpensive, 20ft of 2X4, 30ft of 5/4 decking and 5ft of 1X4. The hardware was actually more expensive than the building materials, I needed 18ft of galvanized ¼” chain, 4 4” eye screws and 2 10” eye bolts to hang the swing along with all the screws to put it together.
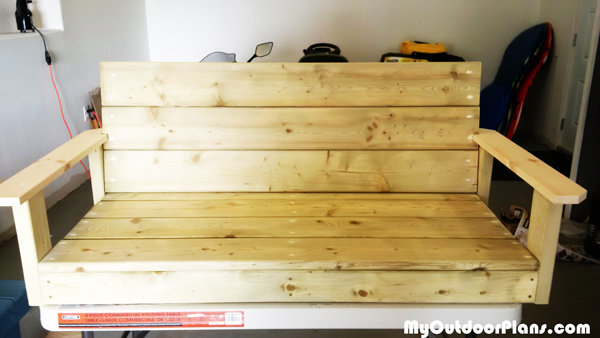
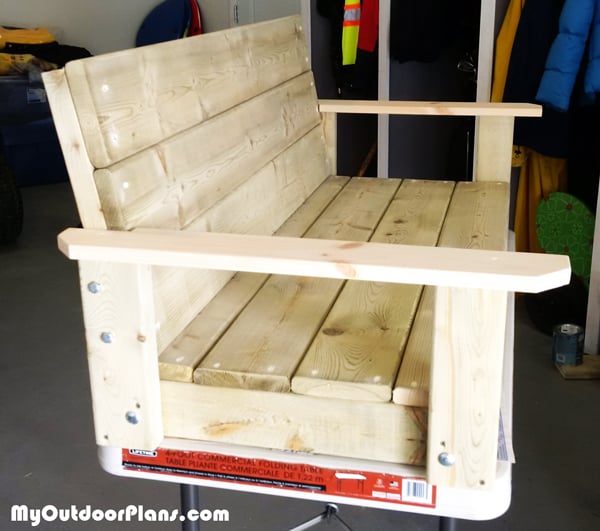
For the bottom you just build a 22 X 48 rectangle from the 2X4 with an extra support across the middle. The seat slats are just cut from the 5/4 decking at 48” lengths and screwed into the 2X4 frame using 2 1/2“ wood screws (I always use deck screws for outside projects).
The back is made starting with two 16” pieces of 2X4 for the supports. Three back pieces are cut from the 5/4 decking each measuring 48”. The back should overhang each end of the vertical supports by about ½”. The back pieces are attached to the back supports with 2” screws. The overhang will be important when attaching the back to the seat.
Four arm supports are cut from the 2X4 each measuring 11 1/2 “. The supports are attached to each corner of the seat using 2 ½” screws as well as one 3 ½” lag bolt through each arm support for extra strength. You will want to drill the screws off center to leave room for the lag bolt, just make sure you mark the drill holes before you start drilling.
The arms are a bit hard to describe without a picture but they are made from 1X4 measuring 26”. If I had my time back I would have used decking for the arms as well, the 1X4 pine seems out of place in this project to me since rough lumber is used for everything else. Each arm has a 1 ½” 45 degree cut at each end and one end has a 3 ½ X ¾” section cut out to fit into the back arm support. When attaching the arms, the rear support should be flush with the cut out portion of each arm and the front arm support should be ¾” from the same edge. Again it is a little difficult to describe but if you follow along you will see how it all fits together.
Insert the back between the two arms (hopefully at this point it all fits), the overhang from the back should give it just the right tilt angle. The back will be attached to the arm supports using two 2 ½” wood screws and two 3 ½” lag screws through each arm support.
I sanded the entire swing using a random orbit sander with a 120 grit and then with the detailed sander with 180 grit. I used some cape cod grey stain for a nice finished color. The hanging was a bit of a production trying to figure out the proper length of chain, what to use to attach the chain both to the support beams and the swing. In the end after some careful measuring I figured it all out. Instead of S connectors as suggested by the book I used snap clamps which seemed much safer to me. Word of advice, make sure the clips fit both the eye bolts and the chain BEFORE leaving the store, I needed a return trip because the first type of clips I had were too big to fit the chain on.
EXPLORE MORE IDEAS FOR:
 |
 |
 |
 |