This step by step project is about brick bbq plans. If you like to spend time in your garden and to cook meat, you should consider building a simple bbq pit, using bricks and concrete. If you know the basic bricklaying techniques and how to mix concrete, you can get the job done in just a weekend. From our experience we recommend you to pay attention when pouring the foundation, as you need to reinforce the concrete with a dense net of re-bars. Measure the size of the grill and of the charcoal pan, before determining the size of the brick bbq.
Draw the contour of the bbq on the foundation with a chalk, about 2-3” inward, before laying the the first course of bricks. Use a carpentry square to make sure the corners of the brick barbeque are perfectly square. In addition, we recommend you to fit the metal supports (steel re-bars) between the courses of bricks, at the height that fits your needs. Use a small pipe to obtain concave joints. The technique is pretty straight-forward, as you need to go with the pipe along the concrete joints vertically and afterwards horizontally. See all my Premium Plans HERE.
Projects made from these plans
Cut & Shopping Lists
- Reinforcement bars – REBARS
- Cement, sand, gravel – CONCRETE
- 200bricks 8 x 4 x 2 1/4” – BRICKS
- Fire clay and fine sand – CLAY MORTAR
- 2×10 lumber and 2×4 stakes – FORM
- Grill and accessories – GRILL
- recommended materials
Tools
![]() Hammer, Trowel, Bucket, Tape measure
Hammer, Trowel, Bucket, Tape measure
![]() Brick saw, Drill machinery, Screwdriver, Power mixer
Brick saw, Drill machinery, Screwdriver, Power mixer
Time
Brick bbq plans

Brick bbq layout
Lay out the foundation of the barbeque. You should build 4 batter boards, using 2×4 lumber. Make sure the bottom part of the stakes are V-shaped, in order to anchor properly in the ground. After you set the batter boards in the ground, use string to determine the contour of the foundation.
Measure the diagonals of the rectangle to see if they are perfectly equal. In addition, adjust the position of the batter boards, until the corners are square.
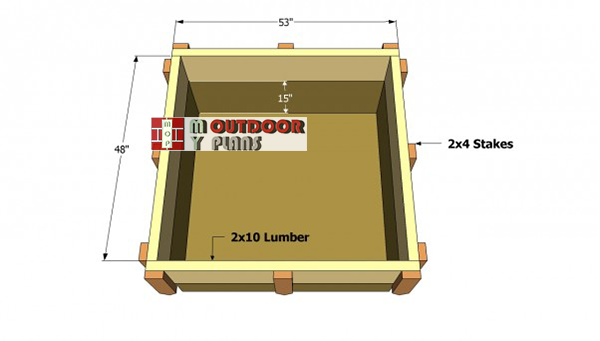
Brick-bbq-foundation-plans
The next step of the project is to pour the concrete foundation for the barbeque. Therefore, build the form using 2×10 wooden boards and 2×4 stakes. Check the corners for squareness using a carpentry square, making sure the diagonals are equal. Lock the wooden boards together tightly, using 3” wood screws.
Top Tip: Plumb the sides of the form, making sure the top is perfectly horizontal.
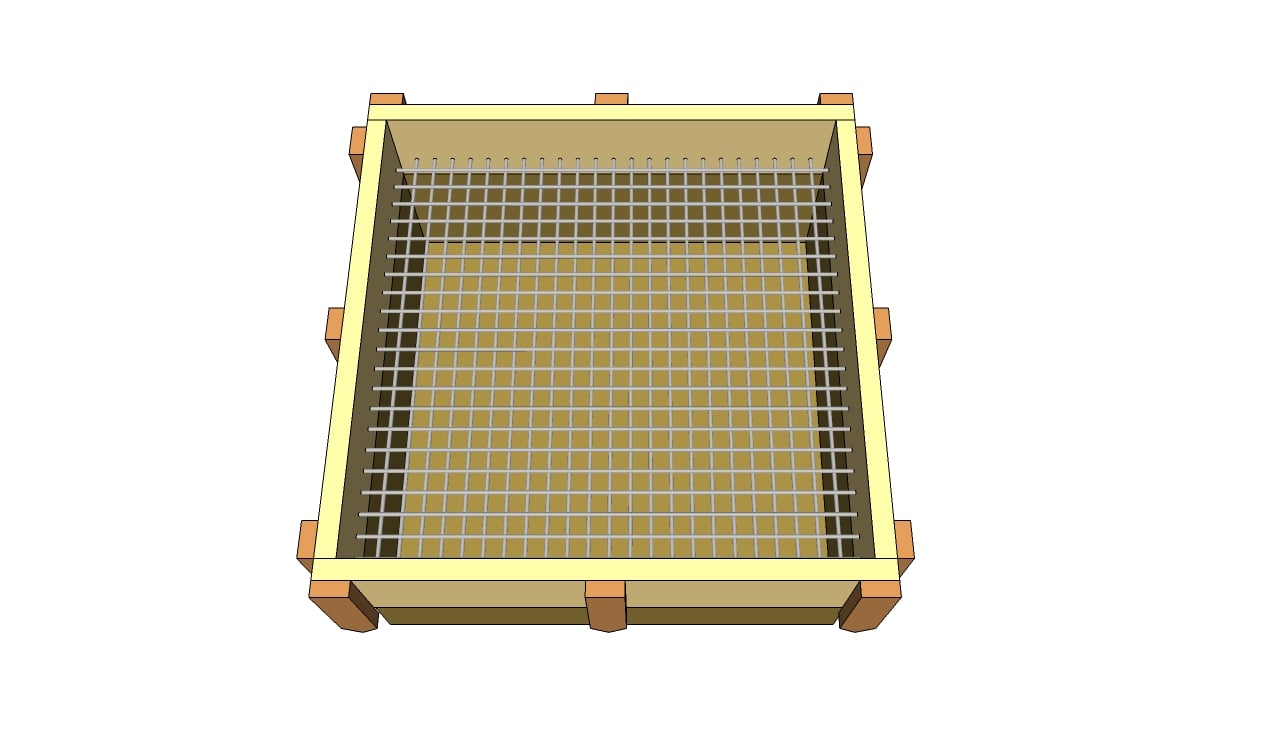
Reinforcing the concrete
Dig about 15” in the ground before pouring the concrete in the form. In addition, compact thoroughly a 4” layer of gravel. Afterwards, build a dense net of re-bars and fit it inside the form.
Top Tip: Place 5” spacers under the re-bars, otherwise they won’t reinforce the concrete properly. Make sure the wooden form is sealed, otherwise the cement paste could get trough the joints.
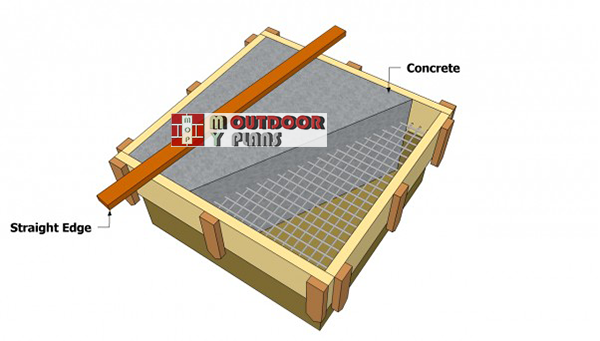
Pouring-the-concrete-foundation-for-bbq
The next step of this project is to pour the concrete in the form-work. Therefore, mix a concrete in a wheelbarrow or using a power mixer, according to the following recipe: 2 parts cement, 3 parts sand, 4 parts gravel and enough water to obtain a compound with cream consistency.
Vibrate the concrete by hitting the form with a hammer. Afterwards, level the foundation with a straight edge, moving it along the sides of the form.
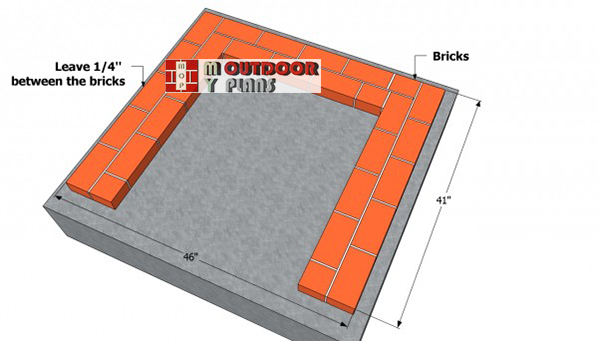
Laying-the-first-course-of-bricks
Spread the mortar on the foundation with a trowel before laying the bricks. Use a string to make sure the courses of bricks are aligned. Leave about 1/4” between the bricks, and remove the excess material. Tap the bricks into mortar, using a rubber hammer.
Top Tip: Pre-wet all the bricks before laying them, as they are so dry that will soak all the water from the mortar. Align the bricks and hit them gently with a mallet, to level them properly.
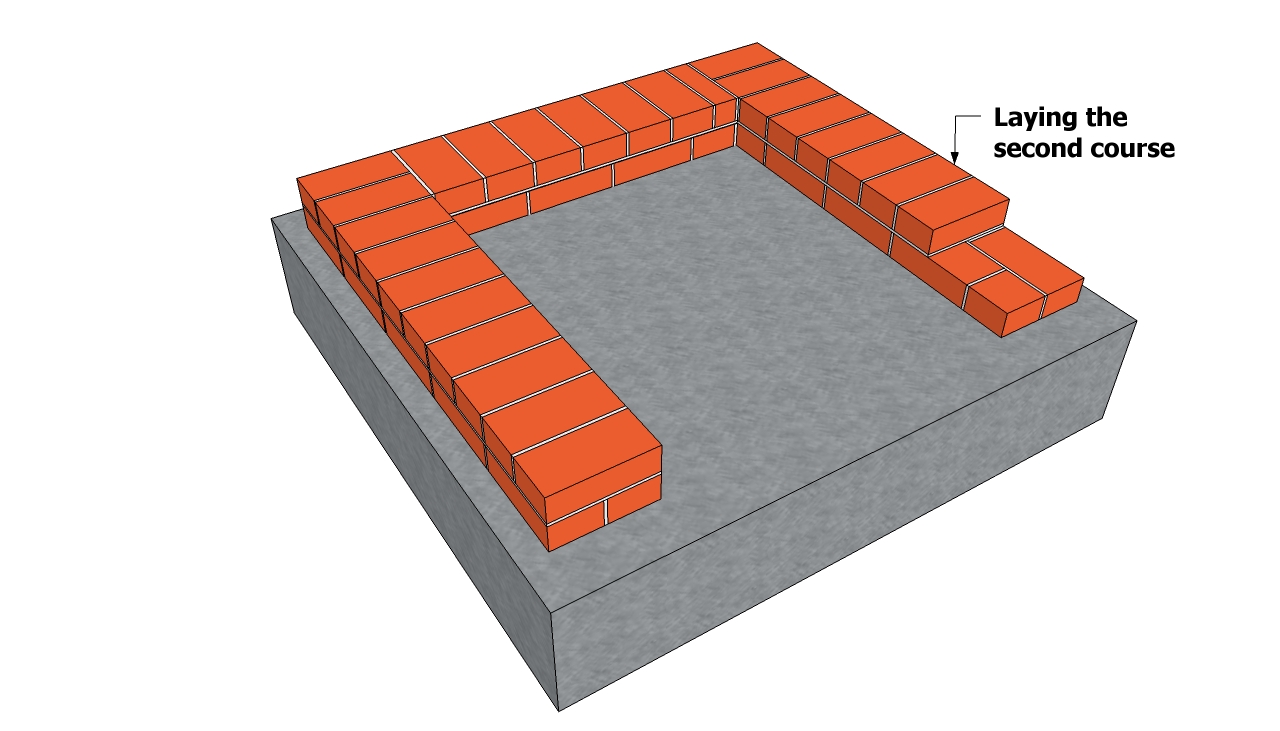
Installing the second course of bricks
Afterwards, you should lay the second course of bricks, in the same manner as you can see in the image. The bricks should be placed perpendicularly on the previous courses. Make sure the joints are consistent and filled with mortar.
Top Tip: Mix 1 part cement to 3 parts sharp sand, in order to prepare the mortar. Use a spirit level, to make sure the bricks are level and to check if the wall is plumb.
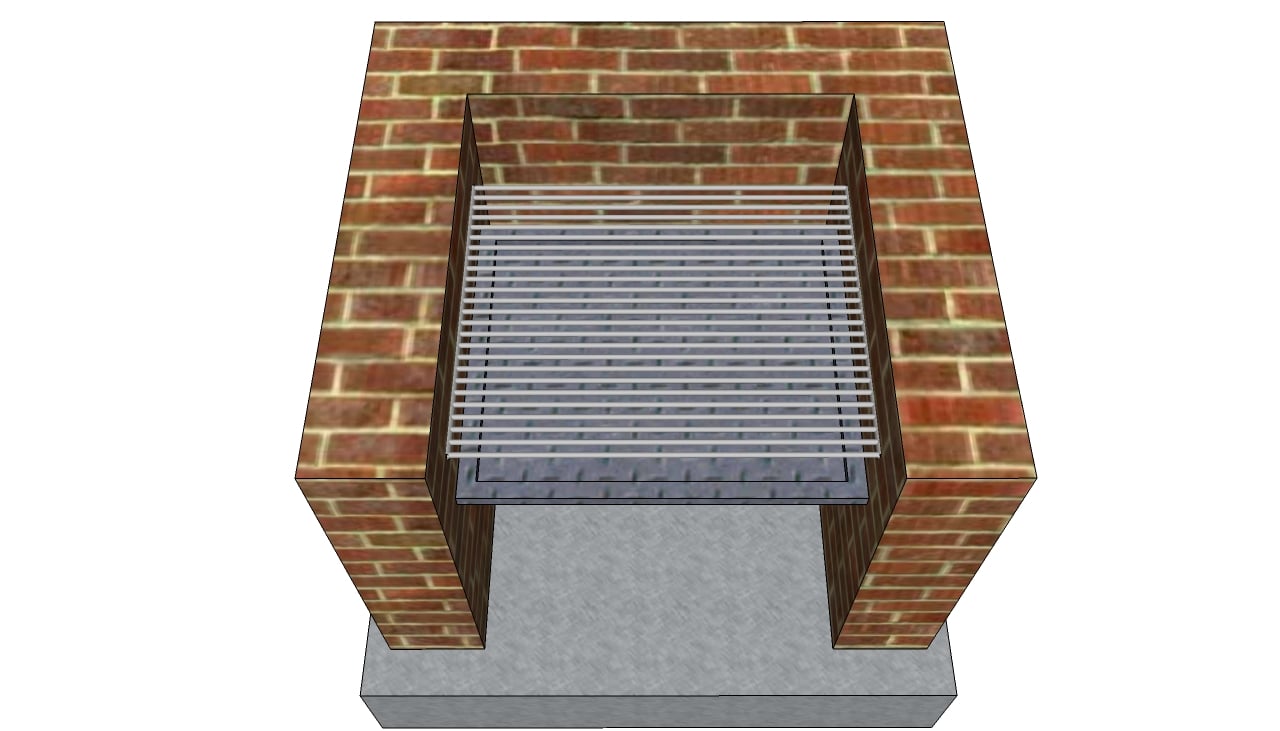
Installing the grill
When installing the rest of the courses, don’t forget to remove the excess mortar with a wire brush or using a brick jointer. In addition, clean the bricks thoroughly with a damp sponge, if you want to obtain a nice appearance.
Top Tip: Install the metal supports for the charcoal pan, as well as for the grill. Adjust the height of the bbq to your needs. In most of the cases, 12 courses of bricks are enough to build a proper bbq pit.
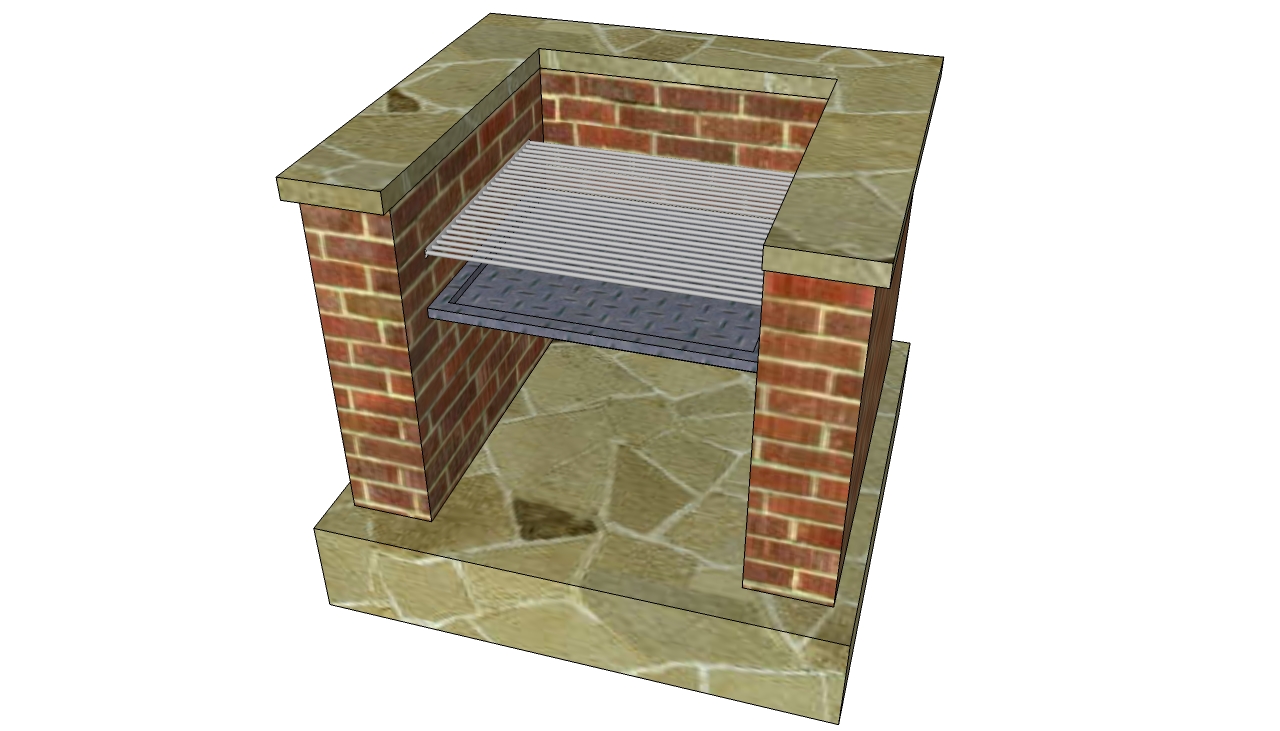
Cladding the brick bbq
Continue the project by installing the flagstone on the concrete foundation of the bbq, as well on top of the wall. Choose the pieces of stone that match the pattern and lay them into place. Mix 1 part cement to 2 parts fine sand to prepare the mortar.
Leave small gaps between the pieces of stone (at most 1/2”). Level the stone using a mallet and a spirit level. Leave the mortar to dry out properly, before filling the gaps with cement.
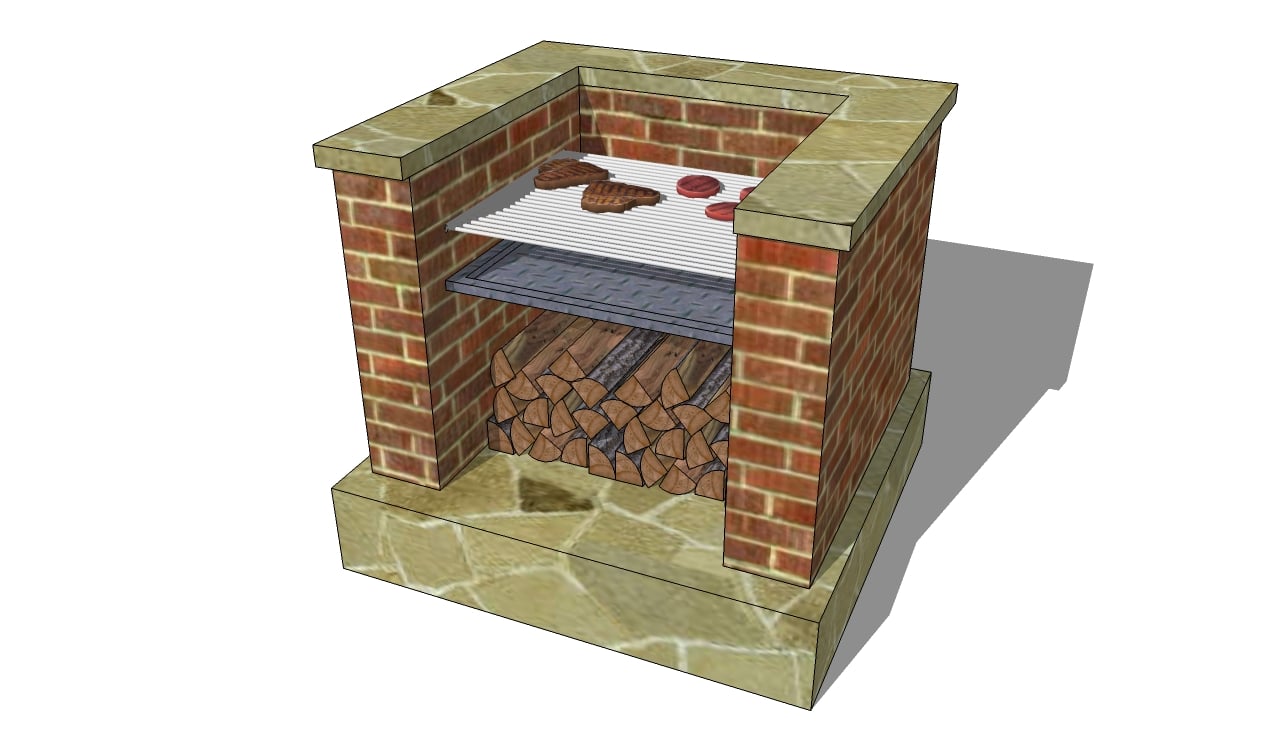
Brick bbq plans
After you finish laying the bricks and the flagstone, you need to take care of the finishing touches. Remove the excess mortar with a wire brush, before cleaning the bricks with a damp sponge.
Top Tip: Enhance the look of the stone by applying stone descaler with a small brush. Don’t forget to wear protective gloves while working with the substance. Let the mortar to dry out for several days, before making the fire in the brick bbq.
This backyard project is about brick bbq plans free. If you want to see more outdoor plans, we recommend you to check out the rest of our step by step projects.

4 comments
I am in the process of building an brick outdoor grill .where is the best place to buy the grill grates and the charcoal pans? I am having trouble finding the correct size
As I have pointed out in the article, it is always a good idea to buy the grill and pan before building the bbq. In this manner you can adjust the dimensions accordingly. You should search for “DIY barbecue grill set” on the internet and hopefully find one that fits your brick bbq. Alternatively, you can try to order a custom one at a metal workshop.
Grant,
turn a few of the inside bricks inwards on both sides so you have two “shelf” hooks to rest the grills on. Go to the thrift store or Craigslist and get a free or super cheap grill plate that is too big for the grill you are building. Cut the ends off so it fits.
You can cut it easily with a grinder or hacksaw. This is not high tensile steel and shouldn’t take long. If you have to cut the front or back off, cut the back (so it looks better) and weld (if you can) the bar from the back right back on to save hold all the spokes in place.
You can get a piece of diamond plate for free from a variety of places to use as a charcoal pan. Turn the bricks in again, like for the shelves, to hold it inplace.
This is not a BBQ but a grill. BBQ and grills are not at all the same.