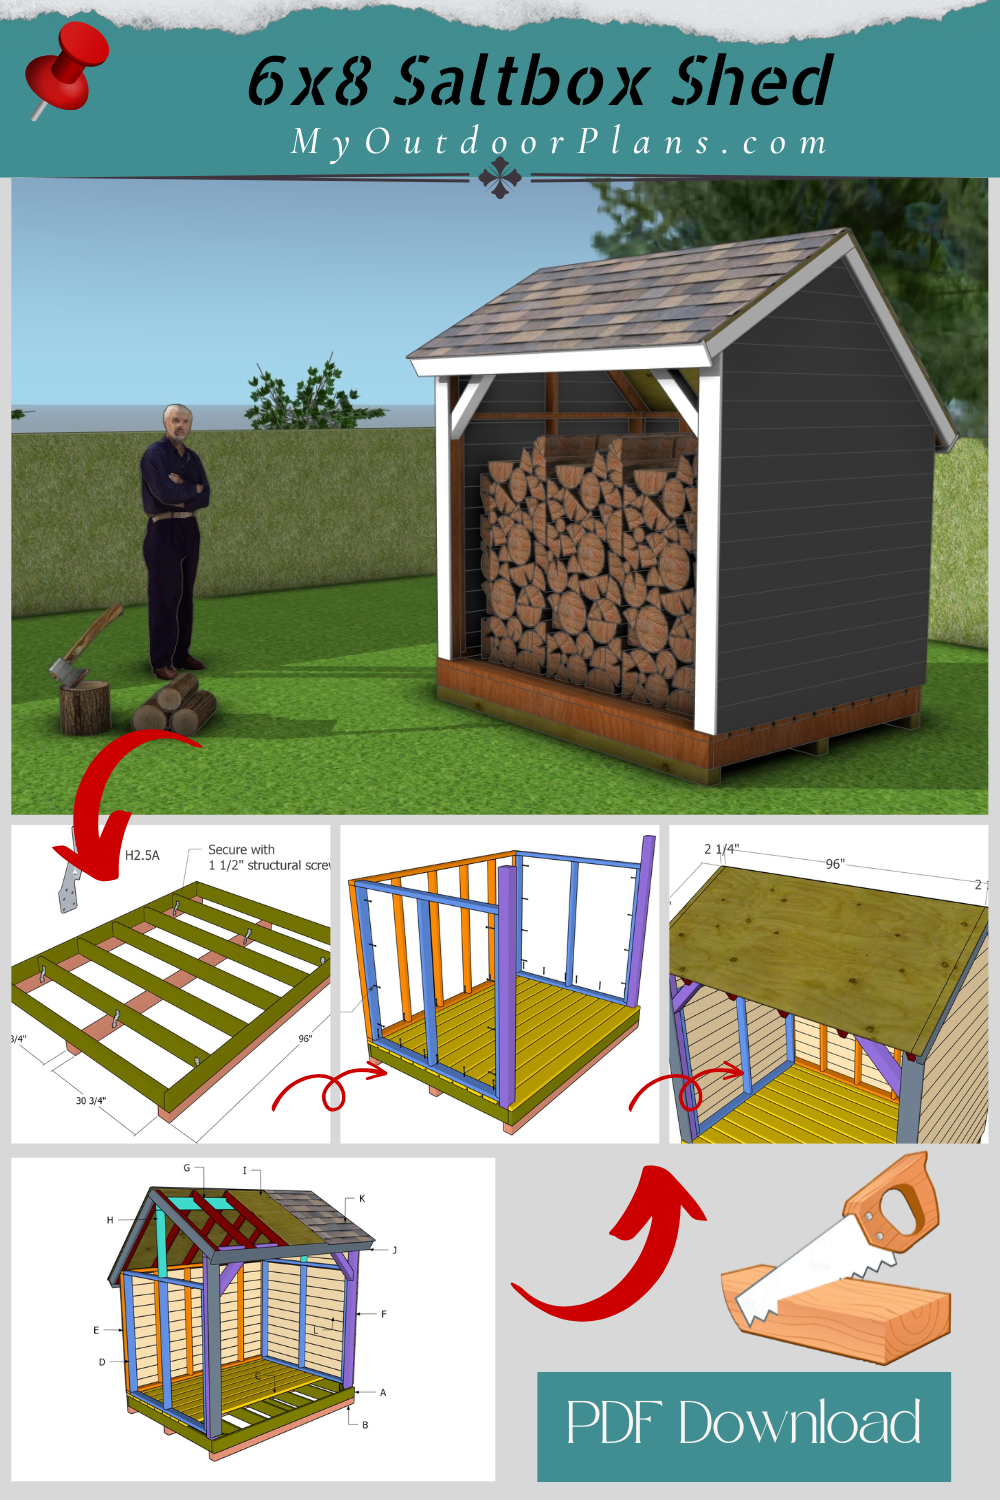
Keeping firewood dry and neatly stacked is essential for efficient burning, and this 6×8 firewood shed is designed to do just that. With a saltbox-style roof and an open front, these shed plans allows for excellent airflow, helping firewood season properly while keeping it protected from rain and snow. Built with sturdy materials and a practical design, this shed can hold up to two cords of firewood, making it an ideal storage solution for homeowners who rely on wood for heating or outdoor fire pits.
This step-by-step guide will walk you through the entire construction process, from building the floor frame to installing the roof and adding reinforcements for long-term durability. With easy-to-follow plans and basic tools, this project can be completed in a weekend, giving you a reliable and stylish firewood storage solution for years to come. Building this 6×8 firewood shed can typically be completed in a weekend, taking around 10 to 12 hours depending on experience and tools available. The estimated cost ranges between $400 to $800, depending on material choices such as pressure-treated lumber, roofing type, and optional upgrades like premium wood finishes.
When buying the lumber, you should select the planks with great care, making sure they are straight and without any visible flaws (cracks, knots, twists, decay). Investing in cedar or other weather resistant lumber is a good idea, as it will pay off on the long run. Use a spirit level to plumb and align the components, before inserting the galvanized screws, otherwise the project won’t have a symmetrical look. If you have all the materials and tools required for the project, you could get the job done in about a day.
Projects made from these plans
It’s that easy to build a saltbox woodshed!
Modern 6×8 Firewood Shed – DIY Plans
Building-a-6×8-firewood-shed
Cut and Shopping Lists
A – 2 pieces of 2×6 lumber – 8 ft FLOOR FRAME
A – 7 pieces of 2×6 lumber – 69″ FLOOR FRAME
B – 3 pieces of 4×4 lumber – 8 ft SKIDS
C – 11 pieces of 2×6 lumber – 8 ft FLOOR
D – 2 pieces of 2×4 lumber – 63 1/2″, 3 pieces – 60″ 2xSIDE WALL
E – 2 pieces of 2×4 lumber – 96″, 5 pieces – 60″ BACK WALL
F – 2 pieces of 4×4 lumber – 81 1/2″ UPRIGHTS
F – 1 piece of 4×4 lumber – 8 ft TOP BEAM
F – 2 piece of 4×4 lumber – 25 1/2″ BRACES
Tools
![]() Hammer, Tape measure, Framing square, Level
Hammer, Tape measure, Framing square, Level
![]() Miter saw, Drill machinery, Screwdriver, Sander
Miter saw, Drill machinery, Screwdriver, Sander
![]() Safety Gloves, Safety Glasses
Safety Gloves, Safety Glasses
Time
![]() One week
One week
Related
- Modern 2 cord firewood shed plans
- PART 1: 6×8 Saltbox Firewood Shed Plans
- PART 2: Roof Plans for 6×8 Wood Shed
Pin it for later!
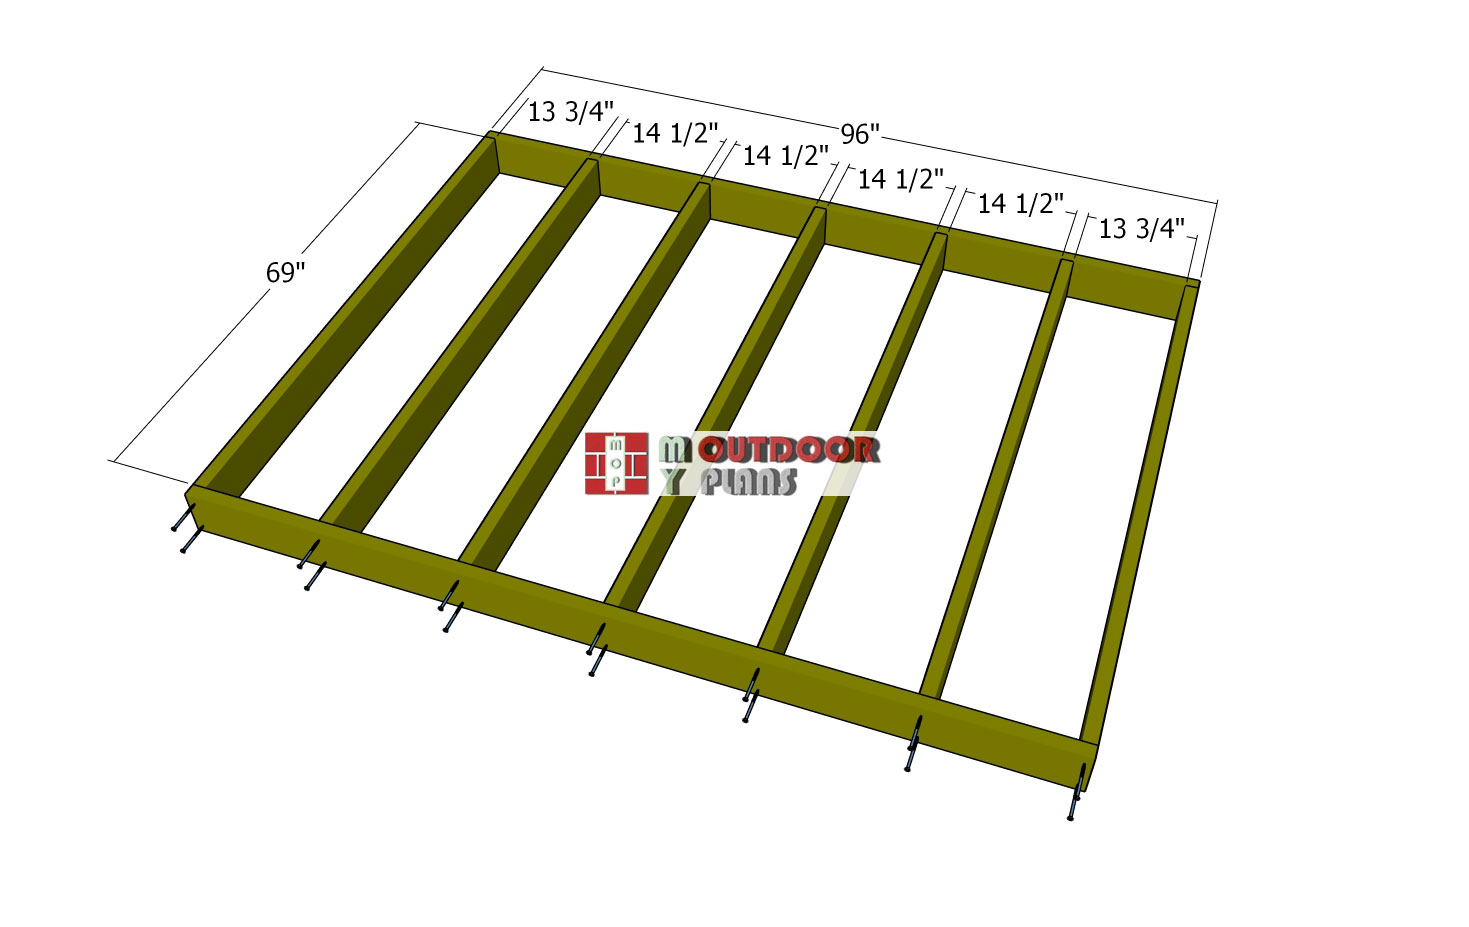
Step 1: Building the floor frame
Assembling-the-floor-frame
Begin this project by constructing the floor frame for the saltbox firewood storage shed. Cut the 2×6 joists to the required lengths and arrange them on a flat, level surface. Drill pilot holes through the rim joists and fasten the perpendicular joists with 3 1/2″ screws, ensuring each joint is secured with two screws. Space the joists 16 inches on center to provide a strong and stable base.
Before proceeding, measure the diagonals of the frame and make any necessary adjustments until they are equal. This step is crucial to ensuring the foundation is perfectly square, which will make the rest of the build much smoother.
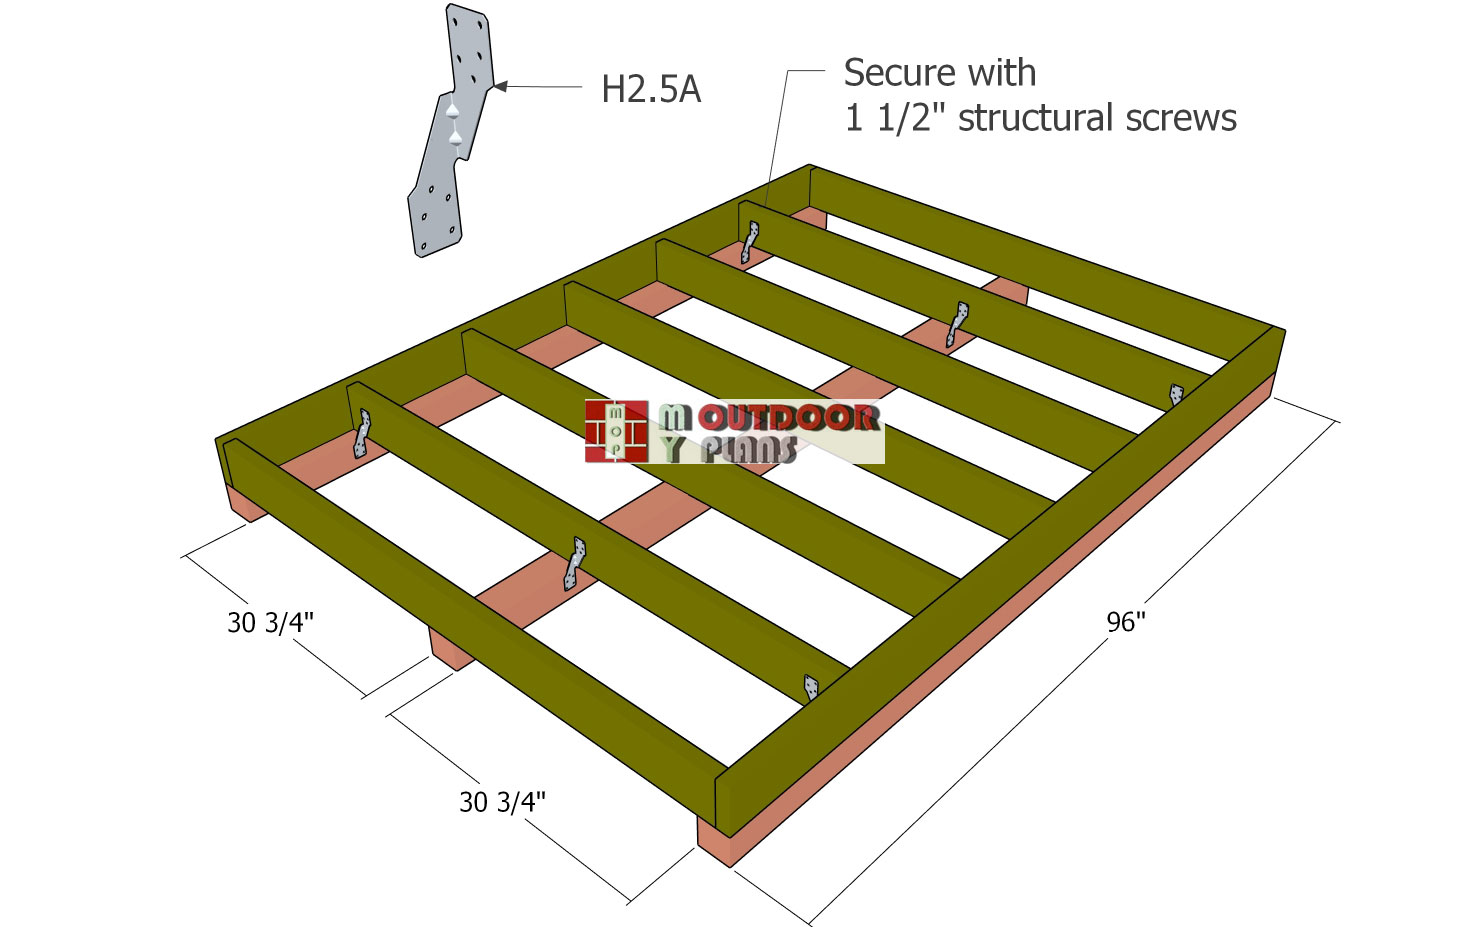
Attaching-the-skids
Move the shed frame to its final location and position the 4×4 skids evenly, following the diagram for proper spacing. Once the skids are in place, lift the floor frame and set it flush on top. Secure the frame to the skids using rafter ties (H2.5A or similar) and fasten them with 1 1/2″ structural screws. Install two ties per skid to reinforce the connection, ensuring the floor is stable and ready to support the structure. Taking the time to properly anchor the base will provide long-term durability for the shed.
Posts
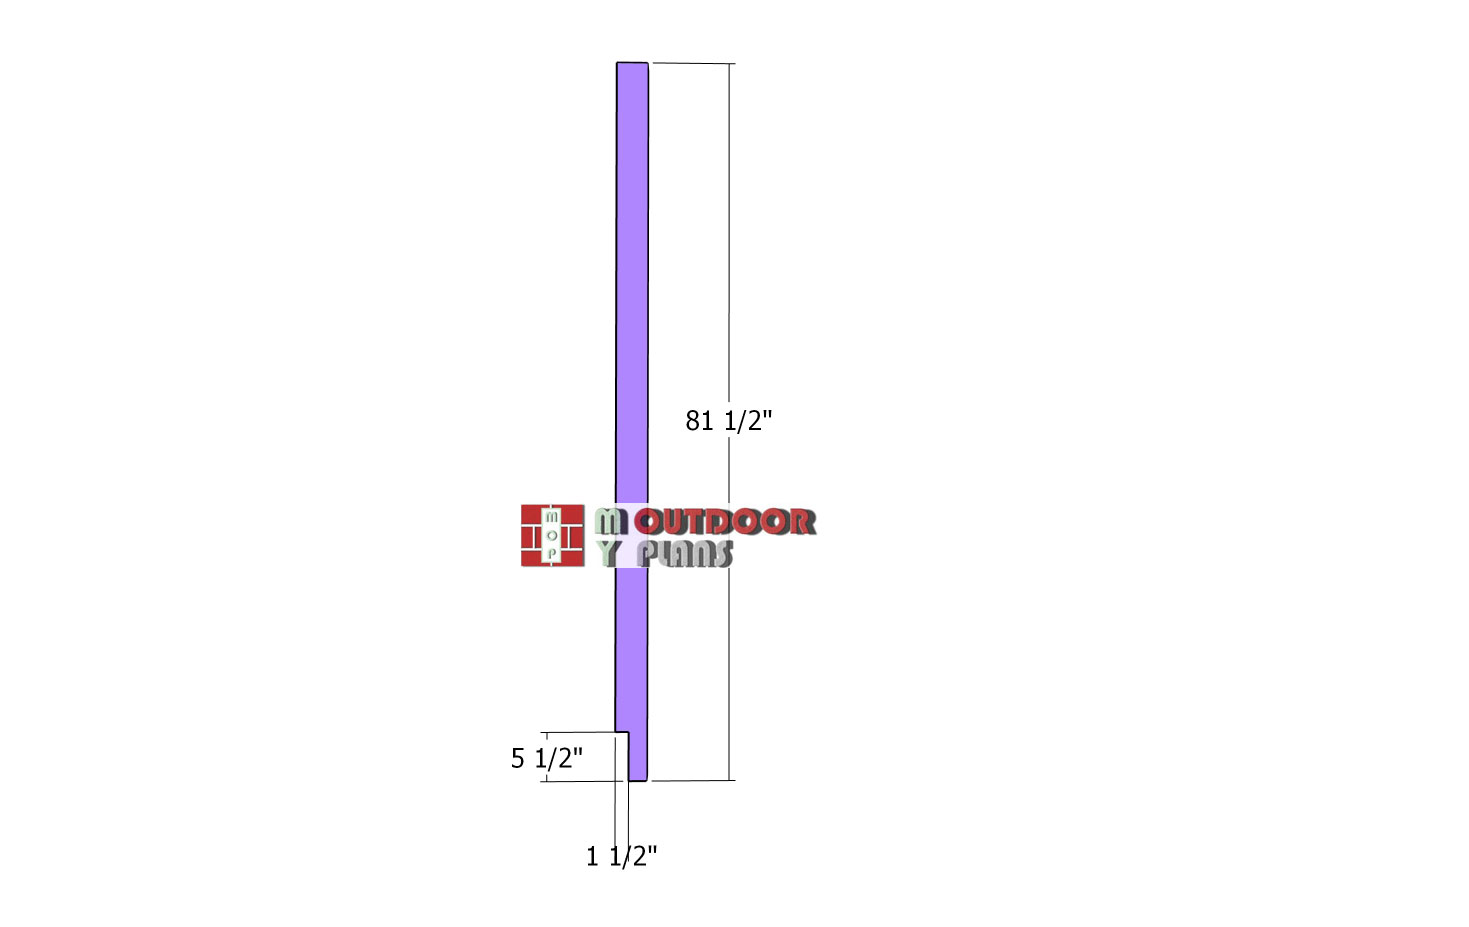
Cut the 4×4 posts for the front wall frame, ensuring they are the correct height for the shed design. Use a circular saw to make 1 1/2-inch deep cuts along the marked areas where the beams will sit. Once the cuts are made, remove the excess material with a hammer and chisel, working carefully to keep the notch clean and precise. Finish by smoothing the recess with sandpaper to ensure a snug fit for the adjoining components. Properly notching the posts will improve the overall stability and strength of the frame.
Fitting-the-front-post
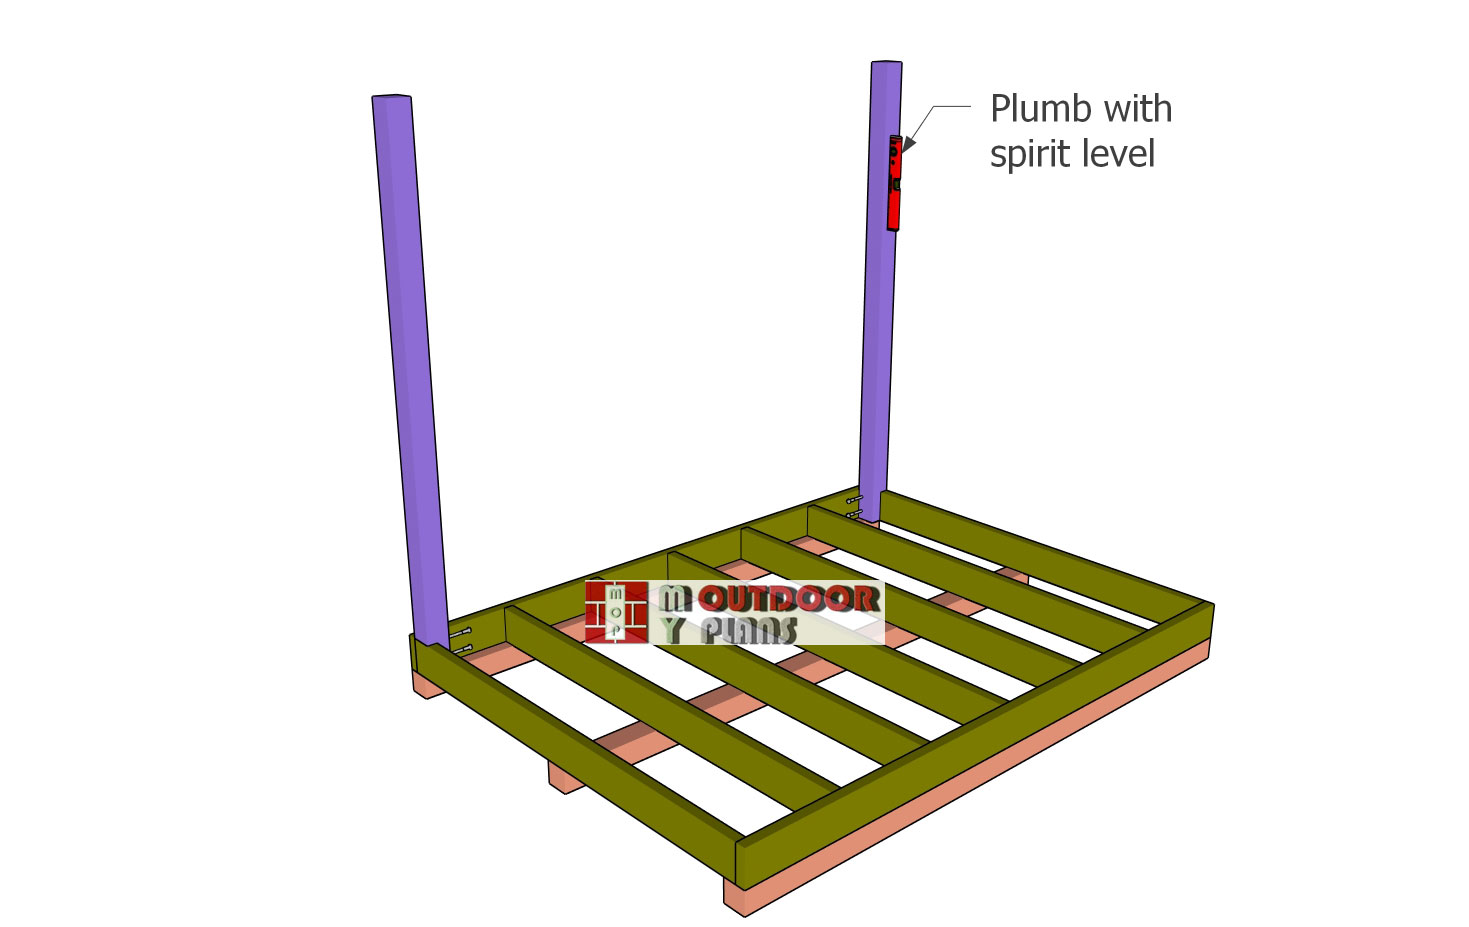
Position the post at the front of the floor frame, ensuring it is aligned properly. Use a spirit level to check that it is perfectly plumb before securing it. Drill pilot holes to prevent splitting, then insert 3 1/2″ lag screws to lock the post in place. For added strength, drive additional lag screws through the front of the frame into the post, reinforcing the connection and ensuring a sturdy structure.
Laying-the-floor-boards
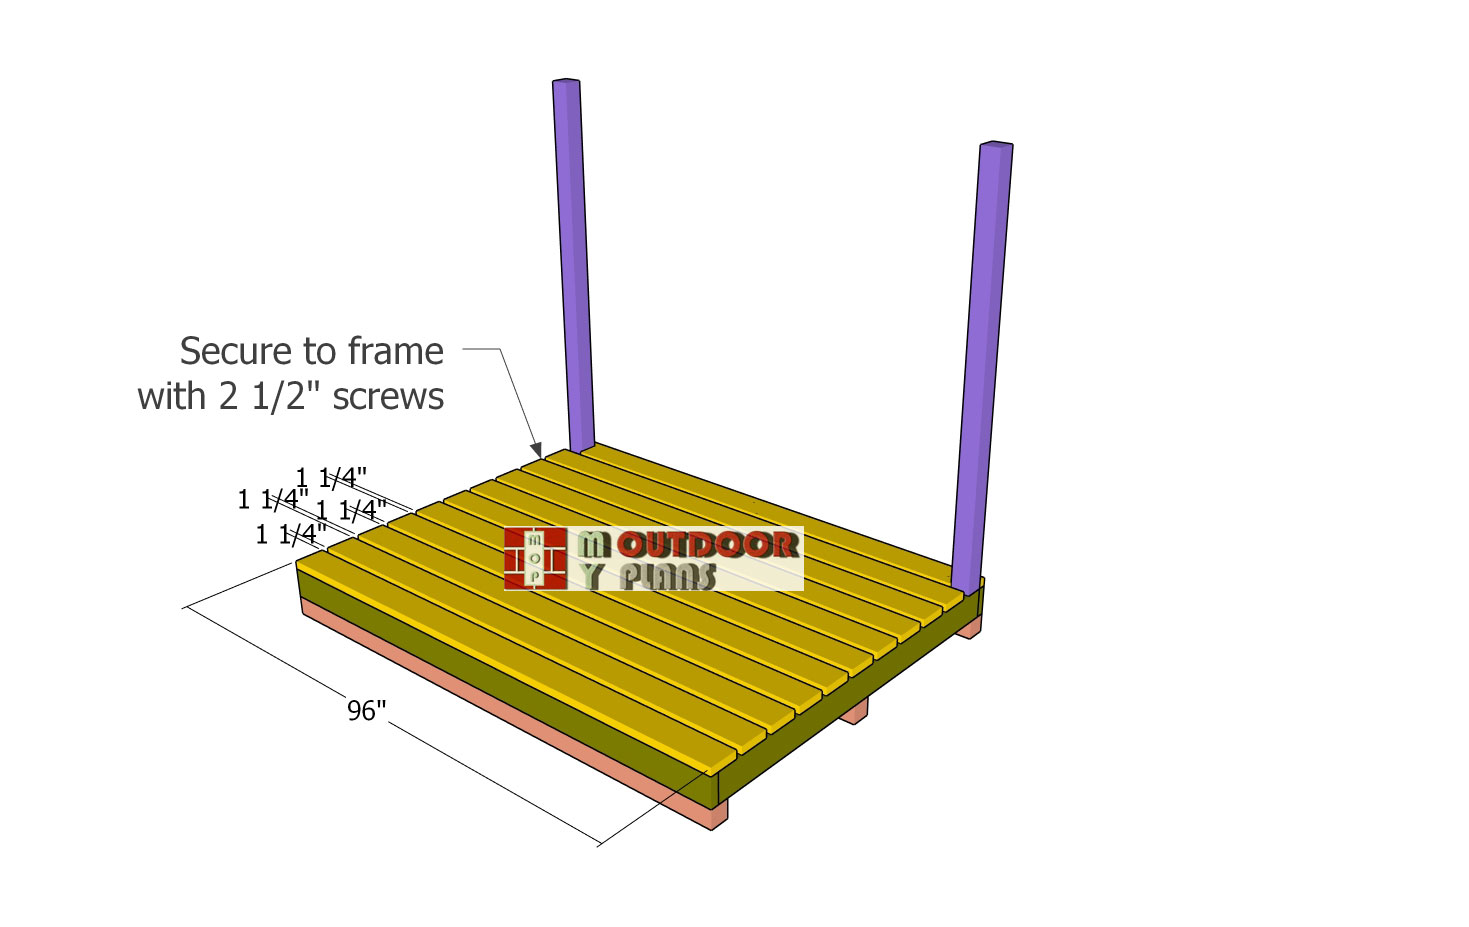
Attach the 2×6 boards to the floor of the shed, ensuring a precise fit. Notch the board that wraps around the front posts so it sits flush. Use 1 1/4″ spacers between the boards to maintain even gaps for proper airflow. Align the boards with the edges of the shed, then drill pilot holes to prevent splitting. Secure each board to the joists with 2 1/2″ screws, driving two screws into each joint for a strong and stable floor. Take your time to ensure proper spacing and alignment for a clean, professional finish.
Step 2: Building the wall frames
Side-wall-frames
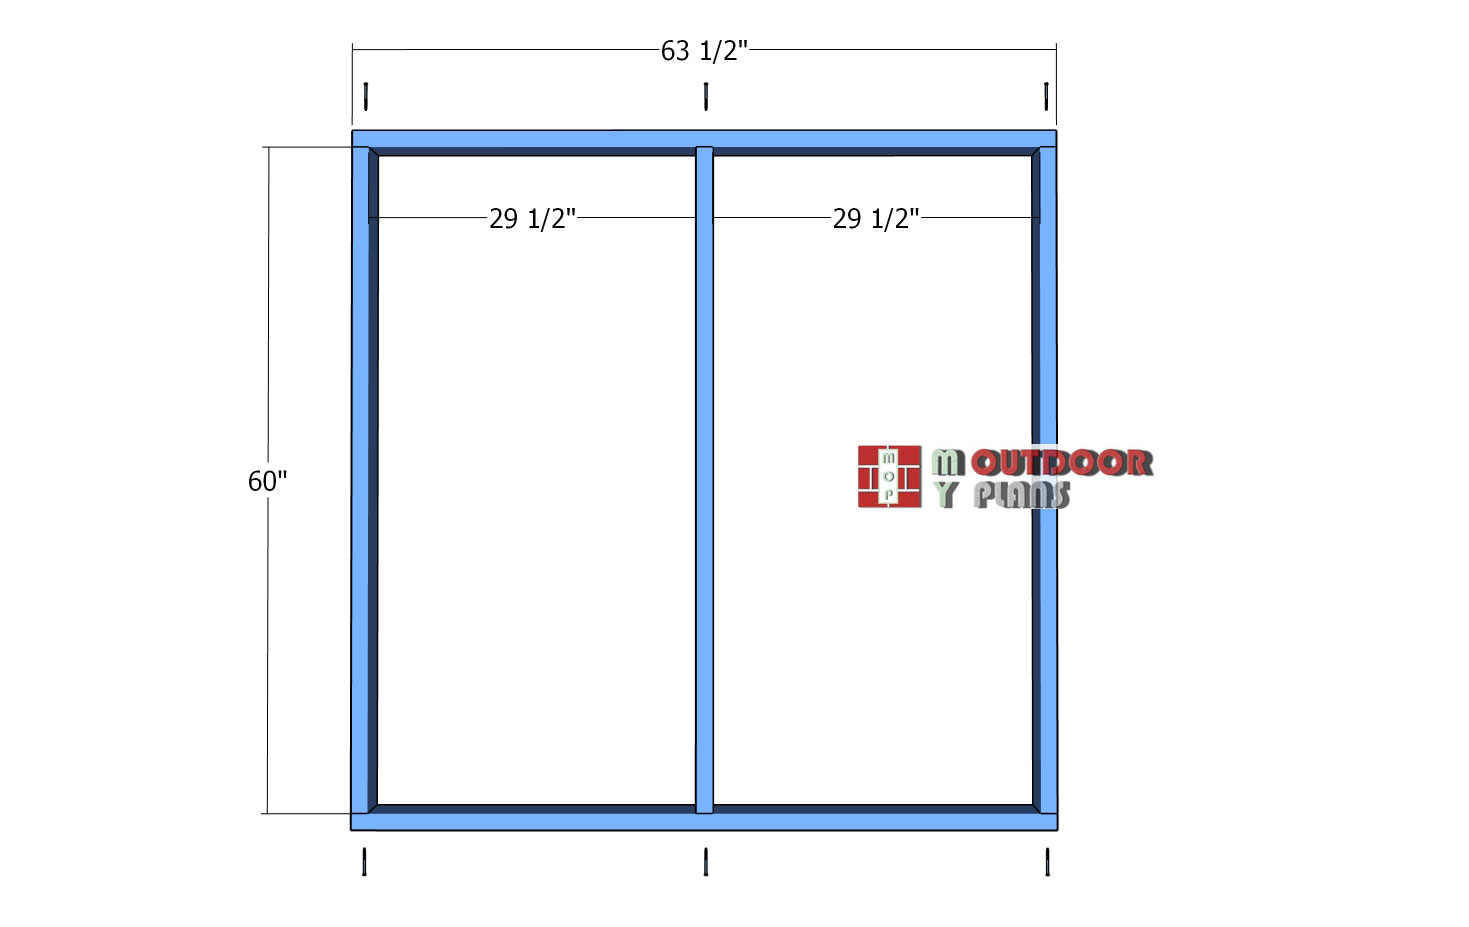
Assemble the side wall frames for the firewood shed by cutting the plates and studs from 2×4 lumber, following the dimensions in the diagram. Lay out the components on a flat surface, ensuring proper alignment. Drill pilot holes through the plates to prevent splitting, then secure the studs in place using 3 1/2″ screws. Drive two screws into each joint for a strong and stable connection. Double-check that the frame is square before moving on to installation.
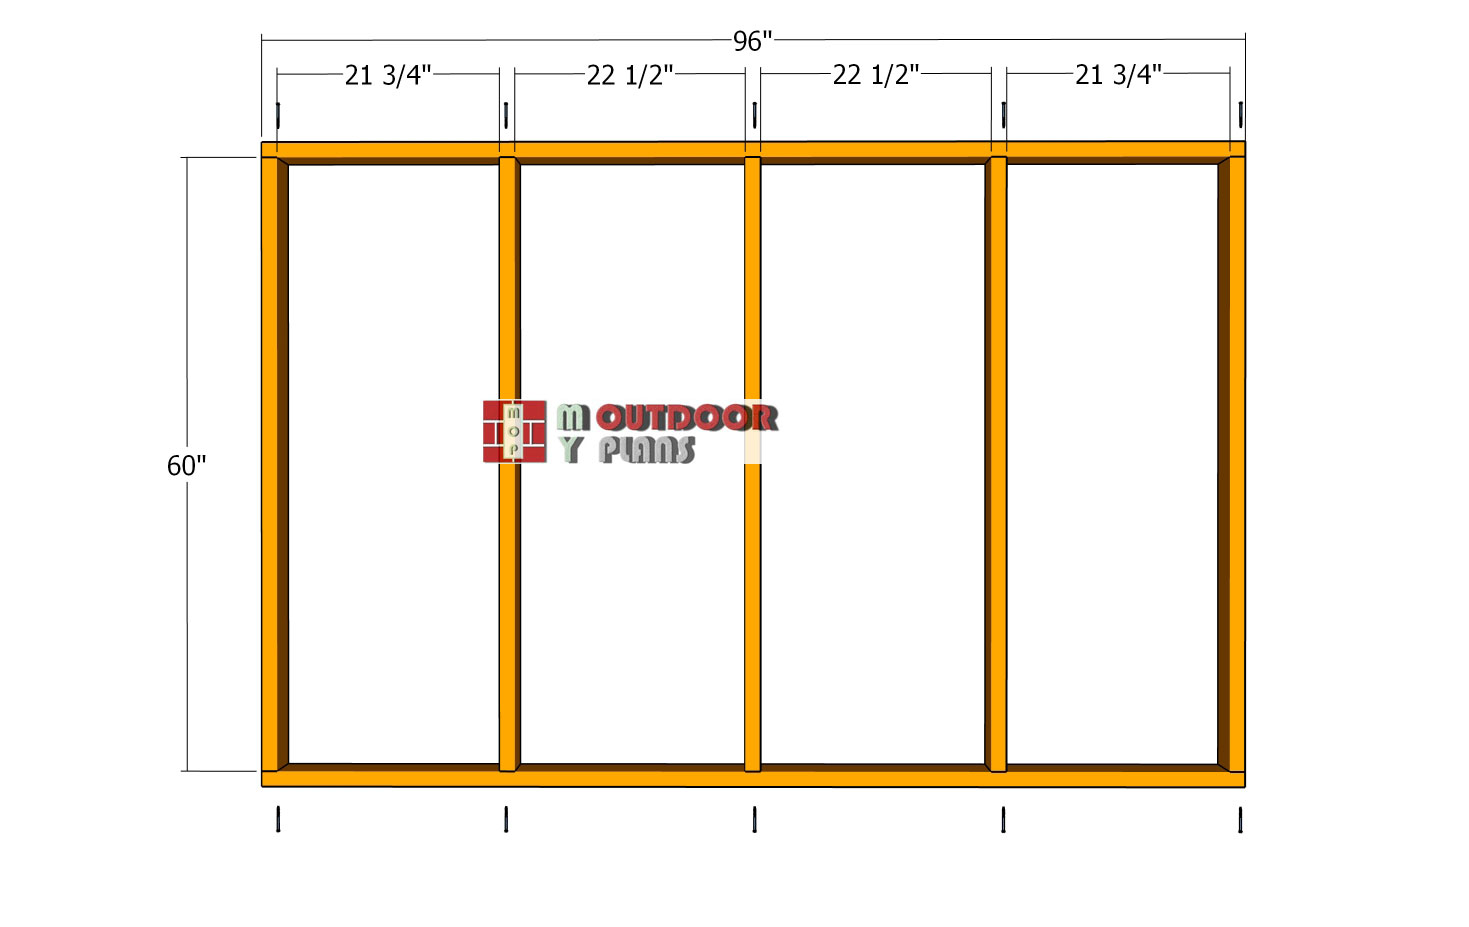
Back-wall-frame
Assemble the back wall frame using 2×4 lumber, following the dimensions in the diagram. Lay out the components on a flat surface and ensure everything is properly aligned. Drill pilot holes through the plates and secure the studs with 3 1/2″ screws, using two screws at each joint. Measure the diagonals to confirm the frame is square before moving forward. Adjust as needed to ensure accuracy, as a properly squared frame will make installation much easier.
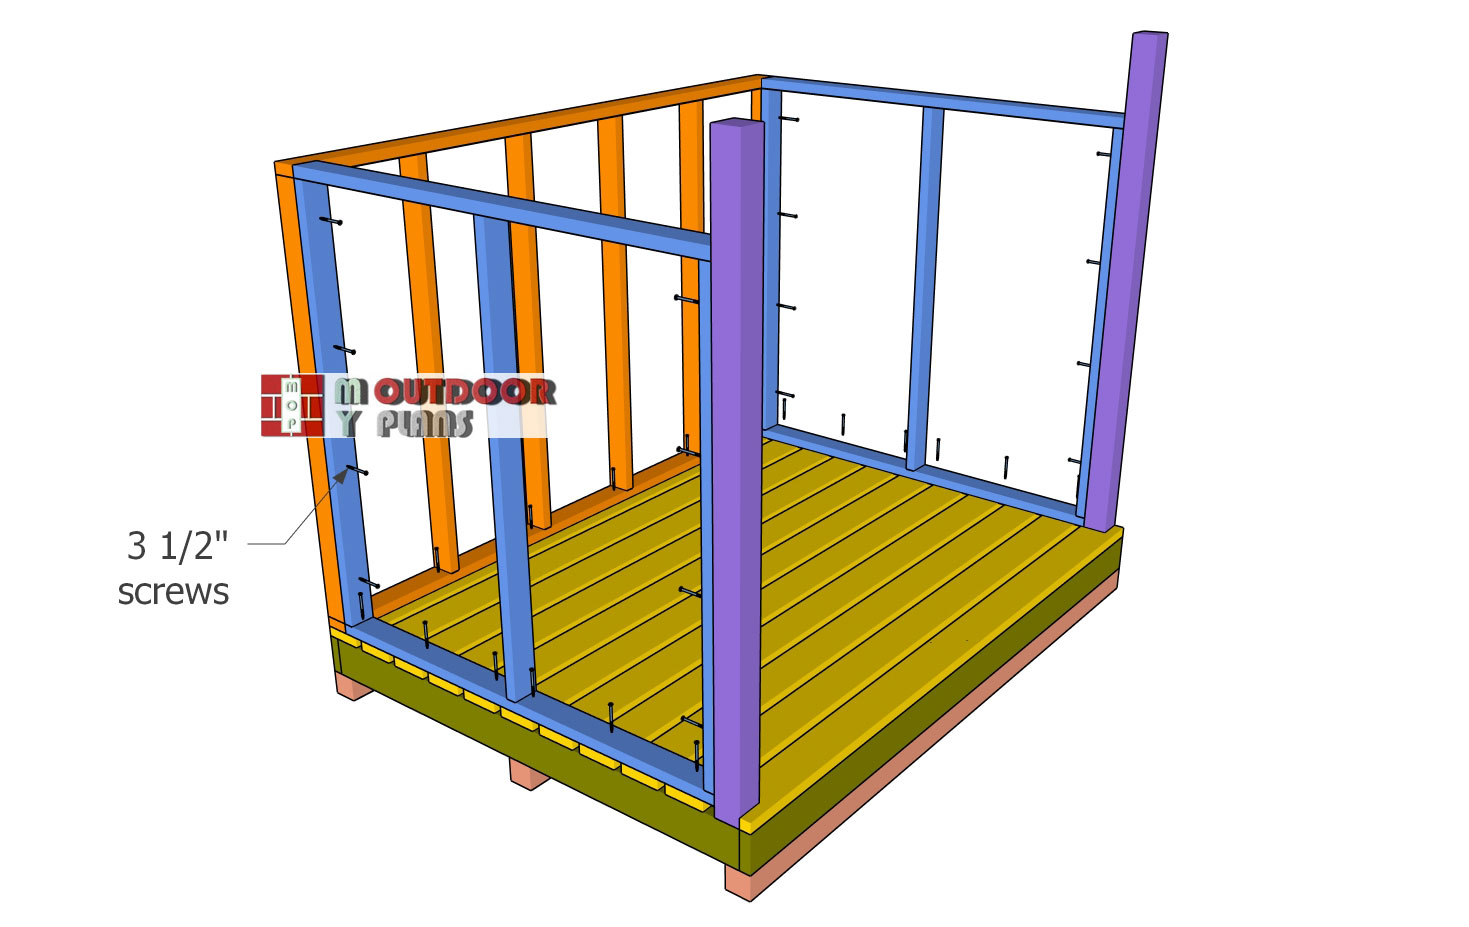
Attaching-the-wall-frames
Position the wall frames on the floor of the shed according to the plans. Align the bottom plates with the exterior edges of the floor, ensuring a precise fit. Use a spirit level to plumb the walls, then drill pilot holes and secure them with 3 1/2″ screws. Fasten the adjacent wall frames together using the same screws, making sure the corners are properly aligned. Additionally, secure the side walls to the front posts for added stability. Double-check all connections to ensure a strong and square structure before moving forward.
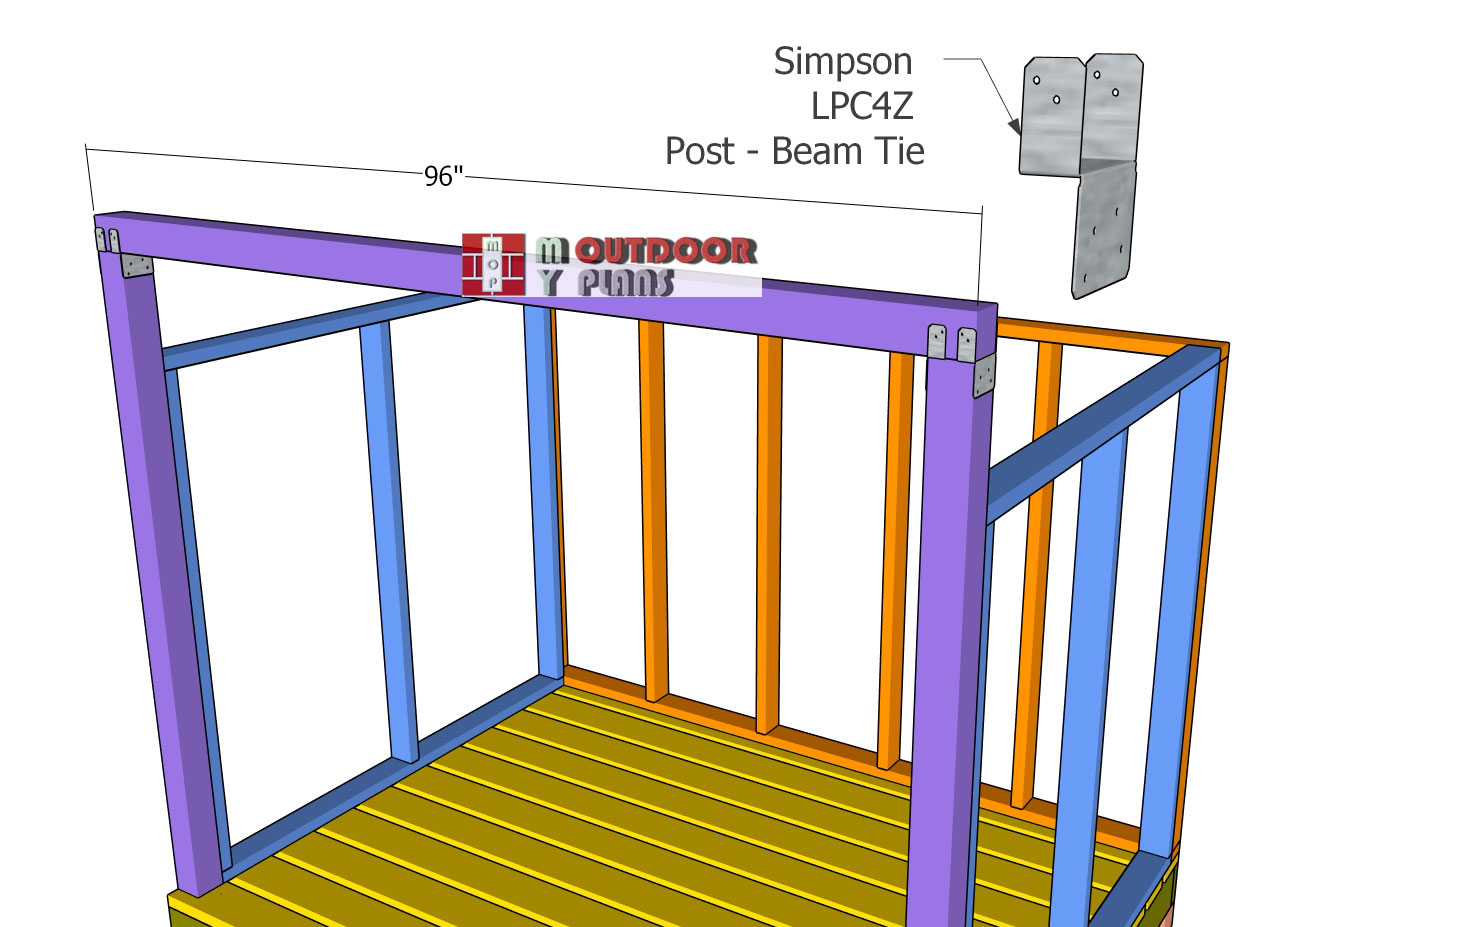
Fitting-the-top-support-beam
Attach the 4×4 support beam to the top of the front posts, making sure it is flush with the edges for a clean and secure fit. Use post-to-beam connectors to reinforce the joints, ensuring a strong and stable connection. Secure the beam in place with 1 1/2″ structural screws or nails, following the manufacturer’s guidelines for proper installation. Double-check that the beam is level before tightening all fasteners, as this will provide a solid base for the roof structure.
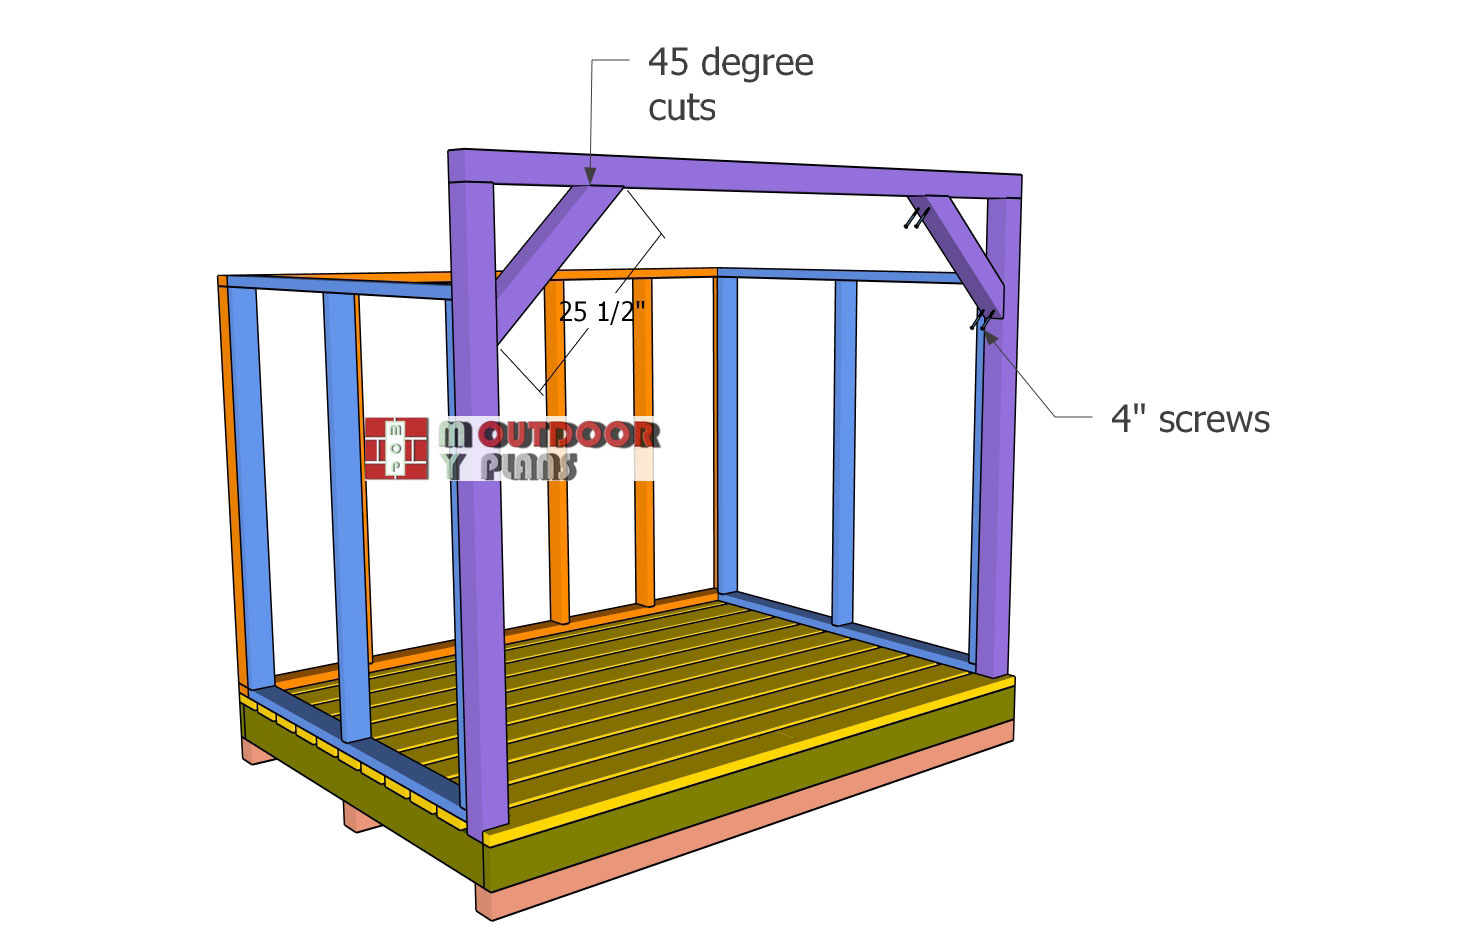
Front-braces
Cut the braces from 4×4 lumber, making 45-degree cuts at both ends for a precise fit. Position the braces between the posts and the support beam, ensuring they are properly aligned. Drill pilot holes to prevent splitting, then secure each brace in place using 4″ screws. Drive two screws into each joint for a strong and stable connection. These braces will reinforce the structure, adding extra support to withstand heavy loads and harsh weather conditions.
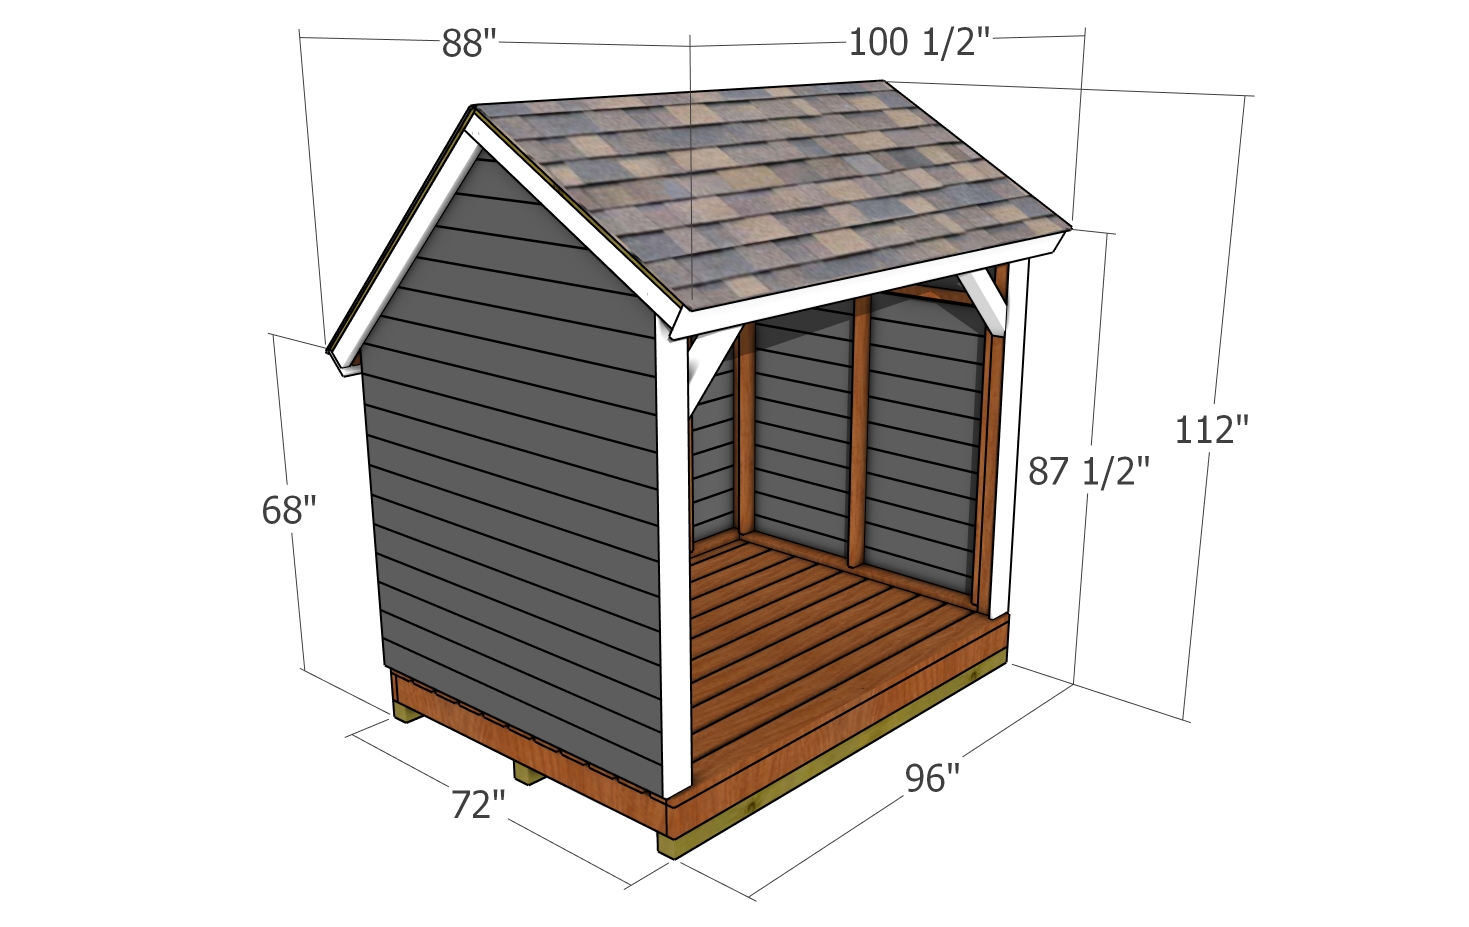
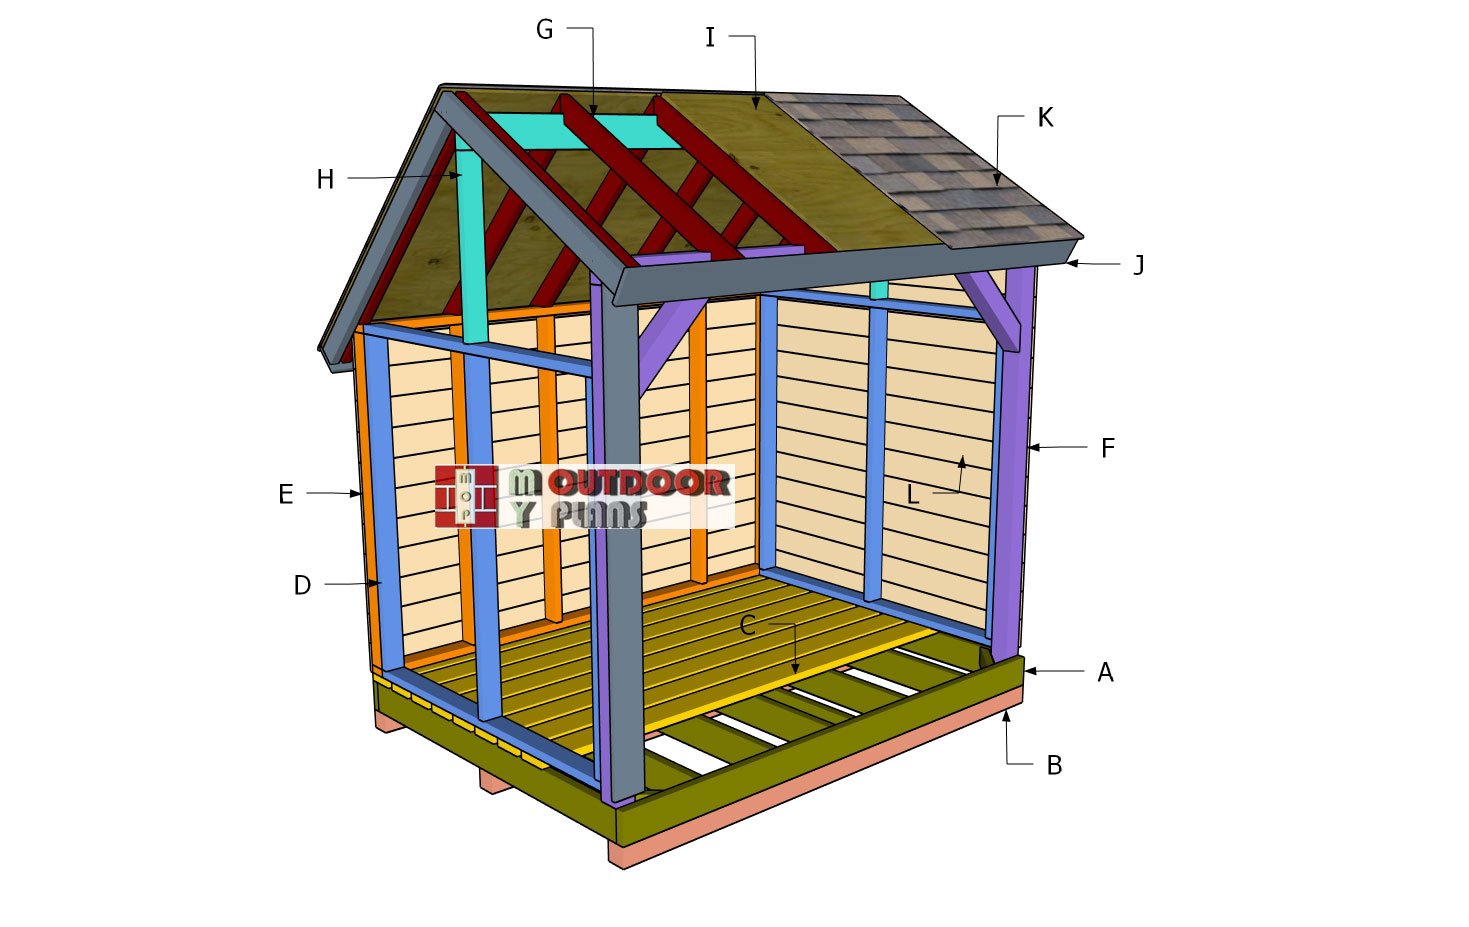
6×8 firewood shed – dimensions
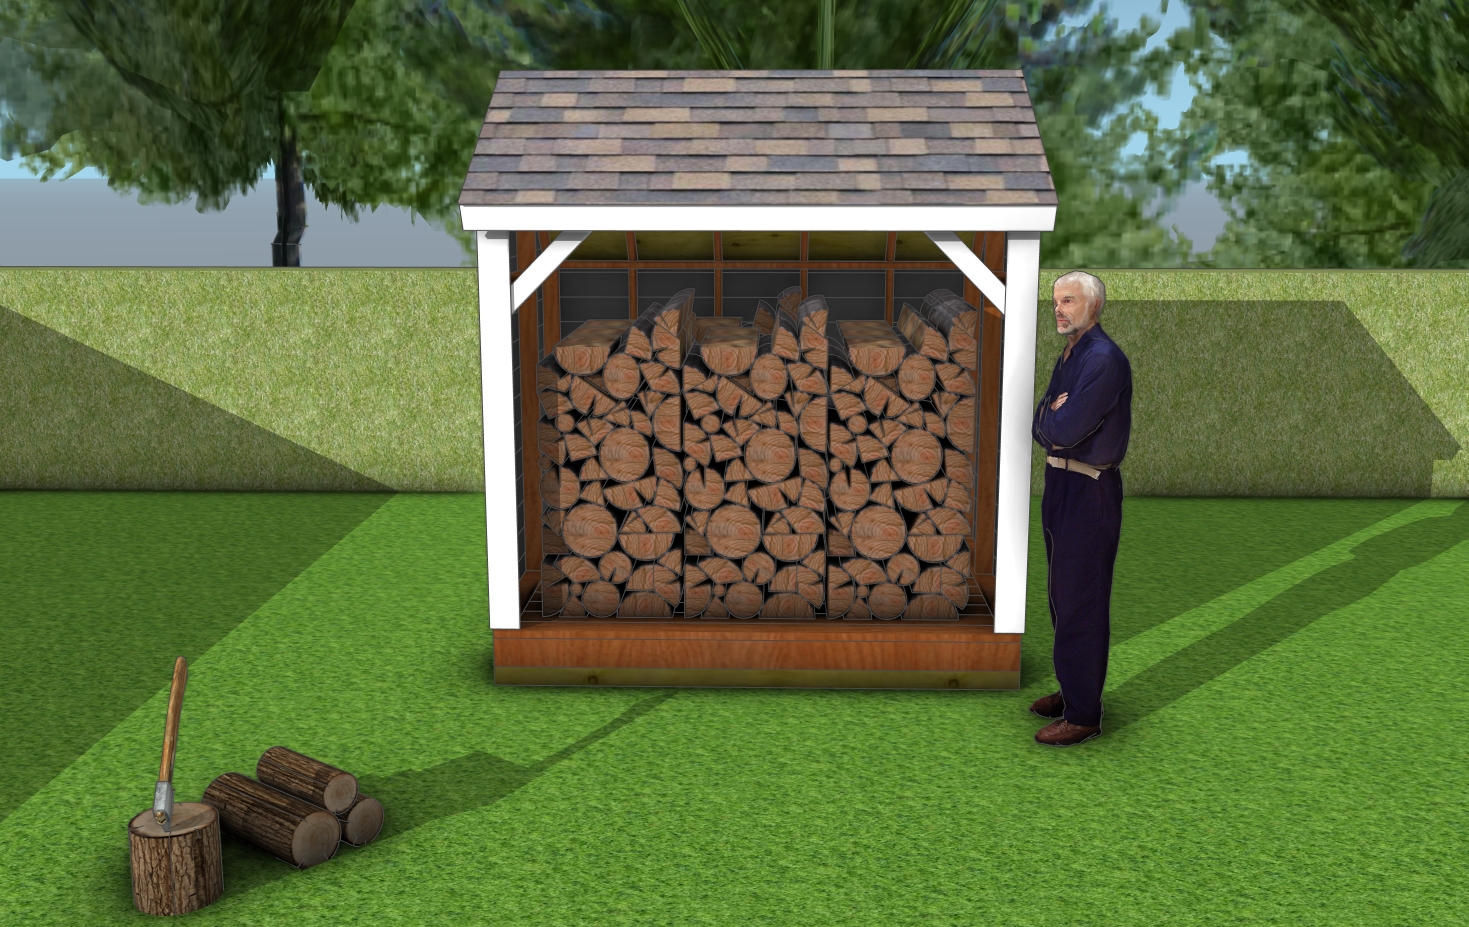
How to build a small firewood shed
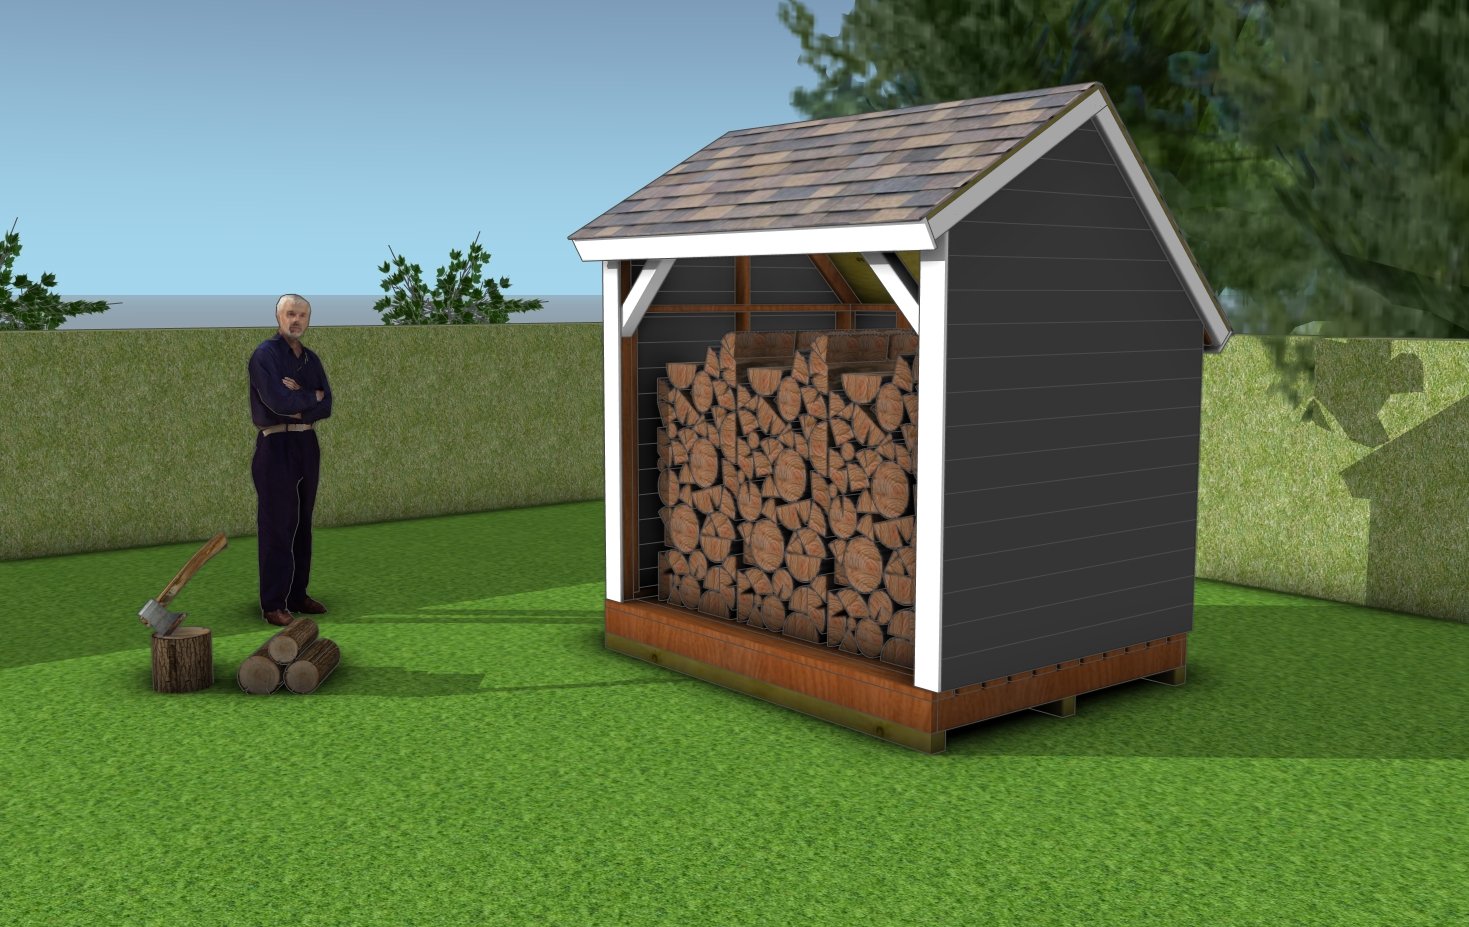
DIY Firewood shed plans
With the frame now complete, your firewood shed is starting to take shape. In PART 2, I’ll walk you through building the roof and attaching the enclosing slats on the sides and back, giving your shed both protection and a clean, finished look. Stay tuned for the next steps!
If you want to get Premium Plans, just press the GET PDF PLANS bellow. If you want to get the free version, please read the blog FAQs.

This woodworking project was about 6×8 saltbox firewood shed plans. If you want to see more outdoor plans, check out the rest of our step by step projects and follow the instructions to obtain a professional result.
