Building a 12×20 modern lean to pavilion is a fantastic way to elevate your outdoor space, offering both style and functionality. Whether you’re looking for a shaded retreat, an entertainment hub, or a place to relax with family and friends, this project delivers on all fronts. With its sleek design and sturdy construction, the pavilion is not just a practical addition but also a stunning centerpiece for your backyard. The roof pitch for this project is 2:12.
On average, this project will take about 3-4 days to complete, depending on your experience and the tools available. The estimated cost for materials ranges from $1500 to $2,500, depending on the type of lumber and hardware you choose. While this is an investment of both time and resources, the end result is a durable, custom-built structure that will enhance your outdoor living space for years to come.
When buying the lumber, you should select the planks with great care, making sure they are straight and without any visible flaws (cracks, knots, twists, decay). Investing in cedar or other weather resistant lumber is a good idea, as it will pay off on the long run. Use a spirit level to plumb and align the components, before inserting the galvanized screws, otherwise the project won’t have a symmetrical look. If you have all the materials and tools required for the project, you could get the job done in about a day.
Projects made from these plans
Pin it for later!
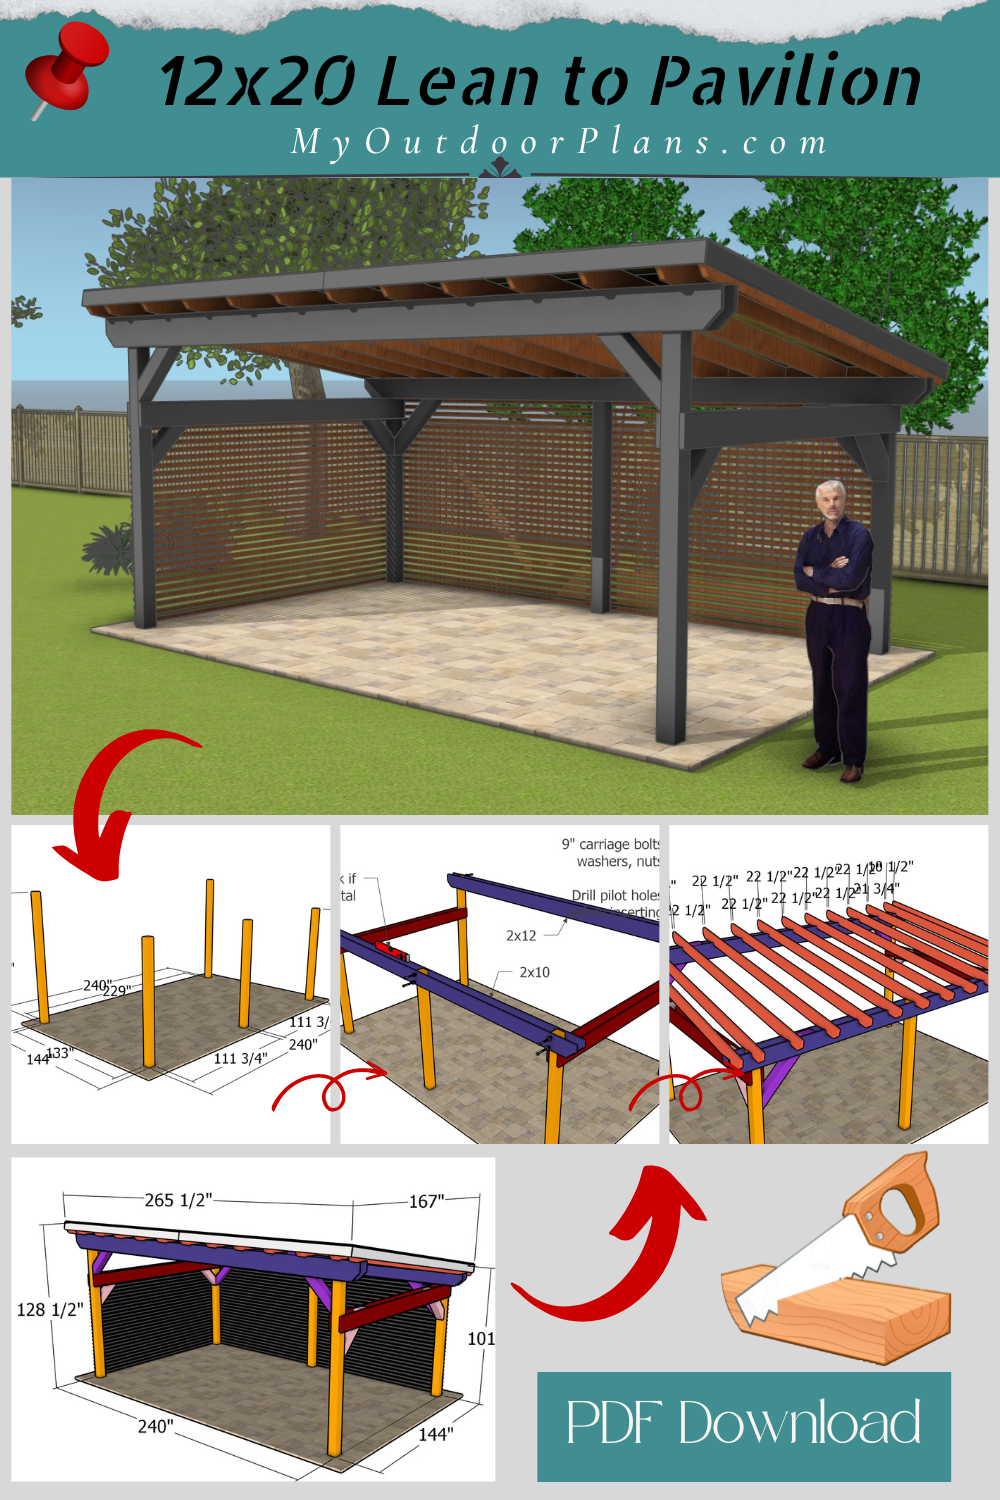
Building a Modern 12×20 Lean to Carport
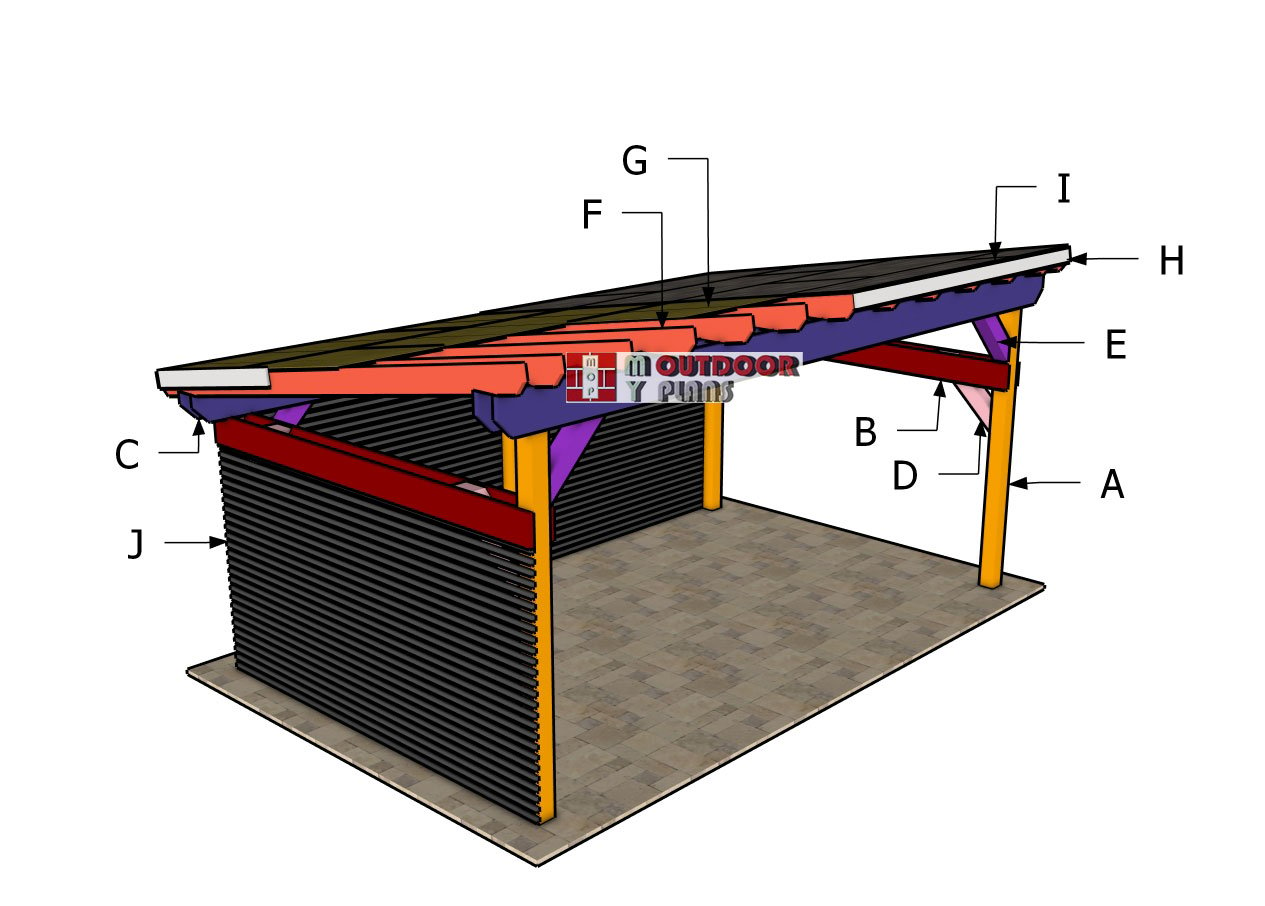
Building-a-12×20-lean-to-pavilion
Cut & Shopping Lists
- A – 2 pieces of 6×6 lumber – 118 3/4″ POSTS
- A – 3 pieces of 6×6 lumber – 96″ POSTS
- B – 4 pieces of 2×10 lumber – 12 ft SIDE BEAMS
- C – 2 pieces of 2×10 lumber – 22 ft BACK BEAMS
- C – 2 pieces of 2×12 lumber – 22 ft FRONT BEAMS
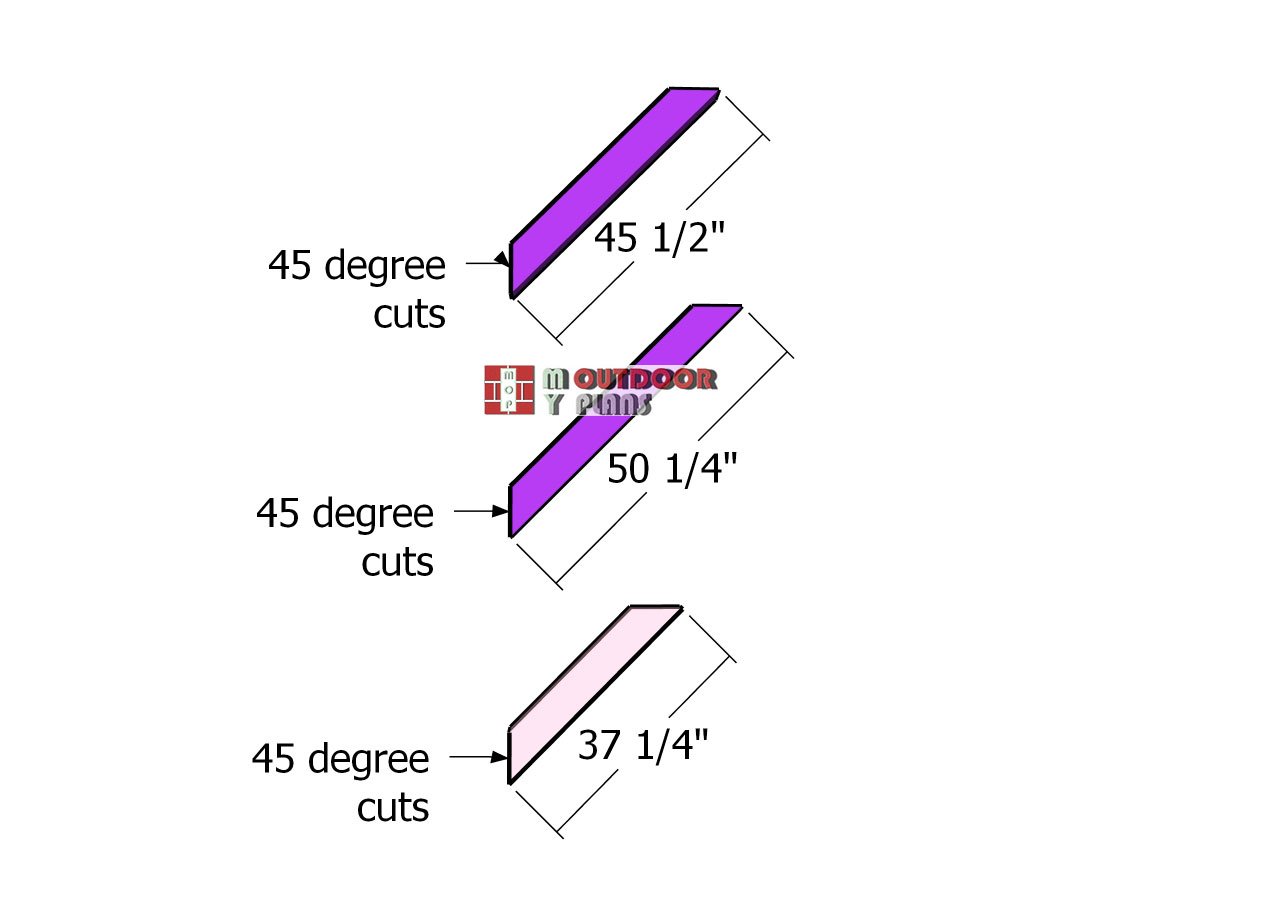
- D – 4 pieces of 6×6 lumber – 37 1/4″ BRACES
- D – 4 pieces of 6×6 lumber – 45 1/2″ BRACES
- D – 4 pieces of 6×6 lumber – 50 1/4″ BRACES
Tools
![]() Hammer, Tape measure, Framing square, Level
Hammer, Tape measure, Framing square, Level
![]() Miter saw, Drill machinery, Screwdriver, Sander
Miter saw, Drill machinery, Screwdriver, Sander
![]() Post hole digger, Concrete mixer
Post hole digger, Concrete mixer
![]() Safety Gloves, Safety Glasses
Safety Gloves, Safety Glasses
Time
Related
- 16×24 run in shed plans
- 18×20 lean pavilion plans
- PART 1: 12×20 lean to pavilion plans
- PART 2: 12×20 lean to pavilion roof plans
It’s that easy to build a lean to pavilion!
STEP 1: Fitting the posts
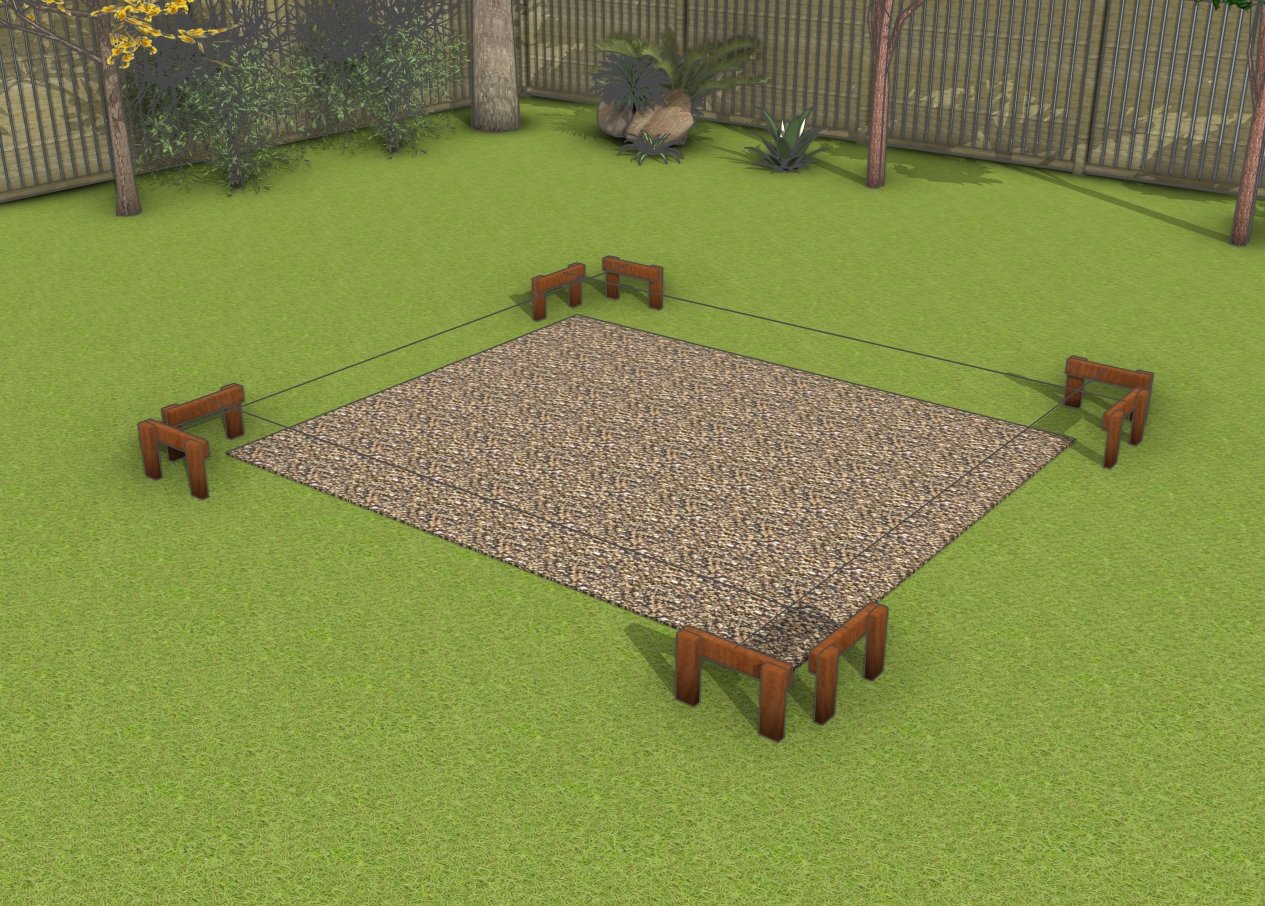
Laying out the shed location
Preparing the site for construction is a crucial first step to ensure a stable and durable structure. Start by clearing the area of any debris, vegetation, or obstacles, and level the ground to create a solid and even surface. Mark the layout of the pavilion using stakes and string, ensuring the dimensions are accurate and square.
If required, excavate the site to the proper depth for footings or concrete pads, depending on your local building codes and project needs. Taking the time to prepare the site thoroughly will make the construction process smoother and set the stage for a reliable and well-aligned finished structure.
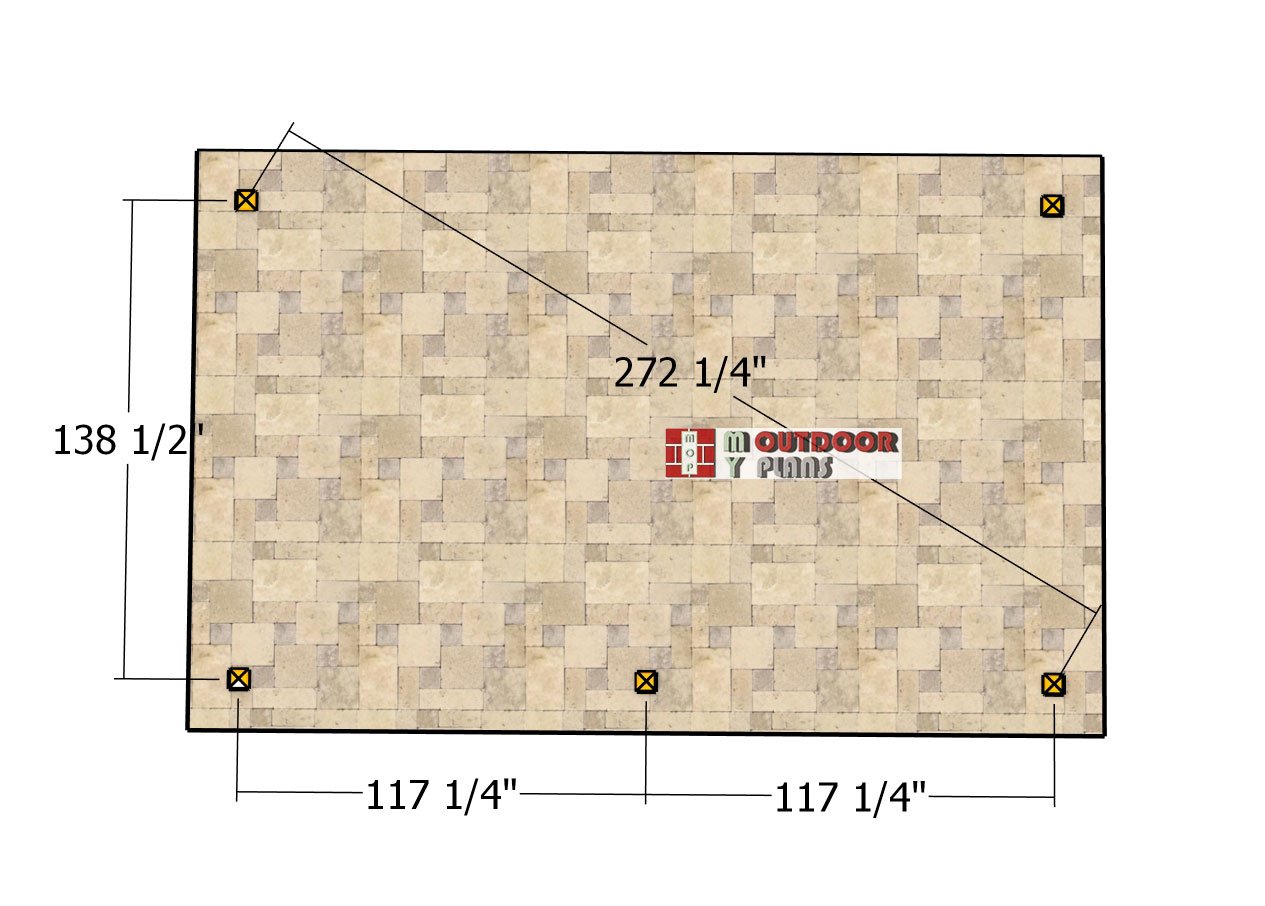
Layout-2
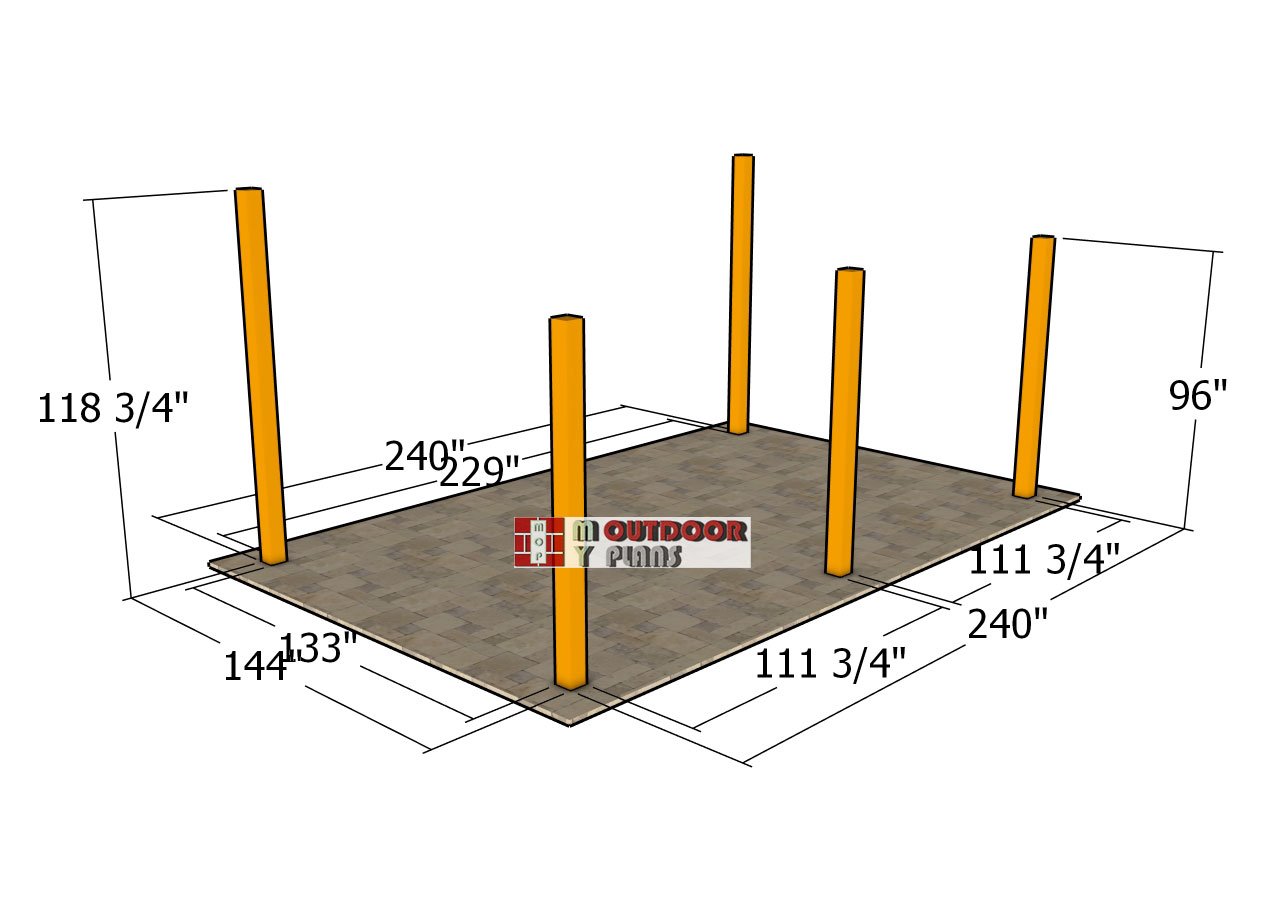
To get started on this project, the first step is to lay out the posts for your modern pavilion. The diagram shows the exact distances between each axis, marking the center points for each post. This precise layout is key to building a stable and perfectly aligned structure, giving you a solid foundation for the gazebo’s frame.
Layout-1
The second layout diagram provides the exact distances between each post, giving you a full overview of the spacing as you position the posts and base plate for the pavilion. This detailed plan ensures precision, helping you build a strong and perfectly aligned frame. With this clear visual guide, you can be confident that every measurement and position is spot-on for a sturdy and polished final structure.
Setting-the-posts
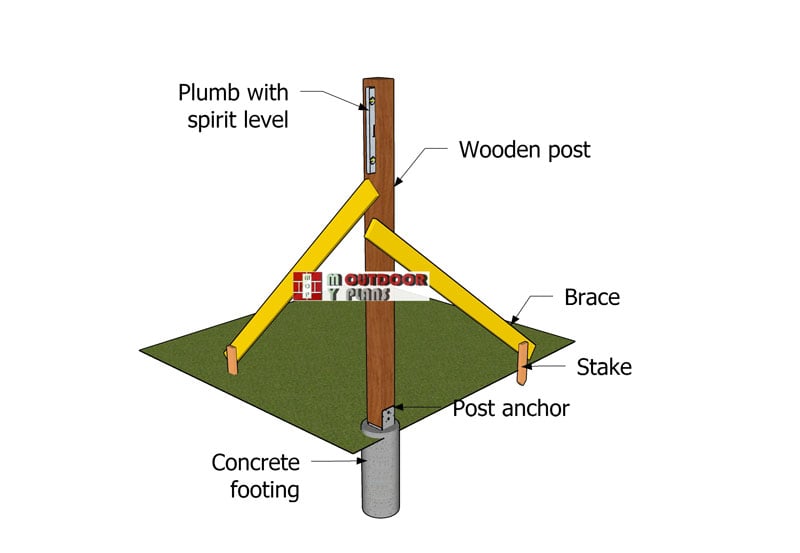
After marking the spots, dig 3-foot-deep holes that are 12 inches wide. Insert concrete tubes into each hole and fill them with concrete. While the concrete is still wet, set the post anchors carefully, making sure they’re perfectly aligned for accuracy. Once the concrete cures, you’re ready to attach the posts to the anchors.
Use a spirit level to ensure each post is perfectly plumb, and temporarily brace them with 2x4s for added stability. Finally, secure each post to the anchors using lag screws to lock everything in place, giving you a rock-solid foundation for your carport.
STEP 2: Attaching the beams
Side beams
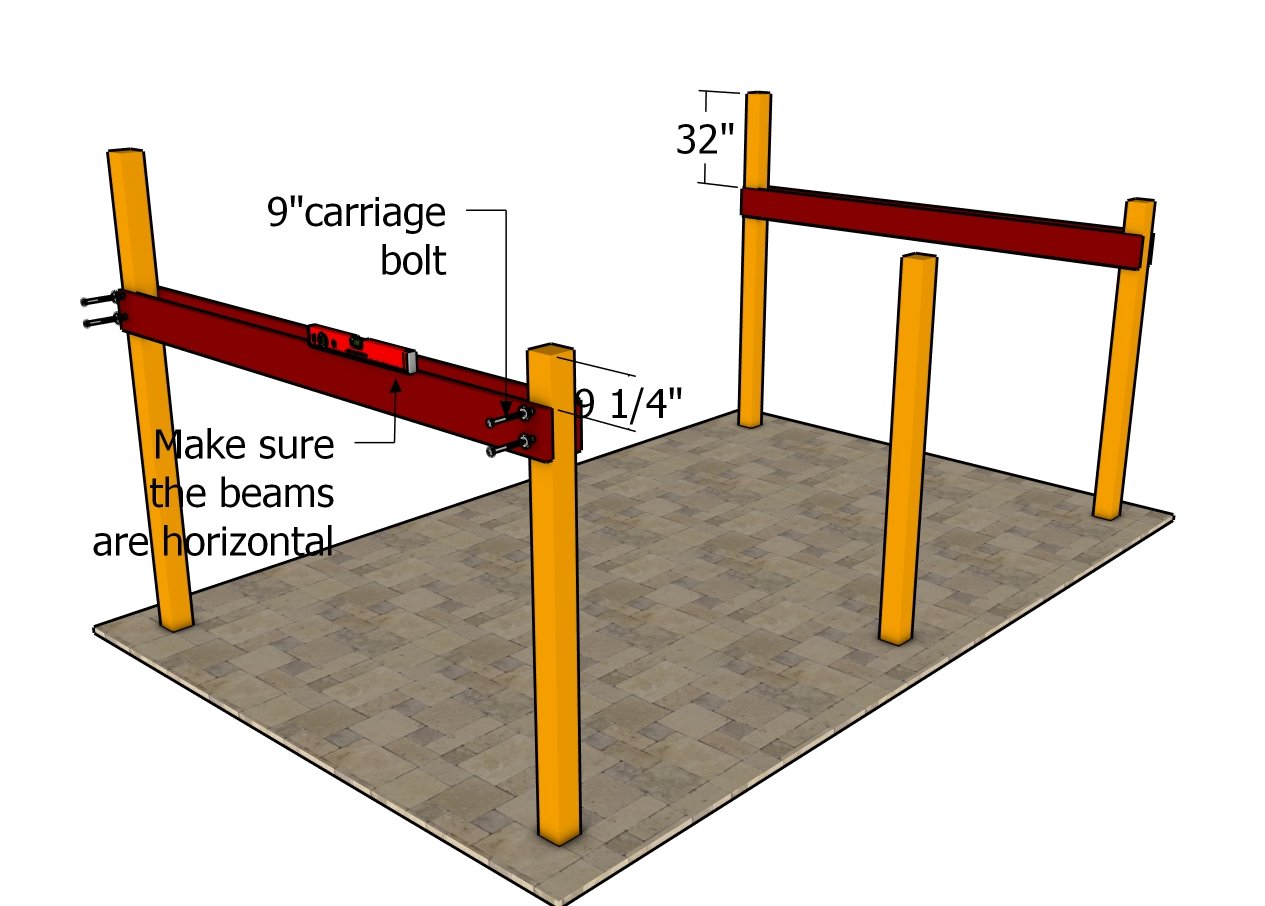
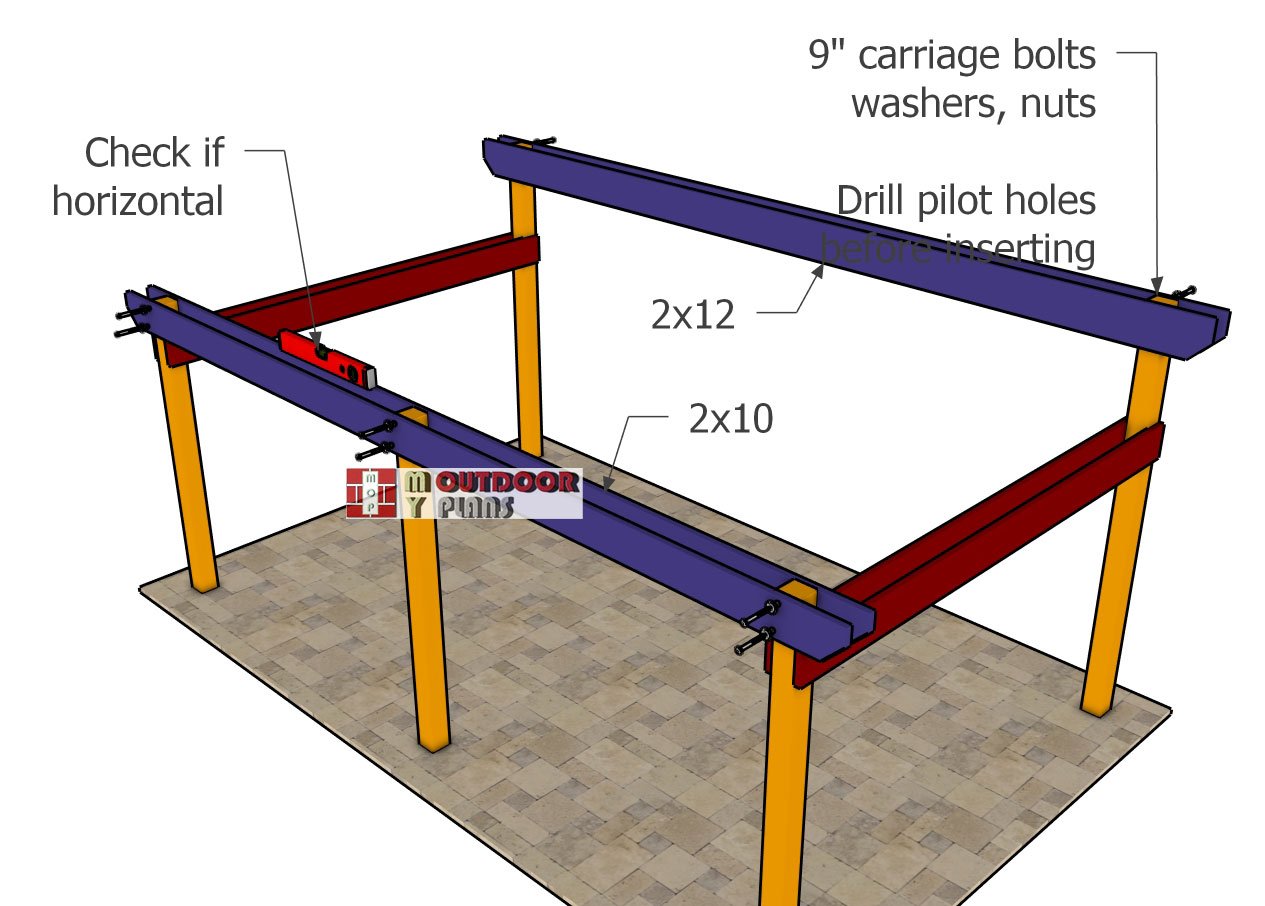
Use 2×10 lumber for the side top beams. Position the beams so there’s exactly 9 1/4″ from the top of the front posts to the top of the beams. Use a spirit level to ensure everything is perfectly aligned, then secure the beams temporarily with clamps. Drill pilot holes through both the beams and the posts, then insert 9″ carriage bolts. Tighten them securely with washers and nuts, ensuring a firm connection. For maximum stability, use two bolts at each joint.
Top-support-beams
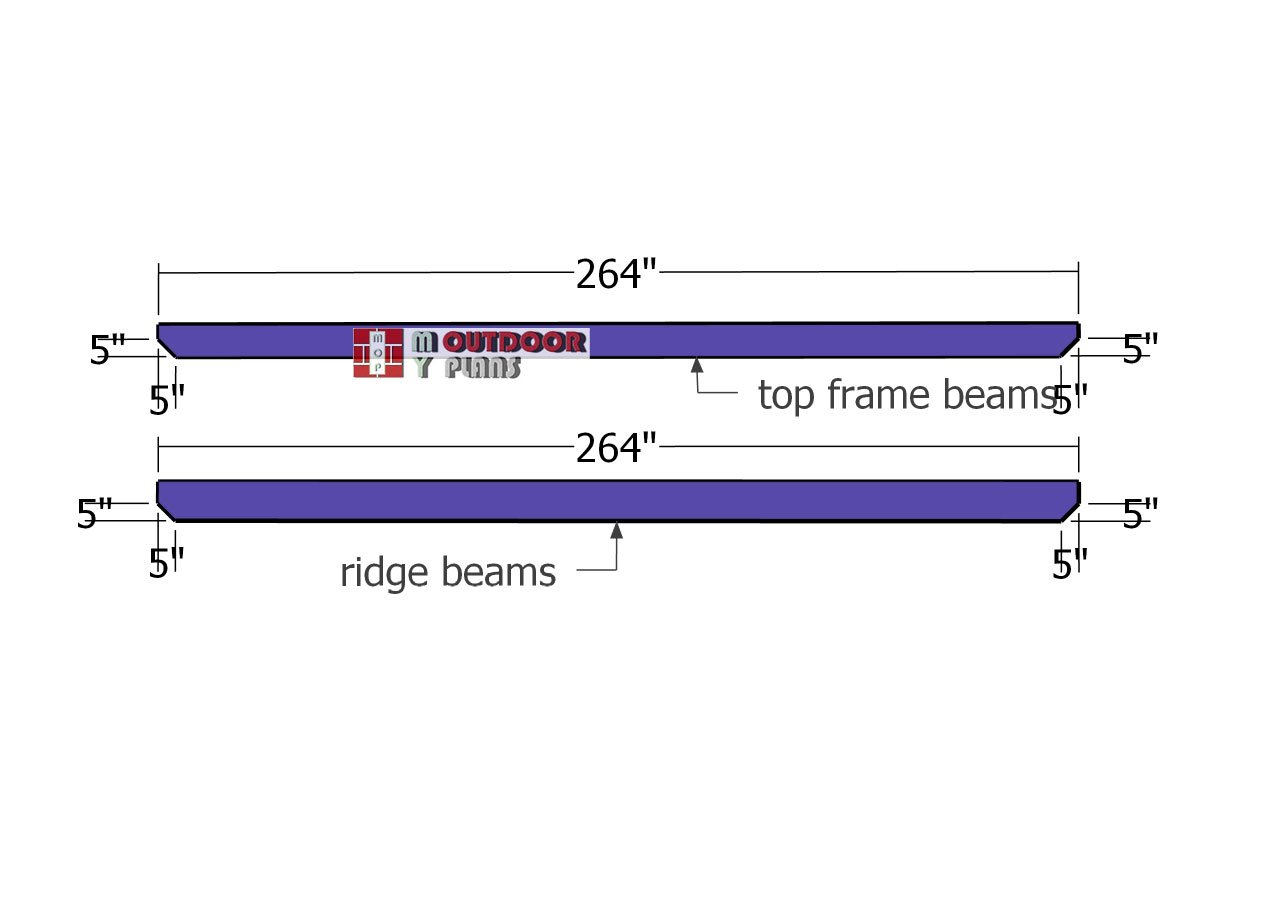
Next, move on to cutting the top support beams for the front and back of the roof. Use 2×12 lumber for the ridge beams and 2×10 lumber for the shorter sides of the pavilion. To add a touch of style, make decorative cuts at both ends of the beams using a circular saw. This not only enhances the look of the pavilion but also gives it a polished, custom finish.
Fitting-the-top-beams
Attach the beams to the front and back of the pavilion, ensuring they overhang the posts by 12″ on both sides. When properly aligned, the beams should sit perfectly horizontal. Drill pilot holes through both the beams and the posts, then secure them with 9″ carriage bolts. Use at least two bolts per joint for stability, but be sure to consult your local building codes to ensure the solution meets your specific requirements.
STEP 3: Adding the braces
Braces
Next, cut the diagonal braces for your outdoor project. Make 45-degree cuts at both ends of each brace to ensure a snug fit and a clean, professional look. These braces will provide additional stability and enhance the overall strength of the structure.
Braces—detail-1
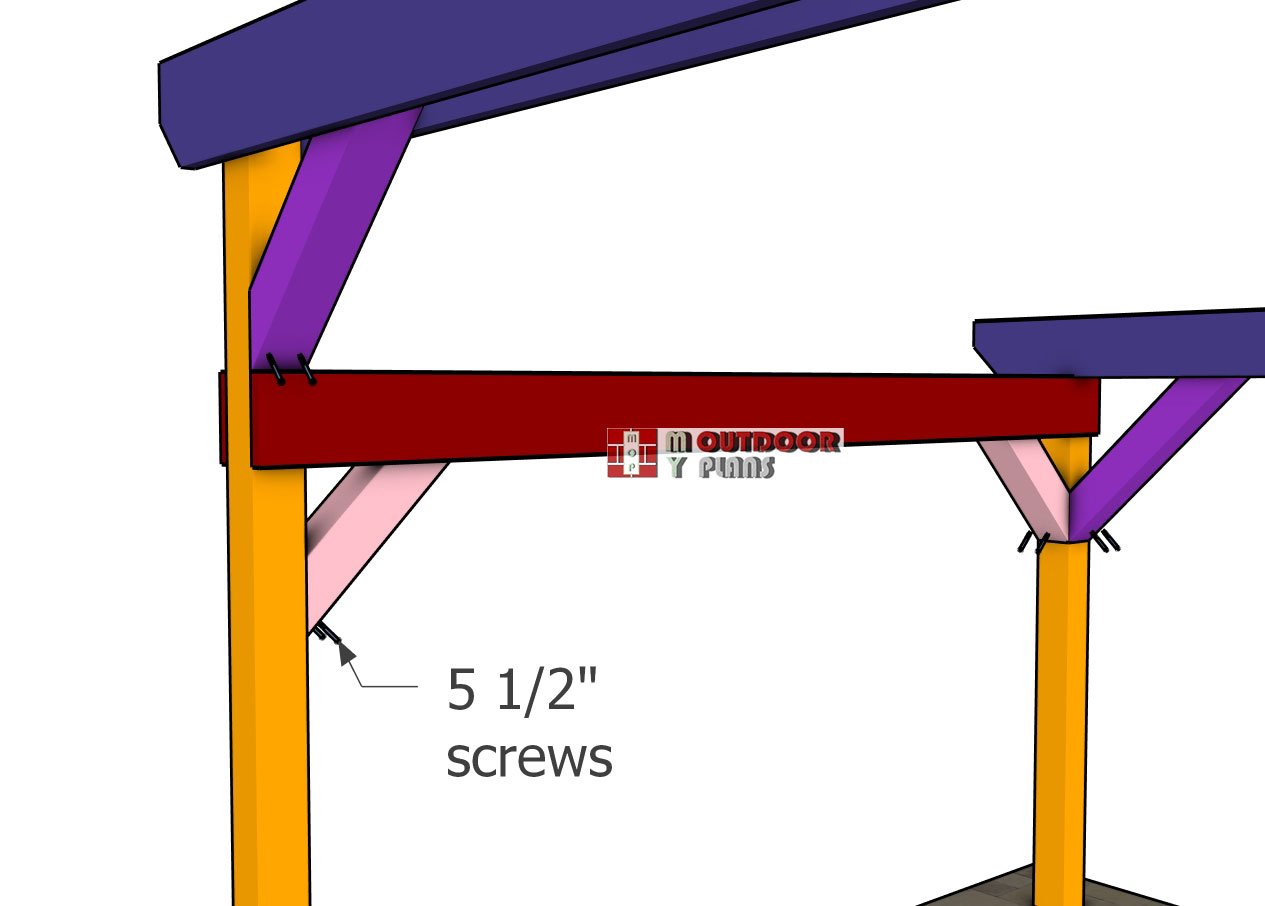
Attach the braces to the pavilion structure, ensuring all posts remain perfectly plumb. Align the braces accurately, then drill pilot holes before inserting 5 1/2″ screws. As shown in the diagram, secure each joint with two screws for maximum stability. Be sure to countersink the screw heads for a clean, professional finish.
Braces—detail-2
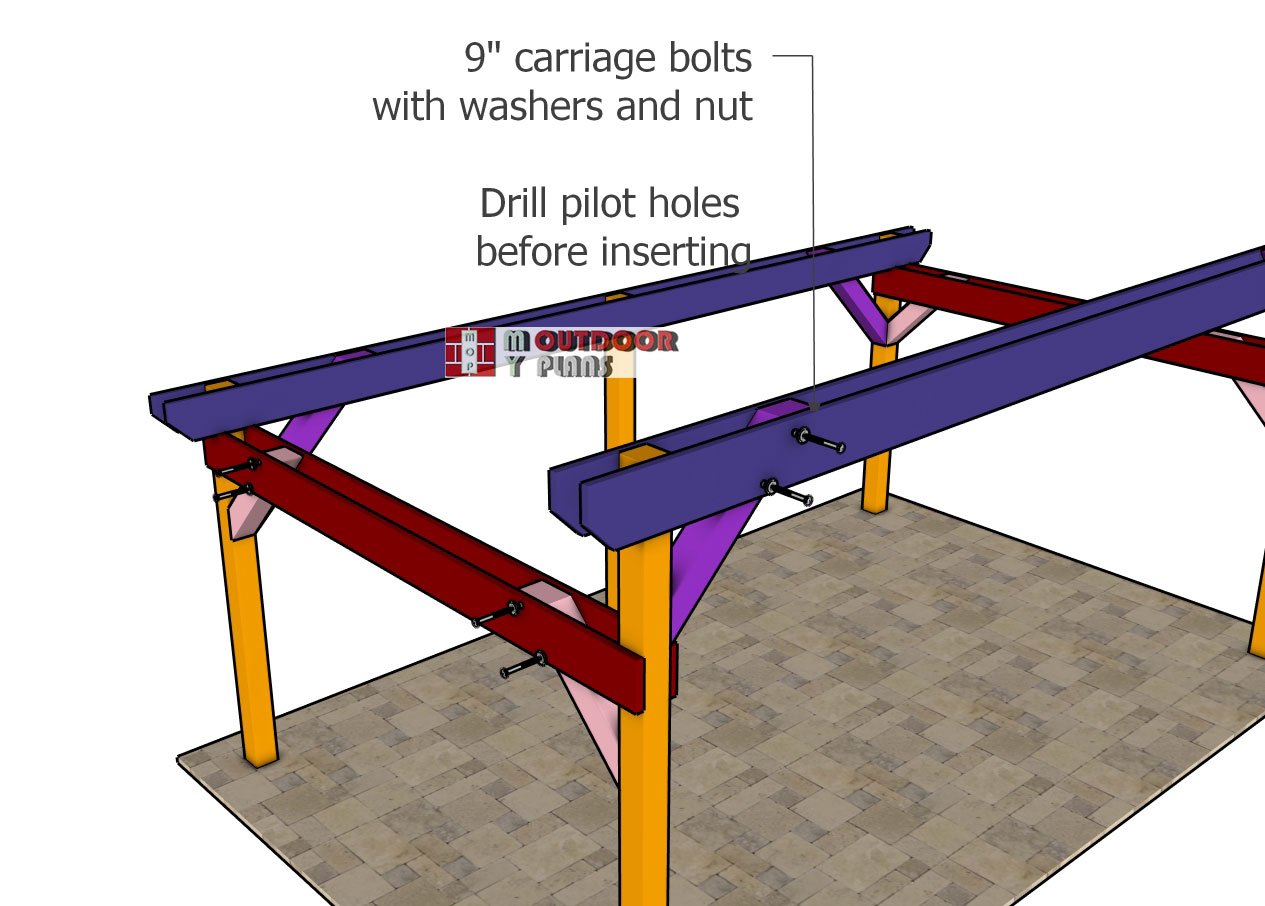
Position the top of the braces between the beams, ensuring a snug fit. Drill pilot holes through the beams and into the top of the braces, following the placement shown in the diagram. Secure the connection by inserting 9″ carriage bolts, then tighten them firmly with washers and nuts to ensure a strong and durable joint.
Finishing touches
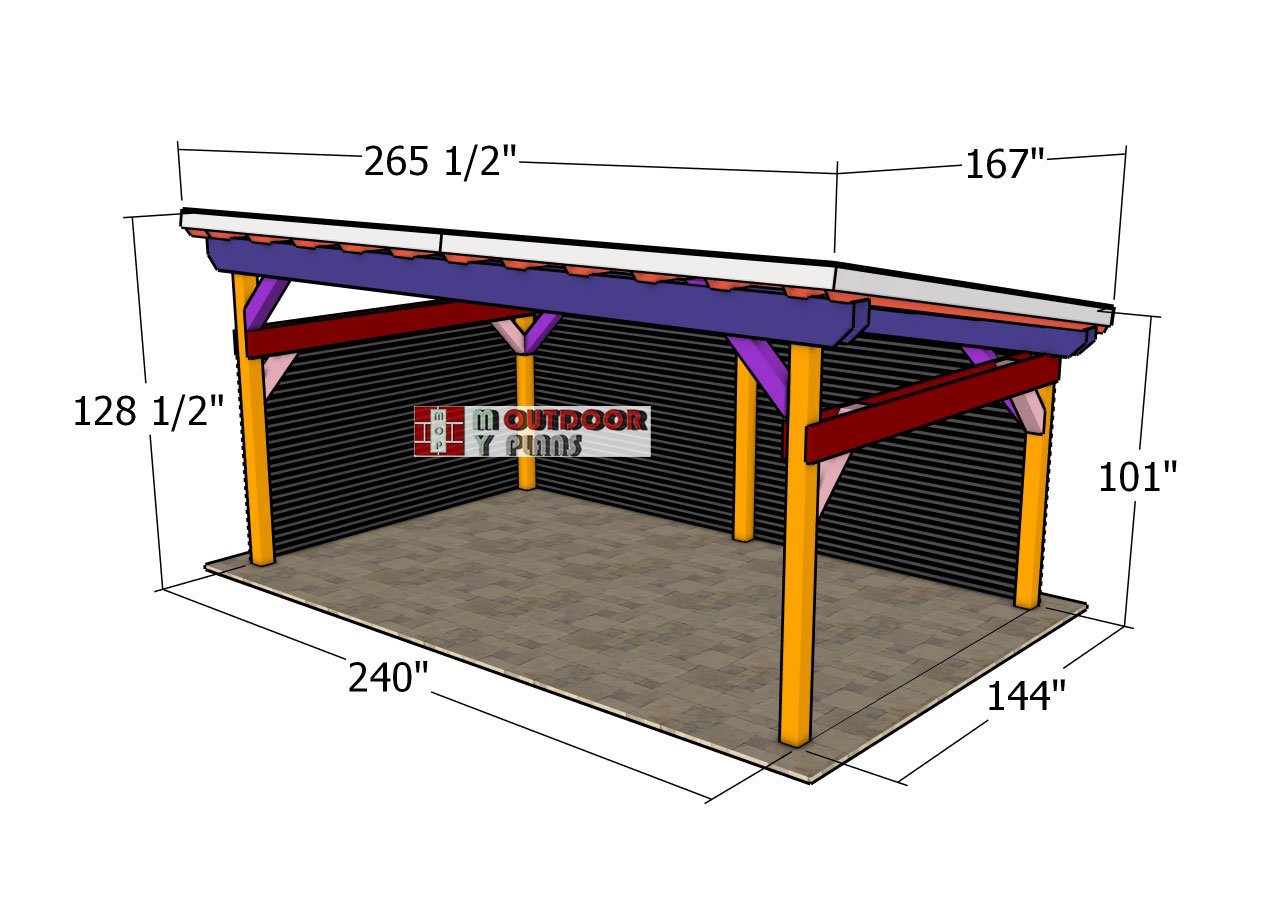
12×20-pavilion—dimensions
Your pavilion is more than just a structure, it’s a beautiful story waiting to be written. To make the most of this project, think about how you’ll use the space. Whether it’s a relaxing retreat, a dining area, or a gathering spot for friends and family, tailor the design to suit your lifestyle. Add comfortable seating, a dining table, or even an outdoor kitchen setup to maximize functionality. Incorporate string lights, lanterns, or a fire pit to enhance the ambiance and make the space enjoyable day or night.
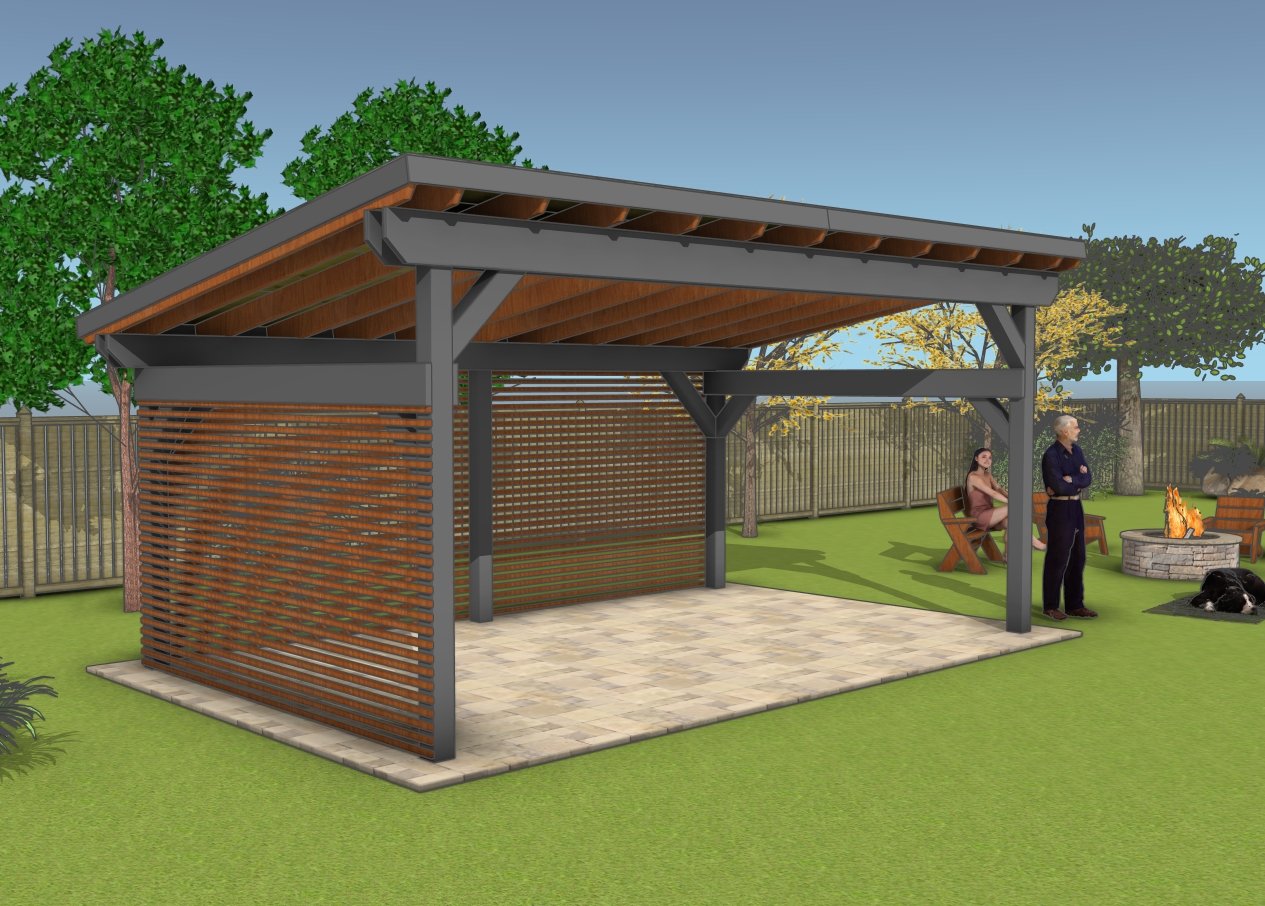
Garden pavilion plans – side view
For customization, consider adding elements that reflect your personal style and complement your outdoor décor. Install privacy screens or lattice panels for shade and seclusion, or plant climbing vines to create a natural, green backdrop. You could also stain or paint the wood in a color that matches your home or garden theme. If you’re feeling adventurous, incorporate built-in planters or shelving for added practicality and flair. These small touches can transform a simple pavilion into a one-of-a-kind oasis that fits your needs and showcases your creativity.
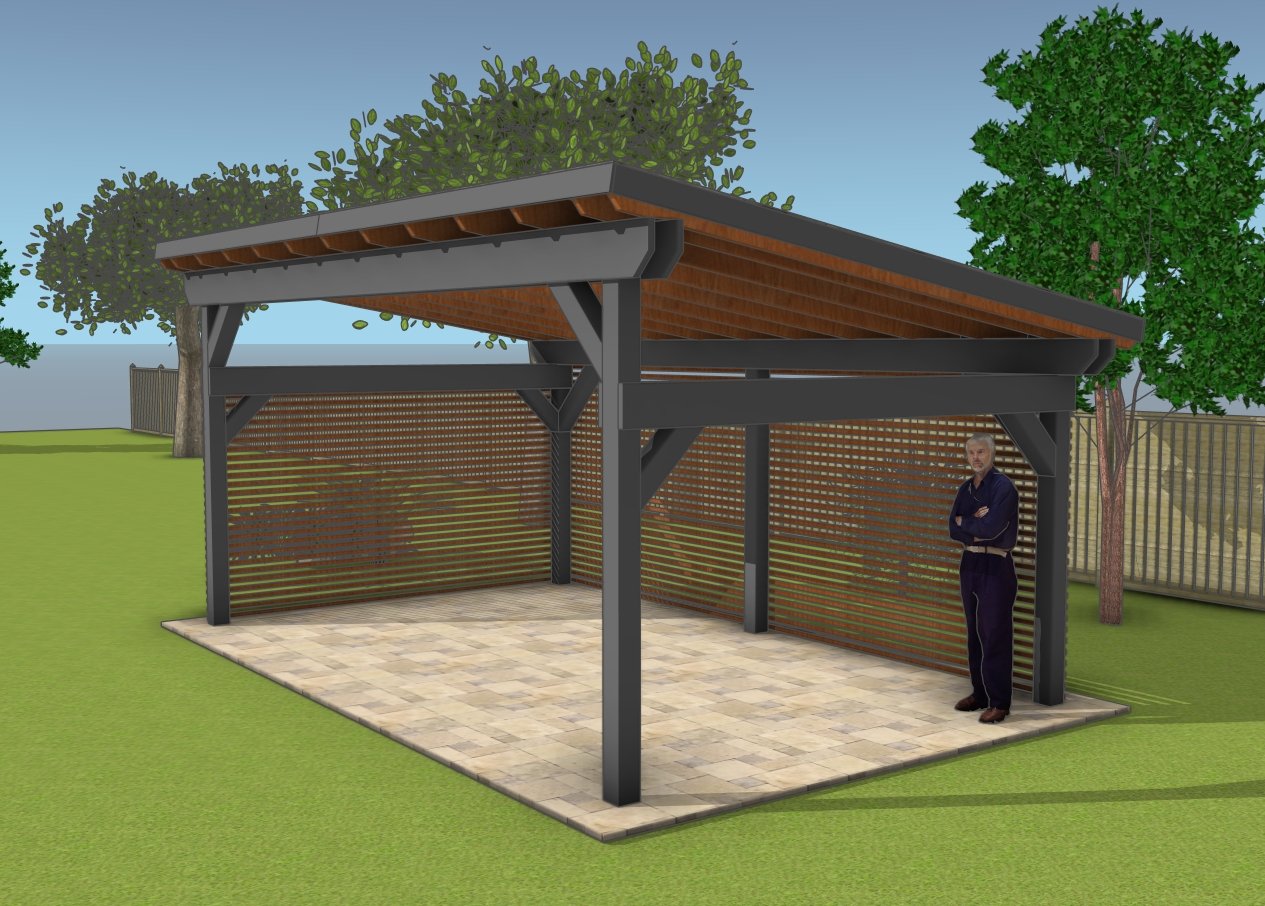
DIY Garden Pavilion Plans
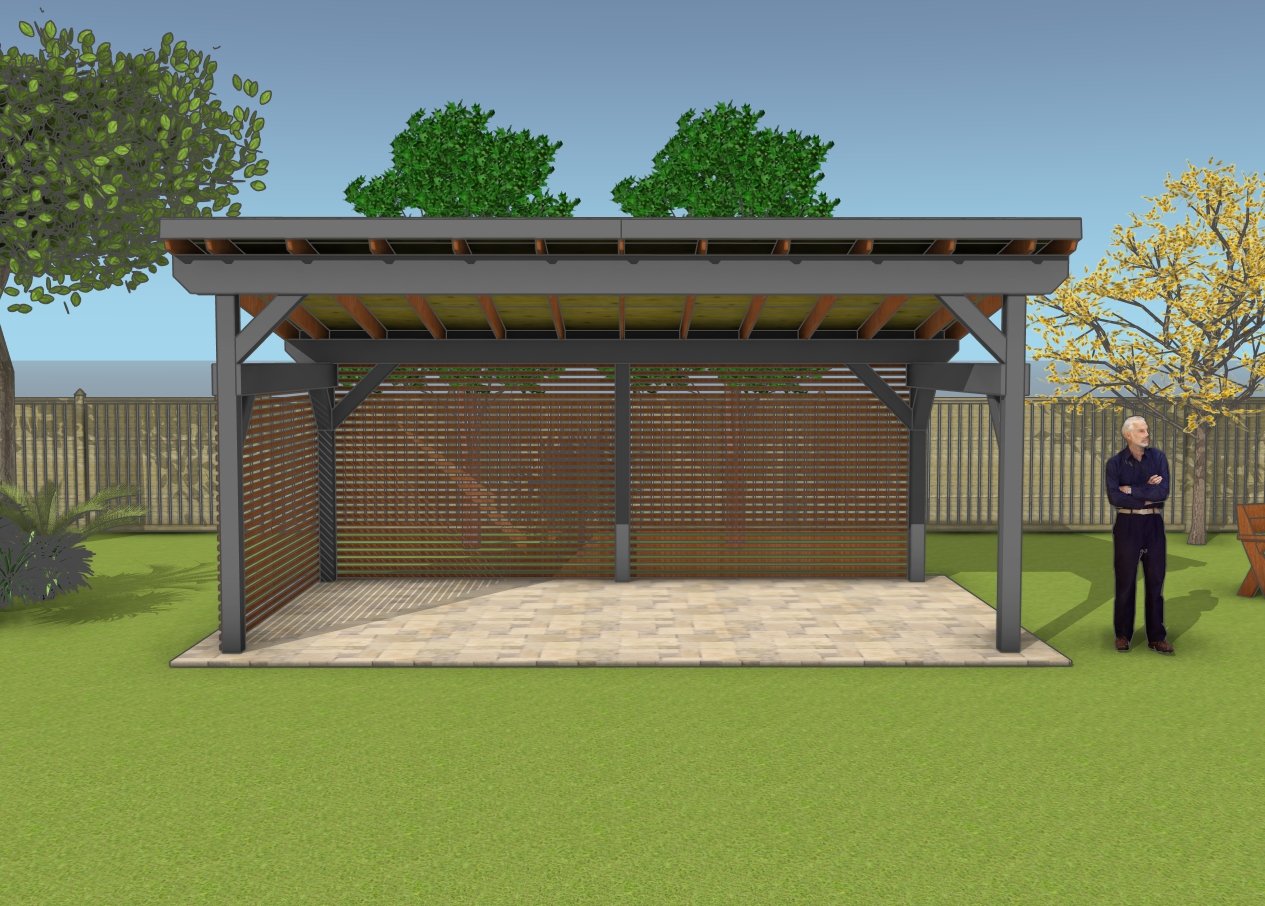
12×20 lean to pavilion – front view
Check out PART 2 of the project, so you learn how to continue the outdoor gazebo project.
Top Tip: If you want to get PREMIUM PLANS for this project, in a PDF format, please press GET PDF PLANS button bellow. If you want the free version of the plans, please read the blog FAQs. Thank you for your support.
This woodworking project was about 12×20 lean pavilion plans. If you want to see more outdoor plans, we recommend you to check out the rest of our step by step projects.


