This step by step diy project is about 2×4 barn shaped vegetable display case plans. I had a request from a farmer to help him built a barn shaped display box so he can place it on the front yard and keep the vegetables in. This would help with this crazy Corona situation and the social distancing rules. The customer stops by, opens the doors, takes the vegetables and leaves the money in. I really liked the concept idea and wanted to help, so this is my take on it! Please leave constructive comments so we can develop this further and make it more practical for both farmers and clients alike.
It is essential to adjust the size of the generator shed to your needs, if the generator doesn’t fit in a 4×4 construction. Work with attention and plan everything from the very beginning, if you want to get the job done as a professional from the very first attempt. In addition, we recommend you to take a look on the second part of the project, if you want to learn how to build the door and how to attach the siding.
Projects made from these plans
2×4 Barn Shaped Vegetable Display – Free DIY Plans
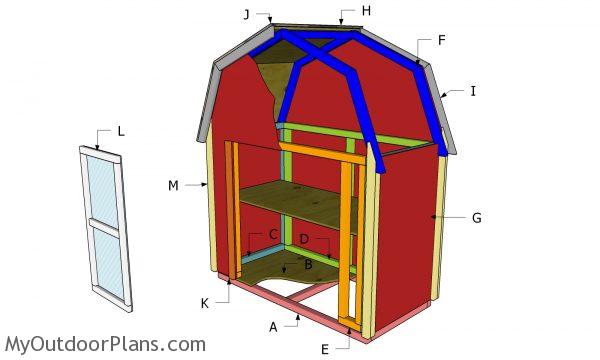
Building a 2×4 barn shed for vegetable display
Cut & Shopping Lists
- A – 2 pieces of 2×2 lumber – 48″ long, 3 pieces – 21″ long FLOOR FRAME
- B – 1 pieces of 1/2″ plywood – 24″x48″ long FLOORING
- C – 2 pieces of 2×2 lumber – 24″ long, 2 pieces – 33″ long, 1 piece – 21″ long 2xSIDE WALLS
- D – 2 pieces of 2×2 lumber – 45″ long, 3 pieces – 33″ long BACK WALL
- E – 1 piece of 2×2 lumber – 45″ long, 4 pieces – 33″ long, 2 pieces – 6″ long FRONT WALL
- G – 2 pieces of 1/2″ plywood – 24″x36″ long SIDE PANELS
- G – 1 piece of 1/2″ plywood – 21″x48″ long SHELF
- 1 piece of 1/2″ plywood – 4’x8′
- 11 pieces of 2×2 lumber – 8 ft
- 3 1/2″ screws
- 2 1/2″ screws
- 1 5/8″ screws
- 6d nails
- wood stain
- wood filler
- wood glue
Tools
![]() Hammer, Tape measure, Framing square, Level
Hammer, Tape measure, Framing square, Level
![]() Miter saw, Drill machinery, Screwdriver, Sander
Miter saw, Drill machinery, Screwdriver, Sander
![]() Post hole digger, Concrete mixer
Post hole digger, Concrete mixer
Time
![]() One day
One day
Related
- Part 1: 2×4 Barn Shaped Vegetable Display – Free DIY Plans
- Part 2: 2×4 Barn Shaped Vegetable Display – PART 2
Building a barn display case

Floor frame – 2×4 barn shed
The first step of the project is to build the floor frame for the 2×4 barn shed. As you can see in the plans, use 2×2 lumber for the frame. Cut the components at the right size and lock them together with 3 1/2″ galvanized screws.
Top Tip: Check if the corners are right-angled, by using a a carpentry square.
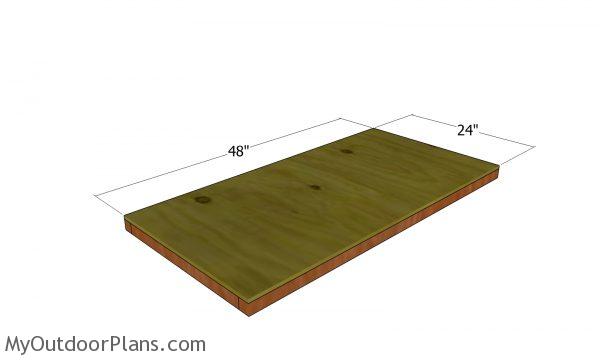
Fitting the floor – 2×4 barn shed
Attach the 1/2″ plywood sheet to the floor frame. Align the edges flush, drill pilot holes and insert 1 5/8″ screws to lock it to the frame. Insert the screws every 8″ along the framing.
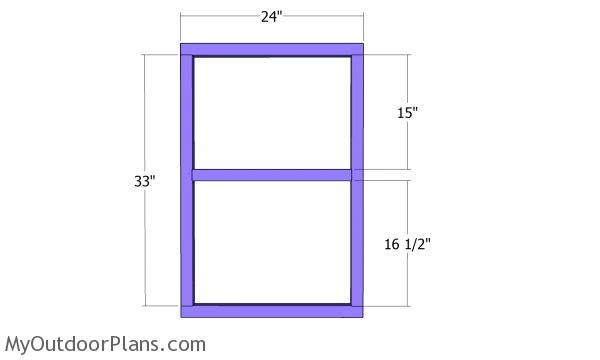
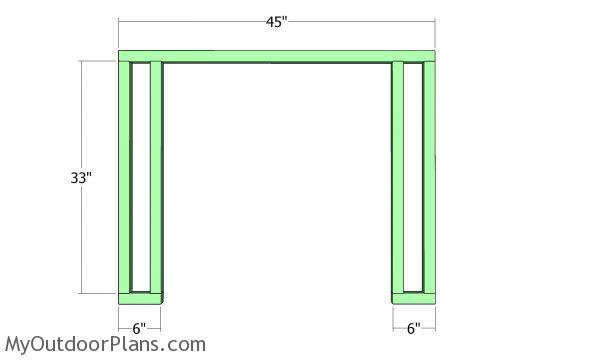
Side wall frames
The next step of the woodworking project is to build the side walls for the small barn display case. As you can see in the image, you need to cut the components from 2×2 lumber and to lock them tightly with screws. Notice the middle support. That is designed to hold a shelf, so if you want multiple shelves, just add more supports.
Top Tip: Drill pilot holes trough the plates and insert the 3 1/2″ screws into the studs. Check if the corners are right-angled after installing every component. Drive screws trough the bottom plate into the floor.
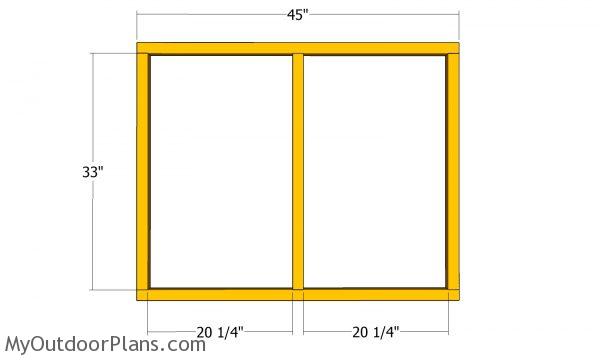
Back wall frame
Build the back wall for the barn, in the same manner described above.
Front wall frame – 2×4 barn shed
Building the front wall need to pay attention to a few things. For example, we need to frame the opening so we can have access inside the display case.
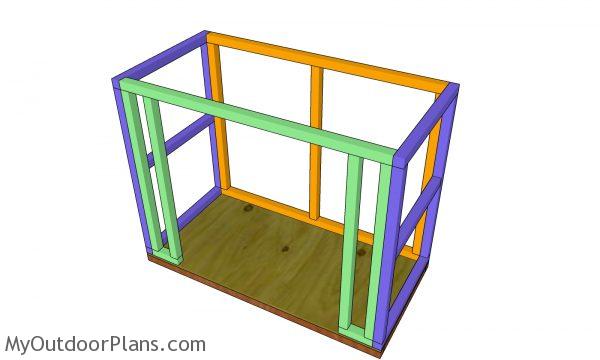
Assembling the frame of the shed
After assembling the 4 wall frames you have to lay them to the top of the floor. Align the edges flush and plumb the walls vertically. Drill pilot holes through the bottom plates and insert 3 1/2″ screws to secure the walls into place. In addition, we need to lock the adjacent walls together tightly with 2 1/2 screws.
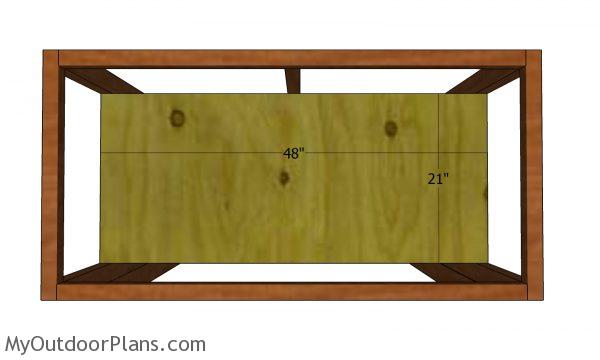
Fitting the shelf
Fit the 1/2″ plywood shelf to the supports. Use 1 5/8″ screws to anchor the screws into place
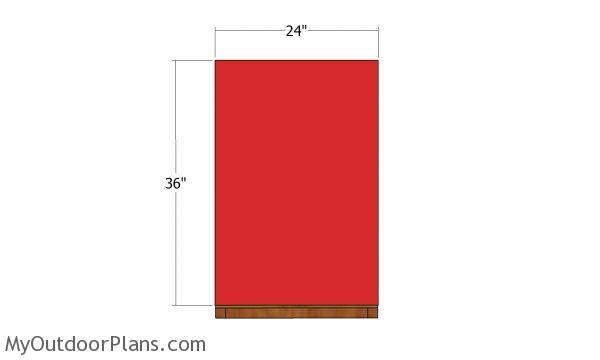
Side wall panels
Use 1/2″ plywood for the exterior walls of the barn display case. Cut the panels at the right size and attach them to the sides walls with 6d nails.
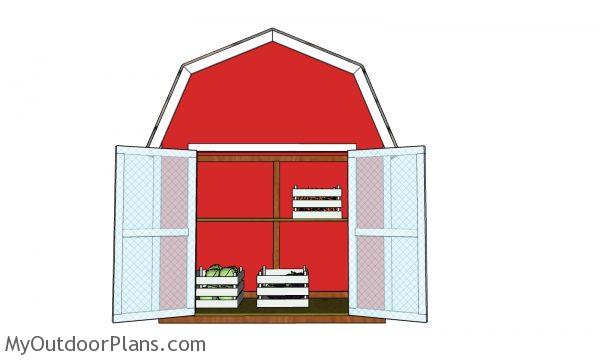
2×4 Barn Shed for Vegetables Display
This barn shaped display box will protect the vegetables from the elements and other particles in the air. It is a simple design and you can build this with a few tools and minimum expenses.
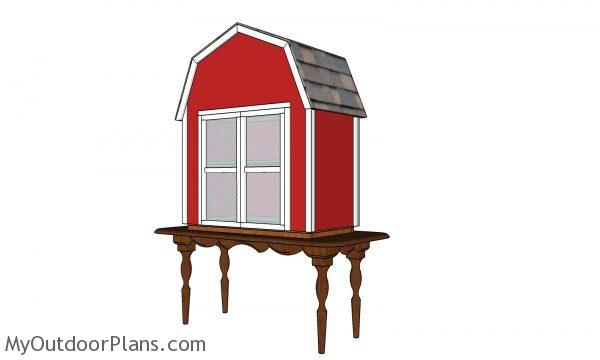
Barn shaped produce box plans
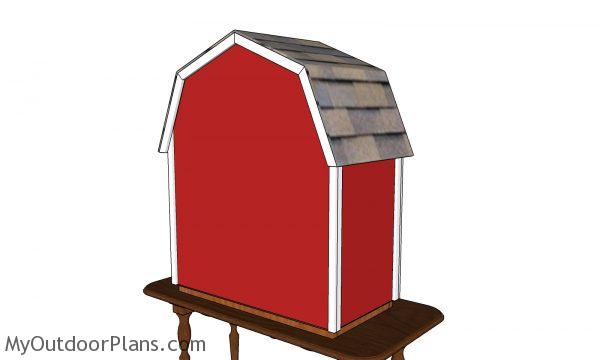
Barn Shaped Vegetable Display – back view
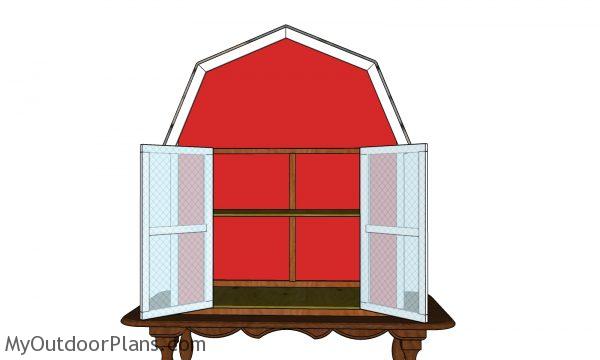
Barn shaped produce box – front view
Top Tip: Don’t forget to take a look over the rest of the project, if you want to learn how to build the roof, the doors and how to take care of the final touches. Make any necessary adjustments to the shed, as to suit your needs.
This woodworking project was about 2×4 barn display case for vegetables plans. If you want to see more outdoor plans, we recommend you to check out the rest of our step by step projects.

- EXPLORE MORE IDEAS FOR -
 |
 |
 |
 |