This step by step diy woodworking project is about drill press stand plans. This article features detailed instructions for building a small tool stand with two storage drawers, that is ideal for your drill press. Make sure you adjust the size of the assemble to suit your needs. Take a look over the rest of our woodworking plans, if you want to get more building inspiration.
When buying the lumber, you should select the planks with great care, making sure they are straight and without any visible flaws (cracks, knots, twists, decay). Investing in cedar or other weather resistant lumber is a good idea, as it will pay off on the long run. Use a spirit level to plumb and align the components, before inserting the galvanized screws, otherwise the project won’t have a symmetrical look. If you have all the materials and tools required for the project, you could get the job done in about a day.
Projects made from these plans
Drill Press Stand Plans
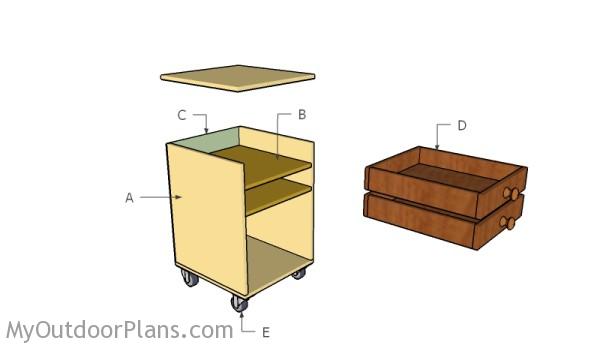
Building a drill press stand
Cut & Shopping Lists
- A – 2 pieces of 3/4″ plywood – 20″x24 1/2″ long, 1 piece – 19″x20″ long, 1 piece – 19″x20 1/4″ long FRAME
- B – 2 pieces of 3/4″ plywood – 17 1/2″x20″ long SHELVES
- C – 1 piece of 1/4″ plywood – 19″x25 1/4″ long BACK
- D – 2 pieces of 3/4″ plywood – 3 3/4″x17 1/4″ long, 2 pieces – 3 3/4″x18 1/2″ long, 1 piece – 15 3/4″x18 1/2″ long 2xDRAWER
- E – 4 pieces of 3″ caster wheels WHEELS
- 2 pieces of 3/4″ plywood – 4’x8′
- 1 piece of 1/4″ plywood – 2’x4′
- 4 pieces of 3″ caster wheel
- 50 pieces of 1 1/4″ screws
- wood glue, stain/paint
Tools
![]() Hammer, Tape measure, Framing square, Level
Hammer, Tape measure, Framing square, Level
![]() Miter saw, Drill machinery, Screwdriver, Sander
Miter saw, Drill machinery, Screwdriver, Sander
Time
Related
Building a drill press stand with storage drawers

Building the drill press cabinet
The first step of the project is to build the frame for the drill press cabinet. Cut the components from 3/4″ plywood. Align the edges with attention, making sure the corners are square. Drill pocket holes along the top and bottom edges of the side components. Add glue to the joints and insert 1 1/4″ screws to lock everything together tightly.
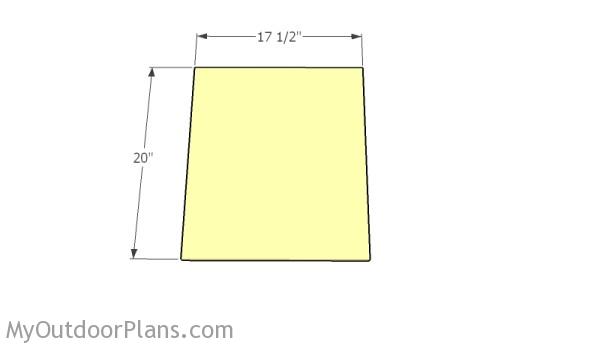
Building the shelves
Next, you have to build the shelves for the drill press stand. Mark the cut lines on the plywood sheets and get the job done with a circular saw. Drill pocket holes along the sides of the panels.
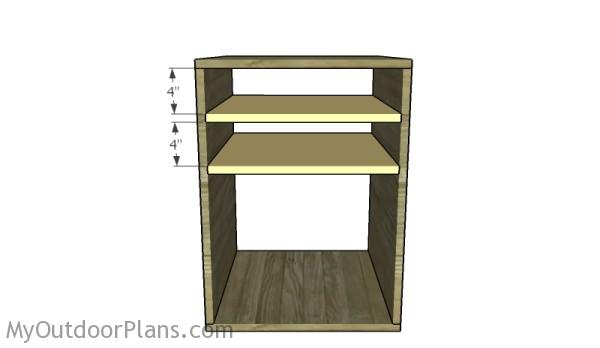
Fitting the shelves
Fit the panels to the drill press stand and lock them to the frame with 1 1/4″ screws. Make sure the corners are square for a professional result.
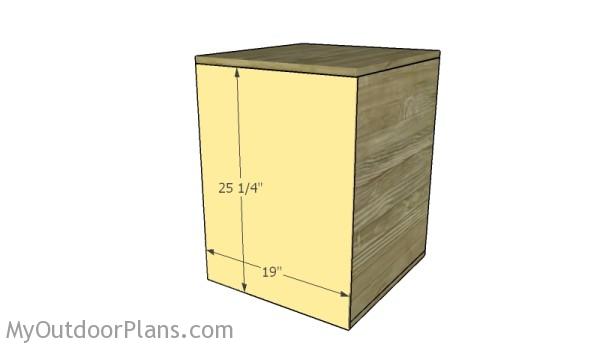
Attaching the back
Attach the 1/4″ plywood back to the cabinet. Align the edges and insert 1 1/4″ brad nails to lock the panel into place.
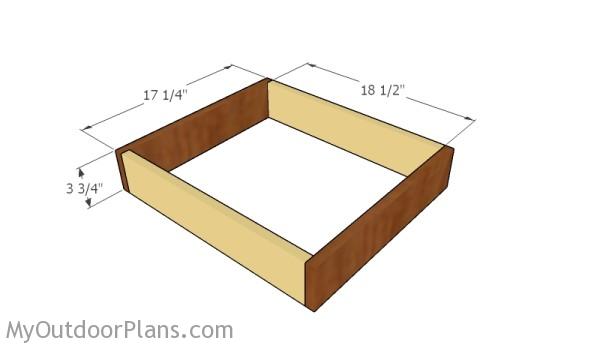
Building the drawers
Build the frame of the drawers from 3/4″ plywood. Use glue and 2″ brad nails to secure the frame of the drawers. Make sure the corners are square before inserting the nails.
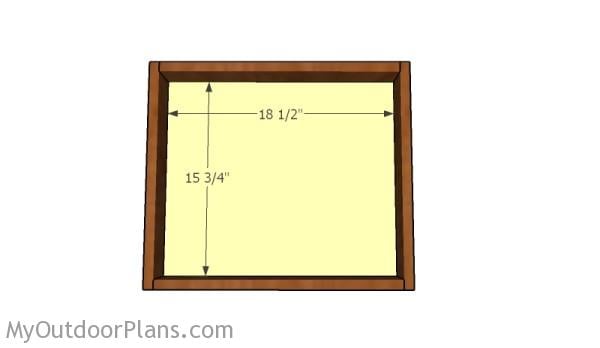
Fitting the bottom of the drawers
Attach the bottom to the drawers, as shown in the image. Drill pocket holes along the edges and secure it to the frame with 1 1/4″ pocket screws.
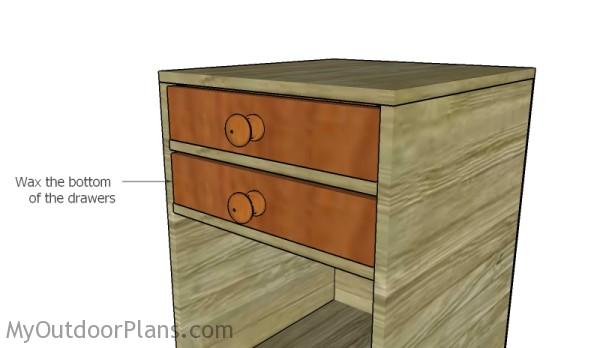
Fitting the drawers
Wax the shelves thoroughly and attach knobs to the front of the drawers. Being just a workshop project you don’t have to install slides for the drawers.
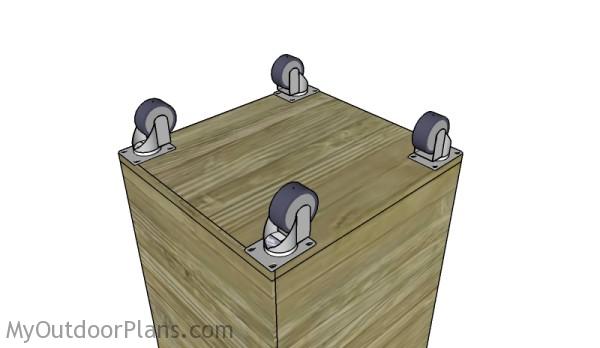
Fitting the caster wheels
Attach 3″ caster wheels to the bottom of the stand. Use 3/4″ screws to lock the casters to the bottom of the stand.

Free Drill Press Stand Plans
The drill press stand is 29″ high, so it should be great for an average height person. However, you can adjust the size of the sides to make it suit your needs.
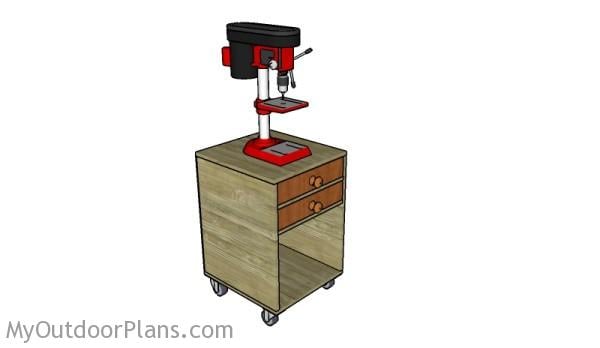
Drill Press Stand Plans
Fill the holes with wood putty and let them dry out for a few hours. Smooth the surface with 100-220 grit sandpaper and remove the residues with a damp cloth.
Top Tip: Apply a few coats of paint or stain to the components, to enhance the look of the project.
This woodworking project was about drill press stand plans free. If you want to see more outdoor plans, check out the rest of our step by step projects and follow the instructions to obtain a professional result.


3 comments
Is there a way to download or print these plans? How can I get them in PDF?
Yes, you can save them to pdf or print them, by clicking the green floating icon with a printer illustration.
You don’t need 2 3/4″ 4×8 sheets of plywood. I was able to cut all pieces out of 1 sheet.