#1 What are the must have tools?
First of all, I will start the list with the absolutely basic tools, that are also the cheapest and easiest to use.
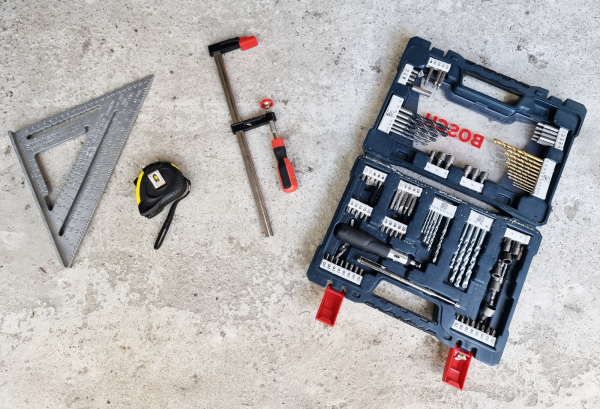
- Speed Square
This is one of my favorite tools on the workshop, because you need it the most when marking cut lines or you can use it as a guiding fence when making the cuts. You can hold the speed square tightly on the board and then run a saw along the cut line. In this manner you make sure the cut is perfectly straight. You can also use this tool to check the corners for squareness, when assembling frames.
- Tape Measure
The best size for a tape measure, when building woodworking projects, is 16 ft. This makes the tape measure small enough to hold it into your pocket, but also just good enough to layout pretty much any cut mark or to layout the build.
- Quick Clamps
There are many types of clamps (C-clamps, Quick clamps, Pipe clamps, Picture frame clamps, and so forth), but I personally prefer a quick clamp. A pair of 16″ clamps are very versatile and you can build many different projects using them. As you tackle more complex projects, you will need to invest in more clamps of various sizes.
- Drill Bit Set
I use a large set that includes a wide variety of both driver bits and drill bits as well as a selection of accessories to help assist in a number of drilling and fastening applications. I love that the set comes with a screwdriver, so you can faster screws manually when needed. Everything is properly organized and you can carry it with you if you need to work outside the shop.
- Safety Glasses and Ear Protection
A pair of safety glasses and hearing protection are under 10 dollars, but they are essential accessories you need when building projects. Cutting wood produces dust and chips, so it’s best to wear glasses to protect the eyes. Some power tools are loud, therefore hearing protection is mandatory for your long term well being.
Next, I will refer to the basic power tools you need to start building woodworking projects. You can see a comprehensive list of all the tools I recommend HERE!
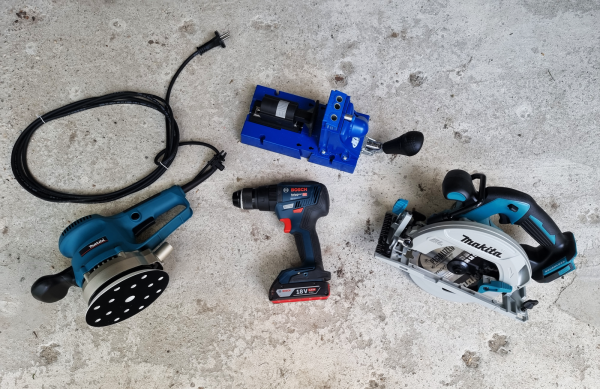
- Cordless Drill / Driver kit
This tool is essential for any woodworking project, as you will use it to drill pilot holes and to insert screws, so you can join boards together. A nice battery powered drill is what you need to speed up projects and it will last you a lifetime.
- Circular Saw
This is a very good tool when starting projects because it will allow you to make straight cuts really fast and precise. If the saw it’s cordless, even better because it makes it portable. As you tackle more complex projects, it would be a great idea to invest in a miter saw that will take you to the next level when talking about cuts (angle cuts will be a piece of cake).
- Orbital Sander
Even this is the task least liked by woodworkers, you still need to pay attention to sanding, because that influences directly the look of your project. An orbital sander will help you smooth the wood and even out the surface with least effort.
- Pocket Hole Jig
I cannot reinforce enough how much I like using pocket holes. It is my preferred method of joining wood, because you get rigid joints while being able to hide the holes and the head of the screws. Using a jig is needed, because that ensures making consistent pocket holes irrespective of the material thickness.
#2 What type of joint should I use?
The most basic joint is the butt joint. You only need a drill and screws to lock 2 components together. However, the head of the screws will be exposed and it is not the strongest joint you can make.
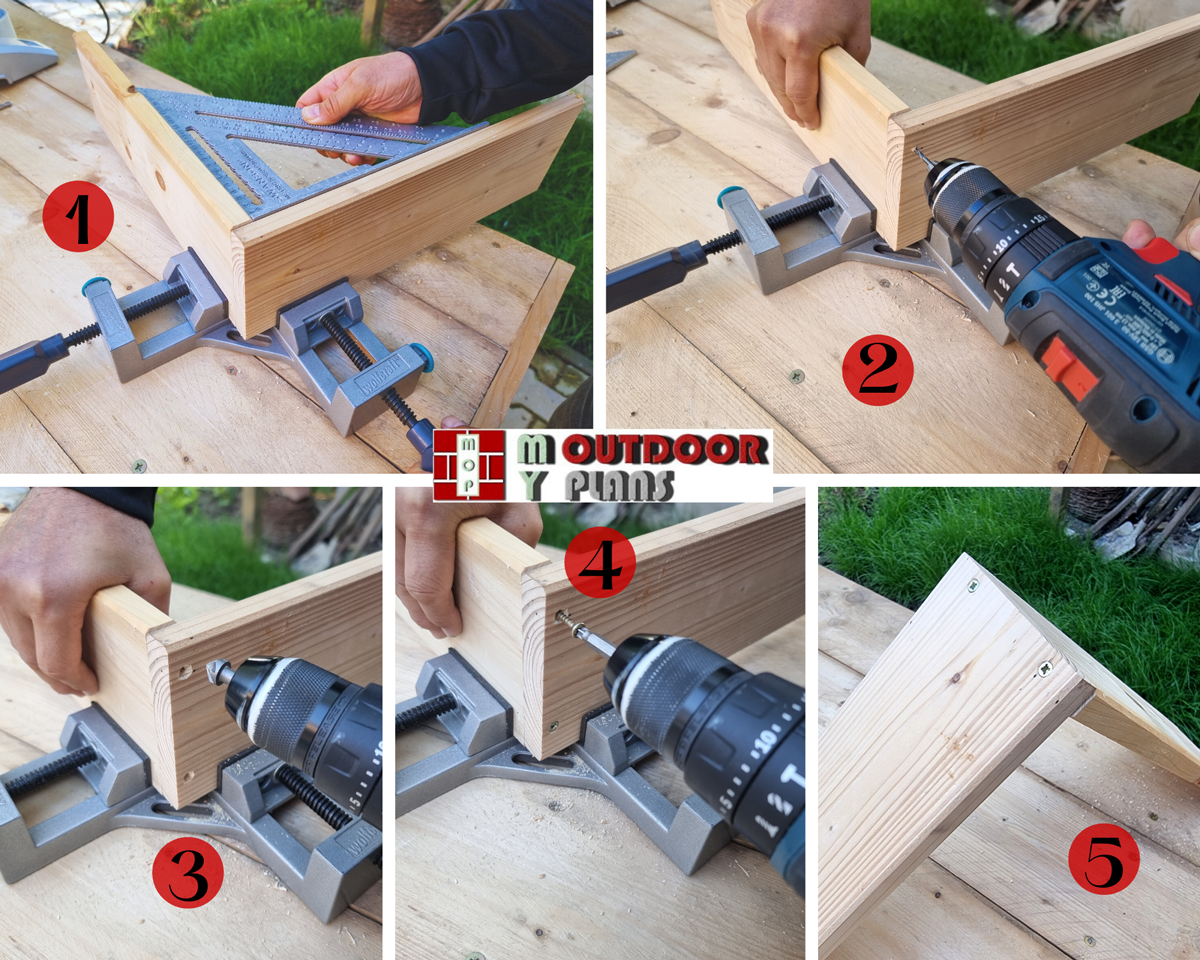
- Use a corner quick clamp or a carpentry square to make sure the components are perpendicular. Align the edges flush.
- Drill pilot holes through the first board only. Use a bit that is thinner than the size of the screws.
- Countersink the holes, so you can insert the head of the screws flush with the board.
- Drive in the screws, making sure you use a low speed so you don’t split the wood.
- Enjoy the joint. You can cover it with wood putty and then smooth the surface with sandpaper.
You can also use pocket holes to joint wood. This gives you endless possibilities, because it creates really strong joints, while you can cover the screws and make professionally looking furniture.
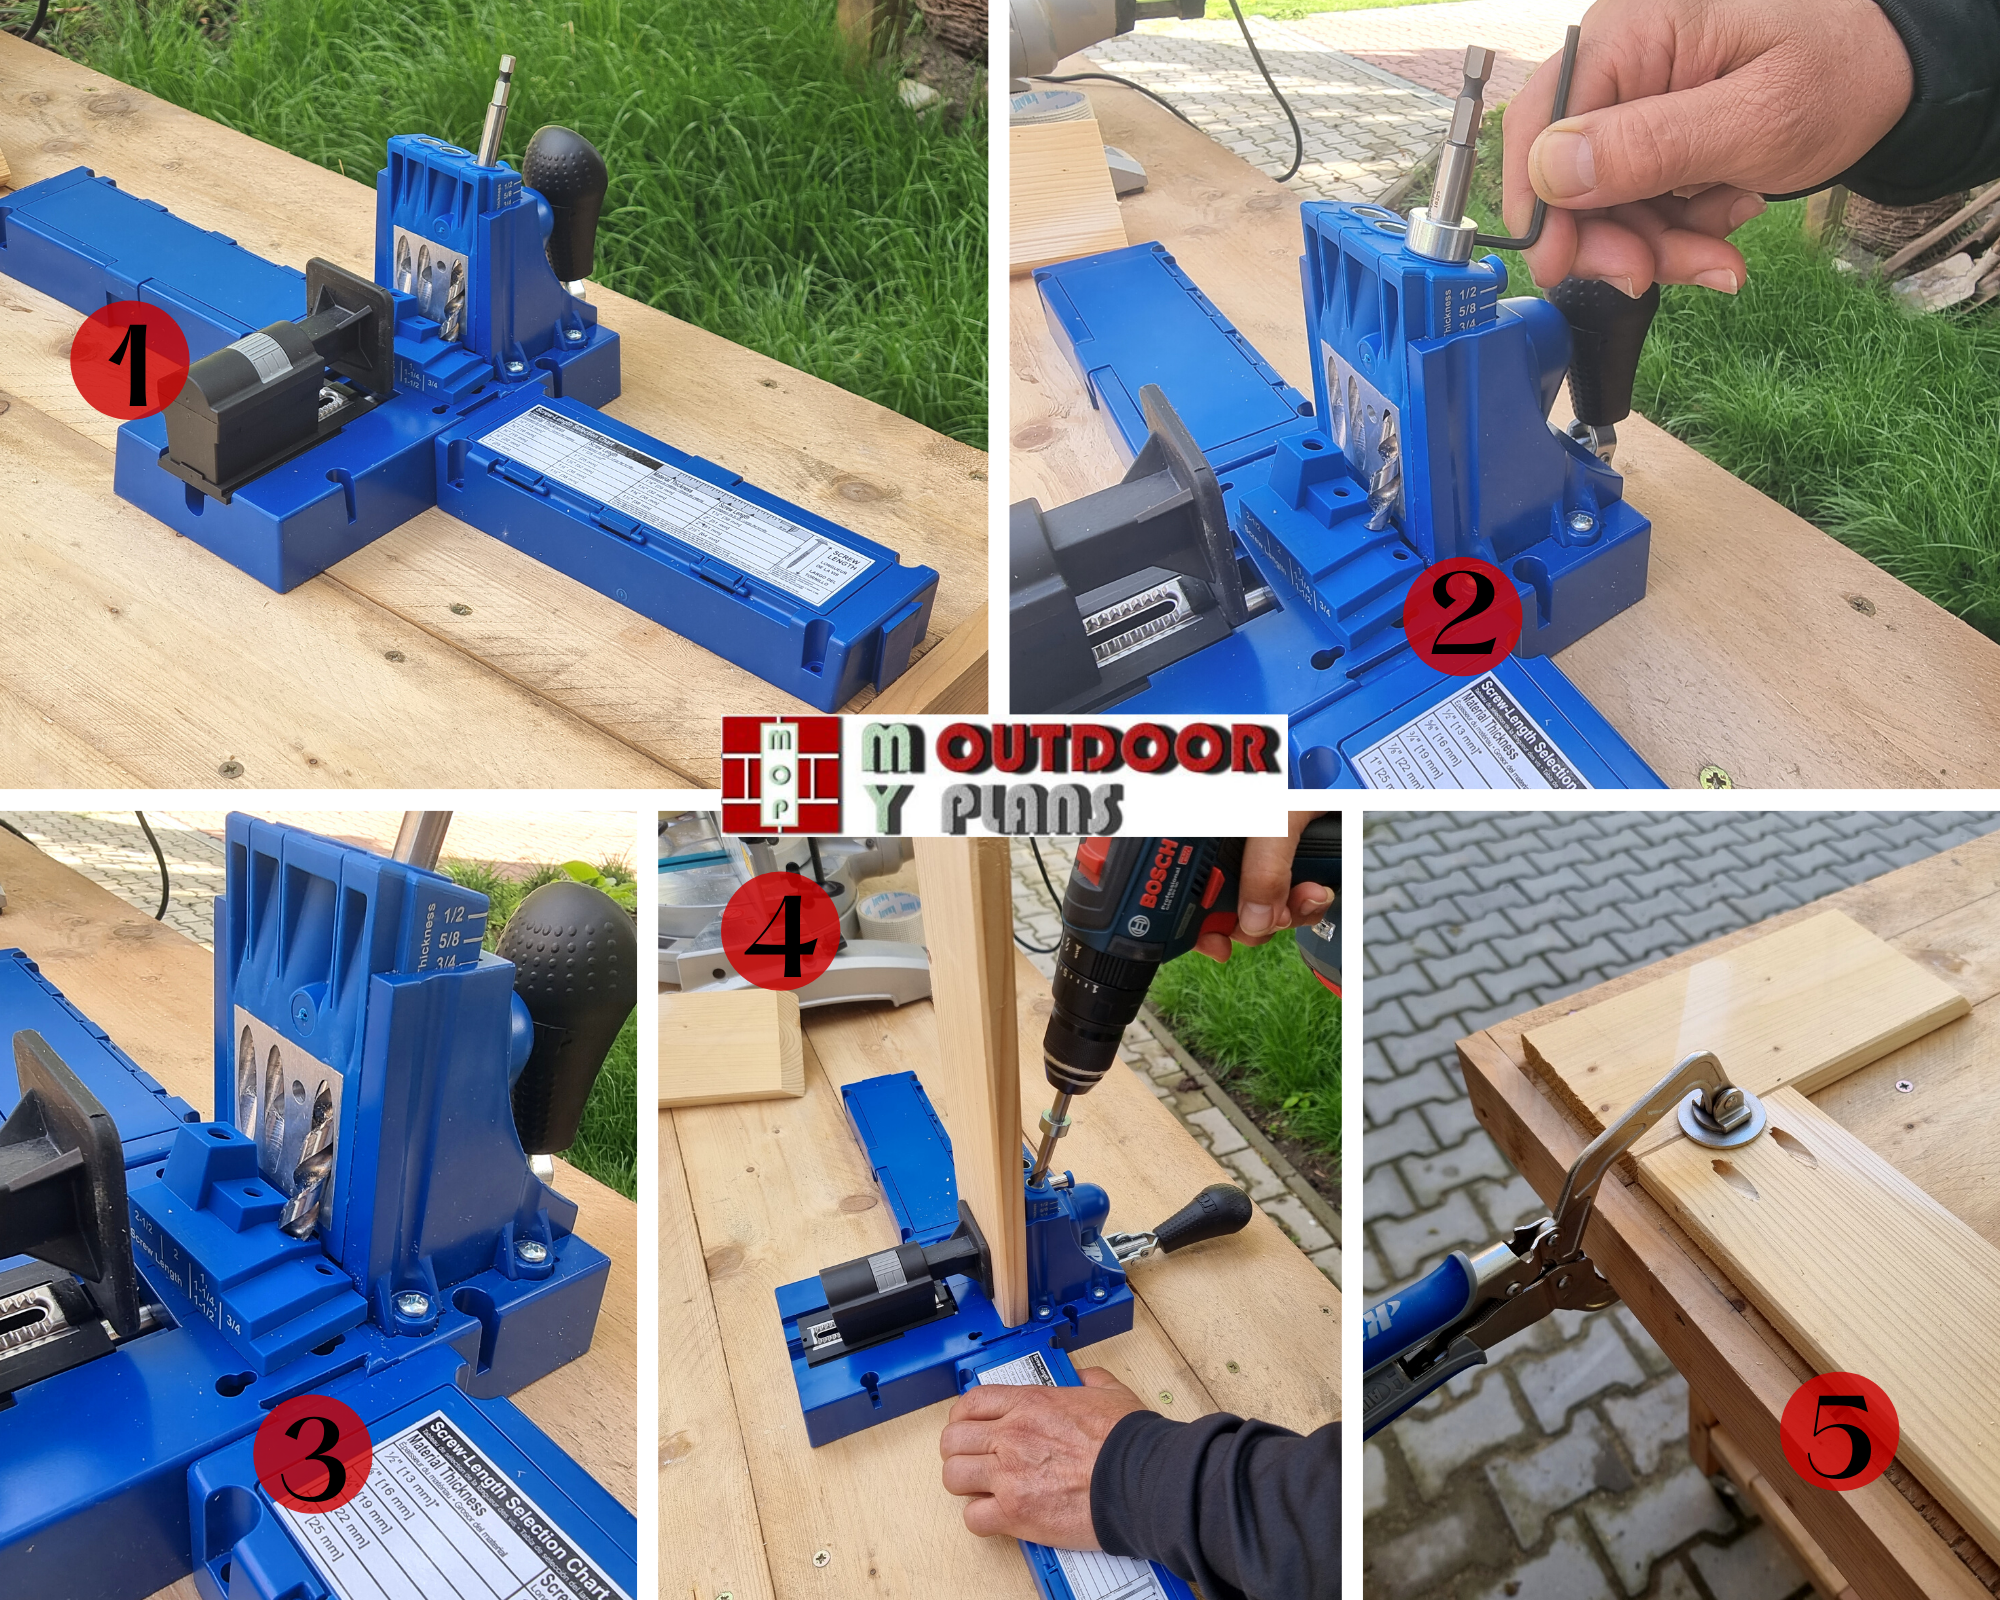
- Use a pocket hole jig. I have a KregJig K5, which I really like because it comes with a front-mounted clamping handle and it is easy to set it to the thickness of the wood. There are also self adjusting pocket jigs, which are beginner friendly, but comes at a higher cost.
- Set the drill bit to the size of the screws you are going to use. For example, I joined two pieces of 1x4s which require 1 1/4″ screws. The jig comes with a guide, so if you are going to join 2x4s, you set the drill bit differently.
- Drill the pocket holes through the jig. The stop collar helps you make the pocket holes at the perfect depth, every single time.
- Align the two pieces of wood on a level surface and clamp them down tightly, using a face clamp.
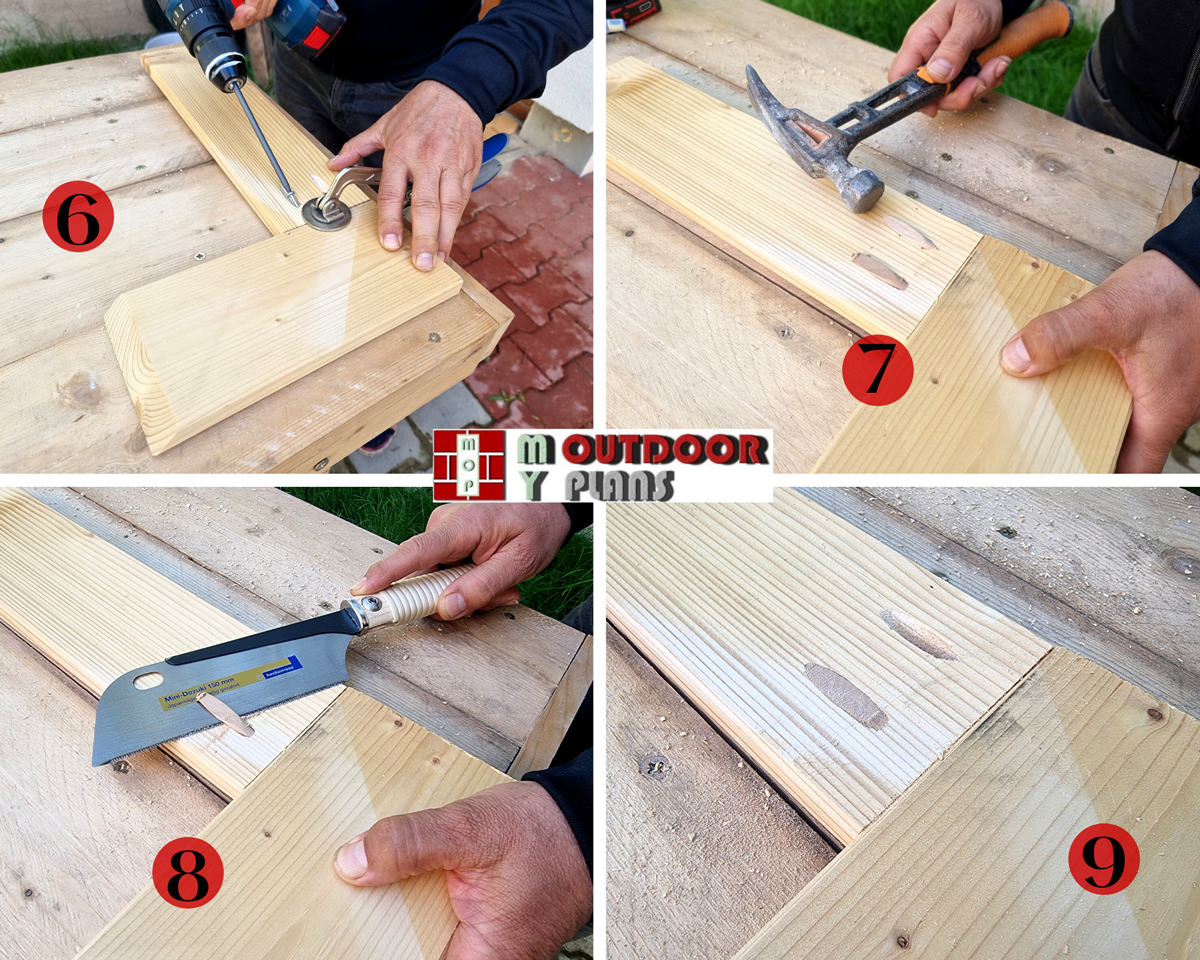
- Insert the screws at a low speed so you don’t drive them too deep. Set the drill on a low torque.
- Insert the wooden plugs and add glue so they lock into place tightly.
- Cut the plugs flush using a pull saw, after the glue dries out.
- Sand the surface with an orbital sander and then apply the finish.
#3 Wood Types
There are several types of wood one can use for the outdoor projects. They are resistant to moisture and have a beautiful appearance. Since the projects will be out in the weather all the time, you need to use wood that will resist decay and insects. The most popular choices are treated lumber, redwood and cedar.
As a general rule, lumber with greater density is stronger but also more likely to split and wrap. On the other side, lower density wood is weaker but less likely to split and warp. Low density wood acts like a sponge, absorbing moisture when the weather is wet and drying when the sun comes out. Dense wood doesn’t adapt so good at the weather conditions so it may split and wrap easier.
- Redwood
This type of wood is commonly associated with outdoor furniture, as it is soft and easy to work with. However, the main drawback of redwood is that it tends to splinter.
- Cedar
Another wood that is mostly used in outdoor projects is cedar. There are several species, but the two that are ideal for outdoor woodworking projects are incense cedar and Wstern red cedar. Both species are soft and easy to work with, making them ideal for furniture projects. The main drawbacks are that these species are weak in resistance and in strength.
- Teak
Teak is resistant to decay, straight grained, very stable and it feels kind of waxy. However, teak is an expensive wood due to its great resistance to water damage. In addition, it dulls tools quickly, as it contains silica.
- Mahogany
It is mainly used by boat builders. The following species are the most used: African, Philippine and Honduran. All three species are used for outdoor projects, but Honduran mahogany is the most decay resistant.
- Oak
white oak was used for barrels and for casks, being more resistant than red oak. However, white oak absorbs moisture, so you need to seal it with varnish before using the outdoor furniture.
- Pressure Treated
Pressure-treated lumber is the most affordable lumber for outdoor use. The lumber is saturated with water-borne copper salts under extreme pressure. However, the main drawback is its color: light green or light brown. Since it can be stained or painted to a brighter color, it makes a good choice for an outdoor project.
#4 Imperial to Metric
Conversion from imperial to metric is difficult because of the different material sizes used in each system. However, I compiled this table as a reference, so you can understand the correspondents of different lumber sizes and thus adjust my plans accordingly.
| Nominal |
Actual – Imperial | Actual – Metric |
| 1×2 | 3/4″ x 1-1/2″ | 19 x 38 mm |
| 1×3 | 3/4″ x 2-1/2″ | 19 x 64 mm |
| 1×4 | 3/4″ x 3-1/2″ | 19 x 89 mm |
| 1×6 | 3/4″ x 5-1/2″ | 19 x 140 mm |
| 1×8 | 3/4″ x 7-1/4″ | 19 x 184 mm |
| 1×10 | 3/4″ x 9-1/4″ | 19 x 235 mm |
| 1×12 | 3/4″ x 11-1/4″ | 19 x 286 mm |
| 2×2 | 1-1/2″ x 1-1/2″ | 38 x 38 mm |
| 2×4 | 1-1/2″ x 3-1/2″ | 38 x 89 mm |
| 2×6 | 1-1/2″ x 5-1/2″ | 38 x 140 mm |
| 2×8 | 1-1/2″ x 7-1/4″ | 38 x 184 mm |
| 2×10 | 1-1/2″ x 9-1/4″ | 38 x 235 mm |
| 2×12 | 1-1/2″ x 11-1/4″ | 38 x 286 mm |
| 4×4 | 3-1/2″ x 3-1/2″ | 89 x 89 mm |
| Full plywood sheet | 3/4″ plywood 4’x8′ | 18 x 1250 x 2500 mm |
| Half plywood sheet | 3/4″ plywood 4’x4′ | 18 x 1250 x 1250 mm |
| Quarter plywood sheet | 3/4″ plywood 2’x4′ | 18 x 625 x 1250 mm |
#5 Glues
Similar to some types of lumber that are well-suited for outdoor use, there are some adhesives that work in moisture. Make sure you choose the most appropriate product for your needs and budget before starting the woodworking project.
- Yellow and White
The traditional white, yellow and hide glues don’t work well outside. These adhesives aren’t designed to stand up against Mother Nature.
- Plastic Resin
Plastic resin is an adhesive that is water resistant and cheap glue that can be used outdoor. It comes in a powder form, so you need to mix it with water, before using it. The glue sets up quickly (5-10 minutes), so you need to apply it fast or it will dry out.
- Epoxy
Epoxy glue create very strong bonds and it is waterproof. Epoxy needs to be mixed before using it. It has two parts: a resin and a hardener. It is important to remove the excess before it dries out. After the epoxy hardens, it is impossible to remove it.
- Polyurethane
This type of glue is available in bottles. However, you need to spay water on the pieces of wood before applying the glue, as it reacts with the moisture. This glue expands as it cures, making it ideal for fillings. Use a plastic scraper to spread the glue evenly. This type of glue takes about half an hour to dry out.
- Adhesive
This adhesive can be used outdoor and it has a good price. It comes in tubes and it can be found at any DIY store. As the parts are clamped together, the adhesive will spread out. Let it dry out and then remove the excess with a utility knife.
#6 Finishes
When selecting the finish for your outdoor project, we recommend you to consider the level of protection, the appearance of the product and the level of maintenance it requires on the long run:
- Oil
The oil that is formulated for outdoor use is the easiest product to apply. The oil penetrates the wood and provides protection for the components. The finish won’t crack up or peel. However, this product requires close maintenance, as the oil will lose its shine and ability to protect against moisture in several months.
- Spar Varnish
If you are looking for more protection against decay, while still preserving the natural beauty of the wood, spar varnish is the right choice. Make sure you select a product that has ultra-violet (UV) filers. These filters prevent the sun from damaging the finish. It is a lot more durable than the oil, but you have to apply the finish at least once a year for proper results.
- Paint
Paint is the best choice if you want to obtain maximum protection against moisture and sunlight. You have a lot of color options and the coats of paint will last for several years.
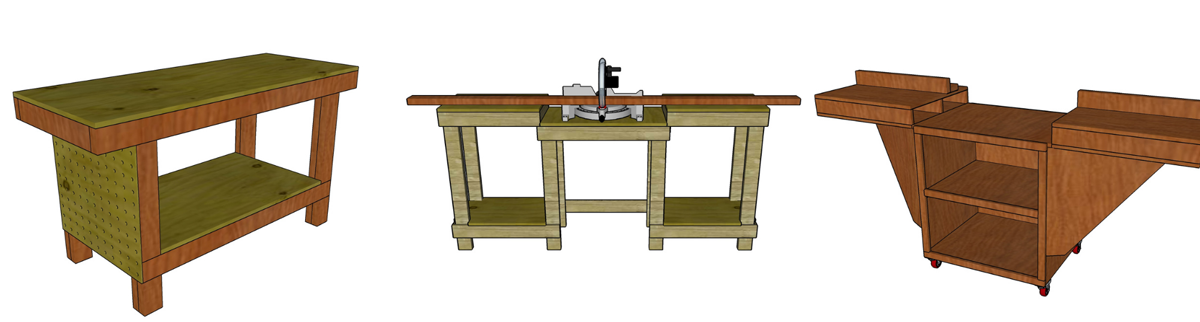
#7 Build yourself a workbench
Building a workbench is a must have for any DIY-er, because you will have a space where you can cut and assemble the projects. A workbench will improve your building process and help your back, as well. I have tons of workbench plans on my blog, so make sure you take a look HERE.
#8 Basic tips for a new DIY-er
Now that we have covered the basics of tools, joining techniques and how to select wood and finishes, I will add more tips to the list:
- When marking the cut line, remember that the blade will take material from the board, so try to make the cut outside the marked line. Otherwise, you will end up with a piece that is 1/16″ or so shorter. When building furniture that makes a difference.
- When going to the lumber yard / home improvement shop, take your time to select the boards. Most of them won’t be straight therefore not worth buying. Look at them lengthwise making sure there is no bow or cope.
- Don’t rely too much on the ends that the board comes with, when buying it. Those are not supposed to me square therefore you need to redo that cut, this time properly.
- Use a plan before building your first projects, otherwise it will get really confusing. Print the plans so you can follow the step by step instructions and make perfect cuts.
- When assembling frames or when building outdoor structures, you need to make sure the diagonals are equal, otherwise the corner angles are not right-angled. Also apply the 3-4-5 rule to each corner.
- When you buy a new tool, you need to be patient and run through the instructions. You need to respect power tools and not overestimate your skills, otherwise you might get yourself injured.
- You can never have enough clamps. Invest in clamps of all sizes and types, because they will be your extra pair of hands when building projects. You need clamps for assembly, for glue-ups and even for complex cuts.
- Never support a piece from underneath with any part of your body, when sawing.
- Never use a power tool on an workpiece that is not properly fixed.
- Never use a tools without understanding the way it works, as to avoid being injured.
#9 Safety Tips
- Always verify and respect the local building codes when planning new construction projects.
- Always use care and good judgment when working with power and hand tools, or when performing any procedure.
- Always check that the electrical tools are safe, that they are correctly grounded and that no circuit is overloaded. In addition, never use power tools in wet places.
- Always read the manufacturer’s instructions and product labels, when using power tools, paints, solvents or any other product. Pay attention especially to the warnings.
- Always clamp the pieces to the work surface, when using power tools.
- Always wear a face mask when working with tools that create dust (sander, sawer, etc.). When working with toxic chemicals, always wear a face mask with a respirator filter.
- Always were safety glasses, especially when working with power tools or preparing concrete.
- Always unplug the power tool before changing a saw blade, a drill or any other component.
- Always be prepared for unexpected events. Be attentive as to react quickly in case something occurs, as safety is the priority.
- Always use ear protection when working with loud tools.
- Never force a tool to perform beyond the limits it was designed. Acknowledge and respect the limits of your tools.
- Never work with dull tools. In addition, do not use tools that do not meet safety, legal or performance standards.
- Never use power tools or hand tools when you are tired. Never drink alcohol or use drugs before working with tools.
#10 What should you Build First?
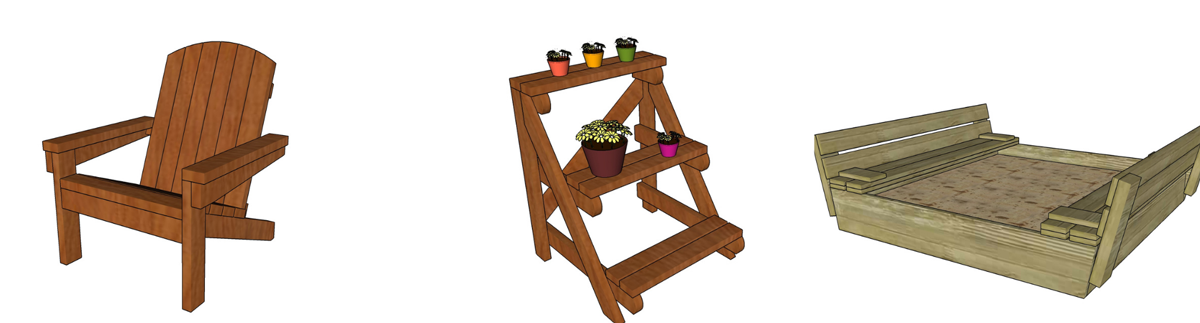
I recommend you to start with a really basic project that doesn’t require much tools, materials nor complex techniques. Therefore, I recommend you to take a look over my selection of 2×4 projects. These are basic plans that only require 2x4s and screws to make, so it shouldn’t be that bad of a beginner. You can find the plans HERE.
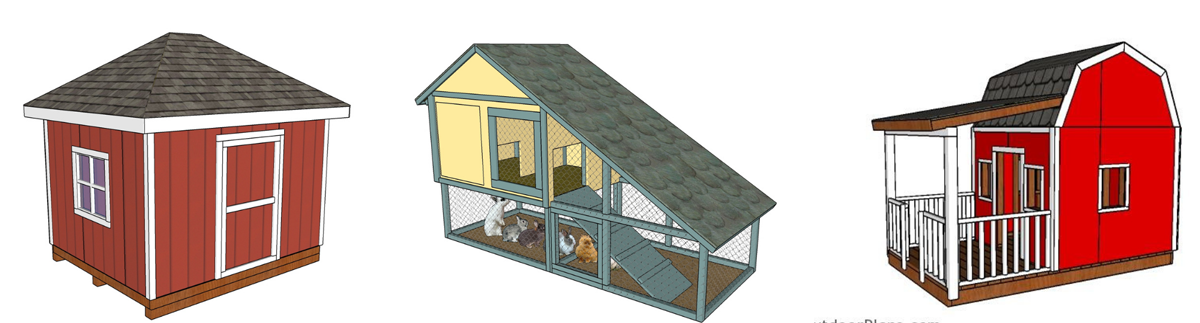
#11 What should you Build Next?
Now that you have built a few 2×4 projects, you can step up and try more complex designs that require more attention and more materials. For example, you can build a garden arbor, a wishing well or a covered picnic table. After you tackle those, you can start building outdoor structures like a small shed, a pergola or a pavilion for your grill bbq. You can see a full list with all my free plans HERE, sorted by category and size. If you want the BEST of the best plans, that come with tons of extras and make building an easy task, because it shows you how to cut the components from the lumber you buy, you need to check my PREMIUM PLANS.
#12 How do you print my plans?
It is really easy, so don’t worry about it. You will nail it (pun intended)! I have a tutorial on how to print the plans on my blog HERE. Enjoy my plans and don’t forget to share you projects with me HERE. Happy Building!
#13 What are Premium Plans?
Many people asked for enhanced plans with more level of detail, with no ads, easy printable and with consolidated Cut and Shopping lists. Therefore, I created the Premium Plans for a selected list of designs.
To get the Premium Plans, you can either click the GET PDF PLANS button at the end of the articles on the blog (see bellow the button), or you can just go to the SHOP and see the full selection of available designs. Once you order the plans, you will get an automated email to the address indicated by you. Open the email, click on VIEW CONTENT button and then press DOWNLOAD.

#14 Get yourself inspired!
I encourage diy-ers to submit their projects to the blog, so you can get inspired. Therefore, if you are not set on a certain design, browsing through the brags might be useful to spark you an idea. See all brags HERE.


EXPLORE MORE IDEAS FOR:
 |
 |
 |
 |