This step by step woodworking project is about large firewood shed plans. This article features detailed instructions and diagrams for building a storage shed that can keep more than 4 cord of wood. If you know the basic woodworking skills and have basic household tools, you can get build a simple wood storage shed in just a few days.
Adjust the size of the shed to suit your needs. Moreover, we recommend you to align all the components at both ends before driving in the screws. Work with great care and with attention, making sure all the slats are placed equally spaced. Invest in high quality lumber, such as pine, cedar or redwood, as the construction will be exposed to rain. See all my Premium Plans HERE.
Projects made from these plans
Large Firewood Shed Plans
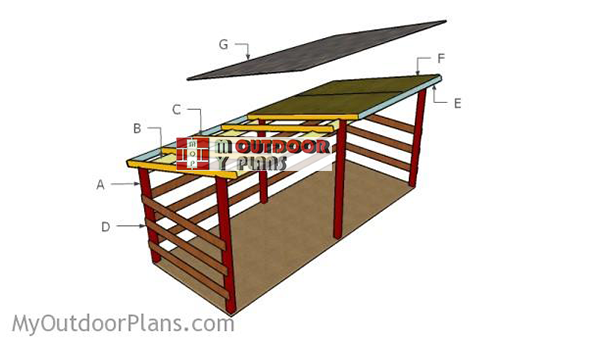
Building-a-large-firewood-shed
Cut & Shopping Lists
- A – 3 pieces of 4×4 lumber – 108″ long, 3 pieces – 89 3/4″ long POSTS
- B – 4 pieces of 2×6 lumber – 90 3/4″ long BEAMS
- C – 9 pieces of 2×4 lumber – 96″ long RAFTERS
- D – 6 pieces of 1×6 lumber – 72″ long, 6 pieces – 96″ long SIDES
- E – 4 pieces of 1×4 lumber – 96″ long TRIMS
- F – 4 pieces of 3/4″ plywood – 48″x96″ long ROOF
- G – 120 sq ft of tar paper, 120 sq ft of asphalt shingles ROOFING
- 3 pieces of 4×4 lumber – 8′
- 3 pieces of 4×4 lumber – 10′
- 4 pieces of 2×6 lumber – 8′
- 9 pieces of 2×4 lumber – 8′
- 6 pieces of 1×6 lumber – 6′
- 6 pieces of 1×6 lumber – 8′
- 4 pieces of 1×4 lumber – 8′
- 4 pieces of 3/4″ plywood – 4’x8′
- 1 1/4″ screws
- 1 5/8″ screws
- 2 1/2″ screws
- filler, stain
- glue
- 120 sq ft of tar paper
- 120 sq ft of asphalt shingles
Tools
![]() Hammer, Tape measure, Framing square, Level
Hammer, Tape measure, Framing square, Level
![]() Miter saw, Drill machinery, Screwdriver, Sander
Miter saw, Drill machinery, Screwdriver, Sander
Time
![]() One week
One week
Build a simple 4 cord firewood shed
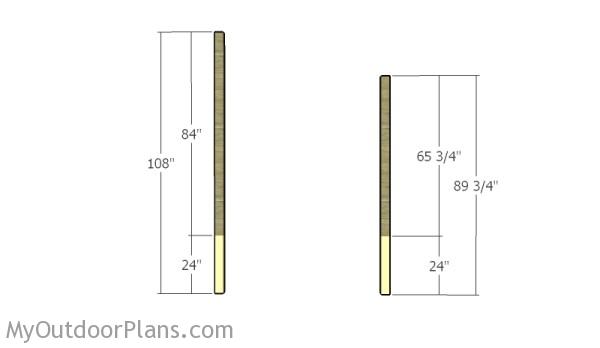
Building the posts
The first step of the project is to build the posts for the firewood shed. Cut three posts from 4×4 lumber at 108″ and three at 89 3/4″.
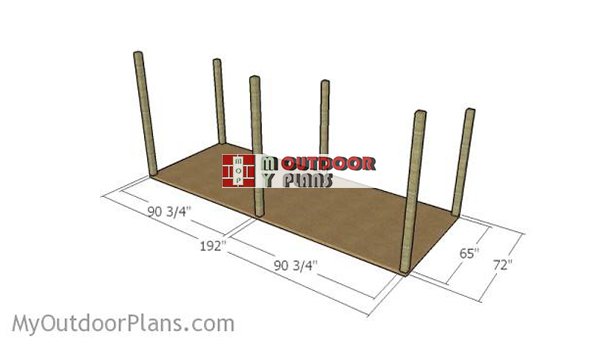
Laying-out-the-posts-for-shed
The next step of the project is to lay out the posts for the firewood shed. Use batter boards and string to lay out the posts. Measure the diagonals and adjust the string until they are equal. In addition, apply the 3-4-5 rule to the corners to make sure they are square.
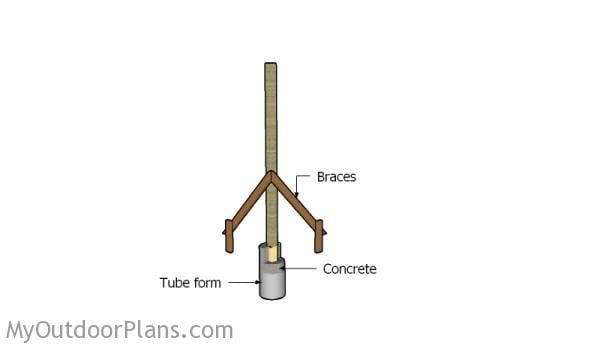
Setting the posts in concrete
You can set the posts into concrete for about 2′. Use a post hole digger to make the holes, install tube forms and fill them with concrete. Install the posts, making sure everything is aligned properly. Use braces to lock the posts into place until the concrete dries.
Fitting-the-support-beams
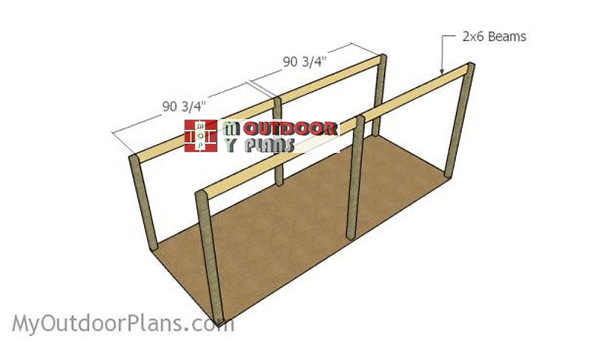
The next step of the project is to attach the support beams to the top of the posts, as shown in the diagram. Build the beams from 2×6 lumber at the 90 3/4″. Drill pilot holes at both ends of the beams and lock them to the posts with 3 1/2″ screws. Make sure the corners are square and align the edges for a professional result.
Attaching the side slats
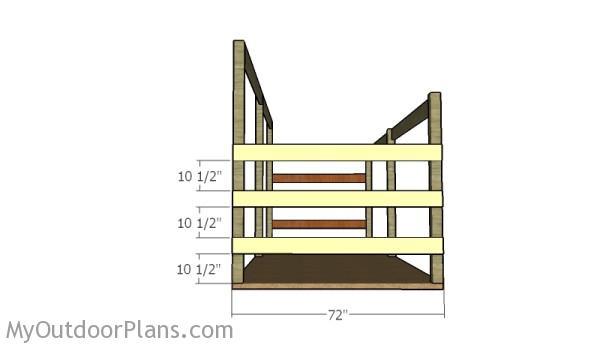
Continue the outdoor project by attaching the 1×6 slats to the sides of the firewood shed. Place the slats equally-spaced, drill pilot holes at both ends and insert 1 5/8″ screws into the posts.
Attaching the back slats
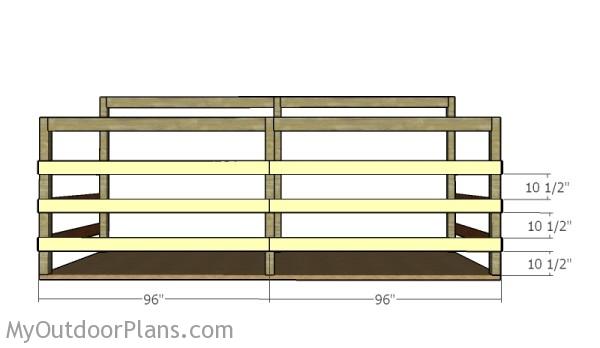
Attach 1×6 slats to the back of the firewood storage shed, as shown in the plans.
Building the rafters
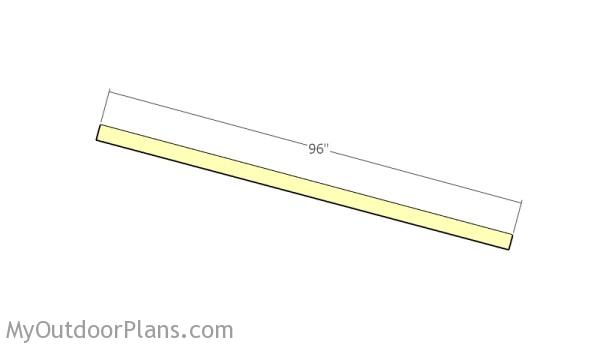
Build the rafters for the shed out of 2×4 lumber.
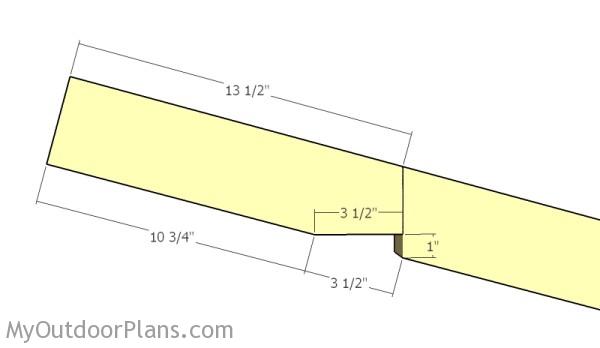
Making the top notch
Make notches to the top of the of the rafters. Mark the cut lines on the rafters and get the job done with a saw. Smooth the edges with sandpaper for a professional result.
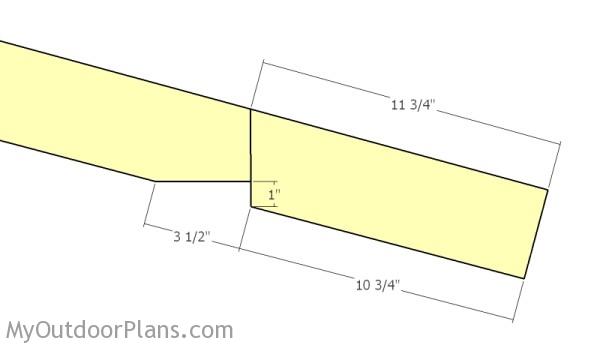
Making the bottom notch
Make a notch to the bottom of the rafters. Take accurate measurements for a professional result.
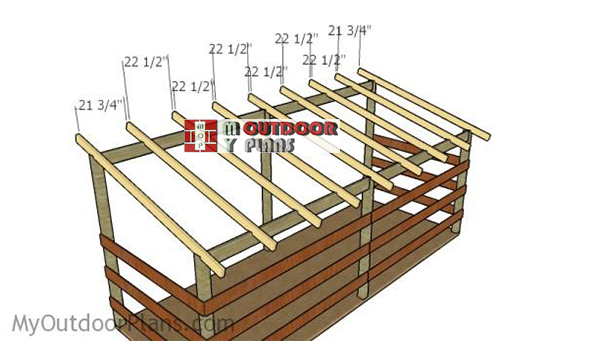
Fitting-the-rafters
Place the rafters to the top of the shed, as shown in the plans. Make sure you place the rafters equally-spaced. Drill pilot holes and insert 3 1/2″ screws into the support beams
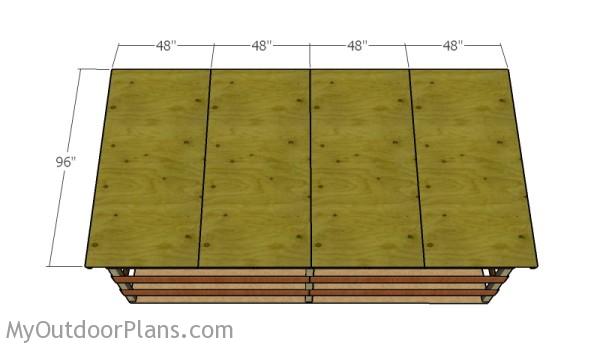
Attaching the roofing sheets
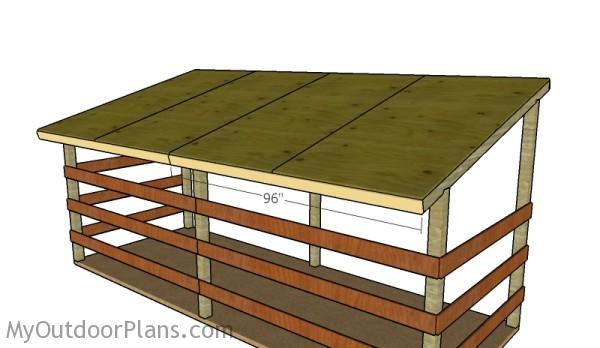
Next, attach the 3/4″ plywood sheets to the roof of the shed. Leave no gaps between the sheets and lock them to the rafters with 1 5/8″ screws, every 8″.
Fitting the front and back trims
Attach 1×4 trims to the end of the rafters, as shown in the diagram, to enhance the look of your outdoor project. Use 1 5/8″ screws to lock the trims to the rafters.
Fitting the roofing
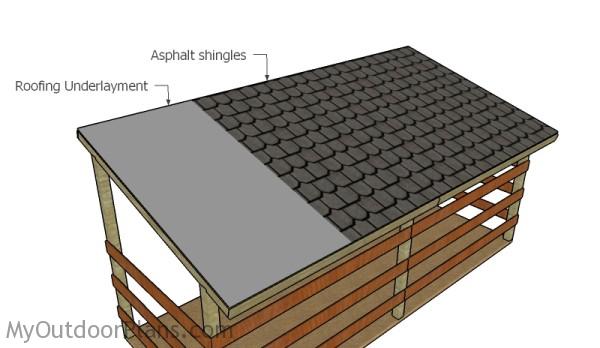
Cover the roof with tar paper. Use staples to secure the tar paper into place. Next, you should install asphalt shingles to the roof, starting from the bottom up to the top.
How to build a 4 cord firewood shed
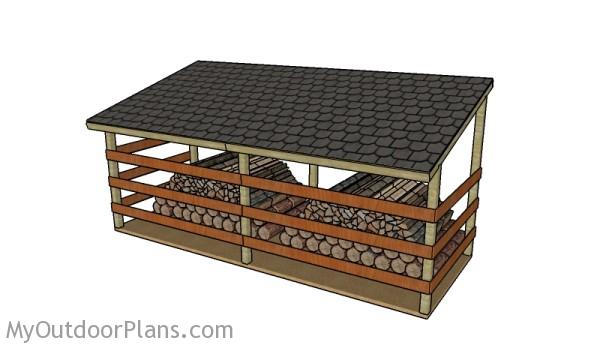
Fill the holes with wood putty and leave it to dry out for several hours. Smooth the surface with sandpaper before applying a few coats of stain, to protect the lumber from decay and to enhance the look of the shed.
Simple firewood shed plans
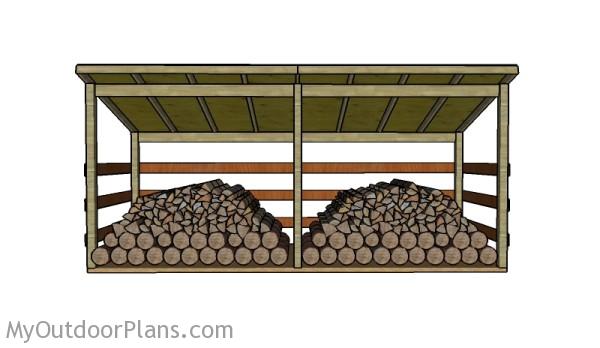
This shed is large enough to store more than 4 cords of firewood, more than enough to get through the winter. If you want to store even more firewood, this project is modular, so that you can easily add more modules.
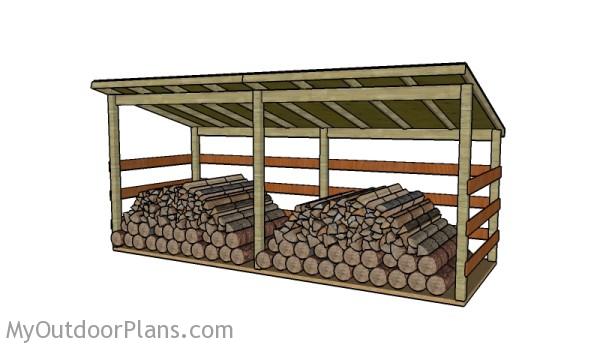
Large Firewood Shed Plans
If you want to keep the firewood off the ground, you should lay a few pallets or pour a thick layer of gravel or concrete.
Top Tip: Check out the rest of the garden projects for more inspiration for your backyard. In addition, we have a lot more firewood shed plans on our site, so make sure you check them out.
This woodworking project was about large firewood shed plans. If you want to see more outdoor plans, check out the rest of our step by step projects and follow the instructions to obtain a professional result.


10 comments
There are no plans for the floor. What materials do I use for the floor?
There is no floor for this project. You have to poor a concrete slab or use pallets.
Making a floor with some 2x4s and some slats would work no? Just mount the 4x4s on cement blocks.
Nice simple woodshed, just what i was looking for
Thanks. Let me know how it comes out.
It appears from the plans that the support beams are to be toenailed to the posts. Is this correct? Thanks.
Yes, you need to toe nail them or use pocket screws.
Don’t do what I did and measure the hole at 6 feet on center. Curious what others do about keeping the wood from pressing on the 1X6s.
Question what do you think about using a Nailer to connect pieces vs using screws (drilling pilot holes, etc..)?
Yes, it works.