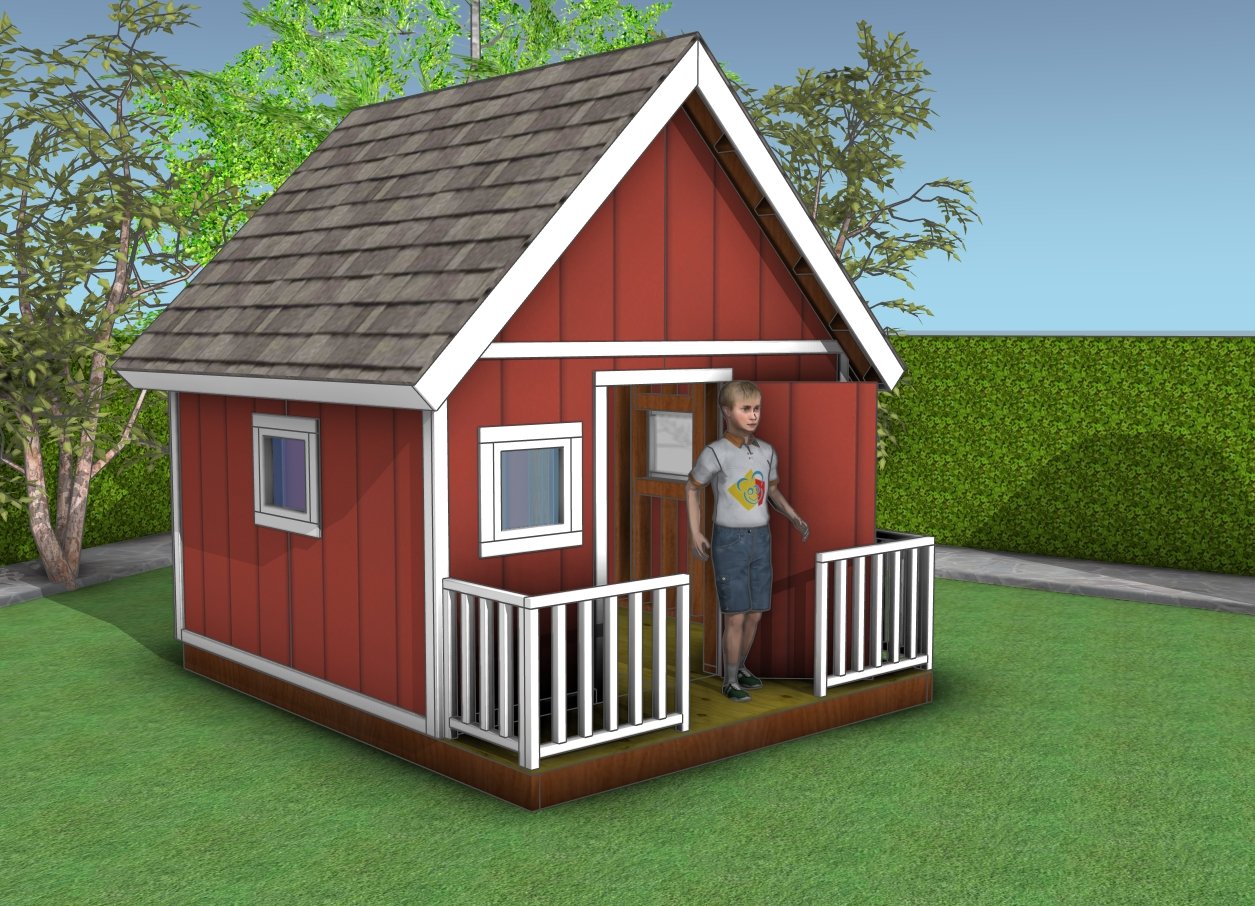
This step by step diy project is about playhouse building plans. I have designed this 8×8 playhouse with front porch, so you can surprise your kids with the ultimate gift. This playhouse has a gable roof and a small porch for extra appeal. You can make adjustments to the design of the playhouse to suit your needs. Take a look over the rest of my woodworking plans, if you want to get more building inspiration.
When buying the lumber, you should select the planks with great care, making sure they are straight and without any visible flaws (cracks, knots, twists, decay). Investing in cedar or other weather resistant lumber is a good idea, as it will pay off on the long run. Use a spirit level to plumb and align the components, before inserting the galvanized screws, otherwise the project won’t have a symmetrical look. If you have all the materials and tools required for the project, you could get the job done in about a day. See all my Premium Plans HERE.
Projects made from these plans
Playhouse Building Plans
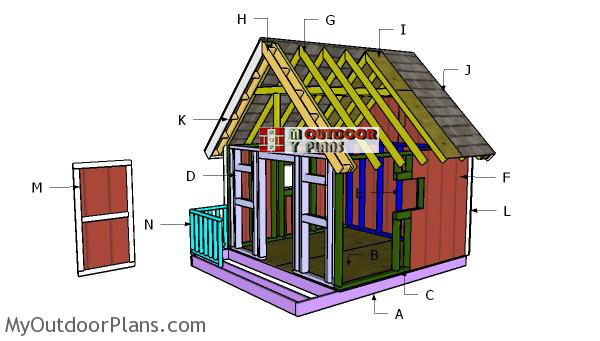
Building-a-8×8-playhouse
Cut List
- A – 2 pieces of 2×6 lumber – 120″ long, 9 pieces – 93″long FLOOR
- B – 2 pieces of 3/4″ plywood – 48″x96″ long, 1 piece – 24″x96″ long FLOORING
- C – 2 pieces of 2×4 lumber – 96″ long, 8 pieces – 57″ long, 4 pieces – 19″ long, 2 pieces – 16″ long, 3 pieces – 8 1/2″ long, 3 pieces – 25 1/2″ long 2xSIDE WALL
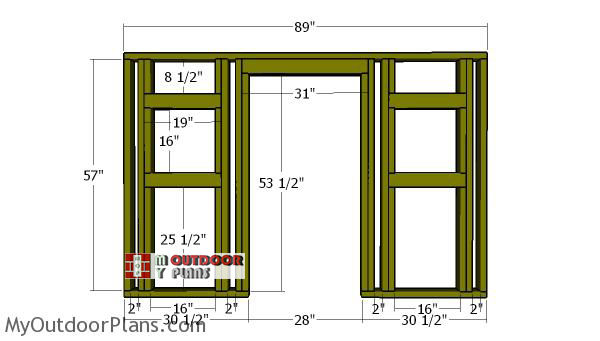
- D – 2 pieces of 2×4 lumber – 30 1/2″ long, 1 piece – 89″ long, 8 pieces – 57″ long, 2 pieces – 53 1/2″ long, 2 pieces – 31″ long, 8 pieces – 19″ long, 4 pieces – 16″ long, 4 pieces – 25 1/2″ long, 4 pieces – 8 1/2″ long FRONT WALL
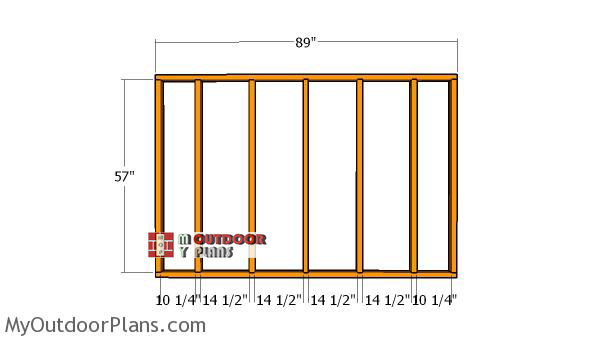
- E – 2 pieces of 2×4 lumber – 89″ long, 7 pieces – 57″ long BACK WALL
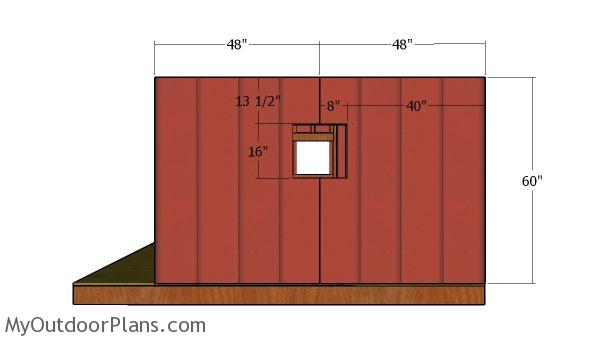
- F – 8 pieces of 1/2″ plywood – 48″x60″ long SIDING
Shopping List
- 9 pieces of 2×6 lumber – 8′
- 2 pieces of 2×6 lumber – 10′
- 8 pieces of 2×4 lumber – 8′
- 48 pieces of 2×4 lumber – 6′
- 3 pieces of 3/4″ plywood – 4’x8′
- 8 pieces of 1/2″ plywood – 4’x8′
- 6d nails, 2 1/2″ screws, 3 1/2″ screws
- wood filler , wood glue, stain/paint
Tools
![]() Hammer, Tape measure, Framing square, Level
Hammer, Tape measure, Framing square, Level
![]() Miter saw, Drill machinery, Screwdriver, Sander
Miter saw, Drill machinery, Screwdriver, Sander
![]() Safety Gloves, Safety Glasses
Safety Gloves, Safety Glasses
Time
Related
- PART 1: 8×8 Playhouse Plans
- PART 2: 8×8 Playhouse Roof Plans
- PART 3: 8×8 Playhouse Railings Plans
It’s that simple to build a playhouse – VIDEO!
How to build a playhouse
Building-the-floor-frame
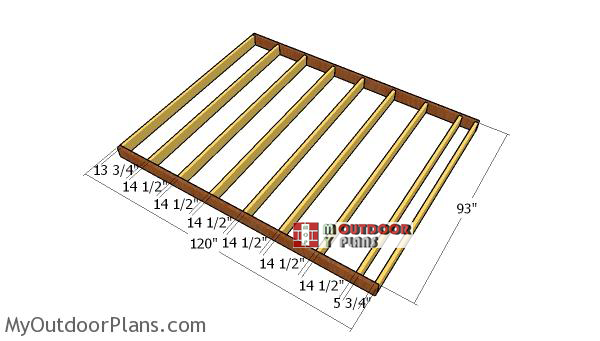
The first step of the project is to build the floor frame for the playhouse. Cut the components from 2×6 lumber, as shown in the diagram. Drill pilot holes through the rim joists and insert 3 1/2″ screws into the perpendicular components. Align the edges flush and check if the corners are square.
Floor
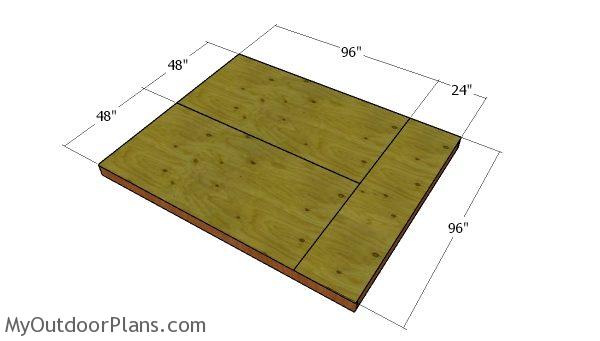
Fit the 3/4″ plywood sheets to the floor frame. Align the edges flush, drill pilot holes and insert 1 5/8″ screws, every 8″ along the joists. Leave no gaps between the sheets for a neat result.
Building the wall frames
Side-wall-frame
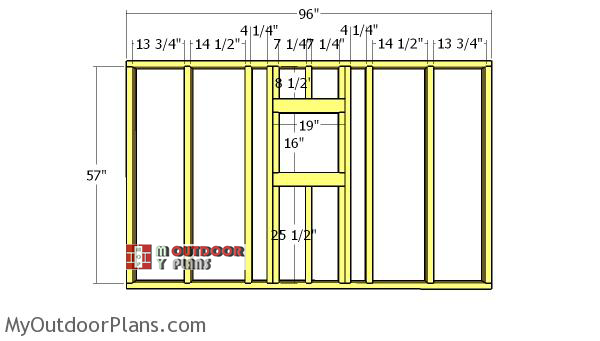
Building the side walls for the playhouse is a straight forward process. Cut the components from 2×4 lumber at the dimensions described in the diagram. Drill pilot holes through the plates and insert 2 1/2″ screws into the studs. Place the studs every 16″ on center and make sure the corners are square. Frame a window opening to the wall frames, so you let a lot of light inside. Use 2×4 lumber and 1/2″ plywood for the double headers. You can adjust the size of the windows to suit your needs.
Front-wall-frame
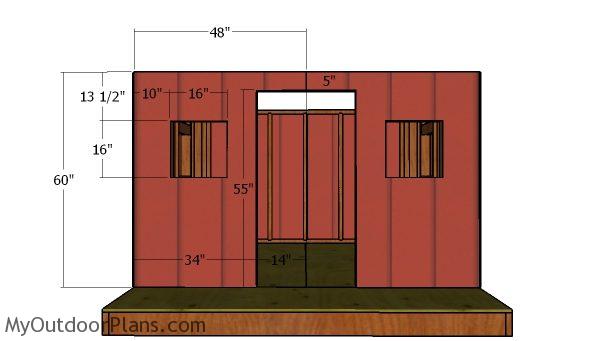
Build the front wall for the playhouse from 2×4 lumber. Frame the door opening and then the window openings. You can adjust the size of the openings to suit your needs.
Back-wall-frame
Build the back wall from 2×4 lumber. Drill pilot holes through the plates and insert 2 1/2″ screws into the studs. Place the studs every 16″ on center and make sure the corners are square.
Assembling the shed frame
Assembling the playhouse frame
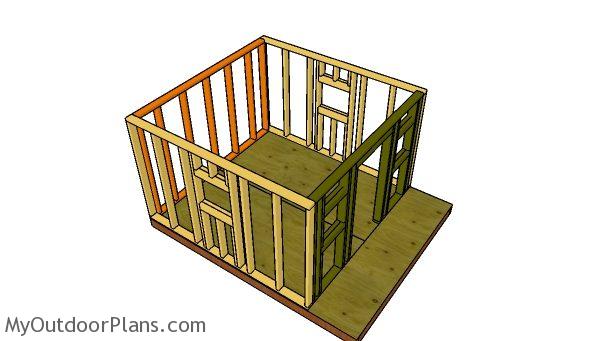
Fit the wall frames to the floor of the playhouse and plumb them with a spirit level. Drill pilot holes through the bottom plates and insert 3 1/2″ screws into the floor frame. Make sure the corners are square and align the edges flush.
Side wall – siding
Fit the 1/2″ plywood sheets to the exterior of the playhouse. Cut the sheets at the right dimensions and then attach them to the wall frames. Align the edges flush and insert 6d nails, every 8″ along the framing, so you can lock them into place tightly. Make the cuts around the window openings.
Front wall – siding
Fit the plywood sheets to the front of the playhouse. Make the cuts so you can fit the panels around the window and door openings.
Back wall – siding
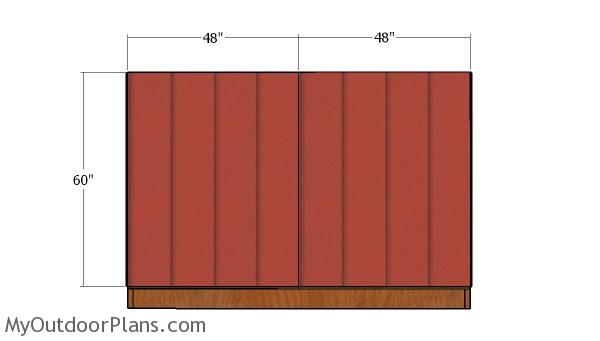
Attach the 1/2″ plywood sheets to the back of the playhouse. Cut the sheets to the right dimensions and then lock them into place tightly with 6d nails. Insert the nails, every 8″ along the framing. Leave no gaps between the sheets for a professional result.
Finishing touches
Playhouse Building Plans
Playhouse Building Plans – overall dimensions
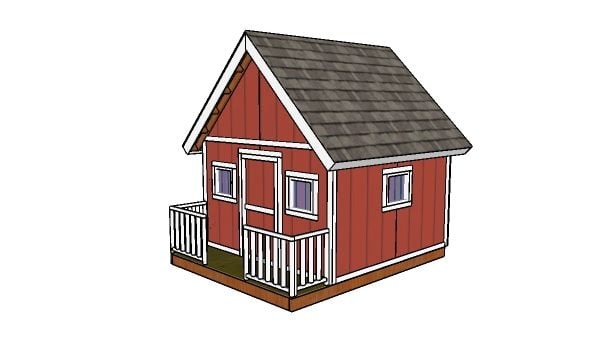
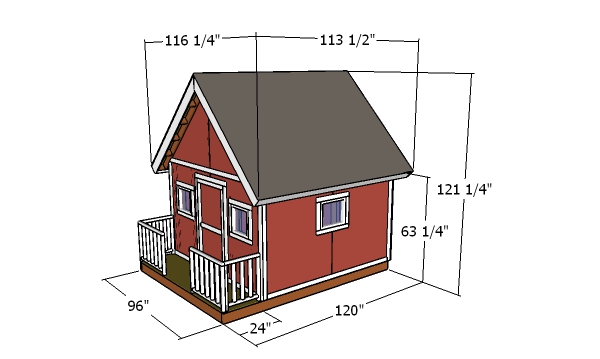
This playhouse has a beautiful appearance and it features a small front porch. The roof has a 45 degree slope.

Playhouse Building Plans – dimensions
Embarking on the adventure of building an 8×10 playhouse with a gable roof, a door, and a front porch is like setting the stage for countless childhood stories. With a budget ranging from $500 to $150, you’ll be crafting this little wonder over 1 to 2 weekends, turning simple materials into a magical retreat. Each weekend will be a step closer to creating a place where imagination takes center stage, and where every nail and board contributes to a world of endless possibilities.
How to build a playhouse
Picture this: an 8×10 playhouse with a gable roof that stands proudly, like a tiny house straight out of a fairy tale. The front porch isn’t just a porch; it’s a gateway to adventures yet to be dreamed, where kids can hold royal tea parties, launch daring pirate escapades, or simply enjoy a quiet moment in their own secret hideaway. The door isn’t just an entrance – it’s a portal to a world where imagination reigns supreme, where every knock and creak becomes part of the story.

Playhouse – free plans
Check out PART 2 and PART 3 of the project so you learn how to build the roof and the railings. If you wat to get this project as a PDF file with 1 full Cut list and 1 full Shopping list, please take a look over the GET PDF PLANS button bellow.
This woodworking project was about playhouse building plans free. If you want to see more outdoor plans, check out the rest of our step by step projects and follow the instructions to obtain a professional result.


