1. Start here. Woodworking 101
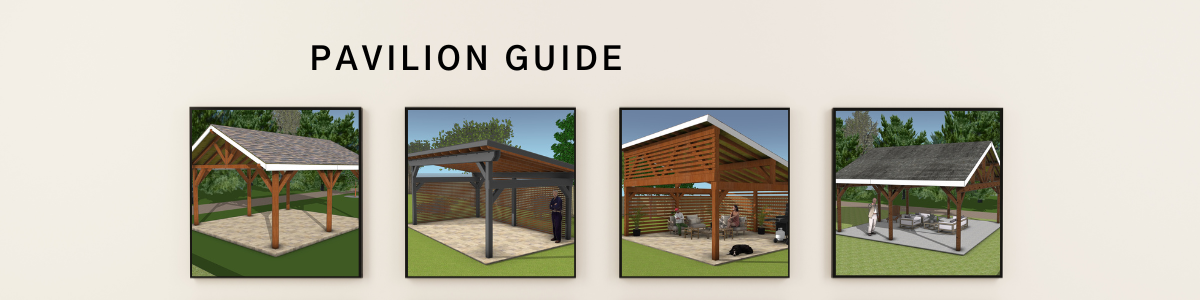
3. The Ultimate Outdoor Pavilion Guide – Permits, Framing, and Roofing
4. The Ultimate Shed Building Guide – Permits, Framing, and Roofing
5. DIY Chicken Coop and Raising Chickens: A Comprehensive Guide
6. Building a Greenhouse in the USA: A Beginner’s Guide
An outdoor pavilion can transform your backyard into a functional and inviting living space. Whether you envision a shaded area for family gatherings or a poolside retreat, building a pavilion involves more than just placing posts and a roof. This comprehensive guide will walk you through permit requirements, framing techniques, and roofing options to ensure your pavilion project is a success. We’ll cover how to handle building permits and local codes in the U.S., explore sturdy wood framing methods (from traditional mortise-and-tenon joinery to modern post-and-beam construction), and dive into roof shapes, slopes, and materials best suited for your pavilion. By the end, you’ll have a clear roadmap to build a safe, beautiful pavilion that stands the test of time. Let’s get started!
1. Permit Requirements in the U.S.
Building an outdoor pavilion usually means dealing with local regulations. While it might be tempting to skip the paperwork, obtaining the proper permits is crucial. Permits ensure your structure meets safety standards and local zoning laws – and they protect you from fines or forced removal down the line. Here’s what you need to know about permits for pavilions in the U.S.:
When Is a Permit Required?
In many areas, a pavilion (or any outdoor structure like a gazebo or pergola) requires a building permit if it exceeds a certain size or is permanently installed. The exact threshold varies by location. Commonly, structures under about 100 to 200 square feet are exempt from permits. For example, one county or city might allow a pavilion up to 120 sq ft without a permit, while another follows the International Residential Code (IRC) which exempts one-story detached structures up to 200 sq ft. Always verify your local limit: if your pavilion’s footprint (length × width) is larger than the allowed size, you’ll need a permit.
Besides square footage, height can trigger permit requirements. Some jurisdictions specify that if a structure is over a certain height (say 10 or 12 feet), a permit is needed. Generally, most backyard pavilions aren’t extremely tall, but if you plan a soaring roof peak or an elevated pavilion, check height restrictions too.
It’s important to note that permit exemptions aren’t universal. Even if state or model codes say you don’t need a building permit under 200 sq ft, your city or HOA might have stricter rules. When in doubt, err on the side of caution and inquire with your local building department. Building without a required permit can lead to stop-work orders, hefty fines, or even an order to tear down the structure. For example, if you built a pavilion larger than allowed and someone complains, the city could impose penalties and require you to dismantle the unpermitted structure. It’s not worth the risk – better to get the green light first.
Tip: Even if a building permit isn’t required due to small size, you must still follow zoning rules. Permit-exempt doesn’t mean you can ignore setbacks or other regulations. Most jurisdictions still mandate that accessory structures comply with placement rules, like how far from property lines they must be. So, always check both building code and zoning code requirements for your project.
Navigating the Permit Process
If you determine a permit is needed, don’t be intimidated. The process typically involves a few key steps:
- Contact the Local Building Authority: Start by calling or visiting your city/county building department or permit office. Explain that you plan to build a pavilion and ask about the required permits and codes. They’ll tell you what documentation is needed to apply (common items include a permit application form, construction plans, and a site plan).
- Prepare the Plans and Documents: You’ll usually need to submit drawings of your pavilion, including a site plan showing where it sits on your property. A simple sketch might suffice for a basic pavilion, but many areas prefer scaled drawings or blueprints. Plans should show the pavilion’s dimensions, framing details, and foundation or anchoring method. If you’re not comfortable drawing plans, you can hire a professional or see if prefab pavilion kits provide permit-ready drawings.
- Construction drawings (blueprints of the pavilion) may be required. Some kit or lumber suppliers provide these standard; custom designs might require hiring a draftsperson. Typically, standard pavilion plans are available at little or no cost, while custom plans could run a couple hundred dollars
- Site plan (Plat), which is a bird’s-eye view of your property showing existing structures, property lines, and where the pavilion will go. This ensures it meets setback requirements. Often, you can use your plot plan from when you bought the house or download a GIS map from the county. Mark the pavilion’s location and dimensions on it.
- Engineering drawings or calculations: Usually not needed for a simple residential pavilion, unless your area has high wind or snow loads or the structure is large. In about 10–15% of cases, building departments might ask for an engineer’s stamp on the plans . This could happen if the pavilion is very big or if you’re in a hurricane or seismic zone. An engineer would verify the design can withstand wind uplift, heavy snow, etc. This step adds cost (several hundred dollars), so clarify if it’s necessary. Most small pavilions built to code with proper connections won’t need custom engineering.
- Submit the Application: Fill out the building permit application form with details of your project (address, homeowner info, description of work, estimated cost, contractor if any). Attach the plans and pay the fee. How much does a permit cost? Permit fees for a backyard pavilion are usually modest – often a flat fee in the range of $60 to $150 for small residential projects. Some building departments base the fee on project valuation or square footage. It’s wise to budget a couple hundred dollars for permit costs, though in rural areas it might be less. (Note: In some rural counties, officials might even waive permits for pavilions under a certain size, such as 200 sq ft, as long as zoning is respected.
- Permit Review and Approval: After submission, the building department will review your plans for compliance with building codes (e.g. ensuring the roof structure is sound, footings are adequate) and zoning ordinances (proper placement on the lot). This review can take anywhere from a few days to a few weeks, depending on your locality’s workload. If anything is missing or needs changes, they’ll usually inform you so you can correct it. Once everything checks out, you’ll be issued an official building permit.
- Inspections During Construction: The permit isn’t the end – you’ll need to pass inspections as you build. Typically, for a pavilion, there may be one or two inspections. A footing inspection (before you pour concrete or set posts in the ground) is common, so the inspector can verify you dug the footing holes to the correct depth (especially important in frost-prone areas) and width. Then a final inspection after the pavilion is completed ensures it was built according to plan. If you ran electrical wiring for lights or fans, you may need separate electrical permits and inspections as well. Always call the inspector at required stages as noted on your permit. After final inspection, you’ll get approval and peace of mind that your pavilion is officially up to code.
- Don’t Forget HOA Approval: If you live in a community with a Homeowners Association, obtaining a building permit alone isn’t enough – you likely need HOA approval too. HOAs often have their own review process for exterior additions. This typically means submitting an architectural request or application to your HOA board or architectural control committee. You’ll provide similar info – site plan, sketches or product brochures, and possibly material samples or colors. The HOA checks that your pavilion complies with community guidelines (for example, matching styles, not exceeding height limits, etc.). They might have rules about maximum pavilion size or requiring it to match your house’s color scheme. Always read your HOA’s covenants and design rules before finalizing plans. Getting HOA sign-off before you apply for the building permit is smart, because the last thing you want is to build a permitted pavilion and then have the HOA demand changes. Open communication helps: inform neighbors of your plans and ensure the pavilion won’t block views or violate any rules. An HOA approval letter may even be required by the city as part of the permit package in some areas.
Pro Tip: Keep communication open with officials and neighbors. If you’re unsure about any requirement, ask the building inspector for guidance – they’re often willing to help homeowners navigate codes. And informing your immediate neighbors about your pavilion project (size, location, and timeline) can prevent complaints. A neighbor who knows what’s happening is less likely to call the city on you, and may even appreciate that you’re following the rules. This kind of goodwill can be invaluable if you need a minor variance or just to maintain a friendly atmosphere.
Zoning, Setbacks, and Other Regulations
Aside from the building code (which focuses on structural safety), you must heed zoning laws and other local regulations when planning your pavilion. Zoning dictates where you can build on your property and sometimes how the structure can be used or look. Key zoning considerations include:
- Property Line Setbacks: These are minimum distances you must maintain between your pavilion and your property lines (and sometimes from your house or other structures). Setbacks prevent buildings from being too close to neighbors, streets, or utilities. Typical residential setbacks for accessory structures might be around 5 feet from side yard boundaries and 10 feet from the rear, but every town is different. For example, one town might require a 10′ rear setback for any shed or pavilion, while another allows as close as 3′ if the structure is under a certain height. Check your local zoning code or ask the planning department. Don’t assume – even if you see many gazebos near fences in your area, there could be specific rules. Ensure your site plan marks the pavilion’s distance from lot lines to verify it meets setback rules. If it doesn’t, you may need to adjust the location or apply for a variance (an exception, which can be time-consuming and not guaranteed).
- Lot Coverage and Placement: Some municipalities limit how much of your lot can be covered by impervious surfaces or structures (including patios + pavilion). This is often to manage stormwater runoff. For instance, a town might say only 30% of your backyard can be covered by structures. A pavilion’s roof counts toward that. Also, if there are easements (for drainage, utilities, etc.) on your property, you usually cannot build in those areas. Verify there’s no utility line or drain field where you plan to build.
- HOA Design Rules: As mentioned, HOAs can impose additional restrictions beyond city codes. These could include height limits (perhaps the pavilion can be no taller than your fence or lower than your house’s roofline), aesthetic rules (approved colors, materials, or requiring certain roof styles), and even whether outbuildings are allowed at all. One HOA might ban detached structures visible from the street; another might restrict them to rear yards only. Review your community’s Covenants, Conditions & Restrictions (CC&Rs) and any architectural guidelines. The HOA may require that you submit plans for approval. Failing to get HOA approval can result in fines or demands to modify/remove the pavilion, even if the city issued a permit. In short: comply with both HOA and city rules for a smooth project.
- Planning & Historical Districts: If you happen to live in a designated historic district or other special planning zone, there could be extra steps. Historic districts sometimes require design review by a preservation board to ensure the pavilion’s style is appropriate. Similarly, coastal zones or environmental areas may have unique regulations (like wind load requirements or floodplain rules). Most homeowners won’t encounter these, but be mindful of any special overlays on your property.
- Usage and Utility Permits: Usually, a simple pavilion intended as a shade structure is considered an “accessory use” to your home – no special occupancy permit needed. However, if you plan to use it as something like an outdoor kitchen with a built-in grill, that could invoke fire code considerations. Or if you run electricity to the pavilion for lighting, you’ll need an electrical permit (and GFCI-protected circuits). Adding plumbing (like a sink or shower) would likewise need plumbing permits and possibly turn the pavilion into a different classification (not common, but worth noting if your design is elaborate). Check whether a separate permit is required for any utilities; often the building permit covers a basic structure and you’d pull a minor electrical permit in addition.
Remember that zoning compliance is crucial even if no building permit is needed. For example, let’s say your area doesn’t require a permit for structures under 120 sq ft. You build a small 10’x12′ pavilion. You still must follow setback rules and any HOA rules. If you placed it 1 foot from your fence when 5 feet is required, you are in violation. Neighbors could report it, and the city can enforce zoning violations with fines. They may not ask you to tear it down if it’s small, but they could; at the very least you’d need to apply for a variance or move the structure. So never assume “no permit” means “no rules.” Always do the homework on placement and allowed size.
One more thing: consider neighborly factors. Don’t position your pavilion in a way that, for instance, channels stormwater onto a neighbor’s yard or violates privacy (like building right up against a neighbor’s patio). Even if legal, these can cause disputes. Many communities have nuisance laws (for drainage, etc.) that could come into play. A well-placed pavilion will enhance your yard without creating issues for those around you.
Tips for Working With Local Codes
Navigating permits and codes can feel daunting, but these tips will help you manage the process confidently:
- Start Early: Begin the permit inquiry before you break ground – ideally in the planning phase. Early knowledge of requirements (and potential hurdles) will save you time and money. It’s easier to adjust your design before construction than to halt a half-built project due to a missed permit.
- Leverage Official Resources: Use your city’s resources. Many building departments have handouts or guides for accessory structures that summarize the rules (often available on their website). These might outline permit exemptions, required footing depths, and so on. For example, some cities publish a checklist: “Decks and Sheds under 200 sq ft require: X, Y, Z.” This can demystify the process.
- Ask Questions: Don’t hesitate to ask the building inspector or planner for advice. They can clarify what size triggers a permit, what the frost line depth is in your area (which determines how deep footings should go), or whether your planned roofing material is allowed. Building officials are usually happy to see homeowners doing things correctly and will offer guidance. A quick question like “Do I need hurricane ties on the rafters for code here?” can ensure you build to standard.
- Document Everything: When you get approvals, keep copies of your permit, plans, and inspection reports. Down the road, if you sell your home, you can show the pavilion was built with permits, which reassures buyers (and their inspectors). It’s part of the home’s improvement history.
- Follow the Approved Plan: Once you have the permit, build the pavilion exactly as per the approved plans. If you want to make a change (say, use thicker posts or a different roofing material), inform the building department – minor field changes are usually fine, but major deviations might need an updated review. The inspector will check that the finished structure matches what was permitted.
- Insurance and Future Sales: Building your pavilion to code and with a permit can also protect you financially. Homeowners’ insurance typically only covers structures that were built legally and meet code. If you build without a permit and something goes wrong – say the pavilion collapses in a storm and causes damage – an insurance company could deny your claim due to non-permitted construction. Even worse, an unpermitted addition could lead to increased premiums or cancellation of your policy. Additionally, when selling your home, unpermitted structures can be a red flag. Buyers might request you obtain retroactive permits or even remove the structure. Retrospective permits can be tricky and may require opening up finished work to verify safety. Avoid these headaches by doing it right the first time.
In summary, take the permit and code phase seriously. It’s the foundation (literally and figuratively) of a safe pavilion build. By understanding when you need a permit, how to get one, and what rules to follow, you’ll set your project up for success. With the paperwork in order, you can focus on the fun part – building the pavilion – with confidence and peace of mind.
2. Framing Techniques and Options
With permits underway or in hand, it’s time to talk pavilion framing. Framing is the skeleton of your pavilion – the posts, beams, and connectors that give it strength and shape. A well-built frame ensures your pavilion can withstand wind and weather for decades. In this section, we’ll focus on wood framing techniques, as wood is the most popular material for DIY pavilions due to its warmth, workability, and strength. We’ll cover classic post-and-beam construction, traditional mortise and tenon joints, the best lumber choices for outdoor use, and a step-by-step overview of assembling your pavilion’s frame. Let’s build it right!
Post and Beam Construction
Post-and-beam is a straightforward and robust method to frame a pavilion. As the name suggests, it consists of vertical posts that support horizontal beams. This technique is sometimes also called “timber framing” (especially when using large timbers), though timber framing can imply more complex joinery. In a basic post-and-beam pavilion:
- Posts – These are the vertical supports at each corner (and sometimes mid-span for larger pavilions). Commonly 4×4, 6×6, or even 8×8 wooden posts are used. Posts carry the downward load of the roof to the ground. For a typical backyard pavilion, 6×6 posts offer an excellent combination of strength and aesthetics (4×4 posts can be used for very small structures, but they may look spindly on anything of significant size).
- Beams – These horizontal members run along the sides of the pavilion, sitting on top of or alongside the posts. They span the distance between posts. There are often two sets of beams: main support beams (also called girders) that carry the roof, and edge beams or headers that frame the perimeter. In a rectangular pavilion, you might have a front and back beam resting on the posts (forming the long sides of the rectangle). The rafters or trusses for the roof will bear on these beams.
A simple way to imagine post-and-beam is four posts at corners with a beam connecting the tops in a rectangle. Think of a basic picnic shelter shape before the roof is added.
Modern Connectors: One of the advantages of post-and-beam construction today is the availability of metal connectors and hardware that make joints strong without advanced carpentry skills. For instance, you can use steel post-to-beam brackets to attach beams to the sides or top of posts securely. Companies like Simpson Strong-Tie produce heavy-duty structural connectors specifically for things like pergolas and pavilions (including decorative ones with black powder coating for a nice look). In a typical build, you might use metal post caps that sit on top of each post and have flanges to receive the beams. You then nail or bolt the beams to this cap. This creates a rigid connection so the beam doesn’t slip off and it resists uplift.
Additionally, lag bolts or structural screws can fasten beams to posts directly. Often builders will notch the post or the beam to create a little shelf (a half-lap or shoulder) for the beam to sit in, and then bolt through. For example, you can cut a notch in the top of a 6×6 post equal to the width of your beam, set the beam into that notch, and run a carriage bolt through the assembly. The notch gives bearing support, and the bolt gives tensile connection – very strong.
Knee Braces: Post-and-beam frames sometimes include diagonal braces between posts and beams. These small 45° braces (often 2×4 or 4×4 lumber) significantly stiffen the structure against lateral forces (like wind pushing from the side). They create triangular support that prevents the pavilion from racking (leaning like a parallelogram). Many pavilion designs include knee braces for both functional and aesthetic reasons – they give a charming, crafted look. If using knee braces, you’ll typically anchor them with lag screws or bolts into the post and beam. Properly fit braces make a huge difference in stability.
One example material list for a 12×16 pavilion shows the hardware and connectors used in post-and-beam construction: post anchors for securing posts to footings, post-to-beam connectors, rafter ties for the roof, and plenty of structural screws. This highlights that metal hardware can do a lot of the work in holding your pavilion together, so you don’t necessarily need complex wood joinery skills to get great strength. Always use exterior-rated, galvanized or stainless hardware (lumber that is pressure-treated or exposed to weather will corrode plain steel fasteners quickly). Look for G185 galvanized or better, or coated structural screws, to ensure longevity.
In summary, the post-and-beam approach with modern connectors is very DIY-friendly. You’re essentially building a rugged open box frame. Key steps (explained in detail later) will be: setting your posts plumb and secure, attaching beams level at the top, and adding any necessary braces. Once that is done, you’ve got the foundation for adding your roofing structure.
Mortise and Tenon Joints (Traditional Timber Framing)
If you’re aiming for a more traditional craftsmanship approach (or just interested in strong wood-only connections), mortise and tenon joints are the gold standard of classic timber framing. This technique has been used for centuries in barn and pavilion construction. Here’s how it works:
A tenon is a projecting tongue of wood cut on the end of a beam, and a mortise is a corresponding slot or hole cut into the adjacent piece (e.g., a post) to receive that tenon. The tenon fits snugly into the mortise like a puzzle piece. The joint is then typically secured with wooden pegs (treenails) driven through aligned holes in the mortise and tenon. When done correctly, the result is an incredibly strong connection without any metal fasteners – essentially the wood locks into itself .
For example, the connection of a horizontal beam into an upright post would involve cutting a rectangular mortise (hole) in the post and a matching tenon on the end of the beam that plugs into it. A shouldered mortise and tenon joint, common in timber frames, has the beam cut so it also rests on a small shoulder for extra support. Once the beam’s tenon is inserted, 1/2″ or 3/4″ diameter hardwood pegs are hammered through a drilled hole that goes through the post and tenon. When the peg is in, the beam can’t pull out – it’s locked in place. This is the classic post-and-beam joinery seen in old barns (and high-end modern pavilions).
Mortise and tenon joints are valued for their strength and beauty. There’s no metal to rust and they create a clean, historic look. They rely on precise carpentry, however. Cutting mortises and tenons requires skill with saws and chisels (or specialized drills). If you have the tools and know-how, you might relish the challenge. If not, you can consider hiring a timber framer for just those critical joints or buying a prefab timber frame kit where pieces are pre-cut and labeled for assembly.
Some popular mortise-and-tenon joints used in pavilion framing include:
- Through Mortise and Tenon: The tenon passes entirely through the post and is visible on the far side (often pinned with a wedge or peg). This is strong and shows off the joinery.
- Blind or Stopped Tenon: The tenon doesn’t protrude out the other side, giving a cleaner face on the post. Still pinned with pegs from one or two sides.
- Bridle Joint: Similar idea for corners – the end of a beam is slotted to sit over a post, and a pin secures it.
Heavy timber trusses (like a decorative king post truss in a pavilion roof) also use mortise and tenon to join the members at the apex and where diagonal braces meet the horizontal beam. These can be real structural connections or purely decorative depending on design.
While true mortise and tenon construction may be overkill for a small pavilion, it’s worth mentioning because it maximizes strength and longevity. A well-made mortise and tenon joint can literally last centuries. In fact, many historic open-air pavilions or garden structures around the world use pegged joints – no nails to weaken over time.
If you incorporate even a bit of this approach, you might do something like cut shallow mortises in your posts to recess your beams (for bearing), then use carriage bolts and wooden peg facsimiles for a decorative look. Some kits use concealed metal knife plates that insert into precut slots (like a hidden steel tenon) for modern speed with traditional appearance.
One thing to consider: time and tools. Going full traditional means more labor per joint. But many DIY enthusiasts find it rewarding. You could practice on scrap wood to get the hang of cutting a tenon and its matching mortise.
To summarize, mortise and tenon joinery is the hallmark of classic pavilion framing – “post and beam” in the old-school sense. It yields strong, rigid frames with a timeless aesthetic. If you have the patience or can invest in a timber frame kit, it will make your pavilion an heirloom piece of craftsmanship. If not, don’t worry – metal connectors can achieve similar structural results with less fuss. You can even mix approaches (e.g., use mortise-and-tenon for visible knee braces and metal brackets for hidden beam-post connections) to get the best of both worlds.
Best Types of Wood for Pavilion Construction
Choosing the right wood is as important as how you join it. Your pavilion will be exposed to the elements year-round, so you want lumber that can handle outdoor conditions – resisting rot, insect damage, and warping from moisture and temperature changes. Here are the top contenders for pavilion framing, along with their pros and cons:
- Pressure-Treated Pine (Southern Yellow Pine): This is one of the most common and budget-friendly choices. Pressure-treated (PT) lumber has been chemically treated to resist rot and termites. It’s readily available at home centers in large dimensions (4×4, 6×6 posts, etc.) and is generally the cheapest option. The treatment gives the wood a greenish or brown tint (which can be painted or stained if desired). Structurally, Southern Yellow Pine (SYP) is quite strong and dense, making it suitable for posts and beams. Pros: Very affordable, durable (when properly treated for ground contact), and widely available. Cons: PT lumber can be somewhat wet and prone to twisting or checking (cracking) as it dries. It also has a less refined appearance than some naturally rot-resistant woods – you might see more knots and a rougher grain. Also, because of the chemicals, you must use appropriate hardware (galvanized or stainless) to prevent corrosion. Overall, pressure-treated wood is ideal for the budget-conscious builder: it will get the job done and, with maintenance, can last for decades. Just plan to seal or stain it regularly to keep it looking good and to slow weathering.
- Cedar: There are different types of cedar, but for pavilions, Western Red Cedar is a superstar. Cedar wood contains natural oils and tannins that make it highly resistant to rot and insects without any treatment. It’s why cedar is often used for decking, fences, and outdoor furniture. Cedar is also dimensionally stable – it tends to lie flat and true, with minimal warping. Aesthetically, it has a beautiful reddish-brown color and a pleasant aroma. In pavilion use, cedar is often left with a clear finish or stain to show off its beauty. Pros: Excellent durability outdoors (can last for many years even unfinished), lighter weight than many hardwoods, easy to work with (soft wood), and great appearance. Cons: Cost – cedar is typically more expensive than PT pine. It’s considered a premium wood. Also, it’s softer, so it can dent or scratch a bit easier, though in a pavilion that’s usually not a big issue. Cedar is a top choice if your budget allows, giving a natural, upscale result. Many high-end kits and custom pavilions use cedar for both structural members and roof sheathing.
- Redwood: If you’re on the West Coast or can source it, Redwood is comparable to cedar in that it’s naturally rot-resistant and gorgeous. In fact, redwood and cedar are often mentioned together as the elite outdoor woods. Redwood has a rich reddish hue and also contains compounds that resist decay and insects. It’s common in California for outdoor structures. Pros: Long-lasting (old growth redwood can last for generations), stable, and premium appearance. Cons: Expense and regional availability – it’s pricier and mostly sourced from the Western U.S. If you’re in the East, cedar might be more available than redwood. Either way, both cedar and redwood are excellent choices for a long-term pavilion frame if budget permits.
- Douglas Fir: Doug fir is often used in heavy timber framing. It’s a strong wood (used in many house frames) and can be obtained in large beams. While not as naturally rot-proof as cedar or redwood, Douglas Fir is still used in covered outdoor applications. If it’s protected by a good finish (paint or stain) and the design keeps it mostly dry, it can do well. Some timber frame pavilion kits use Douglas Fir because of its strength and the fact that it’s more affordable than cedar for big timbers. Also, fir glulam beams (engineered laminated beams) are available if you need very long spans. Pros: High structural strength, generally straight grain, available in large sizes. Cons: Moderate decay resistance (needs to be kept sealed and ideally not in direct ground contact), can be moderately expensive for appearance-grade timbers. Many folks choose fir when they plan to paint the structure or where parts will be under roof (fir rafter beams under a solid roof can stay dry).
- Cypress: In the Southern U.S., cypress is another naturally durable wood. Like cedar, it has oils that resist rot. It’s less commonly used specifically for kits, but if you have a local supply, cypress can be great for outdoor builds. Historically, cypress was used for roof shakes and boats due to its rot resistance. It has a light brown-yellow tone.
- Engineered Lumber: Sometimes, to get extra strength or stability, people might use engineered wood for certain parts. For example, glulam (glue-laminated) beams or LVL (laminated veneer lumber) can be used for long-span beams or ridge beams. These are basically manufactured beams made from layers of wood and resin. They are very strong and resist warping. If you have a wide pavilion (say a 20’ span) and want one beam across without posts in the middle, a glulam could achieve that where solid sawn lumber might not. They can be wrapped with finish wood to look nice if needed. Pros: Superior strength, predictable performance. Cons: Not as natural looking (usually need to be wrapped or painted; some glulams are now made with attractive wood finishes though). Also heavier.
In many pavilion projects, a mix of wood is used. For instance, you might use pressure-treated posts for anything that touches concrete or ground (since PT wood handles ground moisture well), and then use cedar for the above-ground beams and rafters for looks. This approach can be cost-effective while still preventing rot at the vulnerable base of posts. If mixing woods, just be mindful of the appearance and the fact that PT and cedar will weather to different colors if left unstained.
Let’s talk a bit about cost vs. longevity. Pressure-treated lumber is cheapest: often around $1–$3 per linear foot for typical dimensions. Cedar might be 2-3 times the cost of PT lumber for the same dimensions. For example, a 6x6x10’ PT post might cost $50, whereas a cedar 6x6x10’ could be $100+. However, cedar and redwood have built-in longevity (they can last for decades with minimal maintenance), whereas PT lumber, while rot-resistant, still benefits from upkeep (sealing to slow checking, etc.). If you factor in maintenance and aesthetics, many homeowners opt to splurge on a higher-grade wood for the parts of the pavilion you touch and see up close (like the beams and maybe the underside of the roof decking), since it’s an investment into the look and feel of the structure. On the other hand, if you plan to paint the pavilion to match your house trim, using PT lumber and painting it can be perfectly fine and will look uniform.
Insect Resistance: Beyond rot, think about bugs. Termites are a concern in many regions. Pressure-treated wood is chemically protected against termites. Cedar and redwood are naturally less appetizing to bugs (and cedar is noted to be immune to many insect attacks. If you use untreated wood like fir or pine that isn’t pressure-treated, you should definitely apply a wood preservative or ensure those members are not in contact with ground and are sealed from moisture.
Finally, consider sourcing. If you want something like cedar or doug fir, check local lumber yards or specialty timber suppliers. Big-box stores carry some cedar (often in deck boards or maybe 4×4 posts), but for large beams or higher quality, a lumberyard is the way to go. You might also find rough-sawn vs. surfaced lumber. Rough-sawn has a rustic, natural texture (not smooth), which can look great in a pavilion if you want a rustic vibe. Surfaced (planed smooth) lumber looks more finished and is easier to paint or stain evenly. Decide which aesthetic you prefer.
Summary of Wood Choices: If budget is tight, go with pressure-treated pine for the primary structure – it will do the job (just plan to stain it a nice color). If you have moderate budget, consider upgrading the visible parts to cedar or redwood, especially for beams and rafters – you’ll get longevity and beauty with less maintenance. For ultimate strength, douglas fir or engineered components can be used selectively (like a big span ridge beam). Mixing PT for posts and cedar for upper parts is a common strategy, giving you durability where wood meets concrete, and beauty where it meets the eye. No matter what wood you choose, use lumber rated for outdoor use and follow sound construction practices to ensure your pavilion stays sturdy.
Step-by-Step Framing Assembly
Now let’s put it all together – literally. Framing a pavilion involves a series of steps that take you from bare ground to a standing structure ready for a roof. Below is a step-by-step guide focusing on assembling the wood frame. This assumes you have any foundation or footings in place (typically, you’d pour concrete footings or piers before erecting the wood frame, as per your local code and plan). Once the footings are ready and any anchor hardware is set, you can proceed with the wood assembly:
- Lay Out the Post Locations: Mark the exact locations for your pavilion’s posts on the prepared site. Use stakes or batter boards and string lines to outline the perimeter. Double-check that the layout is square by measuring diagonals (they should be equal). For example, on a 12×16 pavilion, you’d mark four corners in a rectangle – ensure 90° corners by the 3-4-5 triangle rule or diagonal checks. Proper layout prevents headaches later, as misaligned posts can throw off the whole structure.
- Set the Posts: Install your vertical posts at the marked locations. If using post anchors (metal brackets that connect posts to concrete footings), you’ll usually drill into the concrete and attach the anchor, then secure the post to the anchor with bolts. Make sure each post is plumb (perfectly vertical) – use a level on adjacent faces or a post level tool. Temporarily brace the posts with diagonal lumber to hold them plumb. If you are embedding posts in concrete, ensure they are treated for ground contact and pour the concrete around them, keeping them plumb until it sets. Standard pavilion designs often use 4 posts, but larger pavilions might have additional posts along the sides for support (e.g., a long pavilion might have 6 or more posts). Get an inspector sign-off on post hole depth (if required) before backfilling or concreting.
- Attach Beams to Posts: Once the posts are secure and braced, it’s time to connect them with the horizontal beams. Typically, you’ll have front and back beams running along the length of the pavilion, sitting on the posts’ tops or bolted to the sides. There are a couple of approaches:
- If your posts were cut to the full height (including roof rise), you might be surface-mounting beams to the sides of posts at the top. Use your chosen connectors or notches: for instance, notch each post and lag-screw a beam to it, or use metal post-to-beam brackets. Another method is a through-bolt: drill a hole through the post and beam and use a long carriage bolt with washer and nut tightened securely.
- In some plans, the posts are cut lower and a continuous beam sits on top of them (like a sill). In that case, you may have to lift a heavy beam and set it on top of each post (scaffolding or a few strong helpers are useful). Then bolt or strap the beam to the post tops so it can’t shift. Simpson makes post caps exactly for this purpose, tying beams to post tops.
- Ensure the beams are level across from one post to the next. Use a long level or a laser level. Shim if necessary while securing.
- Often, you’ll install two parallel beams (one at the front edge of pavilion, one at the back edge). If your pavilion is wider than the lumber spans, you might have a central post or two as intermediate support so you can use shorter beam spans.
At this stage, you now have a rigid rectangular (or square) frame: posts up, beams across. Your pavilion outline is visible. If there are beams on the shorter sides as well (like tying the front posts to each other and back posts to each other), install those too – though in many designs, the roof structure itself serves to tie the side-to-side direction, so you may not have lower beams on the “gables” if it’s a gable roof. Check your plan.
- Install Knee Braces (if used): Before adding the roof weight, it’s smart to put in any knee braces or diagonal supports between beams and posts. Cut your braces (usually at 45° angles on ends) to fit snugly. A common approach: a brace might span down about 2 feet from the beam to 2 feet from the post (forming a right triangle). Secure each end with two lag screws or bolts – one into the post, one into the beam. Not only do these braces strengthen the frame significantly, but they also hold the posts and beams at fixed 90° angles. Now your structure should not sway. If you shake a post, the whole frame should move as one, indicating solid connections.
- Set the Ridge Beam or Trusses (Roof Framing): With the basic “box” frame done, turn to the roof framing. This can be done a couple of ways depending on your roof style:
- For a gable roof pavilion, you’ll have either a ridge beam running along the peak or use prefabricated trusses. If using a ridge beam (common for site-built pavilions), you need to install posts or supports at the gable ends (or temporarily brace up the ridge beam) at the correct height and center. Often, a pavilion will have a king-post truss at each end or a decorative gable frame that includes a vertical post – this can hold the ridge until rafters lock everything in. Set your ridge beam level at the desired height (this height plus the rafter lengths will define your roof slope).
- If using trusses (triangular assemblies that form the roof shape), you might lift each truss onto the top of the side beams. Secure trusses to the beams with hurricane ties or brackets. Trusses eliminate the need for a ridge beam and make it easier to get the roof shape correct without cutting individual rafters. Many pavilion kits come with trusses ready to bolt in.
- For a hip roof pavilion, you won’t have a single ridge but rather a short ridge and hip rafters from each corner. This is more complex; you’d install hip rafters from the top of each corner post up to converge at the center (often on a small central king post). It’s usually easier to cut these rafters on the ground and then install.
- For a flat or shed roof, you’d simply be installing joists or rafters across the beams (with a slight pitch for drainage). In that case, step 5 is basically combined with step 6 (rafters directly on beams).
Ensure whatever roof support (ridge or truss) is plumb and centered. Use temporary bracing as needed because until rafters are all in, the roof structure can wobble.
- Install Rafters: Rafters are the angled beams that form the roof slope and support the roof decking or panels. For a gable roof, pairs of rafters rest on the side beams and meet at the ridge (or attach to either side of the ridge beam). For each rafter, cut the bottom end to sit flat on the side beam (often a “bird’s mouth” notch is cut to seat over the beam) and cut the top end to meet the ridge or opposing rafter at the correct angle. This can be a bit of geometry – many DIY plans provide the angle or template for these cuts. Start by setting a pair of rafters at each end (the gable ends). Nail or screw them in place to the ridge (or to each other if no ridge beam) and to the beam. Use metal rafter ties or hurricane clips to secure rafter-to-beam connections; these prevent uplift in high winds. Then fill in with remaining rafters spaced per your design (typically 16″ or 24″ on center like a house, or sometimes wider for small pavilions). If you have a ridge beam, all rafters can simply be nailed to the ridge beam and to the side beams. If no ridge beam, you might need collar ties or rafter ties across from each pair to keep them from spreading.On a hip roof, you’ll put in the hip rafters first (the diagonals from corners to ridge ends), then fill in with common rafters between ridge and beam, and jack rafters from hip to the beam. It’s a bit more advanced – many people follow specific plans for this to get the lengths right.Once rafters are up, your pavilion really takes shape – it has its roof profile. Take a step back and appreciate it!
- Apply Roof Decking or Purlins: Depending on roofing material, at this stage you add the surface that the final roof will attach to. If you are using asphalt shingles or wood shingles, you’ll need a solid roof deck – typically plywood or OSB sheathing nailed to the rafters. Cut and lay the sheathing panels, leaving a small gap (1/8″) between sheets for expansion. This sheathing will later be covered with felt and shingles (we’ll cover roofing in the next section). If using metal roofing or polycarbonate panels, often you don’t need full sheathing; instead, you attach horizontal purlins (strips of wood, like 1×4 or 2×4) across the rafters to screw the roofing panels onto. Check the roofing manufacturer’s instructions. For example, corrugated metal might need purlins spaced every 2 feet. Install those evenly from eave to ridge, making sure they are secure.If your pavilion design includes any overhangs or soffits, frame those as well – e.g., lookouts for gable end overhangs, sub-fascia boards on rafter tails, etc. You can also trim the rafter tails to a uniform length for a clean look along the eaves.
- Hardware and Final Framing Touches: Go through and install any remaining metal connectors you might have left out. Common ones:
- Hurricane ties at every rafter-to-beam connection (if not already done).
- Truss tie-downs at post-beam or post-truss points.
- Anchor bolts or hold-downs at post bases if your design or code calls for them (some areas require straps that tie the post down to the footing to resist uplift).
- If you have a ledger (in case one side of pavilion attaches to a house, though most are free-standing), ensure it’s lag bolted properly to the existing structure.
Essentially, double-check all structural connections. Make sure every critical joint has either a bolt, a structural screw, or a rated metal connector securing it. Remember, a pavilion has to handle wind trying to lift the roof up like a kite, so tie the roof to the beams (ties), beams to posts (brackets or bolts), and posts to ground (anchors).
- Inspect the Frame: Before adding roofing material, this is a good point to have an inspection if required. The inspector may want to see the framing and connections. They will verify proper assembly: are the correct size bolts used, is everything plumb and level, are there enough rafters, etc. Passing the structural inspection now means you can proceed to finish the roof and any other elements.
- Finishing Touches on Frame: After approval, you can add decorative touches or minor framing details. For instance, you might install trim boards to cover metal brackets or to dress up the beams. Some pavilion builders wrap posts with a nicer wood if they used treated lumber inside. If you plan to run wiring, now is easier to do it (before the roof is fully sealed up, run any conduit or drill holes as needed for lights or fans).
At this point, congratulations – the framing is complete! You have an erected pavilion structure. It should be solid when you push on it (no significant swaying). The hard part – the bones – is done. Now you can move on to the roofing and finishing stage, where your pavilion will really get its personality and function.
Before leaving the framing topic, a quick note on estimated costs and labor: Framing lumber costs will depend on the wood you chose (as discussed earlier) and the size of the pavilion. To give a rough idea, for a medium-sized pavilion (approx 12×16), you might spend a few hundred dollars on pressure-treated posts and beams, or several hundred on cedar. Hardware like brackets, bolts, screws can add another $100–$300 depending on how many and the type (those nice decorative black powder-coated brackets are handy but can be a bit pricey each). If you DIY, the labor cost is just your sweat. If you hire a carpenter for framing, expect labor to be a significant portion (professional pavilion builds often attribute 40% of cost to labor). But since this is a DIY guide, we assume you’re doing much yourself or with friends. Time-wise, setting posts and framing a pavilion can be done in a couple of days of work for a couple of people (not including concrete curing time). Give yourself time and don’t rush the measurements and level/plumb checks – precision in framing pays off with everything else fitting right.
Now, let’s cover the top of our pavilion – the roof. You have a sturdy frame ready to support it, so we’ll explore the design choices for roof shape, optimal slopes for weather, material options, and how to care for that roof so it lasts.
3. Roofing Shapes, Slopes, and Materials
The roof is arguably the most defining feature of your pavilion’s look and its ability to protect you from sun and rain. Pavilion roofs come in various shapes (styles), can be built at different slopes (pitches) to suit climate and aesthetic, and can be covered in a range of materials from traditional shingles to modern polycarbonate panels. In this section, we’ll break down those options:
- First, we’ll explore common roof shapes for pavilions – including gable, hip, flat, and more – and the pros/cons of each.
- Next, we’ll discuss roof slope and why it matters (steeper vs. flatter roofs in different environments).
- Then we’ll compare roofing materials like asphalt shingles, metal roofing, and polycarbonate, considering durability, cost, and maintenance for each.
- Finally, some maintenance tips to keep your pavilion’s lid in top shape year after year.
By understanding these elements, you can design a pavilion roof that is not only attractive but also long-lasting and appropriate for your weather conditions.
Roofing Shapes and Styles
1. Gable Roof: The gable roof is a classic peaked roof with two sloping sides meeting at a central ridge. If you had to draw “a house” as a kid, you probably drew a gable roof – it looks like an inverted V. On a pavilion, a gable roof will have an open triangular area at the front and back (which can be left open or filled with decorative trim or even an attic vent-style detail). Gable roofs are popular for pavilions because they complement many home styles and provide a good amount of vaulted ceiling space underneath. Structurally, they’re straightforward – essentially like framing two roof planes. This shape efficiently sheds water and snow.
Pros: Easy to design and build; excellent drainage; more airy feeling underneath due to the vault. You can customize the pitch to match your house or desired look. Ventilation is easy if needed (gable vents). Gables also allow for cathedral ceiling finishes if you choose (you can leave the rafters exposed for a rustic look or add a tongue-and-groove ceiling). Cons: Because gable ends are open, strong winds can exert pressure on them (make sure the frame has wind bracing). Also, a high-pitched gable will be taller than other roof types, which could be an issue if you have height restrictions or want to minimize blocking a view. Overall, gable roofs are timeless and probably the most common pavilion roof due to their simplicity and effectiveness.
2. Hip Roof: A hip roof has slopes on all four sides, so instead of vertical gable ends, the roof planes hip downwards to meet all around. Imagine a pyramid-like shape on a square pavilion, or a sort of clipped pyramid on a rectangle. All sides slope toward the center, typically meeting at a ridge or a single point for a square (called a pavilion roof or pyramid roof). A hip roof is known for being very sturdy and self-bracing. Because all sides angle down, the roof has no big flat faces catching wind – a hip roof is often recommended in hurricane-prone regions for this reason.
Pros: Great wind resistance (no high gable ends), and generally considered an elegant look (hips have a classic gazebo or pavilion aesthetic – think of a park pavilion with a hip roof). The eaves on all four sides provide shade in every direction and a more enclosure-like feel. Cons: Hipped roofs are a bit more complex to build – the geometry of hip rafters and the need for a more intricate framing (you have rafters meeting at 45° hips, etc.). They also typically provide a little less overhead clearance in the center compared to a gable of the same span and pitch (since the hip planes shorten the peak). If you want a high airy ceiling, a gable might give a bit more room at the peak than a hip. That said, a moderate pitch hip roof can still feel spacious. Design-wise, if your pavilion is attached or adjacent to a hip-roof house, matching that style can unify the look. Many homeowners choose hip roofs for their pavilions for the all-around coverage and cohesive appearance.
3. Flat or Nearly Flat Roof: A flat roof pavilion (often actually a low-slope roof) gives a modern, streamlined appearance. Truly flat roofs aren’t common for pavilions because you do want some drainage, but a roof with a very low pitch (e.g., 1/4:12 to 1:12) can appear flat. These are often built with a slight tilt to shed water off the back or side. Flat-roof pavilions might use materials like roofing membranes (EPDM) or continuous metal to prevent leaks, since shingles typically require a bigger slope. Pros: Modern aesthetic, simpler geometry for construction (basically a horizontal ceiling). A flat roof also keeps the profile of the pavilion low – good if you don’t want to obstruct views or if you have an HOA limiting heights. It can also be easier to attach things like lighting or fans on a flat ceiling. Cons: Not as effective at shedding rain and snow – you must ensure proper waterproofing. Flat roofs can collect leaves and debris, so they’ll require occasional cleaning. They also don’t vent heat as well naturally (heat can get trapped on a flat ceiling more than a high gable). In snowy climates, flat roofs are generally not recommended because snow can accumulate and overload them if not engineered for it. In dry or mild climates, or for temporary/seasonal pavilions, a flat roof can work fine. Often, what people call flat is actually a shed roof…
- Shed Roof: This is a single-slope roof plane, like a flat roof but tilted. Imagine a lean-to style – high on one side, slanting down to the other. It’s essentially half a gable. Shed roofs on pavilions might be used when attaching to a house or when you want a very simple structure. One side of the pavilion is taller (perhaps attached to the house wall), and the roof slopes down away from the house. Or in a free-standing case, it’s just a sloping roof with two posts taller than the opposite two. Pros: Easiest roof to build (all rafters the same size, just set them across the span). Good for sun angle if you want one side open higher. Cons: Asymmetrical look (which can be a pro for modern designs). Also, if free-standing, a shed roof will direct all water runoff to one side, which you must manage to avoid flooding that side. In terms of styles, shed roofs are less common for standalone pavilions but very common for attached patio covers.
4. Other Roof Styles: There are some less common but notable mentions:
- Gambrel Roof: The barn-style roof with a break in the slope (two different pitches on each side). Unusual for pavilions, but if you’re going for a barn or country look, a gambrel pavilion could mirror that style. It offers more headroom (loft-like) due to its steep lower slope. However, it’s complex to build and probably overkill for most pavilions.
- Octagonal / Gazebo Roof: If you’re building a fancy gazebo-style pavilion (many sides), you may have an octagon or hexagon roof that is a series of hip rafters meeting at a central point (a pavilion roof sometimes called). These are essentially hip roofs on a polygon base. They are decorative and often have a cupola on top. Pre-fab kits exist for these because the angles are tricky.
- Pergola Hybrid (Lattice Roof): Some homeowners refer to pergolas (open lattice roof) as pavilions, but typically a pavilion implies a solid roof. However, you could design a pavilion frame and initially build it with spaced slats (pergola style) for partial shade and later add panels on top for rain protection if desired. This isn’t a shape per se, but a note that you can have an open-top pavilion (pergola) if permits allow (sometimes no permit needed if it’s truly open). This guide focuses on solid roofs, though.
When choosing the roof shape, consider your home’s architecture and the intended use. If your house has a gable roof, a gable pavilion may look harmonious. If your landscaping has a Japanese or contemporary vibe, a hip or flat roof might blend better. Also consider the sun: a hip roof casts shade in more directions (since it has eaves all around) which can be nice if the sun shifts around your pavilion. A gable roof will cast two primary shade areas (to the sides of the gable) with more sun coming in the gable ends in morning/evening. You might orient a gable so the broad shade falls where you want it at peak sun.
Lastly, think of ceiling options. A gable or hip roof gives you the opportunity for a finished ceiling under the roof – some people install tongue-and-groove wood paneling on the underside of rafters for a polished look. A flat roof pavilion might essentially have an exposed flat ceiling which you could sheath as well. If you want to hang a fan or chandelier, a centrally peaked roof (gable/hip) makes that a focal point, whereas with a flat or shed roof you might just hang it from one of the beams.
In summary, gable roofs are very popular for their familiar shape and ease, hip roofs are favored for their strength and all-around coverage, flat/shed roofs lend modern simplicity (best in milder climates), and specialized shapes can create unique aesthetics but with added complexity. Whichever shape you choose, ensure your frame is designed to support it and that it complements your overall goals for the pavilion.
Slope Considerations for Climate
The slope (pitch) of your pavilion’s roof isn’t just an aesthetic choice – it significantly affects how the roof performs in different weather conditions. Slope is typically expressed as a ratio of rise/run (e.g., 4:12 means 4 inches of rise per 12 inches of horizontal run) or in degrees. Let’s look at how to choose an appropriate slope:
- Rain and Drainage: At a minimum, any roof needs some slope to shed rainwater. If water sits, you risk leaks or material deterioration. Asphalt shingles, for instance, generally require at least about 2:12 pitch (with special underlayment) and ideally 4:12 or greater for optimal performance. Metal roofing can go quite low slope (even 1:12 or less for some standing seam systems) because it’s essentially waterproof sheets with sealed seams. Polycarbonate panels usually need a modest slope (say 3:12) to ensure water runs off and doesn’t find its way through overlaps. In heavy rain areas, a steeper roof quickly funnels water off into gutters or the ground. A low-slope roof might overflow or cause water to splash around the pavilion edges if not managed. Key point: If you live where torrential downpours occur, avoid an ultra-flat roof unless you have a great drainage plan.
- Snow Load: If you’re in a snowy winter climate, roof slope is critical. Steeper roofs shed snow more easily (snow will slide off once it melts a bit or if the slope is steep enough that gravity overcomes friction). Flatter roofs accumulate snow, meaning the roof must bear the weight until it melts or you remove it. Snow can be very heavy – and wet snow even more so. Generally, a pitch of 6:12 (about 26.5°) or greater is considered good for snow shedding; some recommend at least 4:12 (~18°) in moderate snow areas. For example, a 4:12 roof has enough angle that snow may slide off once it starts to melt, reducing load. In very heavy snow zones (think mountain cabins), you often see A-frame style steep roofs (12:12 or more) so snow doesn’t pile deeply. However, extremely steep roofs can cause snow to avalanche off in big sheets, which is a safety concern if people or property are below. One guide noted not to exceed about 6:12 to avoid dangerous snow slides in certain metal roof cases. As a pavilion is open underneath, you don’t have to worry about attic space, but you should design for the possibility of snow weight sitting there. If you go with a low slope in snow country, you must beef up the structure to carry the load and be prepared to broom off snow buildup. But ideally, just pitch it steeper. Also, consider metal roofing in snow country – snow slides off metal easier than off rough shingles. You might incorporate snow guards (small brackets on roof) if using metal, to control the release of snow so it doesn’t all dump at once.
- Wind: Wind interacts with roof slope differently. A very steep roof presents more surface for wind to push against (like a sail), but a very flat roof can potentially get uplift under it if wind angles upward. In general, hip roofs (moderate slope) are considered very wind-resilient because wind tends to slide up and over them, rather than catching a flat edge. Gable roofs with steep pitches can experience strong uplift at the eaves and pressure on the gable ends. For a pavilion, which is open-sided, wind can blow up into it. If you live in a hurricane-prone area or tornado zone, you might not want an overly steep roof that catches wind like a kite. Instead, a lower profile hip roof or a gable of moderate pitch (like 4:12 to 6:12) might be safer. Ensure all connections (rafters to beams, etc.) have hurricane straps as mentioned. Fun fact: Some coastal construction codes favor hip roofs with about 30° slope for optimal wind performance – not too flat to be lifted, not too steep to catch too much force. For most, just focus on tying the roof down well, whatever the slope.
- Sun and Shade: The slope also affects how much sun comes in under the pavilion at certain times. A lower slope roof is flatter, so it might provide slightly less overhead shade during low sun angles (morning/evening) because the sun can peek under. A steeper roof blocks more of the high-angle midday sun on its underside (which is usually good – more shade). If you angle a shed roof, think about where the high side is – a shed roof sloping down west will block the setting sun better, etc. Also, if you intend to maybe put solar panels on your pavilion roof, you’d want a slope that’s appropriate for your latitude (just a niche thought).
- Headroom and Style: Beyond climate, slope contributes to the pavilion’s feel. A 12:12 pitch gable will make a tall pointy pavilion (perhaps echoing a chalet or churchy vibe). A 3:12 is much shallower, giving a low-profile look. Many pavilion designs opt for something in between, like 6:12 or 8:12, which often looks in proportion and provides a nice height without being extreme. Some kit companies default to around 6:12 for a balanced look. If you have a second-story window or view behind the pavilion, a lower pitch might avoid blocking it as much. If not, a higher pitch can make the pavilion feel more spacious.
Local Codes: Check if your locality has a minimum roof pitch for the roofing material. Example: Some areas might not allow shingles on roofs below 2:12 pitch because of leak concerns. Also, the International Building Code has guidelines for designing for snow vs. slope, etc. If you pulled a permit, the inspectors may already have evaluated your plans for appropriate loading.
Bottom line: In rainy areas, ensure enough slope for quick runoff (and use gutters or proper drip edges to handle the water). In snowy areas, lean towards steeper slopes (and strong framing). In high-wind areas, consider a hip or not overly steep gable and secure it well. For fair climates, you have more freedom to choose purely on looks and headroom. Most pavilion builders find a happy medium around 4:12 to 8:12 pitch which performs well in typical conditions.
One more note on slope: Human comfort. A steep roof creates a taller space which can allow hot air to rise above you, potentially making it cooler underneath on a hot day (especially if ventilated). A flat roof traps heat lower. If you plan to add a ceiling fan, a steeper roof gives that fan room to hang high and circulate air without being in your face. Minor considerations, but worth thinking about if your climate is hot and you want cooling effect.
Comparing Roofing Materials
Your pavilion’s roofing material is its first line of defense against weather. It also significantly impacts the look and maintenance needs of the structure. Here are the popular options, along with their pros, cons, and approximate considerations for cost and upkeep:
1. Asphalt Shingles: These are the same shingles used on many homes – composed of fiberglass/asphalt base with mineral granules. They are a tried-and-true, cost-effective roofing for pavilions too. Shingles come in many colors to match your house or environment, and they provide a classic look.
- Pros: Durable and water-resistant (when properly installed on sufficient slope). They typically last 20-30 years. Shingles are relatively inexpensive compared to other materials. They’re also easy to install for a DIYer (you nail them overlapping, working upward). Many styles (architectural shingles, etc.) can even mimic wood shakes or slate at a fraction of the cost.
- Cons: Shingles are a bit heavy, which your pavilion frame should be designed to support (usually not a problem for a small structure, but the weight is something to note – e.g., ~3 lbs per sq ft). They require a solid deck underneath and roofing felt or underlayment, adding to labor and material steps. In high winds, shingles can blow off if not sealed properly. Also, they’re not the most eco-friendly option (made of petroleum products). Maintenance-wise, you might need to replace a damaged shingle occasionally, and they can grow moss in damp shady conditions (so plan on cleaning them every few years or installing zinc strips to inhibit moss). But overall, maintenance is low – just inspect yearly and remove debris. If a tree limb falls on them, you might have to replace a section, but that’s easier than many materials. Cost: Asphalt shingles are usually the cheapest roofing material. For a pavilion, the cost of shingles for, say, a 200 sq ft roof (2 squares) might be on the order of $100-200 in materials, plus plywood sheathing if needed. Very budget-friendly. They are a great choice if you want to match your house roof or keep costs down while still having reliable protection.
2. Metal Roofing: Metal panels (like corrugated steel, aluminum, or standing seam metal) are another excellent choice. Many backyard pavilions feature metal roofs because of their durability and distinctive look (think rustic barn or modern pavilion).
- Pros: Lightweight and long-lasting. Metal roofs can easily last 30-50+ years with minimal maintenance, and they handle weather superbly. They are excellent in heavy rain and snow – metal’s slick surface sheds water and snow quickly. In fact, in snowy areas, a metal roof often lets snow slide right off once it begins to melt, reducing load (just be cautious about falling snow dumps). They are also fire-resistant (won’t burn, an advantage if you’ll have a grill or firepit nearby throwing embers). Metal reflects a lot of sunlight, which can help keep the area underneath cooler in summer (some metal roofing is even treated as “cool roof” to reflect heat). There are many styles: classic wavy corrugated panels, ribbed panels, or higher-end standing seam (the sleek vertical seams used on modern homes). You can also get them in various colors/coatings. Installation on a pavilion is manageable – usually screwing panels into purlins or the deck. No heavy lifting of shingles bundles. A big pro is low maintenance: aside from occasionally checking screw tightness and maybe hosing off debris, metal roofs are mostly hands-off. They also pair well with a rustic or contemporary aesthetic.
- Cons: The main complaint about metal roofs is they can be noisy in rain or hail. Under a pavilion, this could either be charming (the pitter-patter of rain on a metal roof while you stay dry underneath) or a bit loud for conversation – it depends on your sensitivity. If installed over an open frame, there’s no insulation to dampen sound, so it will be noticeable. Another con: metal can dent if something heavy hits it (like big hail or a falling branch). Minor dents won’t typically affect function, just appearance. Also, over many years the finish can fade or, if scratched down to metal, can rust (for steel) – so you might need to periodically touch up paint on scratches to prevent corrosion. Using galvanized and then painted metal mitigates rust greatly. In seaside environments, salt can corrode some metals, so aluminum or special coatings might be preferable there. Cost: Metal roofing costs more upfront than shingles generally. For a small pavilion, corrugated steel panels might cost a few hundred dollars. The ralphsway comparison indicated galvanized steel roofing runs around $1–$3 per square foot, making a 10×12 roof about $120-$300 in materials – quite affordable. Premium standing seam could be more. Also factor in screws/fasteners and any ridge caps or trim pieces. Despite higher upfront cost, the longevity often makes metal a better long-term value (you likely won’t have to replace it in your lifetime). So if budget allows, metal is a fantastic, worry-free choice for many homeowners.
Additionally, metal roofs often look really nice on pavilions – giving that distinctive shine or color pop. A green or red metal roof, for instance, can become a focal point of your yard. Or a black metal roof can lend a modern look.
3. Polycarbonate Panels: Polycarbonate roofing panels are a type of plastic panel often used for patio covers, sunrooms, or gazebos. They can be clear, tinted, or opaque. Brands like Tuftex or Suntuf make corrugated polycarbonate panels that install similar to metal roofing. Polycarbonate is essentially a tough plastic that is UV resistant and can be transparent or translucent, which is a unique advantage if you want to let light through your pavilion roof.
- Pros: Lets light in. A clear or translucent polycarbonate roof will provide rain protection while still allowing sunlight to filter through, keeping the space bright. This is great if you don’t want to darken an area or if you have plants under the pavilion that need light. Polycarbonate is also virtually unbreakable by impacts – it’s often touted as 200-250 times stronger than glass, meaning it won’t shatter from hail or an errant baseball. It’s lighter than metal and easier to cut (you can use a fine blade on a circular saw to cut panels). It’s immune to rust and won’t rot. Good quality panels have UV coatings so they won’t yellow or get brittle over time (most come with 10+ year warranties against yellowing. Installation is DIY-friendly: you screw them down with special washer screws. Another pro: polycarbonate doesn’t get as hot to the touch as metal can under sun, and it provides some insulation (twin-wall polycarbonate panels can even trap air and reduce heat).
- Cons: While durable, polycarbonate can scratch easier than metal, and over many years the UV sun can degrade lesser-quality panels (they might discolor or lose transparency beyond their warranty period). They also expand and contract more with temperature changes, so you need to follow installation guidelines (oval holes for screws, etc.) to avoid buckling. Compared to a solid opaque roof, clear panels won’t provide as much shade (unless you get them tinted bronze or smoke color, which cuts some light). So on a hot summer day, sitting under a clear polycarbonate roof is a bit like being in a greenhouse – you’re protected from direct sun, but it’s still very bright and can be warm since infrared can come through. Some solutions: choose a tinted panel or one with reflective coating, or plan to add a fabric shade under it if needed on very sunny days. Noise-wise, polycarbonate roofs will also drum in heavy rain (some say it’s between shingle and metal noise levels).
Cost: Polycarbonate panels are typically more expensive than basic metal roofing, but they offer features metal doesn’t (transparency). Ralph’s Way comparison notes polycarbonate for a 10×12 might cost about $600-$800, versus $120-$300 for steel on the same size. That suggests polycarbonate panels cost roughly $5-$7 per square foot installed, which sounds about right for quality panels. So you pay a premium for that clear roof effect. However, because they last a long time and often come in kit forms, many find the cost worth it for the ambiance.
If you want a skylight effect or to enjoy star-gazing from under your pavilion at night, polycarbonate is the way to go. Just be sure to get exterior-grade panels (polycarbonate, not cheaper PVC panels which can crack in cold).
4. Wood Shingles or Shakes: For a truly rustic or traditional look, you could roof your pavilion with wood shingles or shakes (typically cedar). This would match, say, a log cabin aesthetic or a natural garden vibe. Wood shakes are thicker, rougher splits; shingles are sawn and more uniform.
- Pros: Beautiful natural appearance, with a rich texture and color that ages to a silvery gray. They have decent insulation properties and allow the roof to “breathe”. If your home has wood shake roofing, doing the pavilion to match can create a cohesive look. Wood shingles are also fairly light and a good cedar shake can last 20-30 years if maintained.
- Cons: High maintenance relative to other options. Wood is prone to rot and fire. You’d likely need to treat the shakes with preservative and possibly fire retardant (some jurisdictions won’t allow wood roofs due to fire codes, or only allow if treated). They also can attract moss or algae in damp climates. Expect to have to clean them and retreat them every few years to ensure longevity. Installation is more labor-intensive than asphalt shingles (lots of individual pieces to nail). Cost is higher too – wood roofing is usually considered a premium material. And as the foreverarchitect article noted, wood shingles might not be the best in very wet climates unless treated, since they can rot or decay if not maintained. They are also not great in high-fire areas or very windy areas (they can lift or blow off if not secured well). For a small pavilion, however, the quantity needed is small, so if you love the look, it could be done without breaking the bank.
5. Clay or Concrete Tile: Some upscale gazebos or pavilions, especially in Mediterranean or Southwestern style homes, might use clay tiles (the curved terracotta tiles) or concrete tiles to match the house. These are extremely durable and beautiful.
- Pros: Very long lifespan (50+ years), fireproof, and they add an elegant, substantial look. If your house has a tile roof, doing the pavilion in the same tile will integrate it perfectly. Tiles also keep the area cooler underneath by blocking heat effectively and often venting under the gaps.
- Cons: Heavy! Clay or concrete tiles are one of the heaviest roofing materials. Your pavilion must be engineered for that weight – often not practical for a lightly built structure. The weight can be 800-1000+ lbs per square (100 sq ft). Compare that to 200-300 lbs for shingles. So you’d need more posts or beefier beams potentially. Also, tiles are expensive and labor to install is high since each piece is placed and sometimes nailed/clipped. They can break if something hits them (like a falling branch or someone walking on them improperly). If you love this look, consider using synthetic composite tiles or something lighter on a pavilion.
For most homeowners, the decision often comes down to shingles vs metal vs polycarbonate, as those are most practical. To help decide:
- If you want maximum shade and a traditional look, go with asphalt shingles (match them to your house roof for consistency). They’re cost-effective and do the job well. Just keep the slope >= recommended minimum and check them occasionally for moss or damage. They will need replacement eventually, but that’s decades away.
- If you want ultimate longevity and low maintenance, and perhaps a more modern or rustic look, metal roofing is fantastic. Especially in climates with heavy rain or snow, metal shines (and literally, it can shine – so consider potential glare if you have neighbors or upper windows looking down on it). Noise can be managed if you add an insulating layer or use textured metal, but usually for a pavilion it’s fine.
- If you want light transmission – e.g., you don’t want to darken your patio or you like the open feeling of a pergola but need rain protection – polycarbonate panels give you the best of both worlds (light + shelter). Just choose a good quality panel and be prepared for some greenhouse effect on hot days (maybe incorporate roll-down shades or a climbing vine on one side to cool things if needed).
Maintenance Tips for Each:
- Shingle roof maintenance: Keep it clear of leaves and debris (a blower or broom in the fall). Watch for any shingles that curl or lose granules – replace if needed. Keep an eye out for moss in shady damp areas; if it grows, gently remove it and consider a zinc strip at the ridge to inhibit growth. Every few years, it might benefit from a gentle roof cleaning solution (oxygen bleach based) if algae stains appear.
- Metal roof maintenance: Not much is needed. Ensure the screws remain tight (thermal movement can sometimes loosen them over many years). If the screws have neoprene washers, those can degrade after ~15-20 years; you might replace screws if you ever notice leaks at fasteners. Inspect the paint/coating – if you see scratches down to metal, touch them up with matching metal paint to prevent rust. Keep the panels clean by hosing off dirt occasionally (this also preserves their appearance). Check that sealant at overlaps or flashing is intact.
- Polycarbonate maintenance: Gently wash the panels with a soft cloth or sponge and mild soapy water as needed (never use abrasive cleaners as they can scratch). Don’t use solvents or harsh chemicals either. Clear panels can accumulate dust or get a film – cleaning restores clarity. If panels are clear, you might occasionally see condensation inside twin-wall types – ensure the end caps or tapes are secure to keep moisture out. Also, check rubber gaskets or closure strips if used; replace if they deteriorate to maintain waterproof sealing. Polycarbonate is very impact-resistant, but if you ever did manage to crack a panel, it’s usually easy to swap out just that panel with a new one by unscrewing it.
- Wood shake maintenance: Inspect yearly. Remove any debris in the crevices. Consider power-washing moss off very carefully (too much pressure damages wood). Apply wood preservatives or stain every few years to extend life. Ensure none have split badly or blown off – replace those promptly. Also check the flashings (wood roofs rely on flashings at ridges and hips to keep watertight).
- Tile maintenance: Little is needed besides inspecting for cracked tiles and replacing them. Also, ensure the underlayment (roof felt) beneath is intact if you ever do lift a tile.
No matter the material, also maintain the supporting structure: clear out gutters if you added them, and trim overhanging branches that could fall or drop lots of leaves on the roof.
One more consideration: Cost vs Longevity:
- Asphalt shingles: low cost, medium longevity.
- Metal: medium cost, high longevity.
- Polycarbonate: medium-high cost, medium-high longevity (good ones last long but maybe not as long as metal).
- Cedar shakes: high cost, medium longevity (without maintenance can degrade faster).
- Tile: high cost, high longevity.
For an “evergreen” (long-lasting) pavilion, metal is great. But each can be the right choice depending on priorities.
Finally, think about the visual appeal. If possible, look at pictures of pavilions with each roofing to see what you like. Aesthetics are subjective – some love the shiny metal, others want the roof to blend into the garden. For instance, green metal roofing can blend nicely with trees, whereas cedar shingles blend into a wooded setting in a natural way. Clear polycarbonate is almost invisible, making the pavilion feel more open.
Bringing It All Together
To wrap up the guide: building an outdoor pavilion is a project that combines creativity with structural know-how. By understanding the permit requirements, you ensure your pavilion is legal and safe, avoiding costly mistakes. Using solid framing techniques, you create a sturdy backbone – whether you opt for handy metal connectors or showcase craftsmanship with wood joinery, the goal is a frame that stands firm against wind and time. And by selecting the right roof shape, slope, and material, you tailor your pavilion to your climate and style – be it a charming gable with shingles that matches your home, a hip roof with sleek metal sheltering you through any storm, or a modern clear canopy letting the sun through.
Estimated Costs Recap: A basic DIY pavilion might cost a few thousand dollars in materials: pressure-treated lumber framing could be on the order of $1,000 (varies with size and wood prices), hardware maybe a few hundred, roofing a few hundred more. Using cedar could double some of the lumber cost. Still, compared to hiring a contractor (which could easily run $5k-$15k+ depending on size and design), doing it yourself with careful planning can be economical. Permits might add a bit (<$200 typically), but they’re worth every penny for peace of mind. Always budget a contingency for unexpected needs (extra lumber, more brackets, etc.).
Avoiding Pitfalls: Common mistakes to avoid include not digging deep enough footings (leading to wobbling or frost heave issues), underestimating the importance of diagonal bracing (leading to a shaky structure), skipping the permit (potential legal trouble and insurance issues), and using improper fasteners (like non-galvanized nails on pressure-treated wood, which will corrode and weaken joints). We’ve touched on all these – so follow the tips and you’ll steer clear of trouble. Another pitfall: trying to do heavy lifting alone. Pavilions have some bulky components; get a helper for setting beams or rafters to stay safe.
Maintenance Overview: Once built, your pavilion will mostly need just occasional cleaning and resealing of wood (if not using composite or vinyl materials). Check the structure each spring and fall: tighten any bolts that have loosened, look for any wood rot starting (especially at post bases or where screws enter wood – treat or repair early), and check the roof for any issues as we described. A pavilion is fairly low-maintenance, but a yearly once-over keeps it in top shape.
With all these considerations addressed, you’re well-equipped to build an outdoor pavilion that will be an enjoyable gathering spot and an asset to your home. From family barbecues under its roof to quiet mornings with a cup of coffee listening to rain patter above, your pavilion will provide countless moments of pleasure. By investing time in planning (permits, design, materials) and care in construction (solid framing, quality roofing), you ensure those moments are safe and worry-free. See all my Pavilion Plans HERE.
1. Start here. Woodworking 101
3. The Ultimate Outdoor Pavilion Guide – Permits, Framing, and Roofing
4. The Ultimate Shed Building Guide – Permits, Framing, and Roofing
5. DIY Chicken Coop and Raising Chickens: A Comprehensive Guide