This step by step woodworking project is about free picnic table plans. A picnic table is a quick project and the classic shape makes it ideal for any backyard. This project is ideal next to a bbq or on a large grassed area. Before starting the construction project, we recommend you to choose the design and the materials that suit your needs and tastes. Redwood, cedar or pine are great choices, as they are both durable and have a nice natural finish.
This project features a simple picnic table built out of 2×4 and 2×6 lumber. Set the 4×4 or 6×6 post into concrete at least 24″, if you want to get the job done in a professional manner. Work with attention and with great care, making sure you follow the instructions described in this article and use professional tools. Don’t forget to check out the related projects, as to find out more about octagon or traditional picnic tables.
Projects made from these plans
It’s that simple to build a picnic table!
Free Picnic Table
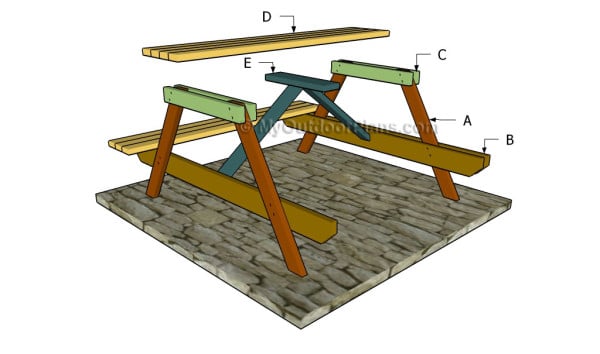
Building a picnic table
Cut & Shopping Lists
- A – 4 pieces of 2×4 lumber – 40” long LEGS
- B – 4 pieces of 2×6 lumber – 76″ long SUPPORT
- C – 4 pieces of 2×4 lumber – 29″ long SUPPORT
- D – 14 pieces of 2×4 lumber – 72″ SLATS
- E – 1 piece of 2×4 lumber – 22″ long, 2 pieces of 1×4 lumber – 33 3/4″ long BRACES
- 4 pieces of 2×4 lumber – 8 ft
- 8 pieces of 2×4 lumber – 12 ft
- 2 pieces of 2×6 lumber – 12 ft
- 1 piece of 1×4 lumber – 8 ft
- 2 1/2″ screws
- 2″ brad nails
- wood glue, stain/paint
- wood filler
Tools
![]() Hammer, Tape measure, Framing square
Hammer, Tape measure, Framing square
![]() Miter saw, Drill machinery, Screwdriver, Sander, Post-hole digger
Miter saw, Drill machinery, Screwdriver, Sander, Post-hole digger
Time
![]() One weekend
One weekend
Related
Building a picnic table
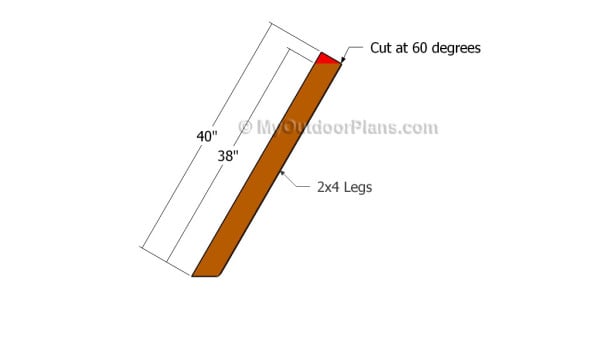
Building the legs
The first step of the project is to build the legs for the picnic table. In order to get the job done in a professional manner, we recommend you to cut both ends of the legs at 60 degrees. Smooth the edges with sandpaper and remove the residues before fitting the supports. Take accurate measurements before making the cuts.
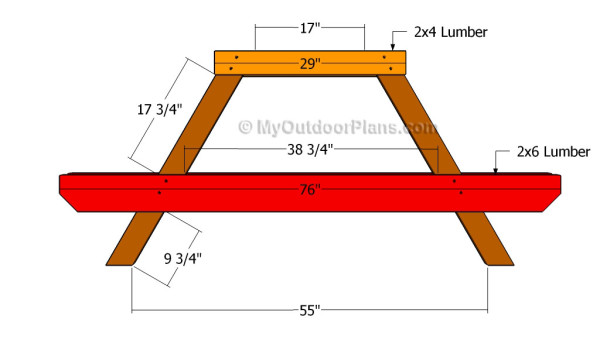
Attaching the braces
The next step of the woodworking project is to attach the bench supports to the legs, as well as the tabletop supports. Drill pilot holes through the supports and secure them to the legs by inserting two 4″ carriage bolts.
Make sure the supports are perfectly horizontal before inserting the bolts. Proceed in the same manner when installing the supports for the tabletop. Leave no gaps between the supports and create rigid joints.
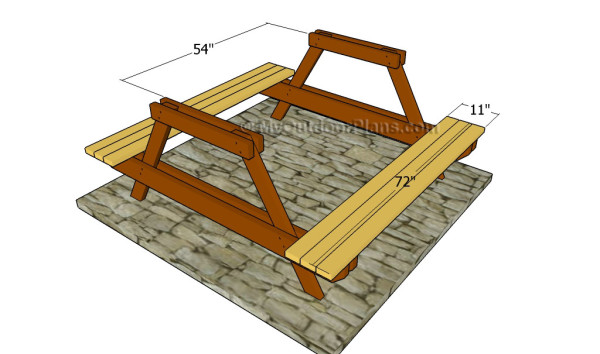
Attaching the seat slats
Continue the woodworking project by fitting the 2×4 slats to the frame of the table, as described in the diagram. Drill pilot holes through the slats before inserting the screws, to prevent the wood from splitting.
Attaching the tabletop
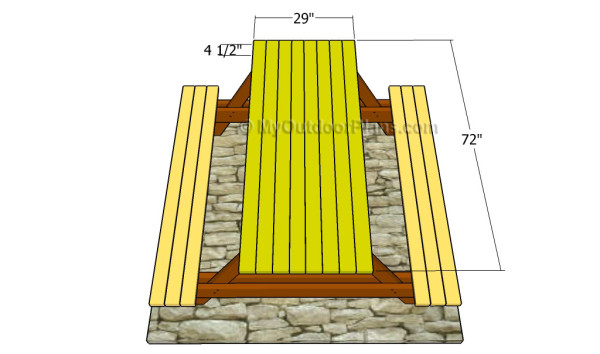
Continue the woodworking project by attaching the 2×4 slats to the top of the picnic table. Drill pilot holes through the slats and insert 2 1/2″ screws into the frame of the picnic table. Leave about 1/8″ between the slats, making sure you create even gaps.

Fitting the braces
In order to enhance the rigidity of the picnic table, we recommend you to attach braces to the structure. As you can easily notice in the plans, we recommend you to cut the supports at the right sizes and angles, before locking them into place using 1 1/4″ screws. Pre-drill the components, to prevent the wood from splitting.
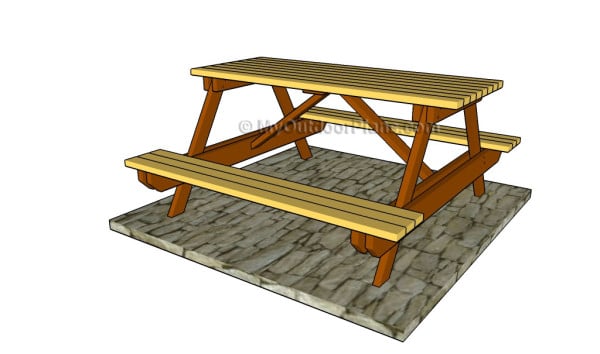
Picnic table plans
Last but not least, you have to take care of the finishing touches. Therefore, fill the holes and the cracks with wood filler and let it dry out for several hours, before sanding the surface with 120-grit sandpaper.
Top Tip: Protect the wooden components from rot by applying several coats of paint. Choose colors that match the design of the rest of your property, as to enhance the look of the picnic table table.
This woodworking project was about free picnic table plans. If you want to see more outdoor plans, we recommend you to check out the rest of our step by step projects.


4 comments
There are two free picnic table plans on the site, I’m trying to decide which one to make. Does one have benefits over the other? One has the 2 X 6 for top and seat but the other one uses 2 X 6 for the supports.
Thanks
Hi, Bren. I would personally go with these plans, as they are more detailed and the 2×6 bench supports add more strength to the project.
I am making this table but the distance from the bench to the table seems way too high. I lowered the top about 2 inches which is all the wiggle room I had after cutting all the pieces and it still seems a bit high. I re-measured everything and it is exactly the same as the plan. I’m not sure if anyone else had this issue? I am thinking about using 1X6 for the table top to save another inch of height but I will be giving up a lot of strength if I do.
Have you considered raising the bench supports as well, for a few inches? I don’t recommend you using 3/4″ thick lumber for the top.