1. Start here. Woodworking 101
3. The Ultimate Outdoor Pavilion Guide – Permits, Framing, and Roofing
4. The Ultimate Shed Building Guide – Permits, Framing, and Roofing
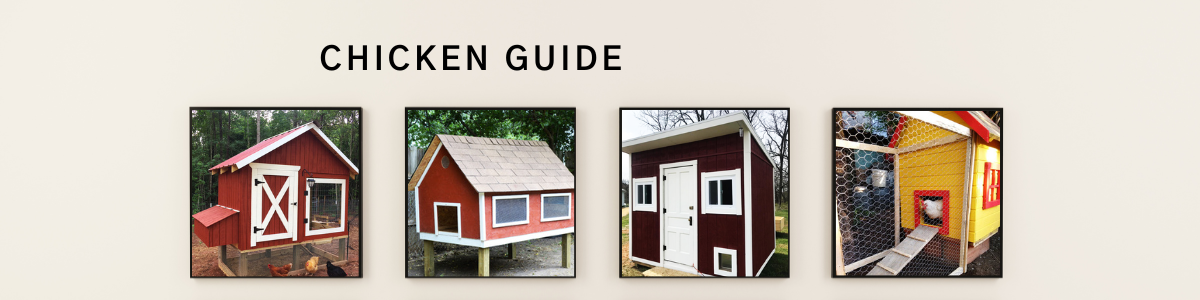
5. DIY Chicken Coops and Raising Chickens: A Comprehensive Guide
6. Building a Greenhouse in the USA: A Beginner’s Guide
This comprehensive guide is about chicken coops and raising chickens. Raising backyard chickens is more than a hobby – it’s a rewarding journey that combines DIY creativity with the joys of caring for a flock. In this guide, we’ll walk through everything from building the perfect coop to daily chicken care. Whether you’re a seasoned DIYer or just starting out, you’ll find practical tips and a bit of inspiration. Let’s get started on building a better home for your hens – yes we can!
Types of Chicken Coops
Chicken coops come in all shapes and sizes. The best design for you depends on your space, budget, and flock size. Here are some popular coop types and their characteristics:
A-Frame Coop
A-frame coops feature a simple triangular structure that’s affordable and beginner-friendly. The sloped “A” shape uses minimal materials, keeping costs low (often $250–$500 for DIY material. These lightweight coops typically house small flocks (2–5 chickens) and often have an open floor or low enclosure that lets hens roam on grass. An A-frame usually includes an enclosed roosting box at the peak and wire sides forming a small run underneath. Keep in mind that A-frames have limited headroom – great for chickens, but you’ll crouch or work from outside when cleaning. Ventilation can also be a challenge in the narrow spa, so be sure to incorporate vents or screens at the ends. Despite their quirks, A-frame coops are beloved for their stability and portability, making it easy to reposition your coop if needed.
Walk-In Coops
Walk-in coops are larger, shed-style structures that you can enter upright, ideal for medium to large flocks. They typically look like mini barns or garden sheds with a door for the keeper and possibly a smaller chicken door. Because of their size and sturdiness, walk-in coops cost more – roughly $700–$1,500 to build (or purchase prefab, not including attached ru – but they offer big advantages. You get plenty of space for features like multiple roosts, nesting boxes, and storage, and cleaning is as simple as walking in with a rake. Walk-in coops are often 6–8 feet tall at the peak and can be built to whatever footprint fits your flock (common sizes range from 4×8 feet up to 10×20+ feet for very large flocks). For example, an 8×12 ft coop with an attached 8×12 run is roomy enough for about 6 to 9 chickens in comfort. Even larger setups exist – one popular plan is a 20×9 ft walk-in coop+run combo that can accommodate a dozen hens. The general guideline is to provide roughly 3–4 sq ft of coop space per chicken (if they also have an outdoor run. Walk-in designs excel at providing this space: a 8×10 ft (80 sq ft) coop, for instance, could house ~20 hens, and a 10×12 ft (120 sq ft) coop around 30 hens, given adequate outdoor run space for day. Walk-in coops also allow for excellent ventilation (with windows and vents up high) and strong predator protection, since you can use solid construction and heavy-duty latches on a full-size door.
Mobile Chicken Tractors
Chicken tractors are portable coops on wheels or skids, designed to be moved frequently to fresh grass. They’re essentially a coop and run in one mobile unit. A small DIY tractor for a few hens can cost about $300–$700 to build. These are great for 2–6 chickens (small flocks) and excel at giving your birds access to fresh pasture daily – you simply tug the tractor to a new patch of lawn, and the hens get to forage new grass and bugs while fertilizing your yard. Tractors often have an A-frame or rectangular frame with an enclosed sleeping area and a wire mesh run. Many feature wheels or handles for easier moving. The coop in the image above, for example, is an A-frame tractor light enough for one person to drag to a new spot each day. Mobile coops help prevent manure buildup (since you’re spreading the love around the yard) and reduce wear on any one patch of ground. However, because tractors must be lightweight, they tend to be smaller and not walk-in – you’ll access the interior by opening panels or lids. This means limited space: plan on about 2–4 sq ft per chicken in the tractor coop plus run, since the hens won’t have a separate roaming yard. Also be mindful of weather exposure – many tractors are only partially sheltered, so you may need to provide extra shade or windbreaks depending on your climate. Despite these trade-offs, tractor coops are a favorite for sustainable, rotational grazing of backyard chickens.
Other Coop Styles
Not every coop fits neatly into a category. You might consider “all-in-one” coops, repurposed structures, or custom designs:
- All-in-One (Prefab Kits): These are ready-made coop kits (often with an attached run) that you assemble. They come in many styles – from small barn-shaped coops to craftsman cottages for chickens. The convenience is high, but so is the price: a quality all-in-one coop for a handful of hens often starts around $800 and can reach $3,000+ for larger, luxury mode. Still, they include all essential features and save you time on building. Just be sure to pick a size advertised for more chickens than you plan to have (manufacturers often underestimate how much space birds need).
- Converted Sheds or Playhouses: If you have an existing small shed, playhouse, or even a large doghouse, you can convert it into a chicken coop by adding roosts, nesting boxes, and ventilation. This is a cost-effective way to get a walk-in coop. An 8×10 ft garden shed, for instance, could become a coop for 15–20 chickens with minimal modification. Ensure the structure is predator-proof (add wire mesh to windows, etc.) and easy to clean (a drop floor or removable litter trays can help).
- Lean-To or Tractor Coop Hybrids: Some designs attach a small coop house to a larger fenced enclosure, or use a lean-to style roof against an existing wall. Others are multi-level coops with ramps inside. As long as you meet the space, ventilation, and predator-proofing needs, feel free to get creative to match your backyard aesthetics or reuse materials.
Coop Size by Flock (Approximate): It’s crucial to give your chickens enough room. Overcrowding can lead to stress and health issues. Here’s a quick guide to coop floor space needed (not including runs), based on the typical 4 sq ft per chicken run:
- 1–3 chickens: ~4–12 sq ft coop (e.g. 3×4 ft for 3 bantams). Note: Chickens are social creatures – plan for at least two so they aren’t lonely!
- 4–6 chickens: ~16–24 sq ft (e.g. 4×6 ft coop).
- 10 chickens: ~40 sq ft (e.g. 5×8 ft).
- 20 chickens: ~80 sq ft (e.g. 8×10 ft).
- 30 chickens: ~120 sq ft (e.g. 10×12 ft).
These sizes assume your flock also has an outdoor run or free-range time. If chickens will be confined indoors all the time (no run), they’ll need much more space – 8–10 sq ft to stay healthy. Always err on the side of more room if you can; your chickens (and your nose when you clean the coop) will thank you!
Building Costs and Permits
Building a coop can be as thrifty or fancy as you want. Likewise, keeping chickens may be subject to local laws. Let’s break down the costs and the red tape:
Cost Considerations: Building a basic coop is not terribly expensive, but costs can add up depending on design and materials. On average, a DIY coop project ranges from about $300 up to $2,000, with a national average around $650 for a medium-sized. Here are factors that influence cost:
- Size & Design: Larger coops need more lumber, roofing, and hardware. Simple designs like A-frames or small boxes are cheaper than elaborate walk-in coops with multiple rooms. Every extra square foot counts – a coop for 2–3 hens might be built for a couple hundred dollars or less, whereas a coop for 20 hens could easily run $1000+ in materials if built from scratch.
- Materials: The choice of materials has a big impact. Budget builds often use construction off-cuts, reclaimed wood (pallets, anyone?), or even recycled doors and windows. You might score free or low-cost materials from community buy-nothing groups or Habitat for Humanity Restores. In contrast, premium builds use new lumber, heavy-gauge hardware cloth, high-quality siding, and weather-proof paints or stains – great for longevity but at higher cost. For example, using all pressure-treated lumber and galvanized metal roofing will cost more upfront than using scrap plywood and a tarp, but it will last much longer. Think about your climate and how durable you need the coop to be.
- Hardware & Features: Don’t forget latches, hinges, screws, nails, and other hardware. These can surprisingly become a significant cost, especially if you opt for predator-proof latches (lockable latches, carabiners, padlocks) and 1/2” hardware cloth mesh (which is more expensive than basic chicken wire, but much safer. Interior features like large-capacity feeders, galvanized waterers, heat lamps, or automatic doors will also add to the budget. An automatic coop door kit, for instance, might cost $100–$200 but can be a worthwhile investment for convenience and predator safety.
- DIY vs. Buy: Building yourself is usually cheaper than buying a ready-made coop of similar size/quality. A store-bought coop that costs $1,000 might be built for a few hundred in raw materials if you have the tools and skills. However, if you’re not handy, factor in the cost of hiring help or buying pre-fabricated panels. Some folks compromise by buying a basic shed kit and modifying it for chickens. Compare costs and your own bandwidth – sometimes a weekend of DIY saves a lot of money, and gives you a coop that’s sturdier than many flimsy prefabs on the market.
To give a rough idea: a small 3-4 hen coop built with scrap wood might only cost $100 in hardware and paint, a mid-sized coop for ~10 hens made with new lumber might be $300–$600, and a large custom coop for 20-30 hens could easily top $1,000 if using all new, high-quality materials. Plan your coop around your budget – you can always start modest and upgrade features over time.
Permits & Legal Considerations (USA): Before you break out the hammer (or bring home a chirping box of chicks), check your local laws. In the U.S., chicken-keeping regulations vary widely by city, county, or HOA:
- Backyard Chicken Ordinances: Many urban and suburban areas allow a small number of hens (commonly 3–6) within city limits, often no roosters due to noise. There are usually rules about coop placement – for example, coops may need to be in the back yard and at least 10–15 feet from property lines or neighboring homes. These “setback” requirements aim to reduce noise/smell issues for neighbors. Some places also cap the total number of chickens or require that you have a minimum lot size. It’s also common to see a maximum coop size defined (e.g. coops over 100 sq ft might not be allowed in small yards, or might trigger additional permit. Always look up your city or county animal keeping ordinances — many publish guidelines online.
- Building Permits: In many cases, a small chicken coop is treated like a garden shed. Often structures under a certain size (e.g. 100 or 120 sq ft) do not require a building permit, as long as they meet the setback rules. For instance, one township in Michigan only required a simple zoning permit and site plan for coops under 200 sq ft (with a $35 fee). If you build bigger than the exemption size, you might need a building permit with drawings to ensure it’s safe and meets codes – which can add cost and time. Check with your local building department if you plan a large coop or one with electrical hookups. When in doubt, ask – it’s usually a quick call or visit to a website to see if a permit is needed.
- Licenses/Fees: Besides building rules, some municipalities require a permit or license to keep chickens at all. This is essentially registration of your flock and agreement to follow the rules. Fees are generally modest (often in the ~$25–$50 range for an annual permit. For example, a town might charge $20 per year to keep up to 6 hens, or a one-time $50 application for a backyard flock. In some cases, the process involves an inspection of your setup or consent from neighbors. (Don’t let that intimidate you – if you maintain a clean coop with happy hens, most neighbors will be won over by the promise of fresh eggs shared now and then!). A few cities even require aspiring chicken-keepers to take a class or workshop on poultry care as part of the permit procedure, ensuring you know basics about health and sanitation. Be prepared to comply with any stipulations, like disposing of waste properly or not slaughtering chickens within city limits, etc.
- HOAs and Covenants: If you have a Homeowners Association, check their rules too. Some HOAs ban poultry outright, others may allow a small henhouse with written approval. It’s best to get permission in writing to avoid issues. If chickens aren’t allowed, you may have to petition for a rule change or stick to quail or pet rabbits until rules change.
Tip: Do your homework on local laws before building your coop. It can save you headaches down the road. Many towns are chicken-friendly, but you might need to file a simple permit application. Usually, the process is straightforward – you submit a form with a sketch of your yard showing where the coop will go, pay a fee, and agree to the rules. Once you’re set up, be a good neighbor: keep the coop clean and odor-free, control noise (no roosters if not allowed), and share those extra eggs. This will keep the community supportive of your new venture in urban farming!
Chicken Run and Enclosure Options
In addition to the coop (where chickens sleep and lay eggs), you’ll need a run or enclosure for them to exercise and explore during the day (unless you free-range 100% of the time). A well-designed run keeps your chickens safe while giving them room to scratch, peck, and bask in the sun. Here are key options and considerations for runs and enclosures:
- Fixed Runs: Most backyard coops include a stationary run – a fenced-in area attached to the coop, where chickens can roam outside. A good run should provide at least 4–10 sq ft per chicken (more is always better) so they can move around free. Commonly, people build runs with wood or metal frames and cover them in wire mesh. The run can be short (just a couple feet high, requiring you to stoop or reach in) or, preferably, tall enough to walk into. Walk-in runs (5–6+ ft tall) are convenient for cleaning and allow you to really interact with your flock. When planning a fixed run, think about weather: providing a portion of roof or a tarp cover will give hens a dry spot in rain and shade in summer. Also, consider laying down a thick layer of sand, gravel, or wood chips as flooring – this improves drainage and cleanliness compared to bare dirt, especially in wet climates. Some keepers even create a “deep litter” in the run with mulch or straw that composts over time. Fixed runs are great for keeping your chickens contained and protected at all times, even when you’re not home. Just make sure they are predator-proof (more on that later).
- Mobile Pens and Free-Range: If you have the space, free-ranging your chickens (letting them roam the yard or pasture beyond a fixed run) can greatly enrich their lives and diet. However, you’ll need to supervise or have protective measures to keep them safe from predators and prevent them from visiting the neighbor’s flower beds. A popular compromise is using portable fencing, such as electrified poultry netting, to create a movable outdoor playpen. These nets can be set up in different parts of the yard to rotate where chickens forage, and when properly electrified, they can deter many ground predators. Another option is a day tractor or portable pen – essentially a lightweight, open-bottom cage that you can move around for chickens to graze, similar to the chicken tractor coop described earlier but just for daytime use. When free-ranging (even in a movable pen), plan to round up the flock before dusk so you can lock them safely in the coop at night. Chickens usually head back to the coop on their own as it gets dark, which makes it easier. If you’re home, you might let the hens out of their fixed run an hour or two before sunset to free-range, then watch them put themselves to bed. This way they get the best of both worlds: security and freedom. Always be cautious with free-range time if you know there are hawks, neighborhood dogs, or other threats around. It’s a joy to see chickens wandering the yard, but their safety is paramount.
- Fencing and Mesh: The choice of fencing for your run or yard is critical. Standard chicken wire (the thin, flexible wire with 1–2 inch hexagonal openings) is cheap and traditional for enclosing chickens – it will keep your hens in, but won’t keep determined predators out. Even a moderately motivated raccoon or dog can tear through typical chicken wire, and smaller predators like weasels can squeeze through the holes. Instead, use hardware cloth mesh (metal wire mesh with ½ inch or smaller openings) for all areas within a few feet of ground level and any openings on the coop. Hardware cloth is much sturdier and resists ripping or bending. Many coop-builders staple hardware cloth over lower sections of runs, windows, and vents – basically anywhere a raccoon could reach or a rat could slip in. You can use chicken wire for the upper parts of a tall run (above 4 feet, for example) to save cost, since it’s less likely a predator will break in from up high. For the top of the run, it’s wise to cover it with either wire mesh or strong netting. This prevents hawks, owls, or climbing animals from dropping. A lightweight aviary net or even criss-crossing wires overhead can stop aerial attacks and also keep your adventurous hens from flying out (most chickens aren’t high fliers, especially after you clip one wing, but lighter breeds and bantams can surprise you!). If a solid roof over the run is feasible (e.g. corrugated plastic or metal panels), it can double as weather protection and predator proofing – a great upgrade for a luxury coop.
- Doors and Latches: Every run needs a door or gate for human access. Build it sturdy and use a secure latch (ideally one that requires two steps to open, like a latch plus a carabiner clip). This is because crafty predators like raccoons have infamously dexterous paws and an figure out simple latches or slide-bolts . A spring-loaded latch with a safety clip, or a lockable latch, will ensure only you can open the run. Also consider the size of the opening – a wide door that you can push a wheelbarrow through will make cleanup much easier than a tiny door. If your coop is attached to the run, you’ll also have a small chicken door (often called a pop door) that lets chickens in and out of the coop. This can remain open during the day if your run is secure. At night, it’s best to close and latch the pop door as well, for an extra layer of protection. Some people install automatic pop door openers that close at dusk and open at dawn on a timer or light sensor – a very handy gadget if you’re not always home at sunset.
In summary, design your run or enclosure to give your chickens safe access to the outdoors. Whether it’s a simple enclosed pen or a movable fence around your orchard, ensure the fencing is sturdy and the layout suits your daily routine. A bit of planning now will let your flock enjoy fresh air and sunshine without constant worry. As one might say, we build our coop and runs strong not only for shelter, but so we can let our chickens roam with peace of mind, knowing we’ve done our part to keep them safe.
Essential Coop Features
A good coop is more than four walls – it’s a functional home for your chickens. When planning the interior of your coop (and its immediate surroundings), be sure to include these essential features so your flock stays healthy and happy:
- Roosting Perches (Roosts) – Chickens sleep best off the ground. Inside the coop, install roosts (also called perches) where your birds will roost at night. A roost can be a wooden dowel, a 2×4 with edges slightly rounded, or a sturdy branch. Aim for about 8–12 inches of roost space per chicken so everyone can find a spot without crowding. Place the roosts higher than the nesting boxes and about 1.5 to 3 feet off the coop floor – chickens instinctively seek the highest perch to sleep on, and you don’t want that to be the nesting boxes or they’ll soil them. You may arrange roosts in a ladder style or horizontal bars; both work, but ladder-style roosts (staggered at different heights) let lower-ranking hens avoid being directly under higher ones, which means less poop dropping on them overnight. Ensure the roost is secure and won’t wobble. Pro tip: wood is better than metal or plastic for rooster, as it has some grip and won’t get as cold in winter. Chickens will huddle on the roost to keep warm and feel safe. If your roosts are high, provide a ramp or ladder so heavier hens can get up and down without injure. Check periodically that roosts are smooth (no splinters sticking out) and clean – a quick scrape will remove accumulated droppings and keep things sanitary.
- Nesting Boxes – These are the “private rooms” where your hens will lay eggs. A typical nesting box is a small compartment about 12×12 inches (for standard hens) that is enclosed on three sides and offers a cozy, dim space. You should provide roughly 1 nest box for every 3–5 hens. It’s okay if they share – often all your chickens will have a favorite box and take turns using the same one! The key is to have a few options so multiple hens don’t have to cram in at once. Nest boxes can be built as individual wooden boxes or as a shelf with dividers. Many coops feature an external nest box accessible via a lift-up lid – very handy for collecting eggs from outside without entering the coop. Just make sure external lids are latched securely to keep predators out. Place nest boxes lower than the roosts (ideally a foot or so off the floor, because if a nest is higher, hens might start sleeping in it, which leads to poop in the nest (and dirty eggs). To make nests appealing, keep them dark, soft, and clean. Line each box with bedding like straw, pine shavings, or shredded paper. You can even cut a piece of curtain or cloth to drape over the nest box opening – hens enjoy the added privacy. Check bedding daily for poop or broken eggs and refresh as needed. A well-designed nesting area makes egg collection easy for you and egg-laying comfy for your hens.
- Food and Water Stations – Every coop needs a feeder and waterer setup, though you might choose to keep these in the run versus inside the coop (to reduce spills inside). The chickens’ food and water supply should be accessible at all times during the day. Many people hang the feeder and waterer a few inches off the ground (around chicken back height) to keep debris out of them. If inside the coop, corners are good spots – just not directly under a nest or perch. You might use a traditional trough or hopper feeder, or a DIY PVC pipe feeder; whichever you choose, make sure it’s large enough to hold at least a full day’s feed. For water, consider a hanging drinker or a poultry nipple system to reduce spills. In winter, you may need a heated water base to prevent freezing. Always check food and water daily – chickens can kick bedding into them or run low faster than you think. A pro tip: having an extra waterer in hot weather, or a second feeder if you have more than a dozen chickens, can help prevent competition and ensure all birds get their fill. Keep feeders rodent-proof by cleaning up spills and storing feed in metal bins; you don’t want to attract mice or rats. Clean and refill waterers regularly (slimy algae or poop can accumulate quickly). With a good feeding setup, your hens will stay well-fed, hydrated, and healthy.
- Ventilation – Fresh air is a must in any coop. Chickens poop a lot at night, releasing ammonia fumes, and their breathing and manure add moisture to the air. Without proper ventilation, a coop can quickly become damp and smelly, leading to respiratory illnesses or frostbite in winter. Install vents or windows high up on the coop walls (near the roofline) to let hot, moist air escape. Ceiling or gable vents, ridge vents, or ventilation holes under the eaves all work. The idea is to create airflow above the chickens’ heads when they roost. This carries away ammonia and humidity without hitting the birds with drafts at roost level. Cover all vent openings with hardware cloth to keep predators off (remember, weasels and rats can squeeze through very small gaps). In hot climates, you might have large screened windows that can open fully to cool the coop – great for summer, just ensure you can close them at night or during storms. In cold climates, do not close up all the vents in winter – chickens can handle cold air far better than damp, stagnant air. If you’re worried about drafts in winter, position vents so that cold air isn’t blowing directly on roosting chickens (for example, vents at the peaks of the roof, not at floor level). You can also use adjustable vents or sliders to modulate airflow seasonally. A well-ventilated coop will smell faintly of pine shavings or straw, not of ammonia. As a test, stick your head in the coop in the morning – if it burns your nose or eyes, you need more ventilation. Remember, good ventilation prevents respiratory issues and even helps with summer heat, so it’s one of the most important aspects of coop design.
- Insulation (and Climate Control) – Insulating a coop can be beneficial in extreme climates. In cold northern winters, insulated walls and roof (using foam board or fiberglass batts sandwiched within the wall cavities) help keep the coop warmer and protect against drafts. In hot summers, insulation also keeps the coop from overheating, especially if you have a metal roof. If you do insulate, ensure the insulation is covered (with plywood or paneling) so chickens can’t peck at it. For example, if you use foam boards, a chicken will gleefully peck and eat the foam unless it’s hidden behind wood or metal. Many premade coops aren’t insulated, and chickens can survive cold winters by fluffing up and huddling, but a well-insulated coop makes for a more stable environment and less stress on the birds. Ceiling insulation is particularly helpful – one recommendation is to use a radiant barrier or insulating sheathing under an asphalt roof to reduce heat in summer. In the South, focus on shade and ventilation; in the North, focus on wind-proofing and insulation. You generally do not need supplemental heat in the coop as long as it’s draft-free – adult chickens (especially cold-hardy breeds) handle cold down to well below freezing. If you do add a heater, never use open heat lamps without extreme caution (they cause many coop fires). Instead, some people use flat panel heaters or brooder plates mounted safely. Bedding (deep litter of straw or pine shavings) also provides insulation on the floor and helps chickens keep warm by snuggling in. So, while insulation isn’t “mandatory,” it is a nice feature that can improve your flock’s comfort and even egg laying consistency (hens don’t like extreme swings in temperature). Just balance it with ventilation – a tightly insulated coop still needs airflow to avoid humidity buildup.
- Litter and Cleaning Features – How you manage manure in the coop is a big part of keeping chickens. Many coop designs include features to make cleaning easier. For example, droppings boards or trays can be placed under roosts to catch overnight poop; these boards can be scraped off daily or weekly into a bin, greatly reducing mess in the litter below. Some folks use sand on a droppings board and scoop it like cat litter – very convenient. Others use the deep litter method on the floor: starting with a thick layer of pine shavings or wood pellets and regularly turning it and adding fresh litter so it composts in place (cleaning out fully only a couple times a year). Decide which method suits your style – if you want low daily maintenance, deep litter is nice; if you want a pristine coop, you’ll be doing more regular cleaning. Removable trays (lined with linoleum or made of plastic) can make waste disposal easier – just pull out, dump, hose off, and replace. A sloped floor toward the door or a small gap can allow you to spray out the coop with water if it’s that kind of construction (common in concrete-floored coops). When building, also consider door lip heights – having a 6-8 inch tall board at the bottom of the door (a “threshold”) keeps litter from being kicked out of the coop. Hinged roofs or large access doors are fantastic for reaching every corner during deep cleans. In short, incorporate features that help you keep the coop clean with minimal fuss. Your future self will thank you on coop cleaning day!
- Additional Enrichment – Chickens are curious, active creatures, and a few extras can keep them entertained (especially if they ever have to stay confined due to weather or regulations). Chicken swings, perches in the run, and even hanging cabbages or treat balls can provide fun and stimulation. A simple swing can be made from a piece of wood hung by ropes; some chickens will love hopping on and swinging (others may ignore it, depends on the bird’s personality!). You can also set up a low stump or branch in the run for them to perch on during the day. These additions help prevent boredom and negative behaviors like pecking each other. Another essential “toy” is a dust bath area – chickens need to flap around in dust to keep their feathers clean and mites away. If your run doesn’t have a dry patch of dirt, provide a box or tire filled with sand/wood ash/soil mix where they can satisfy this need. In summer, a shallow pan of water or a frozen watermelon can be a welcome cooling treat. While not exactly toys, visual barriers in the run (like a pallet leaned up or some shrubs) can also reduce stress by allowing lower-ranking chickens to escape bullies, making for a more harmonious flock. Finally, consider a bit of lighting in the coop if you want to extend winter laying (hens lay best with ~14 hours of light; a low-wattage LED on an early morning timer can simulate longer days – but this is optional and some prefer to let hens rest in winter). In summary, once you have the basics in place – roosts, nests, feed, water, ventilation – you can customize the coop with little touches that make life better for your chickens and for you. A well-designed coop keeps the flock comfortable and makes your daily chores easier, which means more time to simply enjoy watching your “ladies” cluck around contentedly.
Daily Routine for Raising Chickens
Chickens are relatively low-maintenance animals, but they do need daily attention. Developing a consistent daily routine will keep your flock healthy, productive, and tame. Here’s what a typical day might look like:
Morning (Breakfast & Wake-Up): Start your day by checking on your chickens shortly after sunrise (or whenever you start your morning). Head out to the coop with fresh food and water. Open up the coop door to let the chickens into their run or yard, cheerfully greeting them with a “good morning, girls!”. Refill feeders and waterers as needed – chickens often perch all night without eating, so they’ll be hungry and thirsty when they come off the roost. Take a quick look at each bird as she comes out: are they all active, bright-eyed, and moving normally? A slow or puffed-up hen might indicate an issue to keep an eye on. In summer, you may need to replenish water more frequently (chickens drink a lot, especially in heat). In winter, make sure water isn’t frozen (swap in fresh warm water or use a heater base). If you use a movable tractor or a portable run, move it to a fresh spot in the yard each morning so the chickens have new ground to explore. This is also a good time to toss a handful of treats like scratch grains or chopped greens to get everyone excited and active. Morning chores usually take just a few minutes once you’re in the groove – and there’s nothing quite like starting your day with the happy clucks of appreciative hens.
Midday (Check-in & Egg Collection): Chickens will spend the day scratching around, taking dust baths, and laying eggs according to their own schedules. Most hens lay eggs in the late morning hours, generally between 9am and 1pm, though it can vary. Sometime around lunchtime or early afternoon, swing by the coop for a quick check-in. This is the fun part: collect the eggs from the nesting box. It’s like a little Easter egg hunt every day. Prompt collection keeps the eggs clean and reduces chances of them getting accidentally broken (or eaten by a hen). Gently scoop up the eggs – you can put them in a basket or simply in your pockets (just don’t forget about them… we’ve all made that mistake once!). While you’re there, see if the feeder needs a top-off or if the water needs a quick rinse and refill. In hot weather, you might add a large ice cube to the waterer or a frozen water bottle to keep it cool. Take a moment to observe your flock. Happy chickens will be busily pecking, preening, or maybe lazily dust-bathing in a sunny spot. If any are panting (a sign of heat stress), make sure they have shade and fresh water. If it’s cold and they’re all huddled, ensure the coop is draft-free. You might also open the coop door wide for a bit to let it air out and allow the hens to come and go. Many chicken keepers also use this time to toss some kitchen scraps or leafy weeds into the run – the hens will enthusiastically devour veggie peels, wilted lettuce, etc. (Just avoid anything toxic like onion, chocolate, or very salty stuff). This mid-day visit is usually brief but important: it keeps you tuned in to your chickens’ well-being and gives you your daily egg reward.
Evening (Tuck-in & Secure the Coop): As the sun starts to set, chickens will naturally begin winding down. They’ll often return to the coop on their own at dusk – you’ll notice them one by one hopping back inside to roost for the night. Your job is to play “chicken doorman.” At or just after sunset, do a headcount and make sure all hens are inside the coop, then close and latch the coop door securely for the night. This is one of the most crucial steps in protecting your flock, as most predators prowl at night. Double-check all coop doors and windows are closed up, and the run is secured. If any chickens are still out wandering (it happens occasionally, especially with new flocks who haven’t learned the routine), gently guide or place them into the coop. A long-handled hook or simply your arms can help grab a straggler on a low branch or hiding under a shrub. Once everyone is in and the coop is locked, remove any leftover food from the run if it’s something that might attract overnight pests (some people take feeders in at night to deter rodents). You should also collect any eggs that were laid in the late afternoon (sometimes young hens lay late in the day); you don’t want eggs sitting out overnight as they could freeze in winter or invite rats or egg-eating hens. Take a quick peek at the nesting boxes – if a hen decided to sleep in one (naughty girl), you might gently move her to a roost to discourage that habit. Also glance at the water; if it’s going to be a freezing night, you might bring the waterer in so it doesn’t freeze solid, then return it in the morning. Some keepers like to offer a small treat at bedtime (like a pinch of scratch grain) as a way to lure any hesitant hens into the coop – they’ll soon learn to come running at dusk for the treat. Finally, say goodnight to your flock – a gentle “sleep tight” – and leave them to snooze. A securely locked, well-ventilated coop will keep them safe and comfortable until morning.
Routine Extras: In addition to these daily tasks, note that weekly or monthly chores will include deeper cleaning: changing out bedding, scrubbing waterers, raking the run, etc. But on a daily basis, you’re mostly ensuring food, water, and security. Chickens thrive on routine – they will get used to the rhythm of you letting them out and tucking them in. By sticking to a schedule, you’ll reduce their stress and also catch any issues early (like if one hen doesn’t come out one morning, you’ll notice and can investigate). Many backyard flock keepers find the daily routine takes only about 10-15 minutes a day split between morning and evening, with maybe a couple extra minutes at lunch to grab eggs – a small price for the enjoyment and fresh eggs they bring. Plus, spending time with your chickens each day helps them get comfortable with you. Don’t be surprised if they start following you around hoping for treats or even hopping up to sit in your lap. Enjoy this daily farming ritual – it’s often a peaceful, grounding way to bookend your day, with chickens softly clucking as you greet the morning and cooing as they settle at night.
Feeding and Nutrition
Feeding chickens is straightforward, but it’s important to give them a balanced diet that changes with their life stages. A well-fed chicken is a healthy chicken – and healthy chickens lay more eggs and have fewer problems. Here’s what you need to know about feeding and nutrition:
Commercial Feeds for Each Stage: The easiest and most reliable way to feed backyard chickens is to use commercial poultry feed formulated for their specific age or purpose. These feeds are nutritionally balanced with the right protein, energy, vitamins, and minerals. Generally, you’ll encounter these main types of feed:
- Chick Starter Feed – This is fed from day 1 up to about 6–8 weeks of age. It’s high in protein (usually 20–22% protein to support rapid growth and development of baby chicks. Starter feed can be medicated (with a coccidiostat to prevent coccidiosis, a common chick disease) or unmedicated; the medicated version is often recommended for beginners if coccidiosis is a concern in your area. Chicks should have access to starter feed at all times. They eat small amounts frequently. Note: If you’re raising ducklings or other poultry with chicks, use an appropriate starter for all (chick starter is usually okay for ducklings, but never use medicated feed for waterfowl unless advised by a vet).
- Grower or Developer Feed – Around 7–8 weeks, chicks transition to a slightly lower protein feed, often called grower, pullet developer, or developer feed. This is used from about 8 weeks old until they approach laying age (around 16–18 weeks). The protein content is typically 14–18%. Grower feed has less protein and usually no added calcium (since young birds not yet laying don’t need excess calcium). If you can’t find “grower,” you can also mix starter and layer feed half and half for this interim period, or use an “all-flock” feed (~16% protein) – just be sure not to introduce layer feed too early.
- Layer Feed – Once hens start laying eggs (or by 18–20 weeks old even if they haven’t laid yet), they should be switched to layer feed. Layer feed typically has 16% protein (15–18% ran and is fortified with extra calcium (around 3–4% total) for eggshell production. This calcium is crucial for laying hens – without it, they’ll draw calcium from their bones to form eggshells, leading to health issues. Layer rations come in pellet or crumble form. Hens will generally consume about 1/4 to 1/3 pound of feed each per day (more in cold weather, less if they forage a lot). Do not feed layer feed to young chicks or growing pullets – the high calcium can damage their kidneys since they’re not using it for eggshells. Wait until they are at point-of-lay.
- All-Purpose or Flock Raiser Feed – Some people opt for an “all ages” feed (about 16% protein) for the whole flock, especially if you have a mix of ages or species (chickens, ducks, etc.) together. If you do this and have laying hens, you’ll need to supplement calcium by offering oyster shell on the side (more on that below). An all-purpose feed is a convenient one-bag solution, but carefully read the protein and ingredients to ensure it’s suitable for chicks if you have them, or for layers if you rely on free-choice calcium.
Feed Form and Schedule: Chickens are daytime grazers. They wake up hungry and will eat off and on all day until roosting. It’s best to provide feed free-choice – let them eat as much as they want, whenever they want, rather than rationing meals. Fill the feeder and allow them to self-regulate. Most backyard breeds won’t overeat regular feed (they will overindulge on treats like corn, though, so don’t worry that they have feed always available). Check the feeder daily; top it up before it’s completely empty so the hens never go hungry. Remove any feed that gets wet or moldy, as mold can be toxic to chickens. In terms of form, feeds come as mash, crumbles, or pellets. Crumbles and pellets are easiest for adult chickens to eat with minimal waste. Mash is a fine, powdery form – chicks can eat mash or crumbles. If you notice a lot of feed being billed out and wasted, consider a different feeder design or switching from crumbles to pellets as your hens get older. And always store your feed in a dry, rodent-proof container (galvanized metal trash cans with tight lids work well, or thick plastic bins if rodents aren’t an issue). Fresh feed is important – buy only what you’ll use in a few weeks so it doesn’t go stale or attract pests.
Supplemental Foods: While a quality commercial feed can be nearly the chickens’ entire diet, it’s great to supplement with fresh foods and treats – both for nutrition and enrichment. Here are common supplements and treats for chickens:
- Grit – Chickens don’t have teeth; they grind food in their gizzard. They need small stones or grit to do this. If your chickens free-range on the ground, they probably pick up enough tiny pebbles on their grit. But if they’re confined or your soil is very sandy/soft, provide insoluble grit (crushed granite is common) in a separate dish free-choice. Chicks should get “chick grit,” which is finer, and adult chickens “poultry grit,” which is coarser. They’ll eat as much as they need. Do not mix grit into their feed; offer it separately. Think of it as giving them gravel to chew their food – it stays in the gizzard and helps grind up grains, grass, bugs, etc. Without grit, chickens can’t digest hard foods well and may get impacted crops. So it’s an essential if they’re not on natural ground or if you give lots of whole grains/veggies. (Note: Oyster shell is not grit – more on that next – and you need both for laying hens.)
- Calcium (Oyster Shell) – Once hens are laying, they need extra calcium for eggshells. Layer feed includes calcium, but many hens benefit from (or even require) additional calcium, especially high-producing breeds. Crushed oyster shell is the standard supplement. It’s inexpensive and available at feed stores. Offer oyster shell in a small hopper or dish free-choice (separate from feed). Hens will consume what they need – which might be more in peak lay and less when they’re molting or in winter. Don’t worry about non-laying members of the flock (young pullets, roosters) eating a bit; they typically ignore it if they don’t need it, and free-choice feeding avoids overdosing. Other calcium sources: crushed eggshells (baked and crumbled) can be fed back to hens, though some avoid this to prevent hens acquiring a taste for eggs – if you do it, crush them fine and mix into feed so they don’t recognize them as eggs. In any case, providing a calcium source like oyster shell ensures strong eggshells and prevents your hens from depleting their own bones to get calcium. Soft or thin eggshells are usually a sign of calcium or vitamin D deficiency (or an older hen). With good nutrition, you’ll get nice hard shells that don’t crack in the nest.
- Kitchen Scraps and Greens – Chickens are great composters. They will eat a variety of kitchen scraps: vegetable peels, leafy greens, fruit scraps, rice, pasta, etc. These can make up to about 10% of their diet as a supplement (too many treats can dilute the balanced nutrition of their feed). Safe scraps include most veggies and fruits (avoid avocado, which is toxic, and limit citrus which can potentially affect calcium uptake), bread in moderation, cooked plain rice or pasta, and most leftovers that are not spoiled or too salty. Chop up large or hard pieces so they can peck at them. Leafy greens (lettuce, kale, cabbage) and herbs are especially loved and are high in vitamins – hanging a cabbage or leafy bundle in the run can entertain them for hours. Chickens also enjoy scratch grains (a mix of cracked corn, oats, etc.) – scratch is like candy, best given in small amounts (a handful per 5-6 chickens) as a treat or to encourage foraging behavior. It’s handy to toss some scratch in bedding or leaves so they turn and aerate it while searching for the grains. Mealworms or Insects – Dried mealworms are protein-rich treats that chickens go nuts for. Again, moderation is key, but they’re great for taming chickens (they’ll follow you anywhere if you have mealworms). If your chickens free-range, they’ll catch plenty of their own bugs, which is fantastic free protein. You can also cultivate worm farms or black soldier fly larvae to supplement protein (especially useful during molting season when hens need extra protein to grow feathers).
- Seasonal and Special – In hot weather, cold treats like watermelon slices or frozen peas can help cool chickens down. In winter, some folks give a warm oatmeal or mash in the morning – not necessary, but a cozy treat (just don’t let wet food sit and freeze). There are also poultry vitamins and probiotics available to add to water occasionally, especially if birds are stressed or after antibiotic treatment; generally not needed if feed is balanced, but can be a boost if birds seem off. Garlic or apple cider vinegar in water are traditional supplements some swear by for immune health – evidence is anecdotal, but a little ACV (with mother) in water a couple times a week likely won’t hurt and may keep algae down in waterers. The main thing is: keep their core diet (feed) consistent and complete, and use treats as icing on the cake. Too many treats (especially junk like bread, or too much corn) can make chickens fat without giving them the protein and nutrients they need.
DIY Feed Mixes: Some experienced keepers choose to make their own feed from whole grains, especially to go organic or soy-free. This can be done but requires careful planning to meet nutritional requirements. A typical DIY mix might include corn, wheat, oats, peas, soybean or fish meal (for protein), flaxseed (for omega-3), and a vitamin/mineral premix to fill any gaps. For example, a layer mix might target 16% protein and adequate calcium by combining grains and supplementing with oyster shell. If you’re interested in this, there are resources and recipes available. However, for beginners, it’s usually best to rely on commercial feed to ensure nothing is lacking. You can always supplement with wholesome kitchen scraps and free-ranging which effectively “home-makes” part of their diet. Remember that chickens need balanced nutrition: protein for muscle and eggs, calcium for shells, phosphorus for bones, vitamins (like A, D, E, B’s) for overall health, and so on. Commercial feeds are formulated by poultry nutritionists to hit those targets. If you do mix feed, monitor your flock’s condition and production – poor feathering, low egg output, or abnormal eggs may signal a dietary deficiency.
Water: Although not “feed,” water is even more crucial. Chickens should have clean, fresh water available at all times. In hot weather, a hen can drink 2 cups of water a day or more. Dehydration can cause them to stop laying and can be fatal, especially in heat. Provide water in a drinker that’s easy for them to use and hard for them to tip over. If you have more than a few chickens, having two water sources is a good idea in case one gets knocked over or soiled. Check water daily – even if a drinker looks full, it could be dirty or blocked. Clean it out regularly to prevent algae or poop buildup. In winter, keep water from freezing – you may need to swap waterers morning and evening or use a heated base. Chickens will drink more if the water is fresh and cool in summer or slightly warm in winter. It’s a small thing that makes a big difference.
In summary, feed your chickens a quality layer feed (or appropriate feed for their age), supplement smartly, and always provide grit and water. By doing so, you’ll meet all their nutritional needs and be rewarded with healthy hens and delicious eggs. A well-fed flock is also more resistant to disease and less prone to bad behaviors like feather picking or egg eating. You’ll find that feeding time quickly becomes one of the enjoyable daily routines – your chickens will recognize you and may come running as soon as they see the feed bucket or hear the treat bag rustle! Enjoy the flock feeding frenzy, but keep it balanced and they’ll thrive.
Predator Protection
Protecting your chickens from predators is one of the biggest challenges – and responsibilities – of a chicken keeper. Unfortunately, lots of creatures think chickens are a tasty meal. Depending on where you live, you may have to defend against clever raccoons, sly foxes, hungry coyotes, prowling bobcats, weasels and mink, skunks, snakes, rats, hawks, owls, neighborhood dogs, feral cats – even the occasional bear or mountain lion in some regions. The good news is, with a well-built coop and some smart practices, you can dramatically reduce the risk of predation. Here are the top strategies for keeping your flock safe. Elevate the Coop: If possible, build or position your coop a bit off the ground – at least 8–12 inches up on stilts, blocks, or a raised foundation. A raised coop prevents predators from easily getting in or hiding underneath . Many predators like rats, weasels, or snakes will attempt to enter by burrowing or squeezing at ground level. By having the coop floor off the ground, you create an air gap that’s hard to breach. It also has the bonus of reducing moisture rot in the coop and providing a shady spot under the coop where chickens can lounge on hot days. Make sure the perimeter under the coop is secure (add wire if needed to close it off except for chicken access). An elevated coop with a ramp is inherently safer than a coop sitting flat on the dirt. If you cannot raise the coop, then pay extra attention to the floor and foundation – you may need to lay buried wire or even pour a concrete slab to stop burrowers. But most backyard coops benefit from being lifted up on legs. It’s like putting your henhouse on stilts to escape the floods of predators. Dig-Proof the Perimeter: Many predators (foxes, coyotes, dogs, etc.) will try to dig under a fence or coop wall to gain entry. To stop this, install a predator apron around your coop and run. A predator apron is simply wire mesh that extends outwards underground. One method is to dig a trench ~12 inches deep around the entire perimeter, and bury hardware cloth or welded wire mesh down into the ground (and ideally bending it outward at the bottom). Another method that’s less work is to lay a 2-foot-wide strip of wire mesh flat on the ground all the way around the coop/run, attached to the base of the fence, and secure it with landscape staples or rocks. You can then cover this with a little soil or mulch. The idea is that when a predator tries to dig at the fence line, it hits the wire and can’t get through, eventually giving up. This invisible underground fence is highly effective and saves you from needing to bury fencing super deep. Make sure the apron mesh is heavy-duty (the same 1/2″ hardware cloth is great) and check periodically that it hasn’t been uncovered or rusted. Also, close any gaps or holes in the ground – even a fist-sized hole might invite a determined mink. With an apron in place, you’ve essentially armored the foot of your coop and run against intruders.
- Secure Fencing and Openings: As mentioned in the run section, using hardware cloth instead of chicken wire for the lower parts of your run and any openings is critical. Chicken wire simply won’t stop raccoons, dogs, or many predators who can tear or bite through. Cover all windows, vents, and other openings on the coop with hardware cloth as well (using screws and fender washers or heavy staples to attach it firmly). Predators often find a way in through neglected gaps – think like a rat or raccoon and plug even the small holes. Doors are another common failure point: use strong latches that can be locked or clipped. A swivel eye bolt with a spring clip or a padlock works well. Remember that raccoons have dexterous hands – they can undo simple slide latches or hook-and-eye latches if not secured additionally. If your coop has a nesting box lid or other access doors, secure those too each night. It’s also wise to use carabiners or snap clips on the run gates and coop doors. At night, you want your coop to be like Fort Knox – no easy openings.
- Close the Coop at Night: This sounds obvious, but it’s the single most important thing you can do – never leave the coop open at night. Most predators are nocturnal or active at twilight. Ensure all your chickens have gone inside by dusk (do that headcount), then shut the door and secure it. If you have an automatic door, still check that it closed properly and no chicken got left out. Consider having a secondary barrier as well – for example, a secure run plus the closed coop means a predator would have to breach two layers to get your birds. Some people with very secure runs will leave the pop door open so chickens can come out at dawn; this can be okay if you’re confident nothing can get through your run’s fencing. Otherwise, keep it shut until morning. Chickens are basically defenseless in the dark; once they’re on the roost at night, they won’t run away or fight back. So it’s up to us to physically shield them. Think of the coop as their safehouse – always lock it up like you would your own.
- Predator Lights & Alarms: Some flock owners use motion-activated lights, alarms, or even sprinkler systems around the coop to deter predators. Motion sensor lights can startle creatures like raccoons or foxes, and they may avoid a suddenly lit area. There are also solar-powered blinking red lights (marketed as “night guard” devices) that mimic the eyes of another predator and can deter night visitors. These gadgets can help, but don’t rely on them as your only defense – a hungry raccoon might brave a light if desperate. That said, lighting up the area can also help you if you need to investigate a disturbance at night. Even a driveway alarm (motion sensor that chimes in your house) positioned near the coop can alert you to something prowling out there, so you can intervene (with caution). Some people play a radio in the coop at night on a talk station to give the illusion of humans present – mixed results on whether this helps, but it’s been tried especially to deter raccoons. In any case, technology can assist, but the physical barriers are most important.
- Guardian Animals: A good farm dog can be an excellent protector for chickens – but this very much depends on the dog’s training and temperament. Some dog breeds are natural livestock guardian dogs (LGDs), like Great Pyrenees, who, when properly introduced, will watch over chickens and chase off foxes or hawks. Even a mutt with the right disposition, kept outdoors or with access to the yard, can deter predators by their presence and barking. If you go the guardian dog route, do your research and ensure the dog won’t itself harass or kill the chickens (many herding breeds have high prey drive, so they need careful training). Geese and guinea fowl are sometimes touted as barnyard “alarms” – geese can be quite aggressive towards intruders and will honk loudly, and guineas are noisy and alert. They might not physically stop a determined predator (in fact, they could be at risk too), but they can raise a ruckus to alert you or deter a casual predator. And yes, even a rooster can be a form of protection: roosters are very vigilant and will sound alarm calls if a hawk flies over or if they see a threat. A brave rooster might even fend off a small predator or sacrifice himself to protect hens. However, roosters come with their own challenges (noise, aggression), and they are not a guarantee of safety. If you can’t have a rooster due to local rules, a vigilant human is the best guardian – us two-legged “roosters” can chase away many a critter!
- Cleanliness and Baiting: Predators are often drawn by the smell of food – which can mean chicken feed, table scraps, or the chickens themselves. Keep your coop and run clean of food waste. Don’t leave large amounts of kitchen scraps or scratch grains lying around overnight. Use rodent-proof feeders or bring feeders in at night if rodents are an issue. Pick up spilled feed. This helps not only to avoid attracting raccoons, skunks, and rats, but also to keep your chicken area from smelling like a buffet. Secure your feed storage as well (metal bins for feed). If you have persistent rodents around, you may need to set traps (carefully, so chickens can’t access them) or use treadle feeders that only open when a chicken stands on a platform. Also, manage manure – a pile of manure or soiled bedding can attract flies, which attract other pests. Compost it in a closed bin or pile far from the coop. Trash – if you have garbage cans near the coop, keep them sealed; the last thing you want is a raccoon coming for your trash and noticing your hens. Essentially, don’t ring the dinner bell for predators by leaving easy snacks in the open.
- Know Your Predators: Pay attention to signs – if you see tracks, scat, or hear noises at night, try to identify what predators are in your area. This can tailor your defenses. For example, if you have snakes eating eggs or chicks, you’ll want to tighten up small gaps (snakes can get through surprisingly small holes) and perhaps raise nest boxes higher. If hawks are the main threat (common in daytime free-range situations), provide more covered areas or string up some reflective tape or fishing line overhead to discourage swooping. If neighbor dogs are an issue, you may need to have a frank but friendly chat with the owners or reinforce your fence’s lower half with something dog-proof (like strong cattle panel or double-layer wire). For night predators like raccoons, opossums, skunks, etc., the coop and run’s physical fortification is key, since they work under cover of darkness when you’re not watching. Trail cameras can be useful to see what’s prowling around your coop at night, so you know what you’re dealing with. It can be startling to see a parade of creatures that came by while you slept!
Despite all these measures, it’s wise to prepare for the worst just in case. Have a plan for if you do encounter a predator actively attacking (some people keep a bright flashlight and a loud air horn or whistle handy to spook animals, and in rural areas, a firearm or other deterrent might be part of the plan). However, prevention is far better. Many backyard chicken keepers go years without a loss because they’ve been vigilant and proactive from day one. The goal is to create an environment where it’s so difficult for predators to succeed that they don’t bother trying – or if they try, they fail. As the saying goes, “secure the coop like Fort Knox at night, and be present when the hens are out by day.” By following the above strategies – sturdy construction, locked coops, predator aprons, secure fencing, possibly a watchdog – you will significantly tilt the odds in favor of your chickens.
Lastly, don’t be discouraged. Predators are a natural part of raising animals, but the vast majority of days are peaceful. With good practices, those wily raccoons and sneaky foxes will stay frustrated on the outside of your coop, and your chickens will live long, happy lives. There’s nothing more satisfying as a chicken-keeper than hearing a coyote howl in the distance and knowing your hens are safely tucked in, dreaming of juicy bugs, behind a coop door that you made predator-proof. You’ve got this – protect your flock, and enjoy the rewards of worry-free chicken raising!
By now, you should have a solid understanding of how to build a great chicken coop and care for your flock. From choosing a coop design and gathering materials, to daily routines and protective measures, raising chickens is a journey that rewards preparation and attentiveness. It’s the perfect blend of DIY satisfaction (when you see that coop standing in your yard that you built with your own hands) and the simple pleasure of nurturing animals (when those hens come running to you, or you collect a basket of warm eggs). As we’ve highlighted – in a style that mixes creative know-how with a community spirit – anyone can succeed at this with a bit of knowledge and effort. Just remember: provide a safe home, give consistent care, and enjoy the process. Soon you’ll be clucking along with your chickens, marveling at their antics and maybe even inspiring your neighbors to start a flock of their own. See all my Chicken Coop Plans HERE.
1. Start here. Woodworking 101
3. The Ultimate Outdoor Pavilion Guide – Permits, Framing, and Roofing
4. The Ultimate Shed Building Guide – Permits, Framing, and Roofing
5. DIY Chicken Coops and Raising Chickens: A Comprehensive Guide