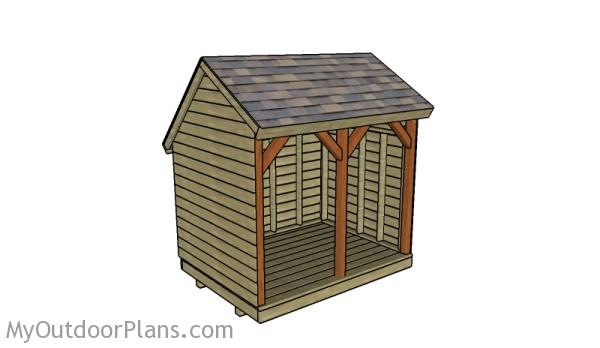
This step by step diy woodworking project is about saltbox firewood shed plans. The project features instructions for building a 6×8 saltbox shed that can store up to 3 cords of wood. If you want to build a stylish shelter for storing firewood, this project is to obvious choice. Check out PART 2 of the article to see how to frame the roof of the shed. Don’t forget to take a look over the rest of firewood shed plans.
When buying the lumber, you should select the planks with great care, making sure they are straight and without any visible flaws (cracks, knots, twists, decay). Investing in cedar or other weather resistant lumber is a good idea, as it will pay off on the long run. Read the local building codes before starting the project, as you might need a building permit. In addition, level the area and remove the vegetation layer.
Projects made from these plans
Saltbox Firewood Shed Plans
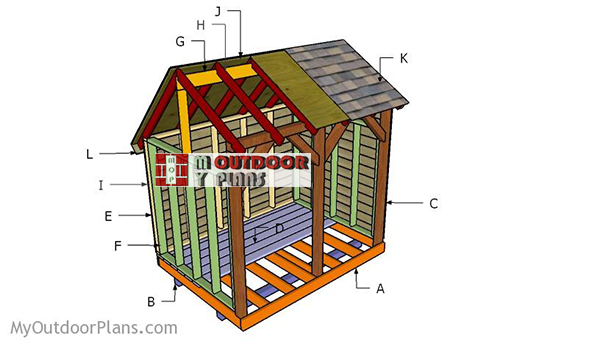
Building-a-6×8-firewood-shed
Cut & Shopping Lists
- A – 2 pieces of 4×4 lumber – 96″ long SKIDS
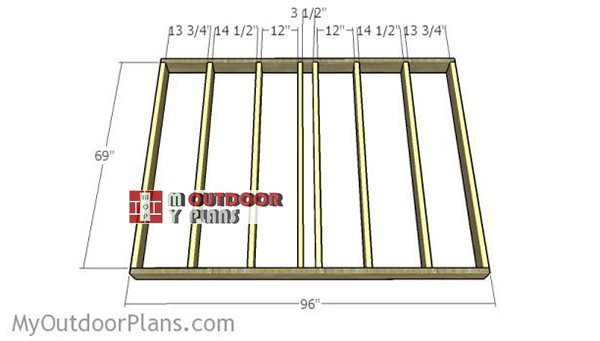
- B – 2 pieces of 2×6 lumber – 96″ long, 8 pieces – 69″ long JOISTS
- C – 3 pieces of 4×4 lumber – 81 1/2″ long, 1 piece – 96″ long, 4 pieces – 25 1/2″ long POSTS
- D – 11 pieces of 2×6 lumber – 96″ long DECKING
- E – 2 pieces of 2×4 lumber – 63 1/2″ long, 5 pieces – 60″ long 2xSIDE WALL
- E – 2 pieces of 2×4 lumber – 96″ long, 6 pieces – 60″ long BACK WALL
- F – 12 pieces of 1×6 lumber – 96″ long SIDING
- G – 2 pieces of 2×4 lumber – 29″ long, 1 piece of 2×6 lumber – 96″ long TOP RIDGE
- 8 pieces of 4×4 lumber – 8′
- 23 pieces of 2×4 lumber – 8′
- 12 pieces of 2×6 lumber – 8′
- 12 pieces of 1×6 lumber – 8′
- 100 pieces of 3 1/2″ screws
- 500 pieces of 2 1/2″ screws
- 100 pieces of 1 5/8″ screws/brad nails
- 12 pieces of 3 1/2″ lag bolts
Tools
![]() Hammer, Tape measure, Framing square, Level
Hammer, Tape measure, Framing square, Level
![]() Miter saw, Drill machinery, Screwdriver, Sander
Miter saw, Drill machinery, Screwdriver, Sander
Time
![]() One day
One day
6×8 Wood Storage Shed Plans
Building-the-frame-for-shed-floor
The first step of the project is to build the floor frame for the firewood shed. Cut the components from 2×6 lumber at the right size. Drill pilot holes through the rim joists and insert 2 1/2″ screws into the perpendicular components. Align the edges and make sure the corners are square.
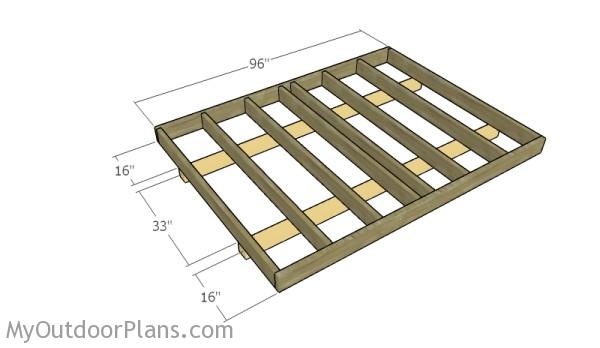
Fitting the skids
Attach 4×4 skids under the floor frame, as shown in the diagram. Drill pilot holes and insert 3 1/2″ screws into the skids. The skids will help you move the shed easily and it will protect the floor from moisture.
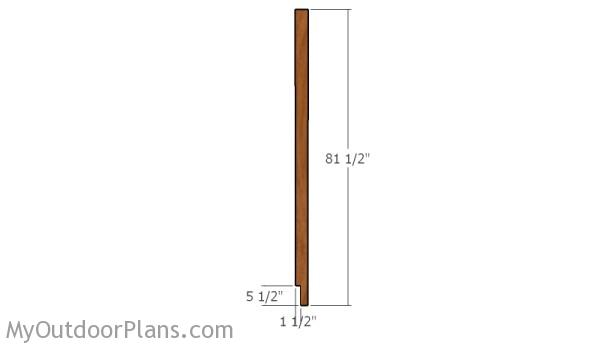
Building the side posts
Next, you need to build the side posts for the front of the shed. Make a notch to the bottom of the 4×4 posts, as shown in the diagram. Make multiple parallel cuts with a circular saw and remove the excess with a chisel. Smooth the notch with sandpaper.
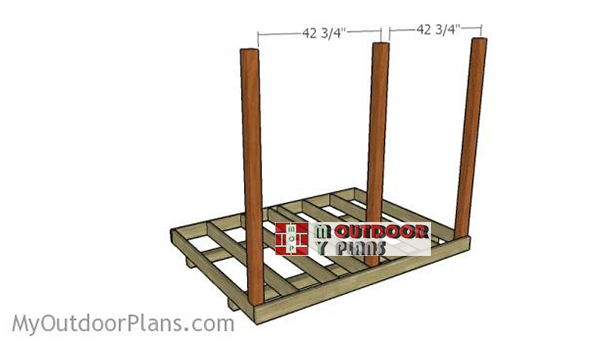
Fitting-the-posts
Fit the posts to the frame of the floor, as shown in the plans. Use a spirit level to plumb the posts. Drill pilot holes through the frame and insert 3 1/2″ lag bolts into the posts.
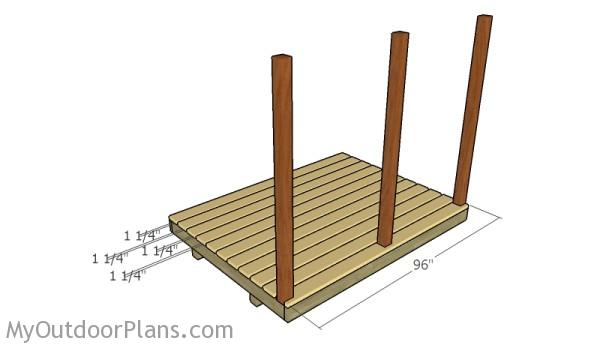
Fitting the decking
Next, attach the 2×6 decking slats to the floor of the shed. Place the slats equally-spaced and align them at both ends. Drill pilot holes through the slats and insert 2 1/2″ screws into the joists.
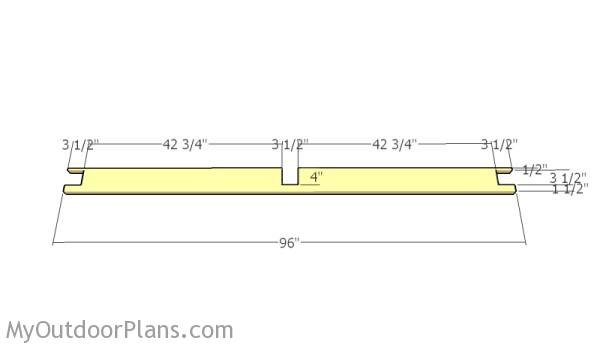
Front decking slat
As you can easily see in the plans, you need to make several notches to the front slat, to fit easily around the vertical posts.

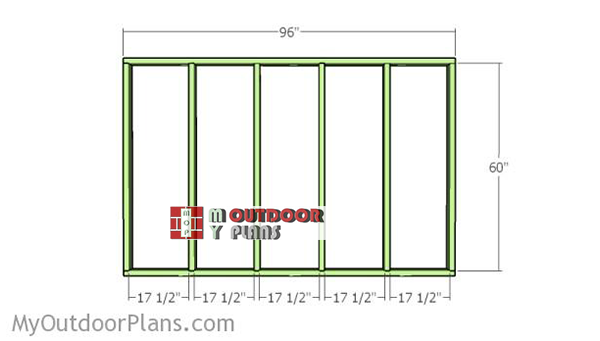
Building-the-side-walls
Build the side walls from 2×4 lumber. Cut the components at the right dimensions and align the edges with attention. Drill pilot holes through the plates and insert 2 1/2″ screws into the studs. Place the studs equally spaced.
Building-the-back-wall-frame
Build the back wall in the same manner described above.
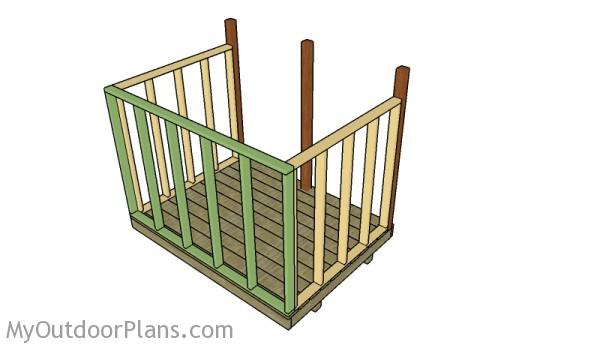
Assembling the shed of the frame
Fit the walls to the floor of the shed, as shown in the plans. Make sure the edges are flush. Drill pilot holes through the bottom plates and insert 2 1/2″ screws into the floor of the shed. Make sure the corners are square and lock the adjacent walls together using 2 1/2″ screws.
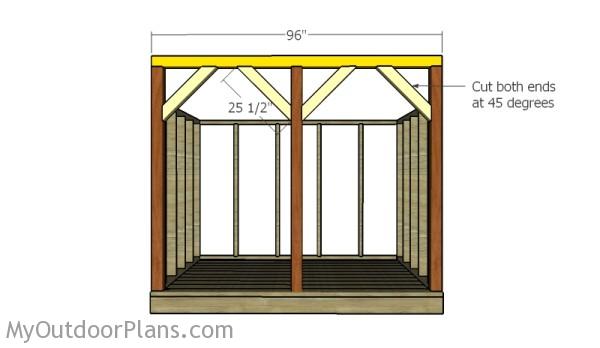
Attaching the front braces
Next, you need to attach the 4×4 beam to the front of the shed. Drill pilot holes and insert 5″ screws into the vertical posts. Afterwards, cut braces from 4×4 lumber (cut both ends at 45 degrees) and lock the to the beams with 3 1/2″ screws.
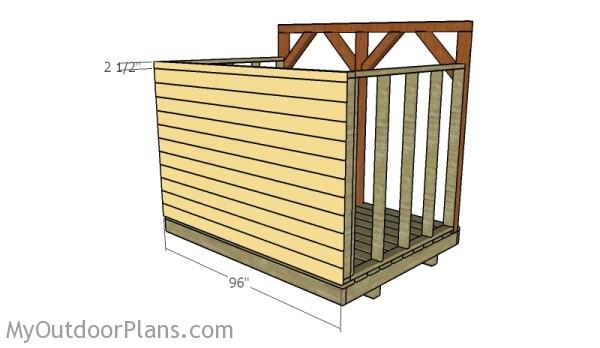
Back wall
Attach 1×6 slats to the back of the shed, as shown in the plans. Leave no gaps between the slats and lock them to the studs by insert 1 5/8″ screws. As you can notice in the diagram, you need to strip the width of the top slat to 2 1/2″ or use a 1×3 slat.
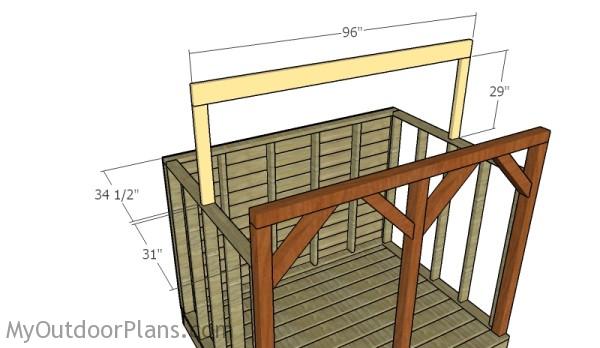
Fitting the top ridge
Next, you need to attach the top ridge into place. Start by fitting the 2×4 support to the top plate, as shown in the plans. Plumb the supports and toe nail them into place with 2 1/2″ screws/nails. Alternatively, you can use corner brackets. Next fit the 2×6 top ridge to the supports, using metal plates. Check if the corners are square before locking it into place with screws.
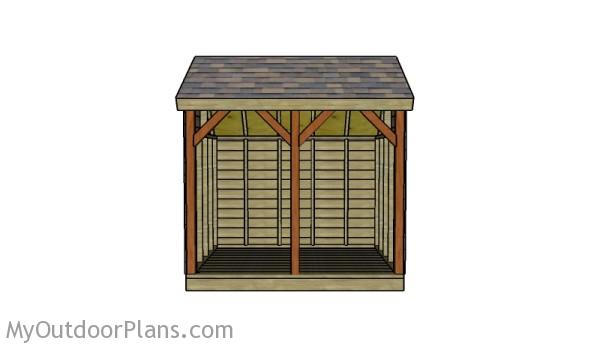
6×8 Firewood Shed Plans
Don’t forget to take a look over PART 2 of the project to learn how to build the roof for the shed. This shed can store up to 3 cords of wood.
Stylish firewood shed plans
Fill the holes with wood putty and let them dry out for a few hours. Smooth the surface with 100-200 grit sandpaper and remove the residues with a damp cloth.
Top Tip: Check out the rest of the project, to learn how to build the roof for the stylish wood storage shed.
This woodworking project was about saltbox firewood shed plans. If you want to see more outdoor plans, check out the rest of our step by step projects and follow the instructions to obtain a professional result.

EXPLORE MORE IDEAS FOR:
 |
 |
 |
 |
2 comments
Is there a link to Part 2 for the roof of these plans?
You have the NEXT button. That is to navigate to Part 2.