DIY Glider Swing Bench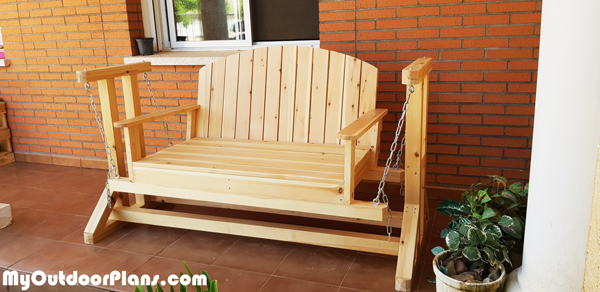
The completed project.

I used the equivalent to 1 x 4 wood for the length of the frame, so the width of the frame was increased to compensate for the less width in the wood.
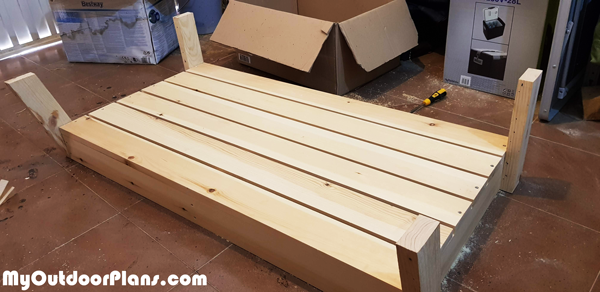
Here you can see all the slats fitted and the arm rest supports. I used some reclaimed wood for the arm rest supports.
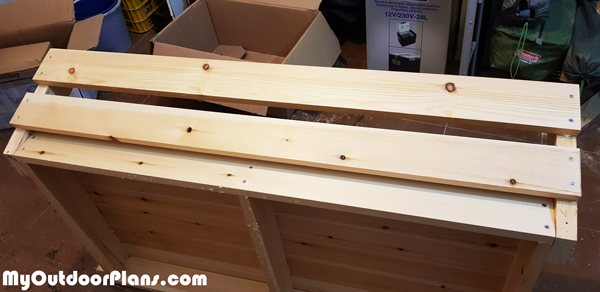
Next photo shows the rear back rest supports fitted.
Rear back rest fitted. A little awkward getting the distance between all the slats the same. If I was to build another back rest like this, I think it would be easier to follow the original plans more closely and lay the slats on the floor and space them out on the floor. My fault, I made this bit harder for myself.
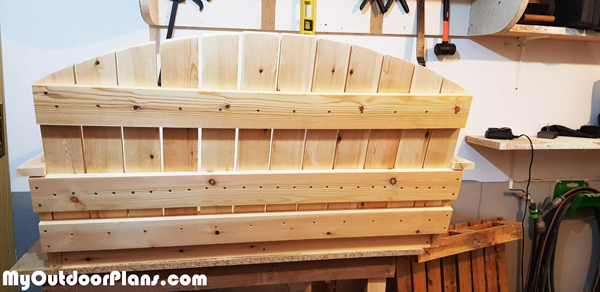
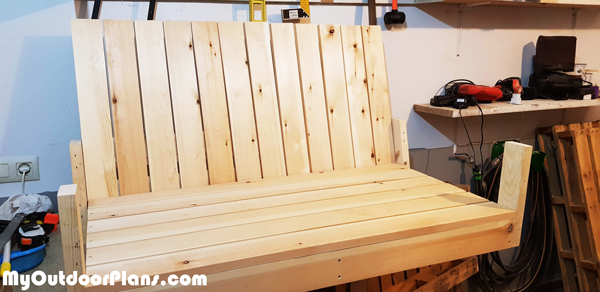
Next was to get the arch. This was not easy, probably the hardest part of the whole project, something I definitely need to practice and learn from. I used a piece of string pulled very tightly from the highest point to the lowest point, then a pencil pushed up against it to create an arch.
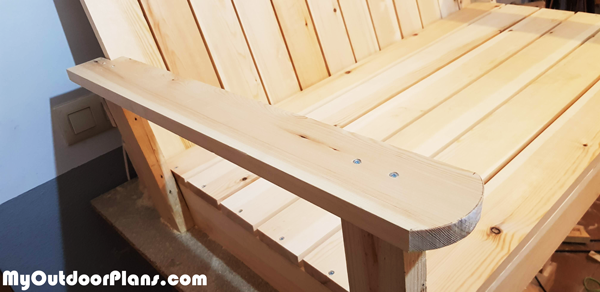
Here we see the armrests fitted. Easy enough part of the project, however I went for a 15-degree angle on the back rest (I live in Spain it’s very laid back here) so this changes the length of the arm rest from the length indicated on the plans.

Bench finished, onto the stand.

Making the side frames for the stand looks easy enough but you have to be very careful to make sure they are at a 90-degree angle. Not owning a pocket hole jig, I had to make do with drilling pilot holes from the top and bottom and screwing the wood together. I covered the screw heads at the top with pine coloured wood filler to disguise and blend them in.
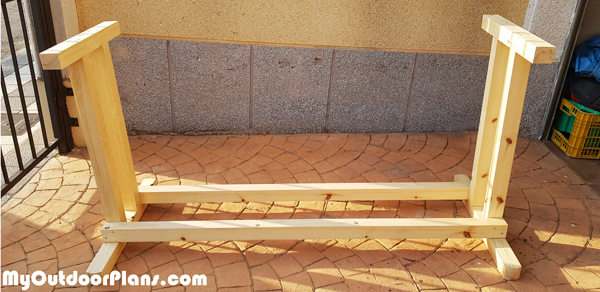
Base supports fitted. I drilled pilot holes, glued and screwed them from the side and bottom to ensure the joints are very strong
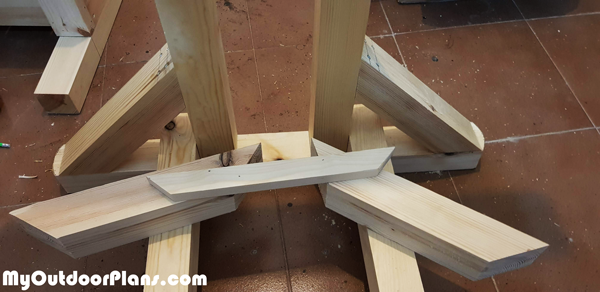
Fitting-the-braces-to-the-stand
Next, I fitted the braces. This was very easy once I made a template which I adjusted to exact size, then all I had to do was draw along each end and cut on my mitre saw.
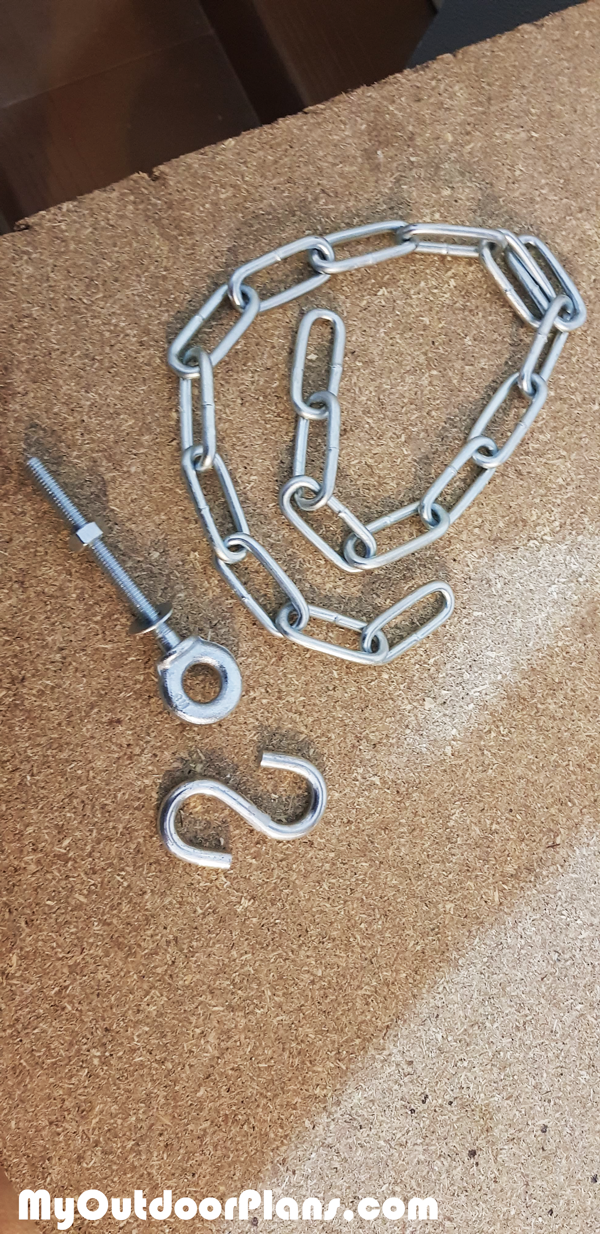
I used these parts to connect the bench to the stand. The bolts are 8cm long and go all the way through the bottom and top supports. Easy to fit and nice and strong. I cut 65cm of chain, but this was too long I actually needed only 11 links.
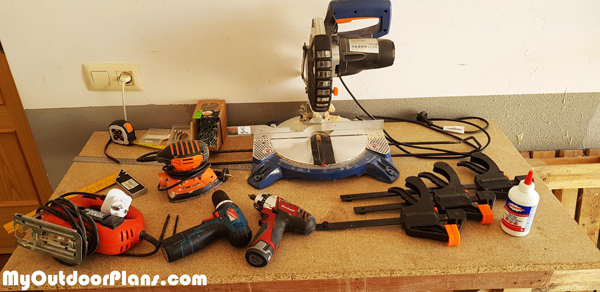
Here are the tools I used to make my project. Only the basics but certainly enough for this project.
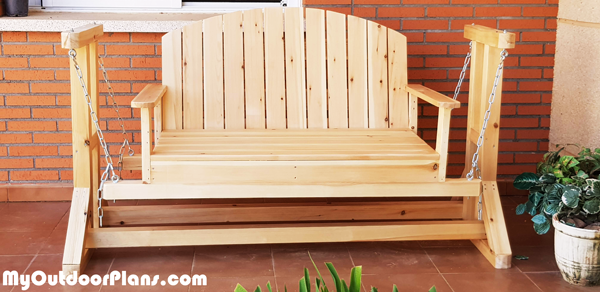
My completed project. Thank-you for the plans. Love this website onto the next, more to follow.
From Stephen Bentley,
The same as my last project all measurements had to be converted into metric because I live in Spain, nobody understands imperial here. It took me 7 days to build working for 3-4 hours per day, not the quickest as I took my time and I’m still fairly novice at wood working. It cost me about 40 euros for the bench, 50 euros for the stand and 45 euros for the chains hooks and paint. Around 135 euros for everything. In the first photo you can see my completed project, the next photos show the building process.
EXPLORE MORE IDEAS FOR:
 |
 |
 |
 |