This step by step project is about how to build a birdhouse. Building a basic birdhouse is a fun weekend projects, especially if you want to involve your kids and pass down several woodworking techniques. After getting the job done by yourself, we also recommend you to check out the related projects, as you could also make a nice bird feeder, as to attract many types of singing birds to your garden.
There are a few things you should take into account when building a birdhouse. Therefore, you should design that size and the shape of the birdhouse as to fit the needs of the birds you want to attract. Always use quality lumber and do not apply toxic paint, otherwise the birds will refuse the move inside the boxes. Cedar, pine or redwood are great choices, as the the components will be weather-resistant and also have a nice appearance. See all my Premium Plans HERE.
Projects made from these plans
How to Build a Birdhouse
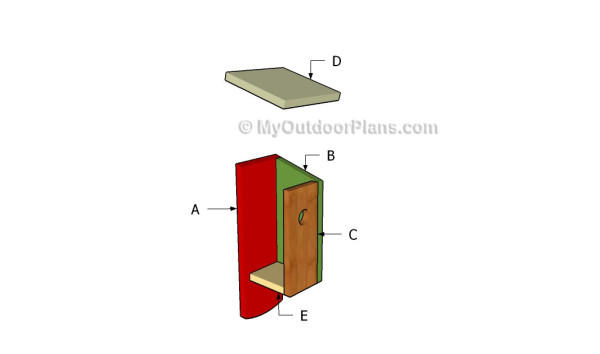
Building a birdhouse
Cut & Shopping Lists
- A – 1 pieces of 1×6 lumber – 16 3/4” long BACK
- B – 2 pieces of 1×6 lumber – 12” long SIDES
- C – 1 piece of 1×8 – 10 1/2″ long FACE
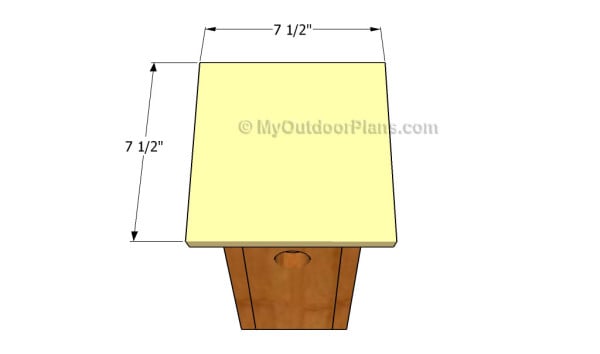
- D – 1 pieces of 1×8 lumber – 7 1/2” TOP
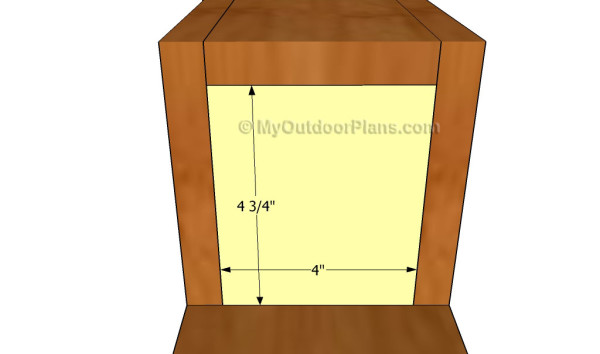
- E – 1 piece of 1×6 lumber – 4″x4 3/4″ long BOTTOM
- 1 piece of 1×6 lumber – 6 ft
- 1 piece of 1×8 ft – 2 ft
- 2 1/2″ screws
- 1 5/8″ screws
- 1 1/4″ screws
- wood filler
- wood glue
- stain/paint
Tools
![]() Hammer, Tape measure, Framing square
Hammer, Tape measure, Framing square
![]() Miter saw, Drill machinery, Sander
Miter saw, Drill machinery, Sander
Time
Building a birdhouse
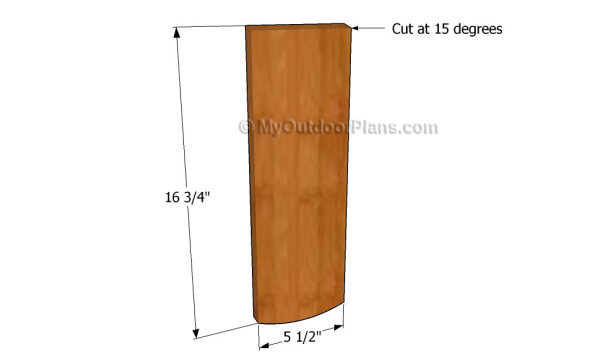
Building the back wall
The first step of the woodworking project is to build the back of the birdhouse. Cut the components out of 1×6 lumber and make sure you round the bottom using a jigsaw. Smooth the cut edges with sandpaper and remove the residues before continuing the project.
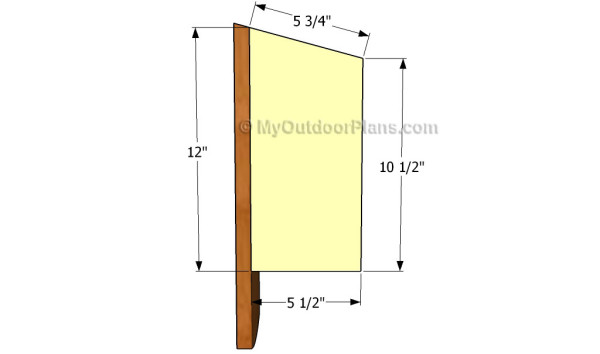
Building the side components
The next step of the woodworking project is to build the sides of the birdhouse. In order to get a professional result, we recommend you to cut the sides out of 1×6 lumber. Mark the cut lines and cut the top at 15 degrees.
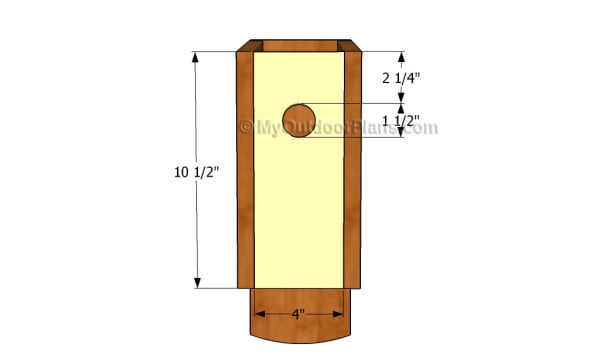
Fitting the face of the birdhouse
Build the front face of the birdhouse out of 1×6 lumber, but make sure you adjust the width at 4″. Smooth the edges with sandpaper and drill the entrance holes using a hole saw drill bit. Fit the face between the side components and lock it tightly by inserting finishing nails.
Fitting the bottom
Continue the project by installing the bottom of the blue bird house. Cut the component from a piece of 1×6 lumber using a circular saw. Sand the edges and secure it into place with two nails. Work with great care and good judgement, in order to obtain a professional result.
Top Tip: As you can see in the free plans, you should drill a couple of 1/8” drain holes, using a drill machinery.
Fitting the roof of the birdhouse
One of the last step of the project is to build the top of the birdhouse. Cut the roof out of 1×8 lumber and center it to the birdhouse frame. Drill pilot holes through the roof and insert 1 1/4″ finishing nails into the frame of the birdhouse.
How to build a birdhouse
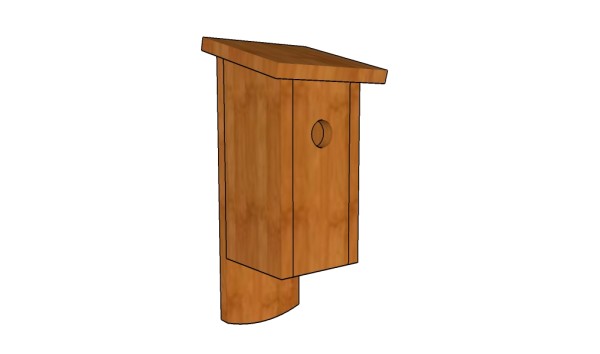
Fill the cracks and the holes with wood putty and leave the compound to harden for several hours. Afterwards, sand the wooden surface and the edges with medium-grit sandpaper.
Top Tip: In order to protect the birdhouse from water damage and wood decay, we recommend you to apply several coats of latex paint (green, white, brown).
This woodworking project is about how to build a birdhouse plans. If you want to see more outdoor plans, check out the rest of our step by step projects and follow the instructions to obtain a professional result.


