This step by step diy woodworking project is about I beam sawhorse plans. If you want to build a stackable sawhorse from 2x4s, this project will ease your job. You can adjust the size of the sturdy sawhorse to suit your needs. If you build a couple of these, you can set a basic workbench anywhere. Make sure you check the rest of plans to see alternatives and more projects for your garden.
Work with attention and don’t forget that a good planning will save you from many issues and it will keep the costs withing the total budget. Invest in high quality materials, such as pine, redwood or cedar. Drill pocket holes before inserting the galvanized screws, to prevent the wood from splitting. Add waterproof glue to the joints, in order to enhance the rigidity of the structure. See all my Premium Plans HERE.
Projects made from these plans
I Beam Sawhorse Plans
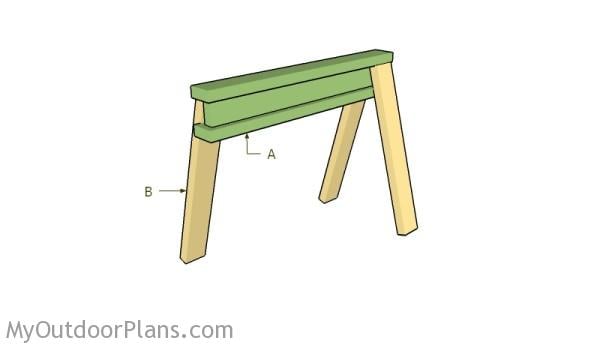
Building an i-beam sawhorse
Cut & Shopping Lists
- A – 2 pieces of 2×4 lumber – 36″ long, 1 piece – 34″ long I-BEAM
- B -4 pieces of 2×4 lumber – 28″ long LEGS
- 3 pieces of 2×4 lumber – 8′
- 50 pieces of 2 1/2″ screws
- sawhorse brackets
- 2 1/2″ screws
- 1 1/4″ screws
- wood putty, wood stain
Tools
![]() Hammer, Tape measure, Framing square, Level
Hammer, Tape measure, Framing square, Level
![]() Miter saw, Drill machinery, Screwdriver, Sander
Miter saw, Drill machinery, Screwdriver, Sander
Time
Related
Building stackable sawhorse
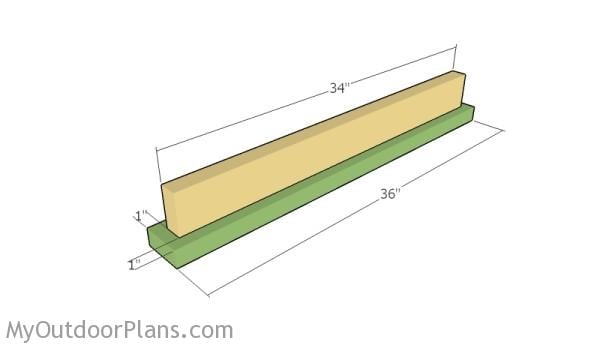
Assembling the I beam
First of all, you need to assemble the I-beam for the sawhorse. Therefore, I recommend you to cut the components from 2×4 lumber. Drill pilot holes through the base beam and insert 2 1/2″ screws into the top component. Add glue to the joint and make sure the components are aligned before inserting the screws.
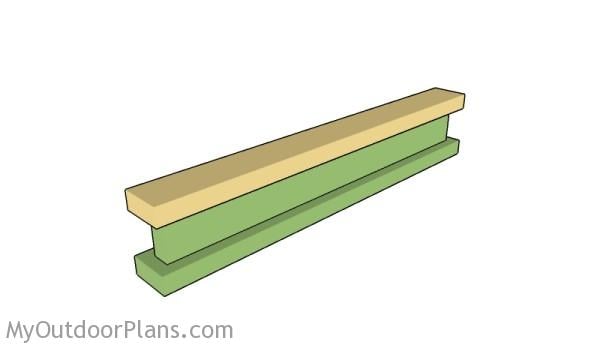
I beam
Fit the top slat to complete the I beam. Add glue to the joints and make sure the components are aligned properly. Drill pilot holes and insert 2 1/2″ screws.
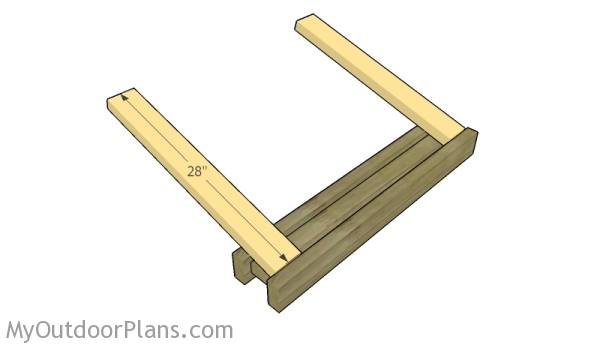
Fitting the legs
Next, attach the 2×4 legs to the I beam. You can adjust the size of the legs to suit your needs. Drill pilot holes and insert four 2 1/2″ screws into the beam.
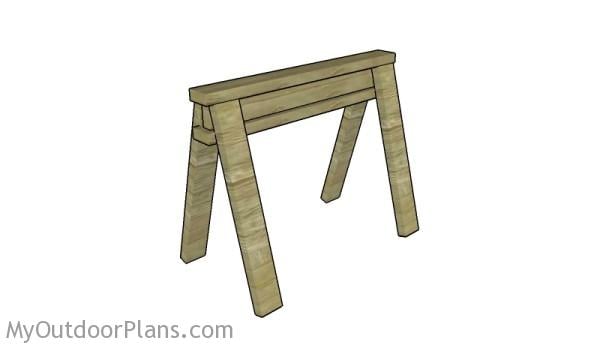
I beam sawhorse plans
Repeat the process for the opposite side of the beam. If you build more of these sawhorse you can save space, as they can be stacked together easily.
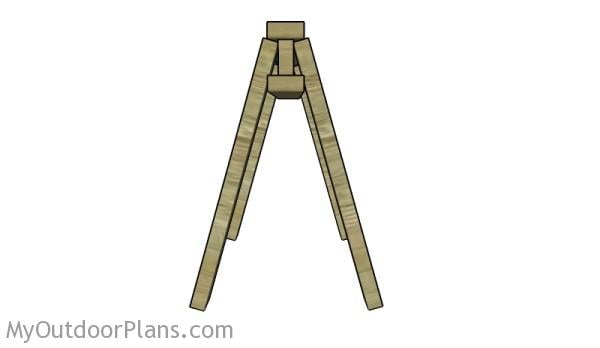
Sawhorse Plans
Fill the holes with wood putty and let them dry out for a few hours. Smooth the surface with 100-220 grit sandpaper and remove the residues with a damp cloth.
Top Tip: Apply a few coats of paint or stain to the components, to enhance the look of the project.
This woodworking project was about I-beam sawhorse plans free. If you want to see more outdoor plans, check out the rest of our step by step projects and follow the instructions to obtain a professional result.


1 comment
how much weight can 2×4 ibeam saw horses hold or support?