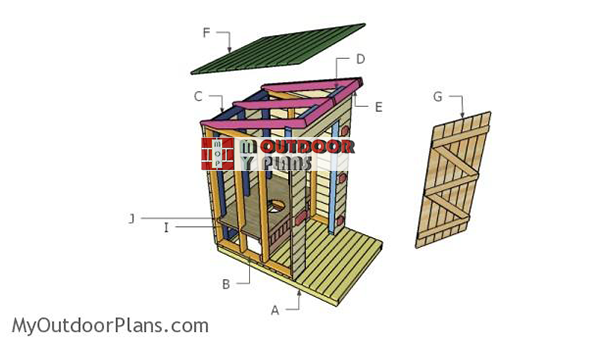
This step by step diy woodworking project is about a outhouse roof plans. This is PART 3 of the project, where I show you how to build the door for the outhouse. Make sure you check out the rest of the plans, so you learn how to build the components and assemble the outhouse in a professional manner. Take a look over the rest of our woodworking plans, if you want to get more building inspiration.
When buying the lumber, you should select the planks with great care, making sure they are straight and without any visible flaws (cracks, knots, twists, decay). Investing in cedar or other weather resistant lumber is a good idea, as it will pay off on the long run. Use a spirit level to plumb and align the components, before inserting the galvanized screws, otherwise the project won’t have a symmetrical look. If you have all the materials and tools required for the project, you could get the job done in about a day. See all my Premium Plans HERE.
Projects made from these plans
Outhouse door building plans
Building-an-outhouse
Cut & Shopping Lists
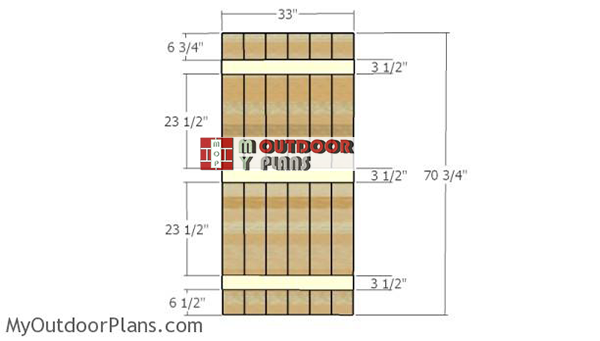
- G – 6 pieces of 1×6 lumber – 70 3/4″ long, 3 pieces of 1×4 lumber – 33″ long DOOR
- G – 3 pieces of 1×4 lumber – 3 1/2″ long, 1 piece – 7″ long SUPPORTS
- 2 pieces of 1×4 lumber – 8′
- 6 pieces of 1×6 lumber – 8′
- 100 pieces of 1 1/4″ screws
- 100 pieces of 2″ brad nails
- wood glue, stain/paint
- hinges & latches
Tools
![]() Hammer, Tape measure, Framing square, Level
Hammer, Tape measure, Framing square, Level
![]() Miter saw, Drill machinery, Screwdriver, Sander
Miter saw, Drill machinery, Screwdriver, Sander
Time
![]() One day
One day
Related
- PART 1: Outhouse Plans
- PART 2: Lean to Outhouse Roof Plans
- PART 3: Outhouse Door Plans
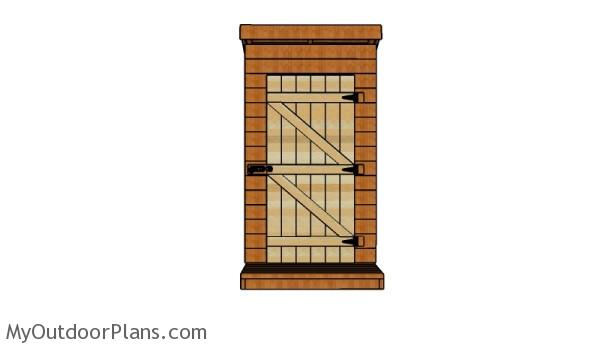
Outhouse Door Plans
Building-the-door-for-the-outhouse
The first step of the project is to assemble the frame of the door for the outhouse. Use 1×6 lumber for the vertical slats and 1×4 lumber for the supports. Lay the panel slats on a level surface and leave no gaps between them. Attach the supports and make sure they are equally-spaced. Drill pilot holes, add glue to the joints and insert 1 1/4″ screws to assemble everything together tightly. Smooth the edges with attention with sandpaper.
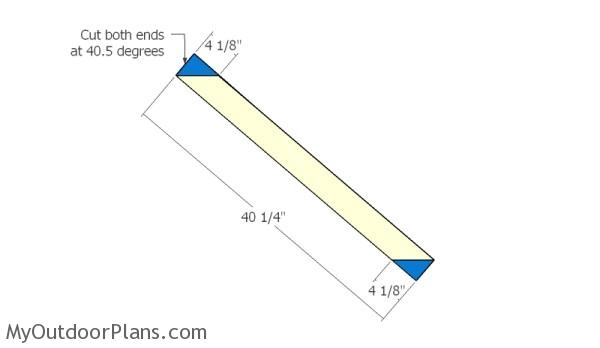
Building the diagonal braces
Build the diagonal braces from 1×4 lumber. Cut both ends at 49.5 degrees using a miter saw and smooth the edges with sandpaper.
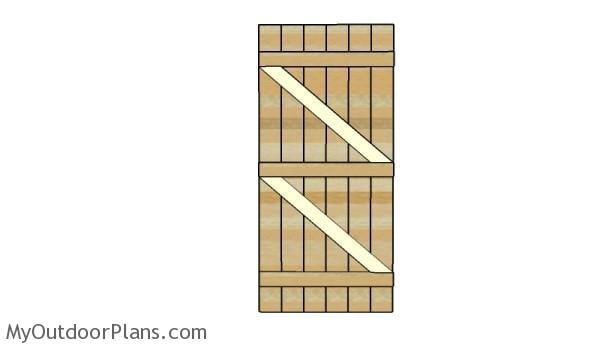
Fitting the diagonal braces
Fit the diagonal braces to the door and lock them into place with 1 1/4″ screws. Add glue to the joints and make sure there are no gaps between the components. In addition, make sure the corners are right-angled.
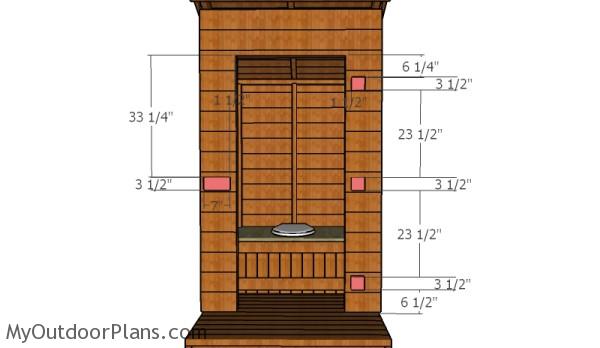
Fitting the door supports
Fit 1×4 supports to the front wall of the outhouse. Align the supports with attention and lock them into place with 1 1/4″ screws. Add waterproof glue to the joints for a better bond.
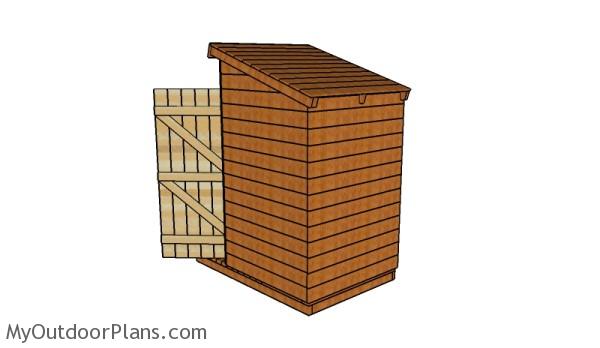
How to build an outhouse
Attach the door to the front wall, making sure you leave a small clearance gap between the decking to the bottom edge. Use three hinges to secure the door to the supports. In addition, attach a latch to secure the door into place. Make sure the door opens and closes easily and make adjustments, if needed. Fit a latch to the interior, as well.
Free outhouse plans
You could apply a few coats of stain or paint over the component to prevent the wood from water damage. If you use cedar, you should be less worried about it, but if you bought pine, this should be on top of your list of priorities.
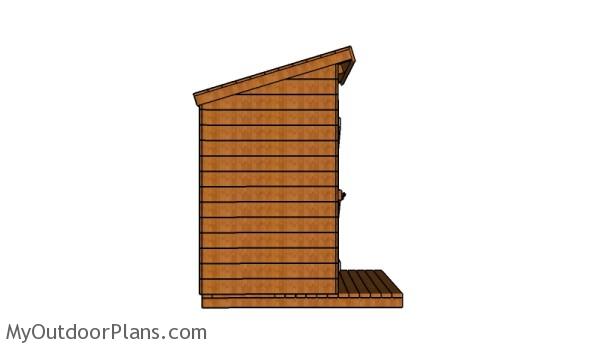
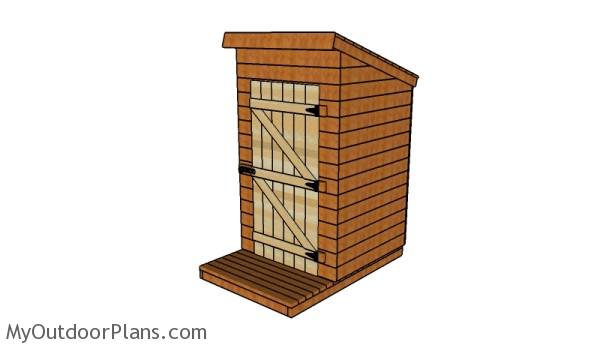
Wood outhouse plans
The outhouse seen from one side has a neat look. Moreover, if you like the design, you can make a few adjustments and use it as a garden shed. This is a one week project, so you should have no problems getting the job done, if you follow my plans.
Outhouse Plans
Fill the holes with wood putty and let them dry out for a few hours. Smooth the surface with 100-220 grit sandpaper and remove the residues with a damp cloth.
Top Tip: Check out PART 1 of the project to learn how to build the frame of the outhouse and PART 2 to learn hoe to build the roof.
This woodworking project was about outhouse door plans free. If you want to see more outdoor plans, check out the rest of our step by step projects and follow the instructions to obtain a professional result.

EXPLORE MORE IDEAS FOR:
 |
 |
 |
 |
2 comments
Thanks – very nice plans for an outhouse!
I might suggest that putting a vent pipe from the ground level up to above the roof is a good practice. It can greatly reduce both bugs/flies and odors. A plan might also include some reference to the foundation – will it be placed on simple cement anchor blocks or wooden posts? How will it be anchored to the ground to prevent an inconvenient tip-over in high winds.
Thanks again!
great plans