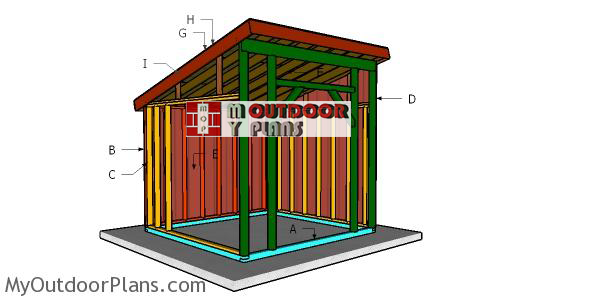
This step by step diy project is about free 10×10 run in shed plans. I have designed this compact run in shelter so you can build it in a few days with basic tools and materials. This is a small and compact shed with a super access on the front side. You can adjust the slope of the roof to suit your needs. Take a look over the rest of my woodworking plans, if you want to get more building inspiration.
When buying the lumber, you should select the planks with great care, making sure they are straight and without any visible flaws (cracks, knots, twists, decay). Investing in cedar or other weather resistant lumber is a good idea, as it will pay off on the long run. Use a spirit level to plumb and align the components, before inserting the galvanized screws, otherwise the project won’t have a symmetrical look. If you have all the materials and tools required for the project, you could get the job done in about a day. See all my Premium Plans HERE.
Projects made from these plans
10×10 Run in Shed Plans
Building-a-10×10-run-in-shed
Cut & Shopping Lists
- A – 4 pieces of 4×4 lumber – 120″ long BASE
- B – 2 pieces of 2×4 lumber – 113″ long, 1 piece – 116 1/2″ long, 7 pieces – 87″ long 2xSIDE WALL
- C – 2 pieces of 2×4 lumber – 120″ long, 1 piece – 113″ long, 11 pieces – 87″ long BACK WALL
- D – 4 pieces of 4×4 lumber – 107″ long, 1 piece – 72″ long, 2 pieces – 34″ long, 1 piece of 2×8 lumber – 120″ long POST
- 8 pieces of 4×4 lumber – 10′
- 2 pieces of 4×4 lumber – 8′
- 9 pieces of 2×4 lumber – 10′
- 29 pieces of 2×4 lumber – 8′
- 1 piece of 2×8 lumber – 10′
- 2 1/2″ screws, 3 1/2″ screws
- 5″ screws
- 4″ carriage bolts
- hurricane ties
- wood filler , wood glue, stain/paint
Tools
![]() Hammer, Tape measure, Framing square, Level
Hammer, Tape measure, Framing square, Level
![]() Miter saw, Drill machinery, Screwdriver, Sander
Miter saw, Drill machinery, Screwdriver, Sander
Time
![]() One weekend
One weekend
Related
- PART 1: 10×10 Run in shed plans
- PART 2: 10×10 Run in roof shed plans
Building a 10×10 run in shed
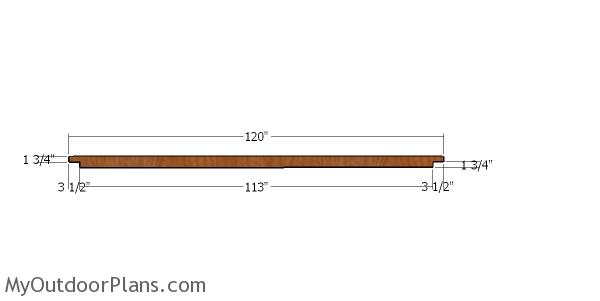
Skids
The first step of the project is to build the beams for the base of the shed using 4×4 lumber. Cut both ends of the beams, as shown in the diagram. Make parallel cuts to the indicated areas and then remove the excess with a chisel. Smooth the surface with sandpaper.
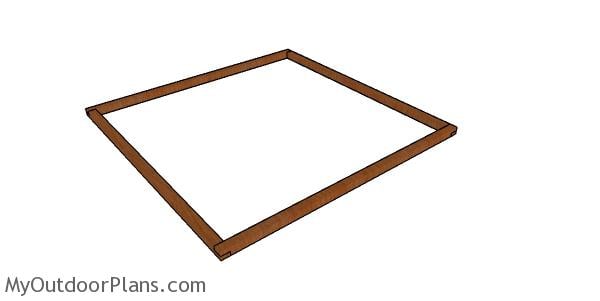
Assembling the shed skids
Select the location for the run in lean to shed and then remove the vegetation layer. Level the surface with a spirit level and then fit the 4×4 pressure treated beams into place. Assemble the base for the shed using 3 1/2″ screws. Make sure the corners are square, drill pilot holes and then insert the screws to lock the base beams together tightly. Use 2×3 anchors to lock the base into the ground, every 16″. Alternatively, use hurricane anchors if you live an area with strong winds.
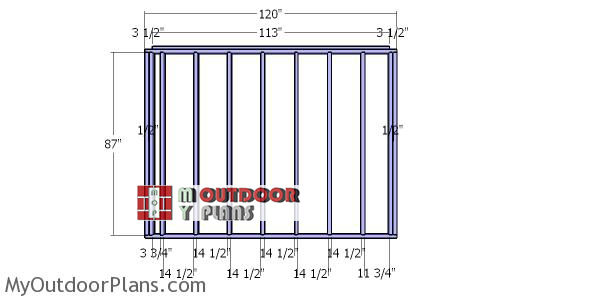
Back-wall-frame—10×10-run-in-shed
The next step of the project is to build the back wall from 2×4 lumber. Cut all the components at the right dimensions, after taking accurate measurements. Make sure the edges are flush and check if the corners are square. Drill pilot holes through the plates and insert 3 1/2″ screws into the studs. Place double studs at both ends of the wall, with 1/2″ plywood between them. Fit the studs every 16″ on center.
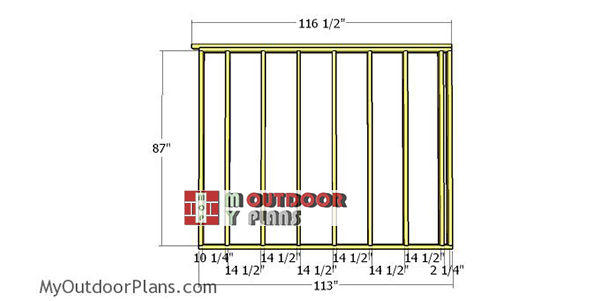
Side-wall-frame—10×10-run-in-shed
Build the side walls for the run in shed. Cut the components at the right dimensions and then assemble the frames using the same techniques described above.

Posts
Use 4×4 lumber for the front posts. Mark the cut lines on the top of the posts and then get the job done with a circular saw. Make 1 1/2″ deep parallel cuts inside the marked area and then get the job done with a chisel. Smooth the recess with sandpaper, for a professional result.
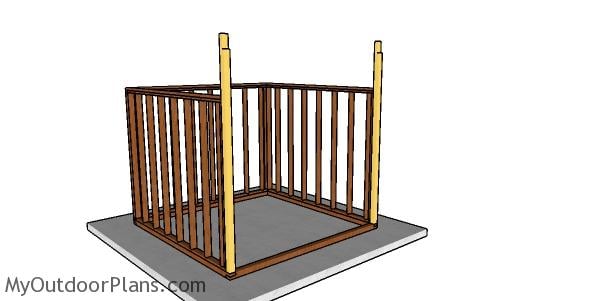
Fitting the front posts
Fit the posts to the front of the shed. Align the edges with attention and then drill pilot holes. Insert 5″ screws to lock them to the side wall properly. Use a spirit level to plumb the posts properly.
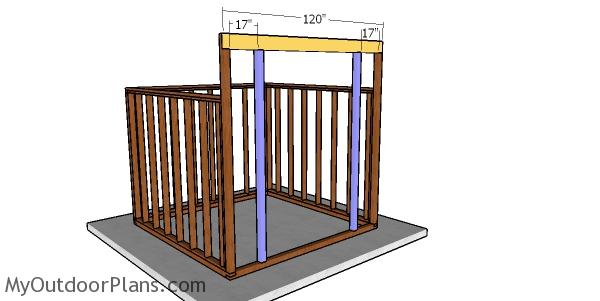
Fitting the top beam
Fit the top beam to the posts, as shown in the diagram. Next, fit the rest of the posts, as shown in the free shed plans. Make sure the corners are square and then align the edges flush. Drill pilot holes and insert 5″ screws to lock everything together tightly.
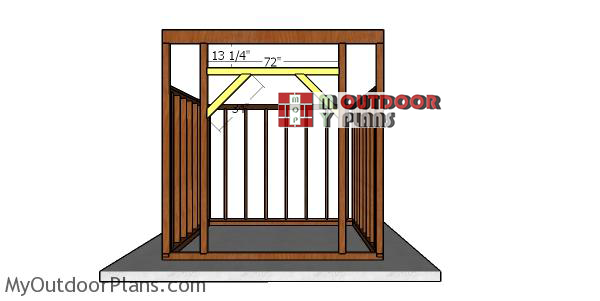
Front-wall-frame
Fit the 4×4 horizontal support between the inside posts. Drill pilot holes at both ends of the support and then secure it into place with 5″ screws. Attach the diagonal braces to the frame, as shown in the plans. Use a saw to make 45 degree cuts at both ends of the braces.
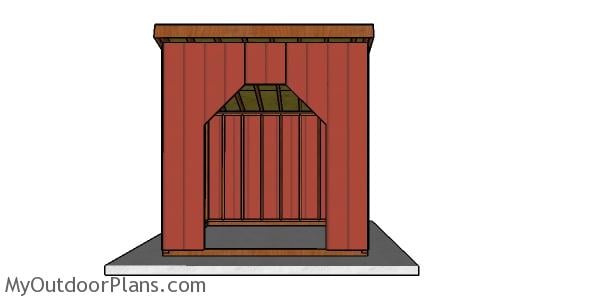
10×10 Run in Shed Plans – Front view
Make sure you check out PART 2 for the rest of the plans.
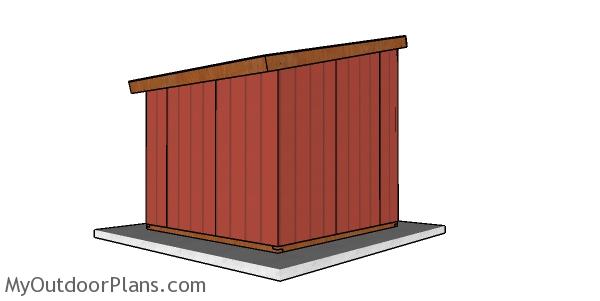
10×10 run in shed – back view
This is a simple project you should be able to build in a few days without much effort. This 10×10 run in shed is a multi purpose shelter. You can use this run in shed for storing tools, equipment or even outdoor furniture. Check out PART 2 of the project to learn more on how to build the roof for the shed.
This woodworking project was about 10×10 run in shed plans free. If you want to see more outdoor plans, check out the rest of our step by step projects and follow the instructions to obtain a professional result.

EXPLORE MORE IDEAS FOR:
 |
 |
 |
 |