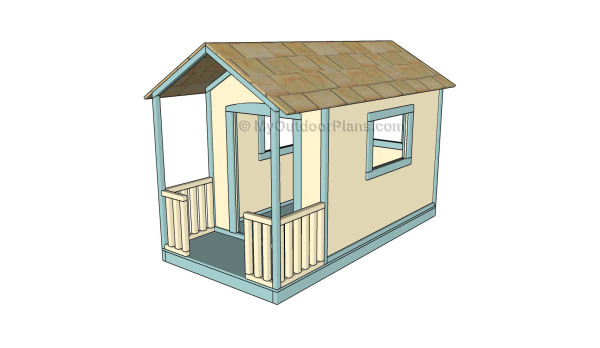
This step by step diy woodworking project is about building a playhouse. If you want to learn more about building the roof of a playhouse with a front overhang, we recommend you to take a look over the instructions described in the article. Work with good judgement and don’t forget to take a look over the rest of the related plans, as there are many designs and woodworking projects to select from.
Work with attention and don’t forget that a good planning will save you from many issues and it will keep the costs within the total budget. Invest in high quality materials, such as pine, redwood or cedar. Drill pocket holes before inserting the galvanized screws, to prevent the wood from splitting. Add waterproof glue to the joints, in order to enhance the rigidity of the structure. See all my Premium Plans HERE.
Projects made from these plans
Building a Playhouse
Building-a-playhouse
Cut & Shopping Lists
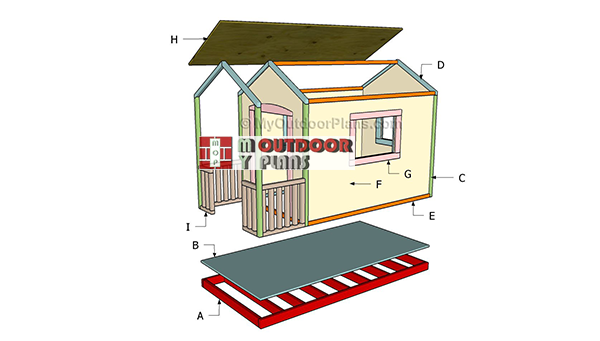
- H – 2 pieces of 3/4″ plywood – 32″x96 long ROOFING
- I – 4 pieces of 2×2 lumber – 19 1/2″ long, 4 pieces – 10″ long, 16 pieces – 16″ long RAILINGS
- 2 pieces of 3/4″ plywood – 4’x8′
- 5 pieces of 2×2 lumber – 8 ft
- 2 1/2″ screws
- 1 1/4″ screws
- wood putty, wood stain
Tools
![]() Hammer, Tape measure, Framing square, Level
Hammer, Tape measure, Framing square, Level
![]() Miter saw, Drill machinery, Screwdriver, Sander
Miter saw, Drill machinery, Screwdriver, Sander
Time
![]() One day
One day
Related
- Part 1: Simple playhouse plans
- Part 2: Building a playhouse
How to build a playhouse roof
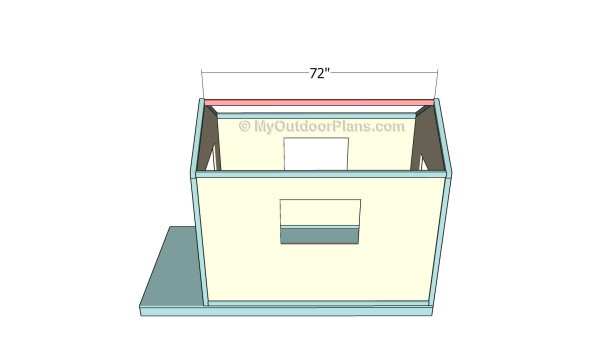
Fitting the top ridge
Build the top ridge out of 2×2 lumber. Drill pocket holes at both ends of the component and secure it to the structure with 2 1/2″ screws. Make sure the corners are square and add glue to the joints.
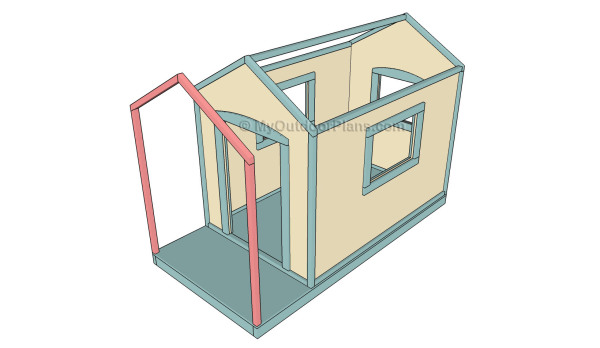
Building the overhang
Next, you need to fit the overhang supports. Cut the components out of 2×2 lumber and drill pilot holes through the rafters. Insert 2 1/2″ screws into the vertical supports. Check out the previous part of the project to learn more about cutting the components at the right angles.
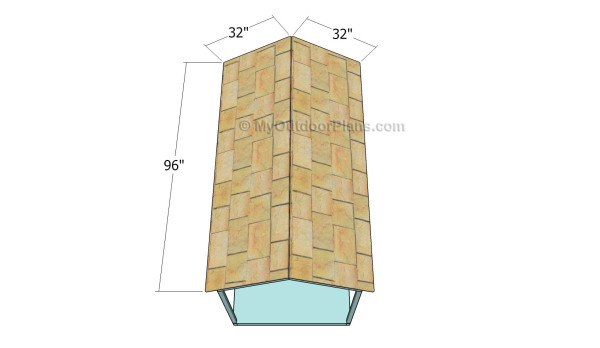
Attaching the roofing sheets
Cut two pieces of 3/4″ plywood at the right dimensions shown in the diagram. Attach the sheets to the top of the structure and secure it into place using 1 1/4″ screws. cover the roof with tar paper and install asphalt shingles, in order to water proof the structure.
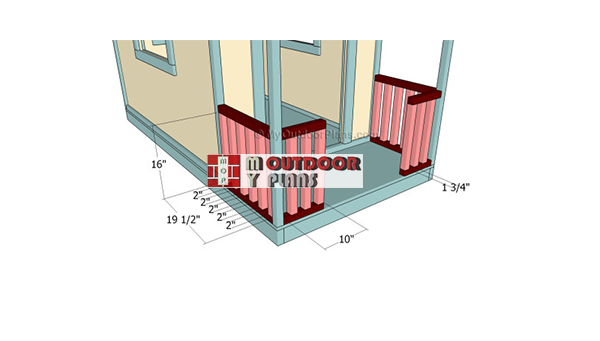
Building-the-balusters
Build the railings for the playhouse out of 2×2 lumber. Cut the components at the right dimensions and lock them together, as shown in the diagram. Drill pocket holes at both ends of the balusters and insert 2 1/2″ screws into the top and bottom plates. Drill pocket holes at both ends of the rails and insert 2 1/2″ screws into the vertical supports.
Align the edges with great care, drill pilot holes through the bottom plates and insert 2 1/2″ screws into the floor of the playhouse.
Simple playhouse plans
One of the last steps of the woodworking project is to take care of the finishing touches. Therefore, fill the pilot holes with wood putty and smooth the surface with 120-grit sandpaper.
Top Tip: If you want to enhance the look of the project and to protect the desk from decay, we recommend you to cover the components with paint or stain. Pay attention to the rest of the project to learn how to build the main structure of the playhouse.
This woodworking project was about simple playhouse plans. If you want to see more outdoor plans, we recommend you to check out the rest of our step by step projects. LIKE us on Facebook and Google + to be the first that gets out latest projects and to hep us keep adding free woodworking plans for you.

EXPLORE MORE IDEAS FOR:
 |
 |
 |
 |