This step by step diy woodworking project is about 2×4 outdoor bar plans. I have designed this funky bar so you can build one in under a day using just 2x4s. This outdoor bar is sturdy and has a playful unique design. Make sure you take your time before making the cuts, for a professional result. See my other woodworking plans HERE.
There are many plans and designs to choose from, so make sure you take a close look over the rest of the garden bridge plans featured on our website. Plan everything with attention and adjust the size and the shape of the bridge to suit your needs. Plumb the legs and make sure the corners are right-angled before inserting the galvanized screws into place. Drill pilot or pocket holes to prevent the wood from splitting. See all my Premium Plans HERE.
Projects made from these plans
2×4 Outdoor Bar – Free DIY Plans
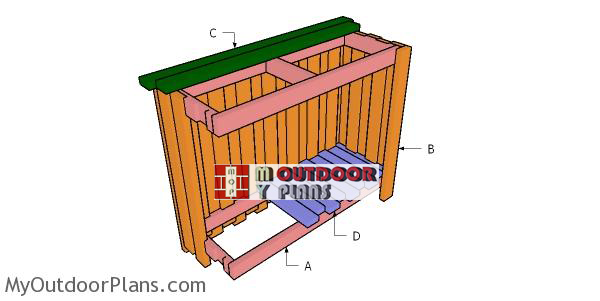
Building-a-2×4-outdoor-bar
Cut & Shopping Lists
- A – 2 pieces of 2×4 lumber – 49 1/2″ long, 3 pieces – 14 1/2″ long 2xFRAME
- B – 14 pieces of 2×4 lumber – 42″ long, 13 pieces – 40″ long SLATS
- C – 3 pieces of 2×4 lumber – 52 1/2″ long, 5 pieces – 55 1/2″ long TABLETOP
- D – 7 pieces of 2×4 lumber – 16 3/4″ long, 6 pieces – 19″ long, 2 pieces – 17 1/2″ long BOTTOM
- 15 pieces of 2×4 lumber – 12′
- 2 1/2″ screws
- glue, filler, stain
Tools
![]() Hammer, Tape measure, Framing square, Level
Hammer, Tape measure, Framing square, Level
![]() Miter saw, Drill machinery, Screwdriver, Sander
Miter saw, Drill machinery, Screwdriver, Sander
![]() Post hole digger, Concrete mixer
Post hole digger, Concrete mixer
Time
![]() One day
One day
Related
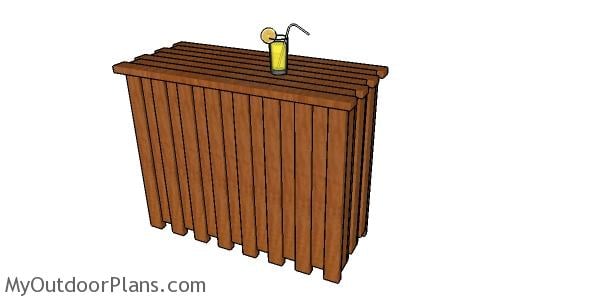
It’s that simple to build a 2×4 bar!
How to build an outdoor bar from 2x4s
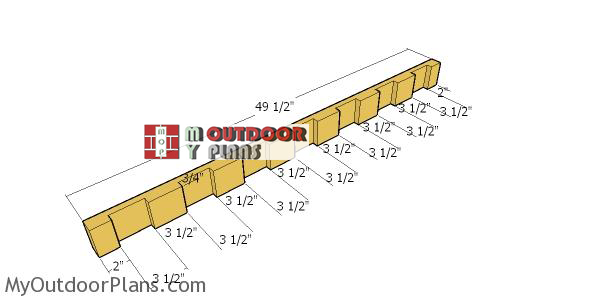
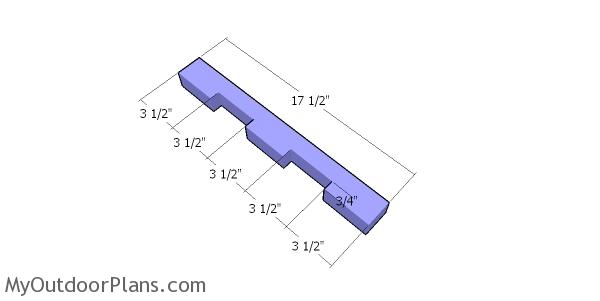
Building-the-long-support-for-frame
The first step of the project is to build the frame for the bar. Therefore, you need to use 2×4 lumber and make a few notches, as shown in the diagram. You can use a circular saw or a table saw to make the notches in the slats. You need one slat for each frame. Make parallel cuts inside the slat and then remove the excess with a chisel and sandpaper.
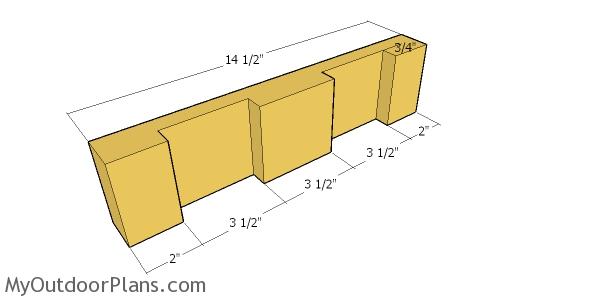
Building the short supports
Next, use the same techniques described above to build the other supports for the frames. Build two supports for each frame.
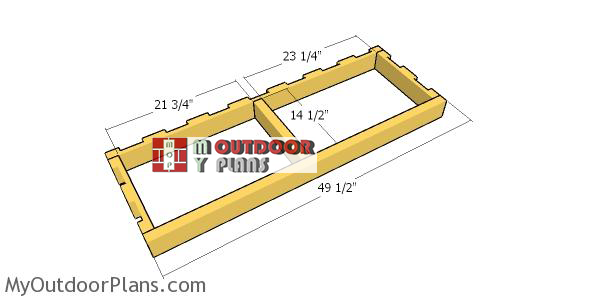
Assembling-the-bar-frame
Next, you need to assemble the two identical frames, as shown in the plans. Align the edges with attention and make sure the corners are square. Drill pilot holes through the 49 1/2″ slats and insert 2 1/2″ screws into the perpendicular components.
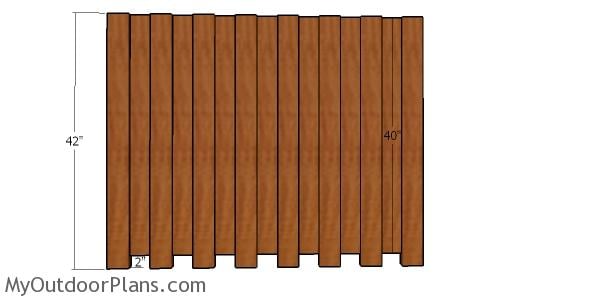
Side slats
Continue the project by attaching the 2×4 slats to the sides of the bar. Align the edges with attention, drill pilot holes and then insert 2 1/2″ screws into the frame.
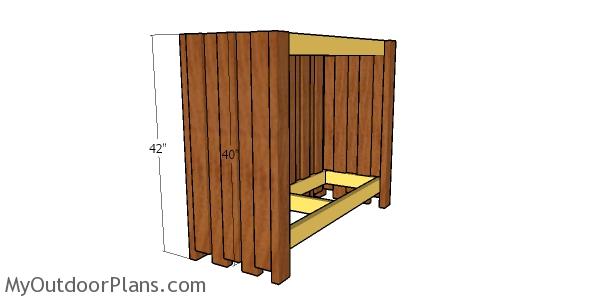
Front wall slats
Next, attach the 2×4 slats to the front of the bar. Align the edges with attention, drill pilot holes and insert 2 1/2″ screws to secure the slats into place.
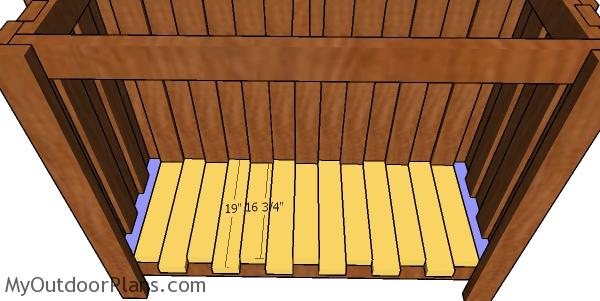
Fitting the bottom slats
The next step of the project is to attach the 2×4 slats to the bottom of the bar. Cut the slats at 19″ and at 16 3/4″ and then lay them to the bottom frame. Leave no gaps between the slats and then drill pilot holes and insert 2 1/2″ screws.
End bottom slats
You need to make a few cuts to the slats that are placed at both ends of the floor. Use a circular saw to make parallel cuts inside the notches and then remove the excess with a chisel. Smooth the recess with sandpaper.
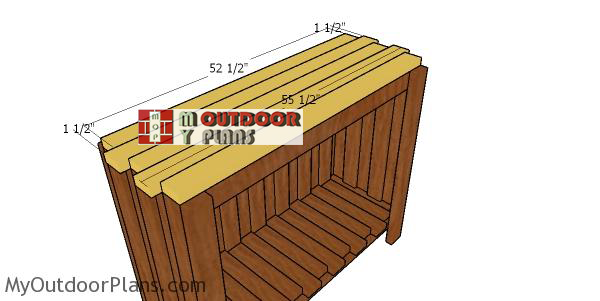
Fitting-the-tabletop-slats
Next, fit the slats to the top of the bar. Make sure the slats are aligned with the sides. In addition, center the slats to the top of the bar. Drill pilot holes and insert 2 1/2″ screws to lock them into place tightly. Leave no gaps between the slats.
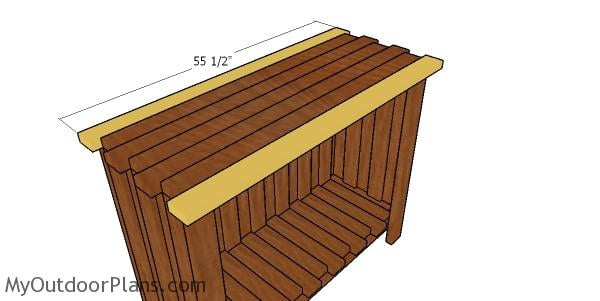
Fitting the end tabletop slats
Fit the end slats to the top of the bar. Drill pilot holes and insert 2 1/2″ screws to lock them to the frame.
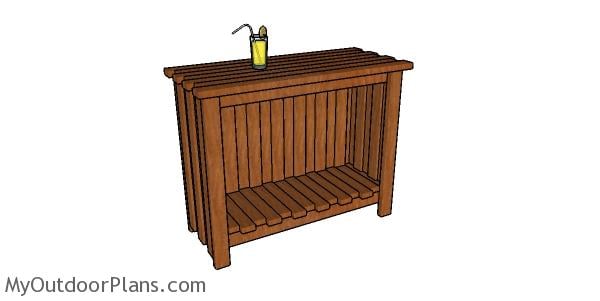
How to build an outdoor bar
Last but not least, you need to take care of the finishing touches. Therefore, fill the holes with wood putty and then smooth the surface with 120-220 grit sandpaper. Apply a few coats of paint or stain to enhance the look of the wood and to protect the components from the elements.
2×4 Outdoor Bar Plans
You can customize the bar to suit your needs, by adding a few shelves.
Top Tip: I have lots of bar plans on the blog and I strongly recommend you to check them out HERE. Moreover, if you are in need for more project ideas, you should check the complete list of my woodworking projects HERE.
This woodworking project was about 2×4 outdoor bar plans. If you want to see more outdoor plans, we recommend you to check out the rest of our step by step projects. LIKE us on Facebook and Google + to be the first that gets out latest projects.
EXPLORE MORE IDEAS FOR:
 |
 |
 |
 |