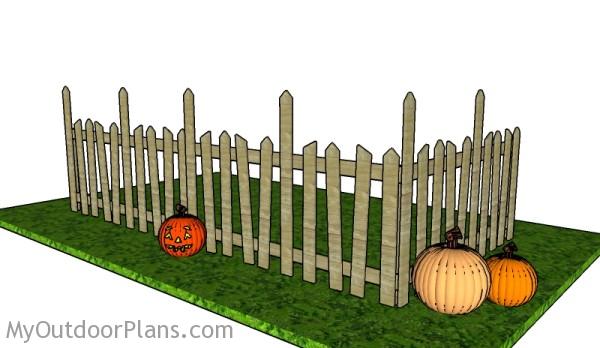
This step by step diy woodworking project is about Halloween graveyard fence plans. The project features instructions for building a scary fence for creating an unique Halloween decor. You can even use scrap wood or pallet wood to get the job done in a professional manner. Make sure you take a look over the rest of the related projects to see alternatives and more projects for your garden. Remember that you might need to adjust the size of the components to suit your needs.
When buying the lumber, you should select the planks with great care, making sure they are straight and without any visible flaws (cracks, knots, twists, decay). Investing in cedar or other weather resistant lumber is a good idea, as it will pay off on the long run. Use a spirit level to plumb and align the components, before inserting the galvanized screws, otherwise the project won’t have a symmetrical look. If you have all the materials and tools required for the project, you could get the job done in about a day. See all my Premium Plans HERE.
Projects made from these plans
Halloween Graveyard Fence Plans
Building a Halloween fence
[tabs tab1=”Materials” tab2=”Tools” tab3=”Time”]
[tab id=1]
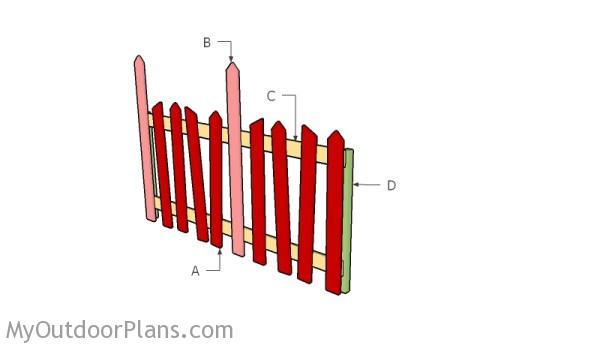
- A – 8 pieces of 1×4 lumber – 36″ long PICKETS
- B – 2 pieces of 1×4 lumber – 48″ long PICKETS
- C – 2 pieces of 1×4 lumber – 72″ long RAILS
- D – 2 pieces of 2×2 lumber – 52″ long POSTS
- 11 pieces of 1×4 lumber – 8 ft
- 1 1/4″ screws
- 1 5/8″ screws
- 2 1/2″ screws
- filler, stain
- glue
[/tab]
[tab id=2]
![]() Hammer, Tape measure, Framing square, Level
Hammer, Tape measure, Framing square, Level
![]() Miter saw, Drill machinery, Screwdriver, Sander
Miter saw, Drill machinery, Screwdriver, Sander
[/tab]
[tab id=3]
![]() One day
One day
[/tab]
[/tabs]
How to build a Halloween fence

Making the pickets
The first step of the project is to build the pickets for the Halloween fence. Use 1×4 slats or pallet wood to make the pickets. As you can easily notice in the diagram, you can make different decorative cuts to the top of the picket. Use a saw to make the cuts and smooth the edges with sandpaper.
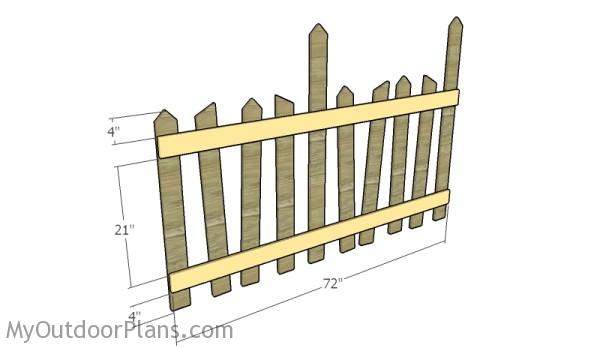
Attaching the rails
After making the pickets, you should assemble the panels, by attaching the rails. Use 1×4 lumber for the rails, as well. You can adjust the height at which you place the rails, but make sure they are equally spaced at both ends.
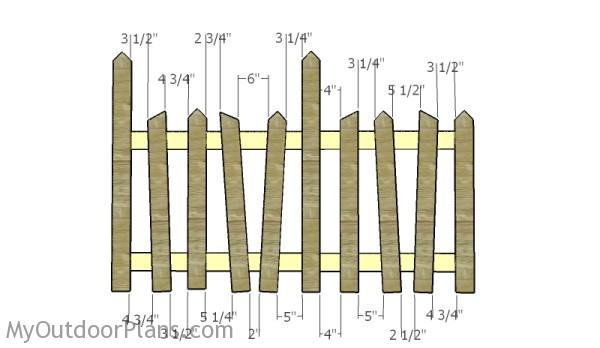
Attaching the pickets
Adjust the distance between the pickets to create that scary effect. Lean the pickets randomly or use the pattern shown in our plans. Drill pilot holes through the picket and insert 1 1/4″ screws into the rails.
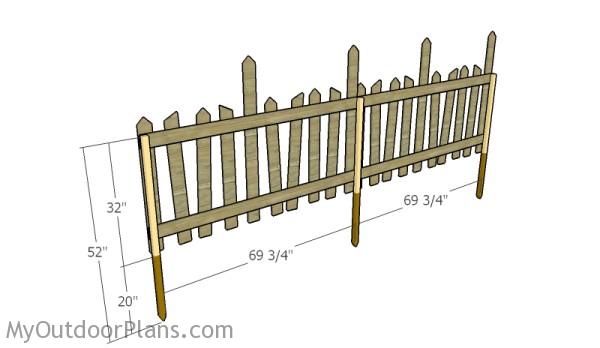
Fitting the posts
After assembling the panels, you need to install them into place. Therefore, use 2×2 posts, as shown in the diagram. Make cuts to the posts and fit them into the ground for about 20″. Use a spirit level to make sure the posts are plumb.
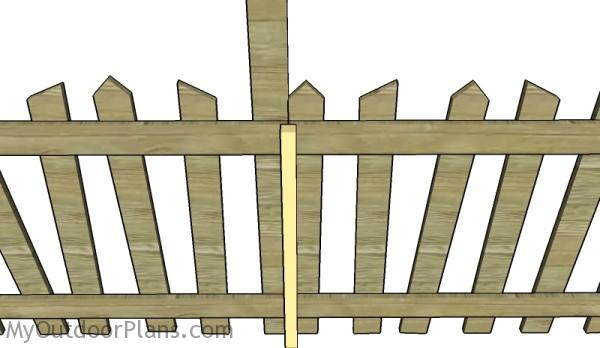
Joining the fence panels
When joining two panels make sure the joint is falling to the middle of the posts, as shown in the diagram. Drill pilot holes and insert 2 1/2″ screws through the pickets into the posts.
Halloween Graveyard Fence Plans
Fill the holes and dents with wood putty and let it dry out for several hours. Use 120-200 grit sandpaper to smooth the surface. Remember that you can adjust the design and size of the fence to suit your needs.
Top Tip: If you want to enhance the look of the project and to protect the components from decay, we recommend you to apply paint or stain.
This woodworking project was about Halloween graveyard fence plans. If you want to see more outdoor plans, we recommend you to check out the rest of our step by step projects. LIKE us on Facebook and Google + to be the first that gets out latest projects and to hep us keep adding free woodworking plans for you.
EXPLORE MORE IDEAS FOR:
 |
 |
 |
 |