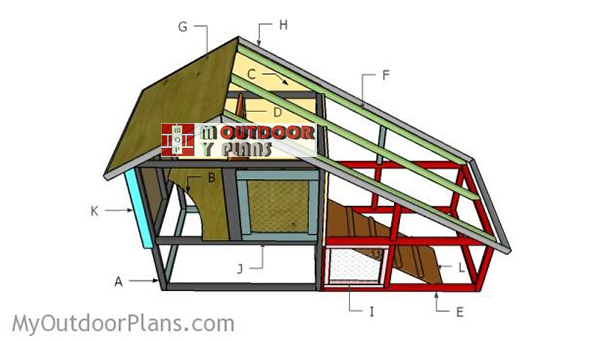
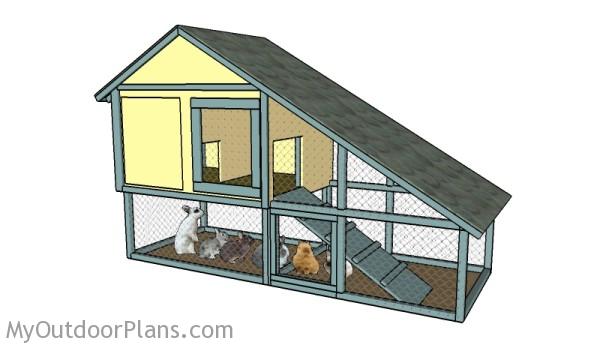
This step by step diy woodworking project is about free rabbit cage plans. The project features instructions for building the roof and the run for the outdoor rabbit hutch. This part of the project will show you how to get the job done with minimum effort and costs. Make sure you take a look over the rest of plans to see alternatives and more projects for your garden.
When buying the lumber, you should select the planks with great care, making sure they are straight and without any visible flaws (cracks, knots, twists, decay). Investing in cedar or other weather resistant lumber is a good idea, as it will pay off on the long run. Use a spirit level to plumb and align the components, before inserting the galvanized screws, otherwise the project won’t have a symmetrical look. If you have all the materials and tools required for the project, you could get the job done in about a day. See all my Premium Plans HERE.
Projects made from these plans
Free Rabbit Hutch Plans
Building-a-rabbit-hutch
Cut & Shopping Lists
- F – 3 pieces of 2×2 lumber – 33 3/4″ long, 3 pieces – 83″ long RAFTERS
- G – 1 piece of 3/4″ plywood – 33 3/4″x40″ long, 1 piece – 40″x86″ long ROOF
- G – 45 sq ft of tar paper, 45 sq ft of asphalt shingles ROOFING
- H – 2 pieces of 1×2 lumber – 35″ long, 2 pieces – 87 1/4″ long, 2 pieces – 40″ long TRIMS
- I – 2 pieces of 2×2 lumber – 18″ long, 2 pieces – 15 1/2″ long DOOR
- J – 2 pieces of 1×3 lumber – 20 3/4″ long, 2 pieces – 19 1/4″ long DOOR
- K – 4 pieces of 1×2 lumber – 46 1/4″ long, 2 pieces – 30, 2 pieces of 1×3 lumber – 30″ long, 2 pieces – 26 3/4″ long, 2 pieces – 32 1/2″ long TRIMS
- L – 1 piece of 3/4″ plywood – 15 3/4″x42 3/4″ long, 4 pieces of 1×2 lumber – 15 3/4″ long LADDER
- 5 pieces of 2×2 lumber – 8′
- 7 pieces of 1×2 lumber – 8′
- 3 pieces of 1×3 lumber – 8′
- 2 pieces of 3/4″ plywood – 4’x8′
- 45 sq ft of tar paper, 45 sq ft of asphalt shingles
- 200 pieces of 1 5/8″ screws
- 200 pieces of 2 1/2″ screws
- 60 sq ft of chicken wire
- 6 small hinges, 3 latches
Tools
![]() Hammer, Tape measure, Framing square, Level
Hammer, Tape measure, Framing square, Level
![]() Miter saw, Drill machinery, Screwdriver, Sander
Miter saw, Drill machinery, Screwdriver, Sander
Time
![]() One day
One day
How to build a rabbit hutch

Building-the-rafters
Build the rafters for the rabbit cage from 2×2 lumber. Cut one end of the rafters at 60 degrees. Cut the opposite end of the long rafter at 30 degrees.
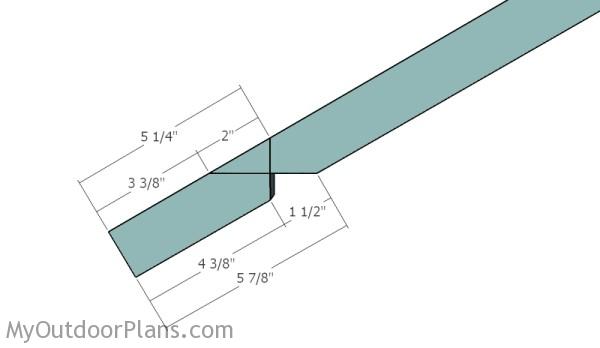
Making the notches to the rafters
Make notches to the rafters, in order to fit into place easily. After making the notch to the short rafters, you need to overlap them to the long rafters and mark the cut lines with a pencil. Get the job done with a circular saw.
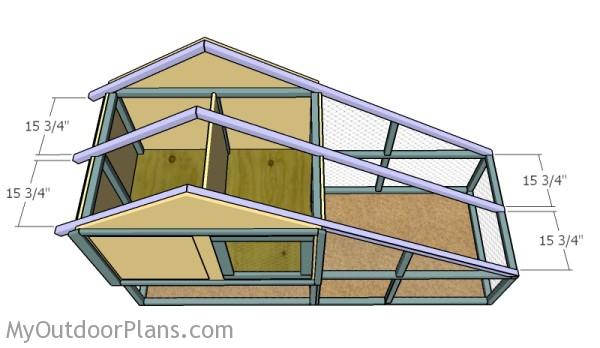
Fitting the rafters
Fit the rafters to the top of the rabbit hutch, as shown in the plans. Align everything with attention, making sure the rafters are placed equally-spaced. Drill pilot holes and insert 2 1/2″ screws through the rafters into the plates.
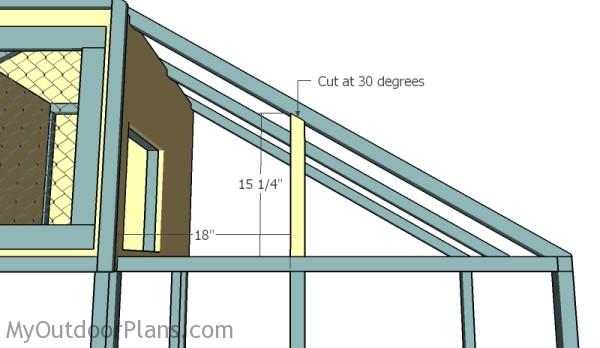
Fitting the rafter supports
Fit 2×2 supports to the long rafters. Drill pilot holes through the rafters and insert 2 1/2″ screws into the support. Make sure the corners are square and leave no gaps between the components.
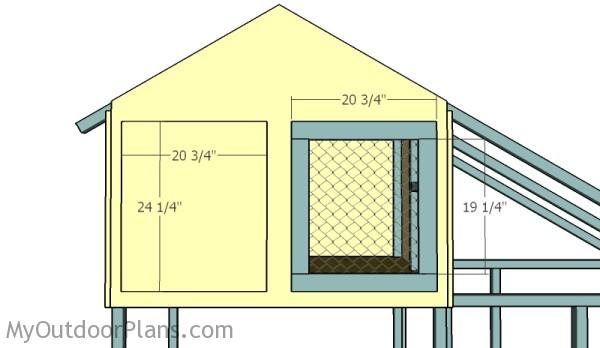
Building the doors
Next, you need to build the doors for the front of the rabbit hutch. Use 3/4″ plywood for the left door and 1×3 lumber for the right door. Fit the doors to the opening and use hinges to lock them into place. In addition, install latches to lock the doors into place.
Side trims
In order to enhance the look of the project, we recommend you to attach trims to the hutch. Cut the 1×3 trims at the right dimensions and secure them to the exterior walls with 1 5/8″ nail. Leave no gaps between the trims and align everything with attention.

Front trims
The left vertical trim is made from 1×3 lumber, while the rest of the trims are made from 1×2 lumber. Cut the top of the vertical trims at 30 degrees. Use 1 5/8″ nails to lock the trims into place.
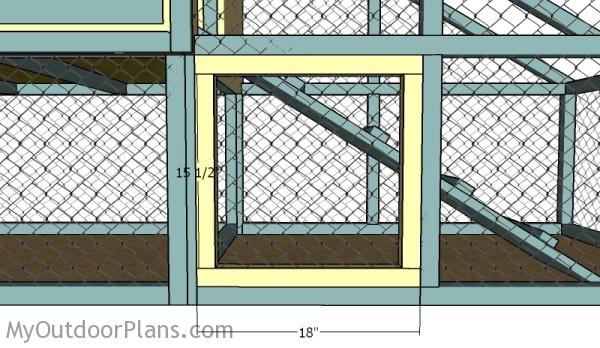
Run door
Build the door for the rabbit run from 2×2 lumber. Drill pilot holes through the top and bottom components and insert 2 1/2″ screws
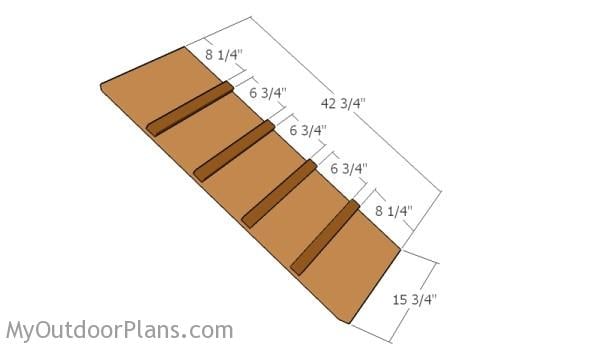
Building the ladder
Build the ladder for the rabbit hutch from 3/4″ plywood and 1×2 lumber. Use 1 5/8″ screws to secure the strips to the ladder. Add glue to the joints and make everything possible to place the steps equally-spaced.
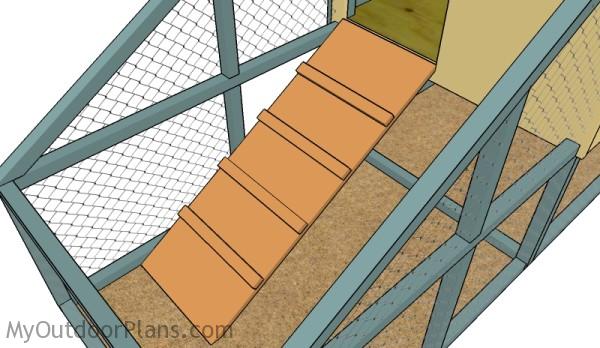
Fitting the the ladder
Fit the ladder to the opening, as shown in the diagram. Use 2 1/2″ screws to lock it into place.
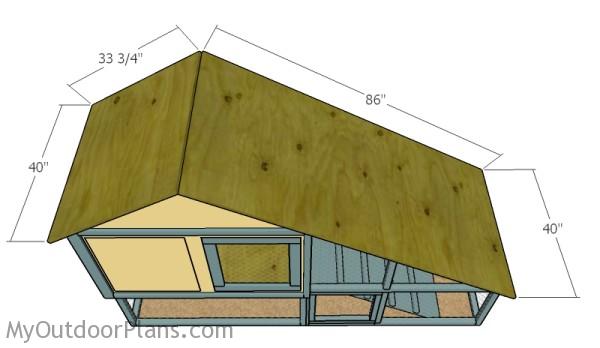
Fitting the roof sheets
Build the roofing from 3/4″ plywood and center the sheets to the top of the hutch, as shown in the diagram. Use 1 5/8″ screws to secure the sheets into place, every 8″ along the rafters. Leave no gaps between the components for a professional result.
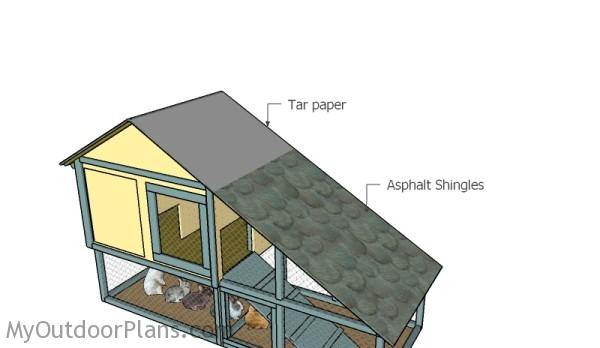
Fitting the roofing
Cover the roof with tar paper and staple it into place. Afterwards, install asphalt shingles from the bottom to the top. Install the ridge to waterproof the structure.
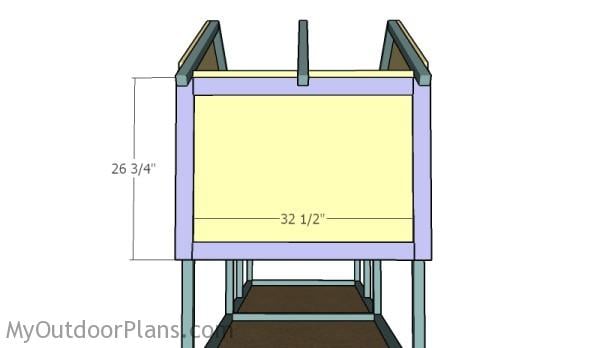
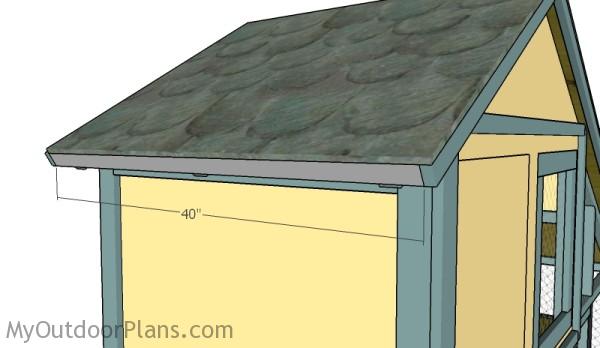
Fitting the roof trims
In order to enhance the look of the diy project, we recommend you to install 1×2 trims to the front and back of the roof. Cut one end of the trims at 60 degrees. Use 1 5/8″ nails to lock the trims into place.
Roof trims
Fit 1×2 trims to both sides of the roof, as shown in the diagram. Use 1 5/8″ nails to lock the trims into place. Align the edges with attention for a professional result.
Rabbit hutch – Top view
After you get the job done, you need to apply a few coats of paint to enhance the look of the rabbit hutch. The project seen from above. Install chicken wire to the run. Use staples to secure the wire to the supports.
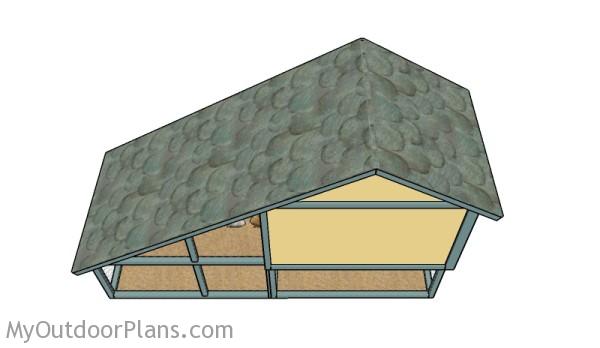
How to build a rabbit hutch
The outdoor rabbit hutch seen from back.
DIY Rabbit hutch plans – Back view
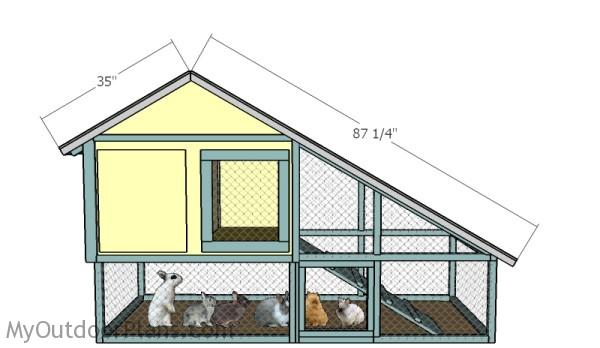
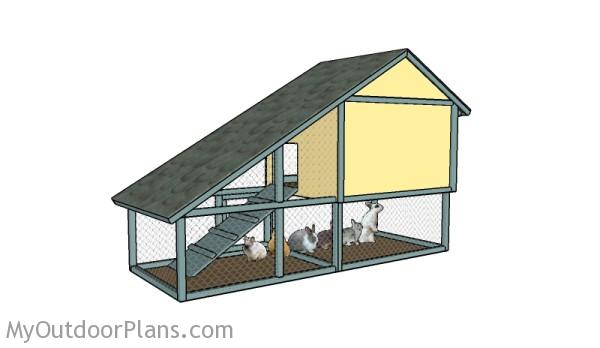
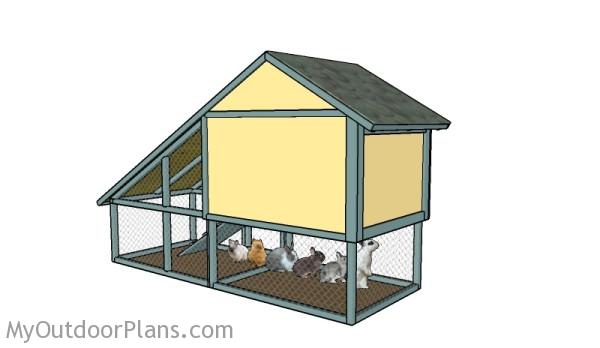
The hutch seen from one side.
Free rabbit hutch plans
This rabbit hutch has a nice design and it is roomy enough to host your pets. It features a large run and has three access doors.
Top Tip: Make sure you check out the part 1 of this project, to learn more about how to build the frame of the rabbit hutch.
This woodworking project was about free rabbit cage plans. If you want to see more outdoor plans, check out the rest of our step by step projects and follow the instructions to obtain a professional result.

EXPLORE MORE IDEAS FOR:
 |
 |
 |
 |
4 comments
Do not use chicken wire. It is unsafe for 2 reasons: 1) predators can easily rip through it. 2) baby rabbits just out of the nest can get their heads caught in it while exploring. (had that happen once, didn’t end well). Use 1/2″ welded wire hardware cloth instead. It costs more but it is worth it.
Put it across the bottom of the run too, or the rabbits will dig out and/or predators will dig in! And set the whole thing up on stacked pillars of 2-3 concrete blocks, so all the manure pellets can drop through and it will help deter predators.
Extra Tip: I use a few of those plastic under-bed storage containers w/ wheels lined up underneath mine. You can find them cheap at flea markets or sometimes even free on CL. Makes cleanup a lot easier when you can just roll them out from underneath and dump into the wheel barrow to transfer to the compost pile.
Thank you for the tips.
Is there a floor? It appears so in the plans but nothing is mentioned in the instructions. Anyone have ideas? Thanks!
hi iwas wondering wich type of mall hinges are best for this project?